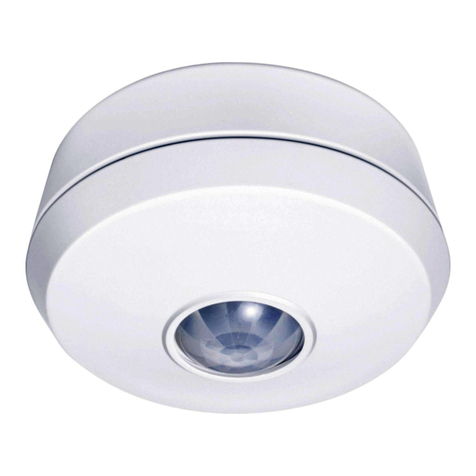
ChinaPST PST-WIP-350 User manual

Detection distance might
be shortened to movement
from these directions
Installation Manual For Indoor Wireless Digital PIR Detector
1. BRIEF INTRODUCTION
This is a wireless intelligent pir detector with a passive
infrared sensor matching advanced micro-power consumption
circuit processing technology. It is with very low rate of
false alarm and fake alarm with bi-direction temperature
compensation technology which can perform intrusion
detection in very wide temperature range. It adopts unique
pet data calculation way which can fullfill pet immunity up
to 20kg. It is also remarkable at anti hot air, waving curtain
or other objects, can offer stable detection base on 2 grade
sensitivities. Its low power consumption design can support
the battery life up to 24 months, so it is more worthy of function
and stability than other pir detectors with similar price in
the mar ket.
- Mini power consumption design
-2 grade detection sensitivities for option
-Digital pet immunity design up to 20kg when used with particular lens
-Bi-direction temperature compensation technology
-High capacity battery (with 24 months life time)
-EDS/anti electric shock/anti mobile interference
-Anti white light
-Fully-sealed optical parts
-Multi-directional bracket, fit for wall or corner mount
2. MAIN FUNCTION
3. SPECIFICATIONS
Power:
Current :
Mounting height:
Detection range:
Temp offset:
Pulse:
Sensitivity:
Anti EMI:
Anti white light:
Alarm output:
Alarm time:
Alarm period:
Wireless Tx:
Temperature:
Humidity:
Detection speed:
Fire proof:
Pet immunity:
Size:
Suitable height
2m
1.5m
3m
2.6m
0m 1.5m 3m 4.5m 6m 7.5m 9m 10.5m
0m
Too high to be with blind area
2m
1.5m
3m
2.6m
0m 1.5m 3m 4.5m 6m 7.5m 9m 10.5m
0m
Lowest sensitive
Most sensitive
Unreasonable installation position Best installation
On installation heightOn installation angle
On installation position
Recommended installation height is 1.8-2.4m
Detection is with mechanical difference to intrusion
angles
Detection is not sensitive to
intrusion from window in this way
Detector is sensitive to intrusion
from door and windows in this way
4. INSTALLATION GUIDE
Select most suitable installation point fit for PIR detection, put detector onto proper position, keep away from
door, window, running machine or heat source.
Don't face detector
tocold/heat source
Installation base
should be stable
Keep away from
high-pressure cable
Don't face directly
to the sun
Keep away from strong
EMI interference
Wrong installation
on pet immunity
Window
Door
Window
Door
TOP VIEW
SIDE VIEW
+6m
2m
12m
-6m
SIDE VIEW
TOP VIEW
-6m
+6m
2m
12m
Wide angle lens
Pet lens
3.6V 1/2AA batteries
20uA(stand by)
14mA (alarm)
1.8m-2.4m
12m*12m 100°
Digital technology
2/3 pulses for option
High/low for option
0.1-500MHz/30V/m
>10000LUX
Ev1527
2s
4 min in USE mode
=200m(open space)
-10℃/+55℃
95%RH
0.2m/s - 3.5m/s
Special ABS plastic
20Kg
78.5mm×53.5mm 39mm×
X
X
X
X
X

SENSITIVITY
Note: setting by matching pulses and sensitivity can produce 4
detection grades to match operation in different environments.
Setting on sensitivity
When jumpers are set to high sensitivity, detector
is very sensitive
When jumpers are set to low sensitivity, detector
is less sensitive
HIGH
LOW
High sensitivity
Low sensitivity
6. SETTING AND WALKING TEST
Setting on detector pulse
Alarm LED control
When jumper is set to OFF mode, even when detector
is triggered, LED will not light, this function is for
purpose of conceal and power save. (Recommended)
TEST/USE modes switch
When jumper is set to TEST mode, detector can
be triggered by any intrusion
When jumper is set to USE mode, detector can only
be triggered 4 minutes later after previous activation
(this function is strongly recommended for the
purpose of battery energy saving)
TEST
USE
TEST mode
USE mode
(Power saving mode)
ON
(LED)
LED OFF
(LED)
When jumper is set to 3 pulse mode, detector is set
to low sensitivity and alarm can be triggered only
when more than 3 pulses are detected
When jumper is set to 2 pulse mode, detector is set
to high sensitivity and alarm can be easily triggered
when 2 pulses are detected
8. ON PET IMMUNITY
Pet immuni ty i s a hig h in d ex f or PIR detector
judgement,we use 2 ways on pet immunity processing
at the same time :
1 . P hys ical way:by particular p r o c e s s i n g o n
FRESNELPET IMMUNITY lens's detection part
to increase th e fa lse ratecaused by small animals.
2、Advanced microchip processing technology:
it is mainly by analysis on detector signal data and
make comparison with the data in the microchip on
detector and then draw a conclusionto recognize
whether it is a man or small animal movement.
From this, we can know that the pet immunity func-
tion is relevant and this relevant includes 2
points:
1. Pet immunity is relevant,the false alarm rate is
greatly reduced comparing those detector not with
pet immunity function, at the same time, it is with
limitation to quantity of pets and size of pets.
2. Installatin height is with particular requirement.
Not all random installation can be effective on pet
immuinity function, during installation, please read
the manual carefully.
Skysafe
Pet immunity lens
UP
Set detector to TEST mode and turn on LED, close
well the front cover and wait for LED OFF. Make
horizontal movement in detection area and watch the
PIR detection status on LED (when alarm is triggered
, LED will flash for 2 times continuously). This is to
confirm that there is no blind angle for PIR in the
protection spot. When intruder makes horizontal
movement t owar ds d ete c tor, s e nsi tivity is the
highest!
When detector is installed in different environments,
please adjust PIR sensitivity and detection pulse
properly. There are 2 grades for sensitivity: high
and low. When pulse is set to 2, detector is with
high sensitivity; when 3 pulse is set, detector is
in low sensitivity. Normal settingg is 2 pulse.
7. STATEMENT OF DIFFERENT CODES
Each detector is set with an ID code of 20 digits,
so there is possibility of 1048576 combinations
which can guarantee the unique transmitting code
can't be copied. 2 compatible control panel can
distinguish accordant ID.
During the period of detection, detector sends out
different signals of system status such as alarm,
tamper, battery status etc by transmitting device
with particular frequencies and unique ID code.
The application environment of detector will
decide the exact mode of transmission. Detector
will send out monitoring signal to control panel
each 720 minutes (or other period can be set) in
order that control panel can receive the monitoring
signal from detector at each proper interval, then
detector status can be well monitored.
PIR Intrusion Alarm:
once detector is triggered, alarm signal will be sent
immediately.
Low Battery Indication:
A particular signal on battery low voltage will be
sent when battery runs out. (Low voltage is 2.2V)
Monitoring message:
Detector can reach periodic self-check each 720
minutes or other interval. Detector will send alarm
signal to control panel in order that detector oper-
ation status can be known well.
Holes for corner
installation
Installation hole
for multi-directional
bracket
Bracket installation
There are 2 kinds of bracket installation ways as
in the figures, so please select correct bracket:
Internal part
Alarm signal LED
Power switch
Transmitter antenna
Tamper
PIR sensor
Detector must be installed in a proper height of
2.1m vertically in order to get best covering range.
And PCB must be put in the proper position. In a
word, guarantee that there is no obstacle in front
of detector, and detection angle is wide. Make a
plan on which “hole installation way” according
to actual needs and make a mark on wall before
drilling 4 holes with 6mm diameter. Strike the 4
plastic stoppers into the holes on the wall according
to the marks and then detector can be fastened on
to the wall by screw driver.
Open detector housings with plat screw driver as
figure, and then loose the screws on PCB by small
screw driver (No need to loose out screws completely)
, take down the PCB and then detector is ready for
installation.
Wall mount
5. INSTALLATION AND INTERNAL PARTS
Wall mount hold
- 3.6V LITHIUM +
Alarm LED control
TEST/USE
modes select
Detector pulse
select
High/low
sensitivity select
Battery clip(with bat)
3P 3 pulse
(low sensitivity)
2P
2 pulse
(high sensitivity)
PULSES
Installer can turn off or turn on alarm LED according
to actual needs after the test.
Strongly suggested: please select “USE” mode
AND “LED OFF”set in order to keep battery
working longer.
Rev.00 17/46
Tamper/resume:
when front cover is removed, tamper switch will
send out signal of open; when front cover is
covered well, tamper switch will stop signal
transmission.
Installation Way With
Multi-directional Bracket
Installation Way With
Embedded Bracket
Other ChinaPST Security Sensor manuals
Popular Security Sensor manuals by other brands

NuAire
NuAire 230-PIR installation manual

Conrad
Conrad HZK202 operating instructions
Elkron
Elkron EIR600FC Installation, programming and functions manual
Lince
Lince 1906-BOBBY-T-E Installation, operation and maintenance manual

LUDLUM
LUDLUM 70 System manual

Bircher Reglomat
Bircher Reglomat Reflex ES user guide

System Sensor
System Sensor SPECTRAlert CH24 Series Installation and maintenance instructions
Eelectron
Eelectron KNX PD00E00KNX Product handbook
Rielta
Rielta FOTON-SH1 installation guide

Pro
Pro PR-500 installation guide
Visonic
Visonic CH-1000 installation instructions

Videoquip
Videoquip Phase 3 SD-2 manual
