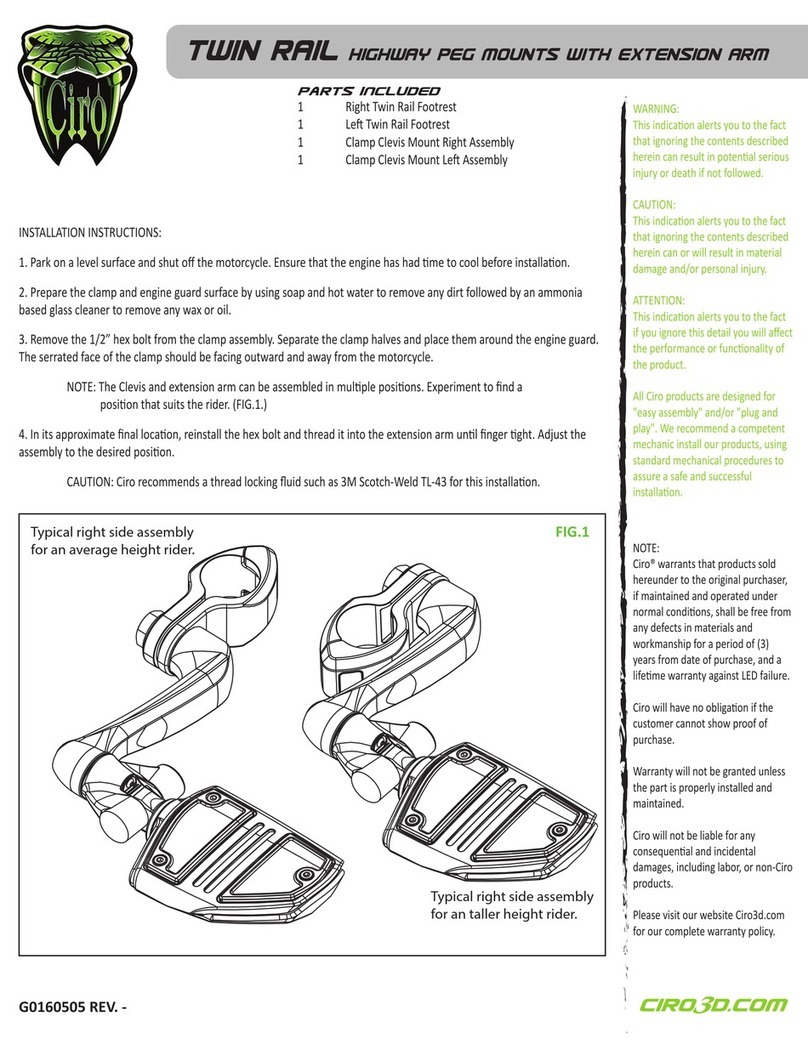
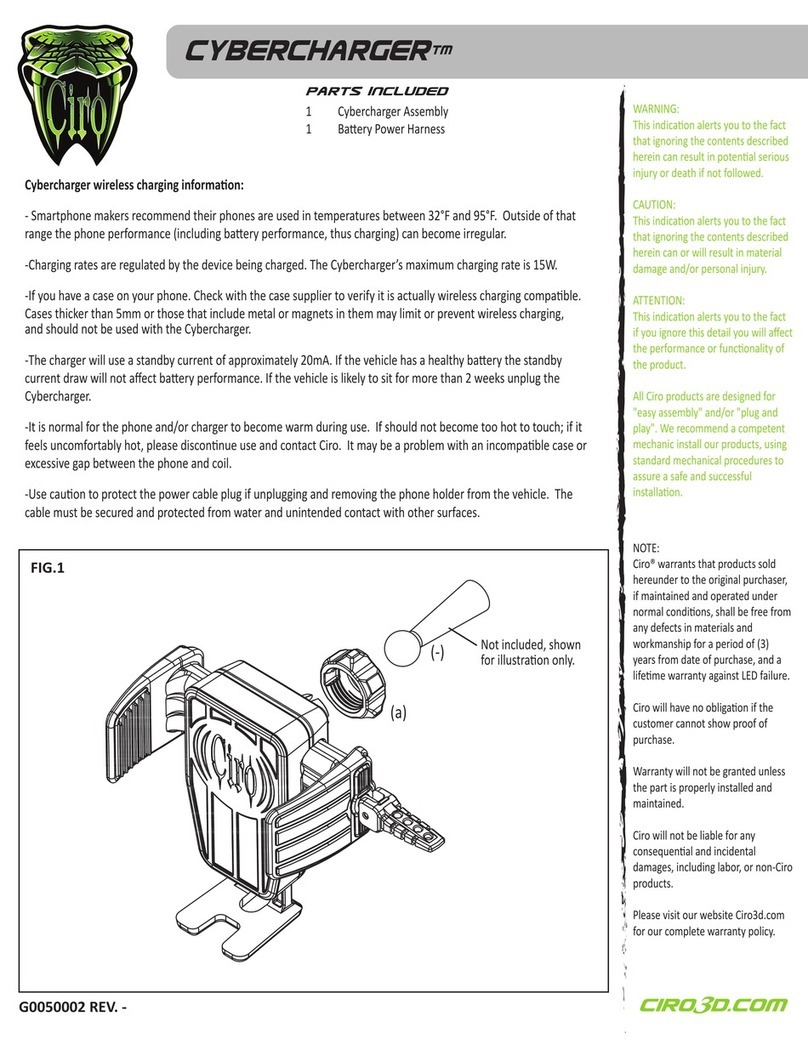
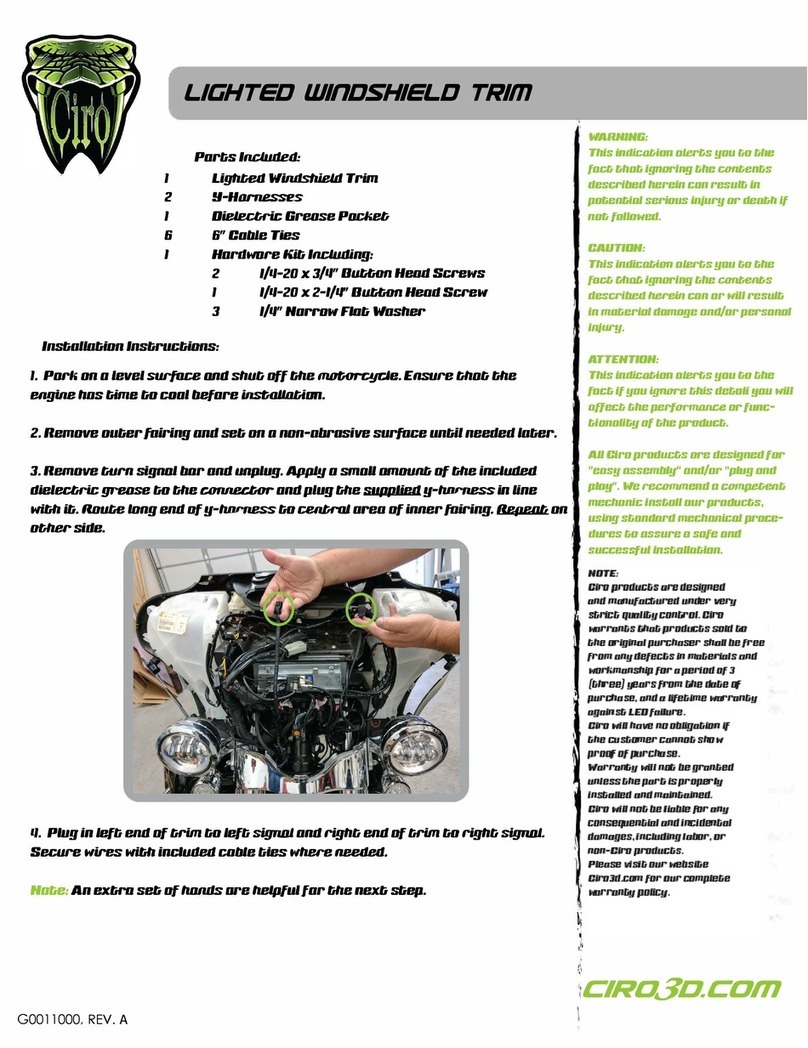
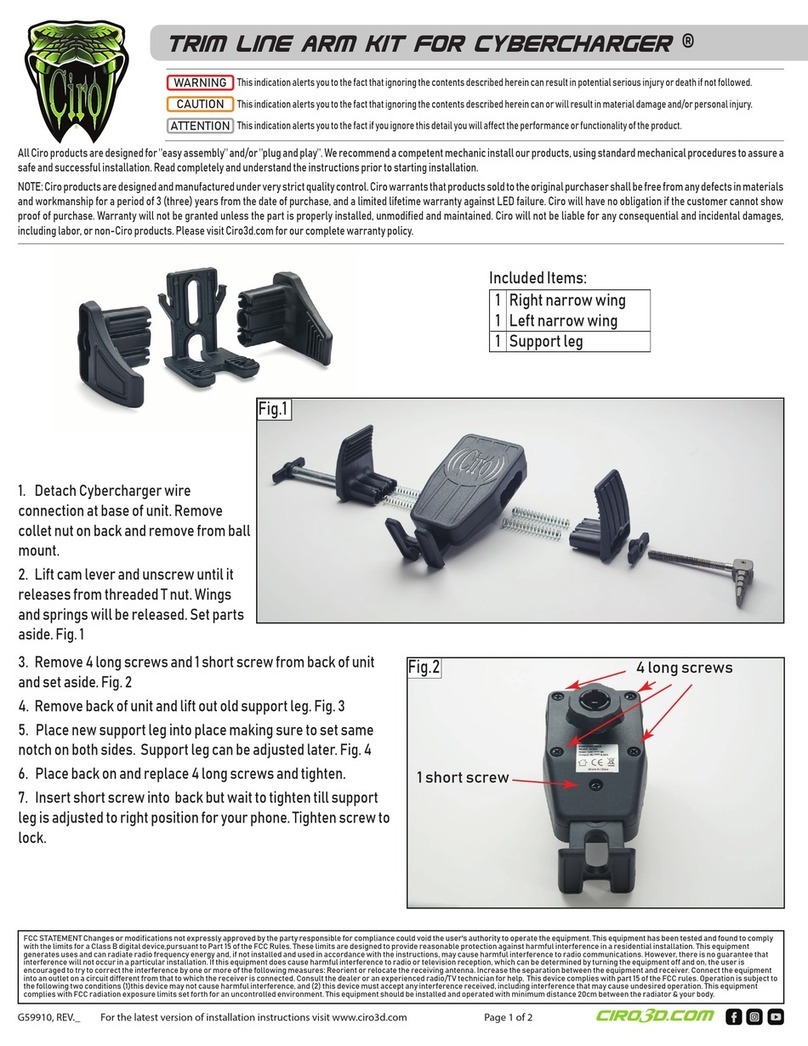
Ciro Goldstrike Shock & Awe 2.0 User manual

InstructionDisclaimer
Dennis Kirk provides instructions to help our customers better understand how to install the
products we sell. The instructions are exact copies of what the manufacturer includes with the
product being sold.
That means the quality and accuracy of the instructions is solely dependent on what the
manufacturer produces. We do our best to make the text legible and the pictures viewable.
However, the end result depends largely on the quality of instructions the manufacturer
provides.
Therefore, you will find that some instructions are not of the highest quality. Sometimes text is
hard to read and pictures are not easy to see. At times you will find the overall look of the
instructions to be less than professional. However, we feel it is better to provide what we have
rather than provide nothing at all.
To the best of our knowledge the instructions and application information contained in the
instructions is accurate. However, Dennis Kirk assumes no liability related to any errors that
may be contained in the copy of the manufacturer’s instructions we provide. Buyers are solely
responsible to insure that product use is consistent with their application.
800-969-7501 so we can further assist you regarding additional product information or any other
business related questions.
Thank you for doing business with Dennis Kirk.

goldstrike Shock & Awe®2.0
Parts Included:
WARNING:
This indication alerts you to the
fact that ignoring the contents
described herein can result in
potential serious injury or death
if not followed.
CAUTION:
This indication alerts you to the
fact that ignoring the contents
described herein can or will
result in material damage
and/or personal injury.
ATTENTION:
This indication alerts you to the
fact if you ignore this detail you
will aect the performance or
functionality of the product.
All Ciro products are designed
for "easy assembly" and/or "plug
and play". We recommend a
competent mechanic install our
products, using standard
mechanical procedures to
assure a safe and successful
installation.
G0048031, REV. -
1 Bluetooth Controller
15 3” LED Flex Pods
2 8” Wiring Extensions
9 22” Wiring Extensions
9 Y-spliers
1 Installaon Kit
INSTALLATION INSTRUCTIONS:
1. Park on a level surface and shut off the motorcycle. Ensure the engine has me to cool before installaon.
2. Download Ciro Shock and Awe app from the Apple iTunes or Google Play store to ulize Bluetooth features. For
instrucon on how to use the app, search “Ciro Shock and Awe App Tutorial” on YouTube.
3. Remove seat.
4. Determine 12 volt power source that is either constant or switched, depending if you would like Ciro Shock & Awe
LEDs to always stay on or turn off with the motorcycle.
Note: The Bluetooth controller will draw about 30 milliamps in standby mode. Without use of a baery
trickle charger or periodic starng of the engine, slight baery drain may occur. You can wire controller to
key-on power on the motorcycle if baery drain is a concern.
5. Connect controller harness to your choice of power source and mount in desired locaon. Reference pictures for
recommended locaons. Red ring terminal to posive 12v source, and black ring terminal to negave ground. Before
applying switch adhesive, wipe area clean with an ammonia-based cleaner and allow to dry. A clean surface ensures
beer adhesion. Firmly hold in place for 60 seconds. Adhesive fully cures within 24 hours.
6. The controller will support up to 3 separate lighng channels controlled through the APP. The outputs of the
controller vary in length, the shortest being channel 1, the mid-length is channel 2, the longest output is channel 3.
7. Temporarily connect a LED flex pod to each of the channel you intend to use. Test the funcon of each through the
use of the APP. Be sure to understand the funcons will be suitable for your intended locaons.
8. Determine placement for the LED flex pods on your motorcycle. Temporarily posion the LED flex pods in place
with customer supplied masking tape or other suitable method.
9. Route wiring extensions to LED flex pod locaons. Place a small amount of dielectric grease on each connector
before plugging in. Reference pictures for recommended locaons. If placing strips and pods in the recommended air
cleaner and horn locaons, use included y-spliers.
Note: Throughout the wiring process, leaving the power source on will guarantee that power is reaching all
strips and pods. Do not allow the wires to contact hot surfaces or other possible pinch points.
Damaged wires are the most common type of problem experienced and can lead to unexpected results.
10. Make final adjustments to LED flex pod locaons and wire paths. Prior to adhering LED flex pods, use ammo-
nia-based cleaner to wipe away any dirt and allow to dry. Press LED flex pods firmly into posion, hold for 60 seconds.
11. From the installaon kit; use adhesive backed cable e mounts and cable es as necessary. Addional pieces of
adhesive and clips can be used to hold wires and connectors in posion on the motorcycle.
12. (Oponal) To ulize the brake override funcon connect loose red wire of the controller to the brake light circuit
of the motorcycle using supplied posi-tap connector or other suitable method. A factory service manual or test light
may be required to idenfy the proper connecon locaon.
13. Reinstall seat.

G0048031 REV. -
Page 2
OPERATION INSTRUCTIONS:
The light system can be either operated through the physical controller or through the downloaded APP.
Here is an overview of the funcons of the physical controller:
The small round buon will cycle the lights ON-OFF. This buon can also be used to put the system into “sleep” mode or reset the enre system.
Sleep mode:
-To enter sleep mode, press and hold the buon for approximately 3-5 seconds. The lights will flash indicang sleep mode.
-Once in sleep mode, the motorcycle cannot not be found through Bluetooth; this minimizes any possible baery drain. The lights cannot be
controlled through the APP in sleep mode.
-A simple short press of the buon will take the system out of sleep mode and be discoverable again.
Factory reset: -Press and hold buon for 10+ seconds, the lights will flash.
-This forgets all Bluetooth sengs, and system would need to be rediscovered through the APP.
The round dial can be used change modes and sengs. Push the end to change modes, turn dial to select seng.
There are 5 modes.
1st click of dial: BRIGHTNESS SETTING - turning the dial will select the brightness level.
2nd click of dial: COLOR SETTING - turning the dial will select a color and the previous brightness level.
3rd click of dial: FLASH SETTING - turning the dial will select a flash speed of the previous color and brightness.
4th click of dial: PAINT MODE - This will cycle through a rainbow of colors at the previous brightness. Turning the dial will select the speed which they
change.
5th click of dial: APP MODE – This puts system into the last mode the APP was set to.
Addional clicks will cycle back through 1-5 above.
The APP can be used to control a variety of addional features, please see the website or online videos for addional explanaon. NOTE: When used;
the APP will override any sengs of the physical controller.
FCC INFORMATION
This device complies with Part 15 of the FCC Rules. Operaon is subject to the following two condions:
1. This device may not cause harmful interference.
2. This device must accept any interference received, including interference that may cause undesired operaon.
Note: This equipment has been tested and found to comply with the limits for a Class B digital device, pursuant to part 15 of the
FCC Rules. These limits are designed to provide reasonable protecon against harmful interference in a residenal installaon.
This equipment generates, uses and can radiate radio frequency energy and, if not installed and used in accordance with the instrucons, may cause harmful
interference to radio communicaons. However, there is no guarantee that interference will not occur in a parcular installaon. If this equipment does cause
harmful interference to radio or television recepon, which can be determined by turning the equipment off and on, the user is encouraged to try to correct the
interference by one or more of the following measures:
- Reorient or relocate the receiving antenna.
- Increase the separaon between the equipment and receiver.
- Connect the equipment into an outlet on a circuit different from that to which the receiver is connected.
- Consult the dealer or an experienced radio/TV technician for help.
Cauon: Any changes or modificaons not expressly approved by the party responsible for compliance could void the user's authority to operate this equipment.
FCC Radiaon Exposure Statement
This equipment complies with FCC RF radiaon exposure limits set forth for an uncontrolled environment. This equipment should
be installed and operated with a minimum distance of 20 cenmeters between the radiator and your body.

G0048031 REV. -
Page 3
- Pictures on page 3 show one controller viewed from both sides of the motorcycle.
- The system shown uses a separate channel to run the le and right side lights.
- The controler is connected to the baery and placed under the seat.
- LED Flex Pod placement. *requires panel removal. 1.&13.under the grab handle,
2.&3. boom of saddlebag,
4.&12.*back of side cover,
5.&11. inside lower edge of the frame,
6.&12.*behind side pannel,
7.*under right side of fender,
8.*under le side of fender,
9.under center of fairing,
14.&15. boom of saddlebag,
Controller
Y-splier
LED Flex Pod
8” Extension
22” Extension
1.
2.
3.
4.
6.
7.
9.
10.
14. 15.
8.
13.
11.
- This is a suggested layout, your preferences may be different.
- P/N 48031 contains the components to produce this layout, and a few extra parts.
- Addional LED Flex Pods / Strips and wiring componets are available at GOLDSTRIKE3D.COM.
5.
12.
This manual suits for next models
1
Other Ciro Motorcycle Accessories manuals


