manuals.online logo
Brands
  1. Home
  2. •
  3. Brands
  4. •
  5. Cirrus
  6. •
  7. Measuring Instrument
  8. •
  9. Cirrus CR:262 User manual

Cirrus CR:262 User manual

Acoustic House, Bridlington Road
Hunmanby, North Yorkshire, YO14 0PH
United Kingdom
Tel: +44 (0) 1723 891655
Fax: +44 (0) 1723 891742
Email: [email protected]
Web: www.cirrusresearch.co.uk
Cirrus
Research plc
dedicated to noise measurement
Quick Setup Guide Cirrus
Research plc
dedicated to noise measurement
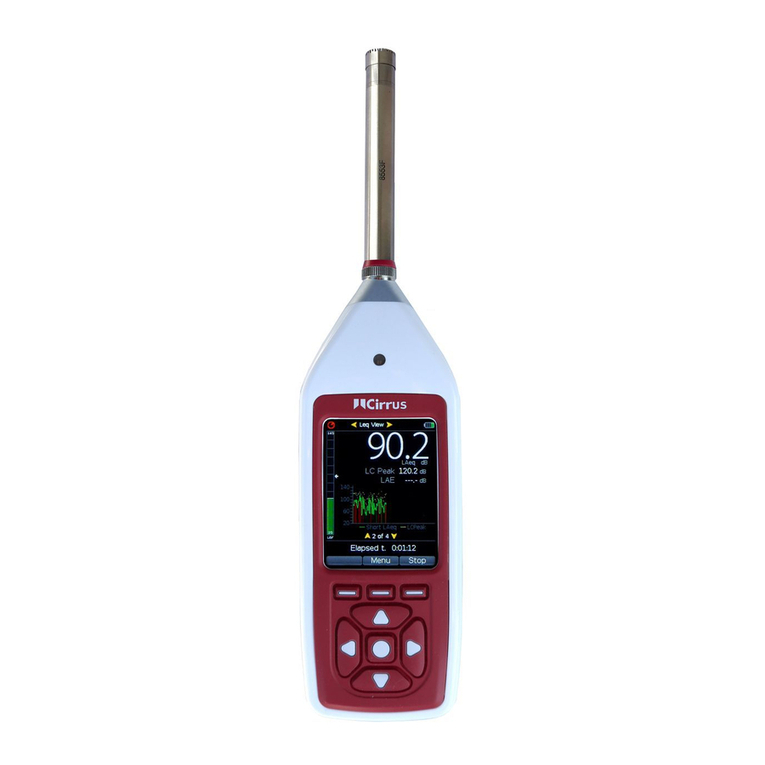
CR:260 Series Sound Level Meters
Covering:
CR:262 Type 2 Sound Level Meter
CR:261 Type 1 Sound Level Meter
CR:264 Type 2 Octave Band Sound Level Meter
CR:263 Type 1 Octave Band Sound Level Meter
Precautions
Please refer to the CR:260 Series User Manual for full operating instructions and safety
information. This Quick Setup Guide does not constitute a full product operating manual, and
Cirrus Research plc accepts no responsibility for any damage or misuse arising from the use
of this Quick Setup Guide.
+Version
Instruments
Please refer to the User Manual for details of the additional functions available from the
+Version
CR:260 Series Sound Level Meters or visit the CR:260 Series Website at
www.cirrusresearch.co.uk/
cr260.html
Product Information CD
Cirrus Research plc is committed to protecting the environment. As part of this policy, we are
reducing the amount of printed materials and packaging supplied with our products.
Documentation for the CR:260 Series Sound Level Meters is supplied on the CD included with
all instruments. The information is supplied as Adobe Acrobat documents. A copy of the latest
version of the Adobe Reader software is included and can be installed if required.
The Product Information CD contains the following information:
> CR:260 Series Sound Level Meters Quick Setup Guide
> CR:260 Series Sound Level Meters User Manual
> CR:260 Series Product Datasheet
> Noise Measurement Terminology Guide
> Example Meaurement Report
> Adobe Acrobat Reader
>
+Version
Upgrade Information
> Deaf Defi er 3 Software
> Link to the Cirrus Research Website
6
. Review the measurement
The instrument will disp
lay the
last measurem
ent made.
Press t
he Graph button to view
the graphical display.
Press the Graph button again to
view the Numerical display.
8
.
Switch
off
Press and hold the Power b
utton
to switch off the instrument.


































  
























Broadband Mode
1:1 Octave Band Mode
CR:263 & CR:264 Only
7. Recording the measurement information
Please note that the standard CR:260 Instrument only stores the last measurement in memory.
When a new measurement is made, the last measurement information is erased and overwritten.
Record the measurement information before making a new measurement
To store additional measurements in memory, the instrument must be upgraded to the
+Version
.
Batteries
To
replace the batter
ies, remove the battery
cover.
Gently pull the battery holder from the instru-
ment and remove the batteries.
Replace the batteries, ensuring that the polar-
ity is correct.
ity is correct.
Push the battery holder back into the ins
tru-
ment and replace the
battery cover.
Connecting the Preamplifier (CR:261 & CR:263)
Care should be taken when fi tt
ing or remov
ing the preamplifi er.
(1) Drop the preamplifi er into the socket on the Sound Level Meter
(2) Ensure the connector has
located into the socket
(3) Tighten the Locking Ring.
Do not cross thread the locking ring.
Damage caused by misuse is not cov-
ered by the warranty for the instru-
ment.
Removing
the Preamplifier
Do not twist the preamplifi er body.
Unscrew the locking ring and pull the
preamplifi er from the Sound Level Me-

ter.
















































1
. Switch On
Press the Power button to switch
on the Sound Level M
eter
The instrument will display the
startup screen, and then will dis-
play the last measurement made.
Press the Graph Key t
o cycle be-
tween the n
umerical dis
play and
the graphic
al dis
play of the las
t
measurement.
2
. Calibration
Attach the Acoustic Calibrator to
the Sound Level Meter and switch
to the 94dB level setting.
Press the C
al key to start the
calibration procedure.
When the calibration is c
omplete,
the dis
play will
change to show
the calibration level.
Remove the Acoustic Calibra-
tor, switch off the calibrator and
store.
3
.
Measurement Range
T
he
Sound Lev
el Meter should be
set to the correct r
ange before
measurements are made.
Press the Start Key.
Use the Up and Down Arrow
keys to change the measurement
Range.
The bar graph at the top of the
screen will change to show the
selected range and the current
noise level.
If the selected measurement range
is too low, the instrument will display
the Overload symbol.
Select a higher measurement range
.
If the selected measurement range is
too high, the instrument will display
the Under-Range symbol.
Select a lower measurement range.
4
.
Mode Select
Press t
he Mode key to view the
current setup.
The CR:262 and CR:261 instru-
ments provide Broadband meas-
urements only. Go to step 5.
CR:264 & CR:263 Instruments
The CR:264 and CR:263 instru-
ments pr
o
v
ide Broadband & 1:1
Octave
Band Filter Measure-
ments.
Press the Mode Key to switch be-
tween Broadband or 1:1 Octave
Band Mode.
5
.
Start Measurement
Pr
ess t
he Start button to start
a measurement in the current
mode.
Press the Graph button to view
the graphical display.
Press the Graph button again to
return to the Numerical display.
Press the Stop b
utton to fi n-
ish the measurement. The last
measurement will be displayed.












  





























































 

 

 


 


 


 


 































 
































































 














 
 















































Broadband Mode
1:1 Octave Band Mode
CR:263 & CR:264 Only







 








 







Broadband Mode
1:1 Octave Band Mode
CR:263 & CR:264 Only

 
























Calibration Error Messages
Too Low Check the calibrator is switched on and correctly attached
Too High Check the calibrator is set to the 94dB position
Unstable The background noise is too high
Ra
nge Up
Ra
nge
Down
Bottom of
selected
range
Top
of
selected
range
Attaching the Calibrator
Gent
ly push and twist the calibrator cl
ockwise.
To Remove, gently
pu
l
l and twist clockwise









































This manual suits for next models

3

Other Cirrus Measuring Instrument manuals

Cirrus CR:514 User manual

Cirrus

Cirrus CR:514 User manual

Cirrus CR800 series User manual

Cirrus

Cirrus CR800 series User manual

Cirrus Optimus+ Series User manual

Cirrus

Cirrus Optimus+ Series User manual

Cirrus CR:800B Series User manual

Cirrus

Cirrus CR:800B Series User manual

Cirrus CK675 User manual

Cirrus

Cirrus CK675 User manual

Cirrus CR:270 Series User manual

Cirrus

Cirrus CR:270 Series User manual

Cirrus Optimus+ User manual

Cirrus

Cirrus Optimus+ User manual

Cirrus Quantum Outdoor User manual

Cirrus

Cirrus Quantum Outdoor User manual

Cirrus Optimus+ User manual

Cirrus

Cirrus Optimus+ User manual

Cirrus doseBadge5 CR:120A User manual

Cirrus

Cirrus doseBadge5 CR:120A User manual

Cirrus INVICTUS User manual

Cirrus

Cirrus INVICTUS User manual

Popular Measuring Instrument manuals by other brands

Jinko JK3000-8 Operation manual

Jinko

Jinko JK3000-8 Operation manual

Keysight M3102A PXIe user guide

Keysight

Keysight M3102A PXIe user guide

Marantz PMD670 Service manual

Marantz

Marantz PMD670 Service manual

SolarEdge SE-MTR-3Y-400V-A installation guide

SolarEdge

SolarEdge SE-MTR-3Y-400V-A installation guide

GANN HYDROMETTE CH 17 quick start guide

GANN

GANN HYDROMETTE CH 17 quick start guide

PCB Piezotronics 357B22 Installation and operating manual

PCB Piezotronics

PCB Piezotronics 357B22 Installation and operating manual

PCE Instruments PCE-VA 11 user manual

PCE Instruments

PCE Instruments PCE-VA 11 user manual

Sensia NUFLO MC-I user manual

Sensia

Sensia NUFLO MC-I user manual

Fema Electronica BDF Series user manual

Fema Electronica

Fema Electronica BDF Series user manual

Cub Cadet 490-900-C066 quick start guide

Cub Cadet

Cub Cadet 490-900-C066 quick start guide

Apogee 2349 DLTM4 instructions

Apogee

Apogee 2349 DLTM4 instructions

PCE Health and Fitness PCE-T 238 Operation manual

PCE Health and Fitness

PCE Health and Fitness PCE-T 238 Operation manual

ESD SYSTEMS MiniMeg 41256 Operation and maintenance

ESD SYSTEMS

ESD SYSTEMS MiniMeg 41256 Operation and maintenance

GW Instek LCR Series user guide

GW Instek

GW Instek LCR Series user guide

Kapro DIGIMAN 985D-L quick start guide

Kapro

Kapro DIGIMAN 985D-L quick start guide

Ulvac G-Tran Series instruction manual

Ulvac

Ulvac G-Tran Series instruction manual

Aeon Labs Aeotec manual

Aeon Labs

Aeon Labs Aeotec manual

Texmate FL-B101D40H manual

Texmate

Texmate FL-B101D40H manual

manuals.online logo
manuals.online logoBrands
  • About & Mission
  • Contact us
  • Privacy Policy
  • Terms and Conditions

Copyright 2025 Manuals.Online. All Rights Reserved.