manuals.online logo
Brands
  1. Home
  2. •
  3. Brands
  4. •
  5. claber
  6. •
  7. Lawn And Garden Equipment
  8. •
  9. claber HYDRO-4 RF User manual

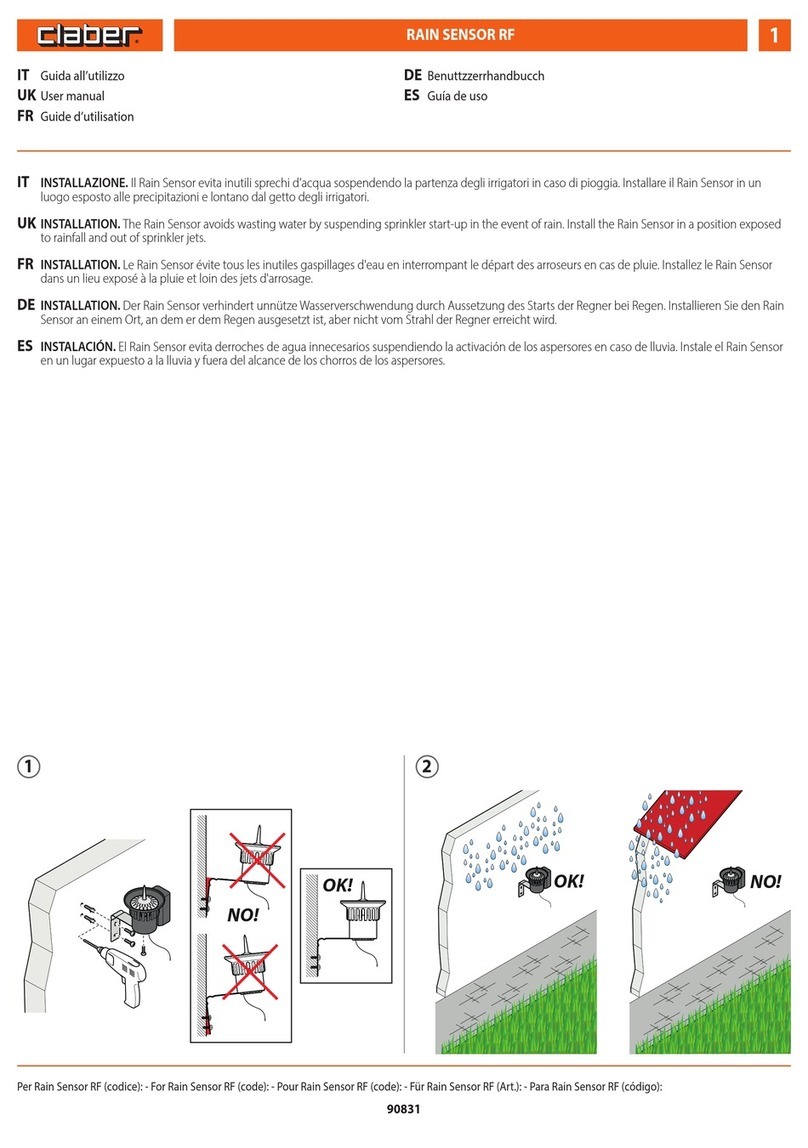
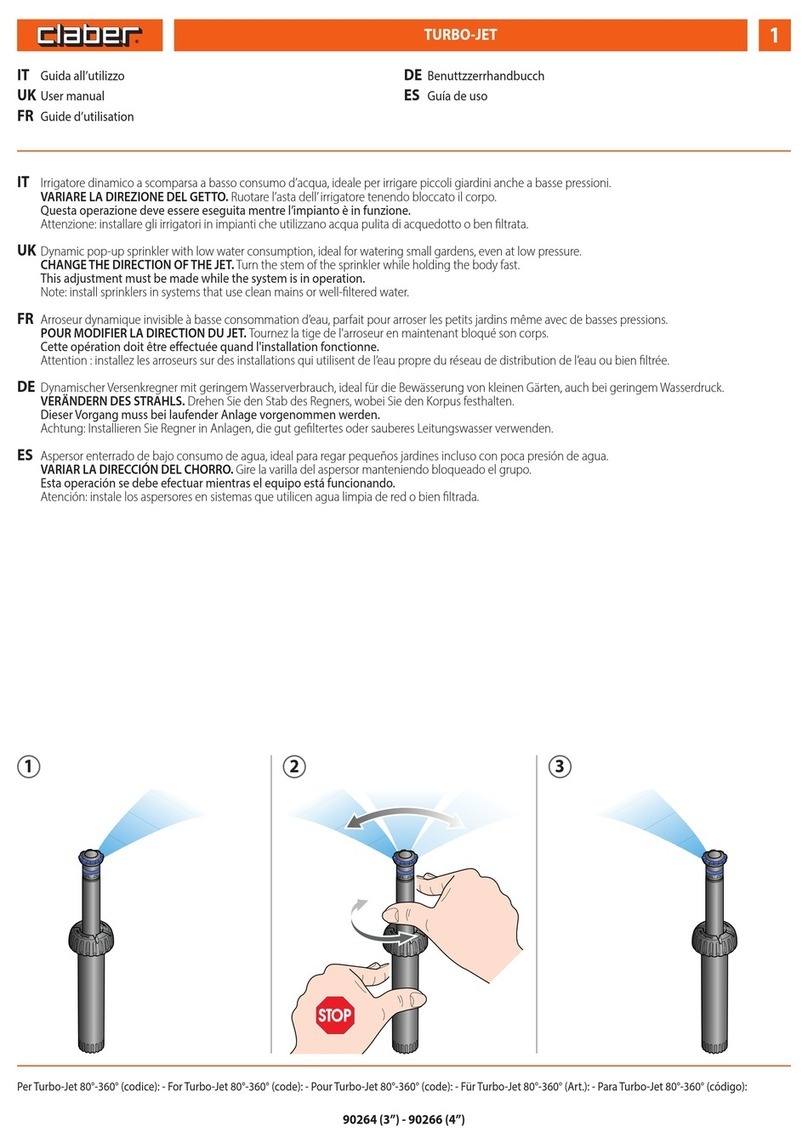
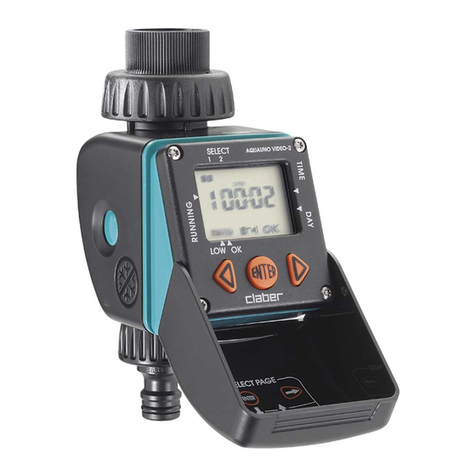
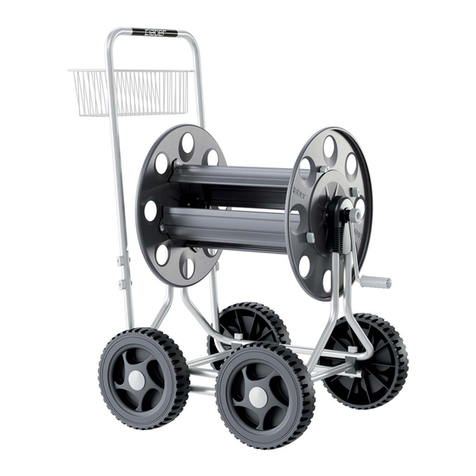
claber HYDRO-4 RF User manual

HYDRO-4 RF 1
Guida all’utilizzo
User manual
Guide d’utilisation
INSTALLAZIONE. Il pozzetto va installato all‘aperto, interrato a livello del terreno (1-2) oppure in appoggio su pavimento (3), mantenendo libera
l‘apertura del coperchio per poterlo agevolmente programmare. In caso di installazione interrata, disporre materiale drenante e un telo protettivo sul
fondo, prima di alloggiare Hydro-4, in modo che terra ed eventuali detriti non entrino nel prodotto. Rimuovere il telo e i tappi di chiusura linea solo ad
impianto ultimato. Evitare posizionamenti soggetti ad eccessivo e continuo calpestio e al passaggio di mezzi meccanici (es. trattorini rasaerba).
Usare solo acqua ltrata. Portata delle linee: 2,5 bar 25 l/min.
* componenti non forniti, da acquistare a parte.
INSTALLATION. Install the valve box outside, buried at ground level (1-2) or resting on the surface (3). Keep the cover opening free so that it can be
programmed easily. If installed below ground, lay draining material and a protective sheet in the hole before putting in the Hydro-4, to make sure that soil
and any other debris cannot get into the product. Remove the sheet and the line closure plugs only when the system is completed. Do not place it in
areas which are frequently walked over or passed over by mechanical means (eg. ride-on lawn mowers).
Only use ltered water. Water line ow rates: 2,5 bar 25 l/min.
* parts not supplied, to be purchased separately.
INSTALLATION. Le regard doit être installé à l'extérieur, enterré au niveau du terrain (1-2) ou bien posé sur le sol (3), en maintenant libre l'ouverture du
couvercle an de pouvoir le programmer facilement. En cas d'installation enterrée, disposez un matériau drainant et une toile de protection sur le fond
avant de loger Hydro-4 an que ni terre ni d'éventuels détritus n'entrent dans le produit. Retirez la toile et les bouchons de fermeture de ligne seulement
une fois l'installation terminée. Évitez des emplacements soumis à un piétinement excessif et continu et au passage de moyens mécaniques (ex. tracteurs
de pelouse).
N'utilisez que de l'eau ltrée. Débit des lignes: 2,5 bar 25 l/min.
* composants non fournis, vendus séparément.
INSTALLATION. Der Ventilschacht muss im Freien installiert werden, unter- (1-2) oder überirdisch (3), wobei die Önung der Abdeckung freiliegen muss,
damit er leicht programmiert werden kann. Im Falle der unterirdischen Installation, Sehen Sie unbedingt Drainagematerial und eine Plastik-Schutzplane
unter dem Hydro-4 vor, damit keine Erde und eventuelles Geröll in das Produkt gelangen. Entfernen Sie die Plane und die Verschlussstopfen am
Leitungsende erst, wenn die Anlage fertiggestellt ist.Vermeiden Sie Stellen, die stark frequentiert sind oder gar von schweren Fahrzeugen befahren
werden (z. B. Rasenmähertraktoren).
Verwenden Sie nur geltertes Wasser. Durchussmenge der Kreise: 2,5 bar 25 l/min.
* nicht mitgelieferte Bauteile, separat erhältlich.
INSTALACIÓN. La arqueta debe instalarse al aire libre, enterrada a nivel del terreno (1-2) o colocada sobre el suelo (3), manteniendo libre la abertura de la
tapa para facilitar la programación. Si se opta por la instalación enterrada, coloque material drenante y una lona de protección en el fondo antes de
introducir el Hydro-4 para evitar que entren en el producto tierra y posibles residuos. No retire la lona y los tapones de plástico hasta completar el sistema.
Evite ubicaciones sometidas a un tránsito peatonal excesivo y continuo y al paso de vehículos mecánicos (como tractores cortacésped).
Use solo agua ltrada. Caudal de las líneas: 2,5 bar 25 l/min.
* componentes no incluidos, deben adquirirse por separado.
Per Hydro-4 RF (codice): - For Hydro-4 RF (code): - Pour Hydro-4 RF (code): - Für Hydro-4 RF (Art.): - Para Hydro-4 RF (código):
IT
UK
FR
DE
ES
IT
UK
FR
Benuttzzerrhandbucch
Guía de uso
DE
ES
90839
8804*
90424*90325*
90320*
90910*
90326*
8547*
8627*
8547*
9063*
91013*
16
mm
20
mm
20
mm
25
mm
16
mm
16
mm
16
mm
91002*
91009*
91025*
91013*
* *
Turbina
90474
Pop-up
90264
90266
Turbo-Jet
90210
90220
90230
Colibrì
90019
90020
91256
91227
91228
91229
91255
91254
91257
91258
91222
91225
91232
1 32
HYDRO-4 RF 2
DISEGNI DI INSTALLAZIONE INDICATIVI. Posizionato il pozzetto, eettuare i collegamenti idraulici come suggerito qui sotto: a seconda delle proprie
esigenze è possibile collegare al pozzetto tubi di diverso diametro utilizzando raccordi specici (non forniti). Di seguito ogni collegamento è riferito
all’esempio sopra riportato.
Prima di interrare l’impianto, vericarne il corretto funzionamento.
INSTALLATION DRAWING. Once the valve box has been positioned, make the hydraulic connections as indicated on the following pages: depending on
individual requirements, it is possible to connect the valve box with pipes of dierent diameters using the specic ttings (not supplied). Below each link
is referred to the example above.
Before burying the system, check that it is working properly.
DESSIN D'INSTALLATION INDICATIF. Une fois le regard positionné, eectuez les raccordements hydrauliques comme il est suggéré dans les pages
suivantes : selon vos besoins, il est possible de raccorder des tuyaux de dièrent diamètre au regard en utilisant des raccords spéciques (non fournis).
Ci-dessous, chaque connexion est référée à l'exemple ci-dessus.
Avant d'enterrer l'installation, vériez-en le bon fonctionnement.
ZEICHNUNGEN ZUR VERANSCHAULICHUNG DER INSTALLATION. Nach der Positionierung des Schachtes nehmen Sie die Wasseranschlüsse vor, wie
nachstehend beschrieben: Je nach Ihren Anforderungen können an
den Schacht mithilfe spezieller Anschlüsse (nicht mitgeliefert) Schläuche mit unterschiedlichem Durchmesser angeschlossen werden. Im Folgenden
bezieht sich jeder Anschluss auf das obige Beispiel.
Bevor Sie die Anlage unterirdisch installieren, prüfen Sie, dass sie korrekt funktioniert.
DIBUJO DE INSTALACIÓN INDICATIVO. Una vez colocada la arqueta, realice las conexiones del agua tal y como se recomienda en las páginas
siguientes: dependiendo de las necesidades concretas, pueden conectarse a la arqueta tubos de diversos diámetros utilizando racores especícos (no
incluidos). Debajo de cada enlace se denomina el ejemplo anterior.
Antes de enterrar el sistema, compruebe que funcione correctamente.
Per Hydro-4 RF (codice): - For Hydro-4 RF (code): - Pour Hydro-4 RF (code): - Für Hydro-4 RF (Art.): - Para Hydro-4 RF (código):
IT
UK
FR
DE
ES
90839
1
23
1
4
2
3
16
mm
16
mm
16
mm
20
mm
25
mm
20
mm
16
mm
1 32
HYDRO-4 RF 3
INSERIMENTO BATTERIE. Per il suo funzionamento il programmatore richiede due batterie da 1,5V Alkaline tipo AAA LR03 che devono essere sostituite
ad ogni inizio stagione.
Per inserire o sostituire le batterie, procedere come segue:
- Svitare le due viti poste sul coperchio del pozzetto (1), slarle (2) e togliere il coperchio (3).
- Svitare il coperchio in plastica che ricopre il programmatore (4) e sollevarlo (5).
- Estrarre il programmatore (6).
- Svitare il tappo del vano batterie (7), estrarre il porta-batterie (8), se presenti rimuovere le batterie esaurite.
- Inserire le batterie nuove rispettando la polarità (9).
- Reinserire il porta-batterie nel suo alloggiamento (10) e riavvitare il tappo controllando che la guarnizione di tenuta sia correttamente posizionata in
sede (11).
- Inserire il programmatore nella sua sede (12), riavvitare il coperchio (13), chiudere il pozzetto con il suo coperchio (14) ssandolo con le apposite viti
complete di guarnizioni (15-16).
FITTING THE BATTERIES. In order to operate the water timer requires two AAA (LR03)1.5V Alkaline batteries that must be replaced at the start of each
season.
To install or replace the battery, proceed as follows:
- Unscrew the two screws on the valve box cover (1), remove them (2) and remove the cover (3).
- Unscrew the plastic cover on the water timer (4) and lift it up (5).
- Take out the water time (6).
- Unscrew the battery compartment plug (7), take out the battery-holder (8), and if present, remove the drained batteries.
- Fit the new batteries in the holder, observing the correct polarity (9).
- Replace the battery-holder into its housing (10) and screw down the plug checking that the seal is correctly placed in its seat (11).
- Put the timer in position (12), screw on the cover (13), close the valve box with the cover (14) and x it in place using the screws and gaskets (15-16).
MISE EN PLACE DE LES PILES. Pour son fonctionnement, le programmateur nécessite de deux piles de 1,5V Alcaline type AAA LR03 qui doivent être
remplacées à chaque début de saison.
Pour mettre en place ou remplacer les piles, veuillez procéder ainsi:
- Évissez les deux vis sur le couvercle du regard (1), retirez-les (2) et enlevez le couvercle (3).
- Dévissez le couvercle en plastique qui protège le programmateur (4) et soulevez-le (5).
- Enlevez le programmateur (6).
- Dévissez le couvercle du compartiment des piles (7), enlevez le support des piles (8), et si présentes retirez les piles usées.
- Placez les piles neuves en respectant la polarité (9).
- Réinsérez le support des piles dans le compartiment (10) et revissez le bouchon en contrôlant que le joint d'étanchéité soit correctement positionné
dans son logement (11).
- Insérez le programmateur dans son logement (12), revissez le couvercle (13), fermez le regard avec son couvercle (14) en le xant avec les vis et les joints
prévus à cet eet (15-16).
Per Hydro-4 RF (codice): - For Hydro-4 RF (code): - Pour Hydro-4 RF (code): - Für Hydro-4 RF (Art.): - Para Hydro-4 RF (código):
IT
UK
FR
90839
ONLY
ALKALINE
BATTERY
6
ONLY
ALKALINE
BATTERY
ONLY
ALKALINE
BATTERY
AAA
+
AAA
+
AAA
+
AAA
+
AAA
+
AAA
+
12
15 16
13
14
7
8
10
11
9
21
3
4
5
1 32
HYDRO-4 RF 3
EINLEGEN DER BATTERIEN. Für seinen Betrieb benötigt der Bewässerungscomputer zwei 1,5V-Alkali-Batterie vom Typ AAA LR03, die immer bei
Saisonbeginn ausgewechselt.
Gehen Sie zum Einlegen oder Auswechseln der Batterien folgendermaßen vor:
- Lösen Sie die beiden Schrauben an der Schachtabdeckung (1), ziehen Sie sie heraus (2) und entfernen Sie die Abdeckung (3).
- Lösen Sie die Kunststoabdeckung des Bewässerungscomputers (4) und heben Sie ihn an (5).
- Ziehen Sie den Bewässerungscomputer heraus (6).
- Lösen Sie die Abdeckung des Batteriefachs (7), ziehen Sie die Batteriehalterung heraus (8) und, wenn vorhanden, entfernen Sie die alten Batterien.
- Achten Sie beim Einlegen der neuen Batterien auf die richtige Polarität (9).
- Setzen Sie die Batteriehalterung wieder in ihren Sitz ein (10) und schrauben Sie den Verschluss wieder fest; kontrollieren Sie dabei, dass die Dichtung
richtig sitzt (11).
- Setzen Sie den Bewässerungscomputer in seinen Sitz ein (12), schrauben Sie die Abdeckung wieder fest (13) und verschließen Sie den Ventilschacht mit
seiner Abdeckung (14), indem Sie sie mit den entsprechenden Schrauben und Dichtungen xieren (15-16).
COLOCACIÓN DE LAS PILAS. Para funcionar, el programador necesita dos pilas alcalinas de 1,5V tipo AAA LR03 que se deben cambiar a principio de
temporada.
Para colocar las pilas o sustituirlas, siga estos pasos:
- Desenrosque los dos tornillos situados en la tapa de la arqueta (1), extráigalos (2) y retire la tapa (3).
- Desenrosque la tapa de plástico que cubre el programador (4) y levántela (5).
- Extraiga el programador (6).
- Desenrosque la tapa del compartimento de las pilas (7), extraiga el portapilas (8) y retire las pilas agotadas, si las hay.
- Ponga las pilas nuevas respetando la polaridad (9).
- Vuelva a introducir el portapilas en su alojamiento (10) y enrosque la tapa, asegurándose de que la arandela quede correctamente colocada en su
asiento (11).
- Introduzca el programador en su alojamiento (12), vuelva a enroscar la tapa (13) y cierre la arqueta con su tapa (14), jándola mediante los tornillos con
junta correspondientes (15-16).
Per Hydro-4 RF (codice): - For Hydro-4 RF (code): - Pour Hydro-4 RF (code): - Für Hydro-4 RF (Art.): - Para Hydro-4 RF (código):
DE
ES
90839
ONLY
ALKALINE
BATTERY
6
ONLY
ALKALINE
BATTERY
ONLY
ALKALINE
BATTERY
AAA
+
AAA
+
AAA
+
AAA
+
AAA
+
AAA
+
12
15 16
13
14
7
8
10
11
9
21
3
4
5
1 2 3
HYDRO-4 RF 4
CARATTERISTICHE GENERALI - Descrizione degli indicatori Led del pannello. Dopo 30 secondi dall’inserimento delle batterie o dall’ultima pressione
di un tasto i Led del pannello si spengono: per riattivare la visualizzazione premere un tasto qualsiasi.
Hydro-4 RF si programma in automatico attraverso radiocomando RF (cod. 8387, gestisce no a 2 dispositivi RF - cod. 8348, gestisce no a 6 dispositivi RF)
venduto separatamente. In assenza di Radiocomando RF sarà possibile solo l’irrigazione manuale.
GENERAL SPECIFICATIONS - Description of Led indicators on display panel. 30 seconds after having tted the batteries, or pressed any of the
buttons, the Leds on the panel will go out: to refresh the display, press any button.
RF Hydro-4 can be programmed automatically using the RF remote control (code 8387 manages up to 2 RF devices/ code 8348 manages up to 6 RF
devices), sold separately. Without the RF remote control, you can only irrigate manually.
CARACTÉRISTIQUES GÉNÉRALES - Description des voyants d'indication (LED) sur le clavier : 30 secondes après la mise en place des piles ou le
dernier appui sur une touche, les voyants du clavier s'éteignent : pour réactiver l'achage, appuyer sur une touche quelconque.
Hydro-4 RF se programme en automatique moyennant radiocommande RF (code 8387, il gère jusqu'à 2 dispositifs RF - code 8348, il gère jusqu'à 6
dispositifs RF) vendue séparément. En l'absence de Radiocommande RF seul l'arrosage manuel sera possible.
ALLGEMEINE EIGENSCHAFTEN - Beschreibung der LED-Anzeige des Bedienfelds. 30Sekunden nach Einlegen der Batterien oder nach dem letzten
Tastendruck gehen die LED am Bedienfeld aus: Zum Reaktivieren der Anzeige drücken Sie eine beliebige Taste.
Hydro-4 RF wird automatisch über eine separat erhältliche Funk-Fernbedienung programmiert (Art. 8387, steuert bis zu 2 Funkgeräte, oder Art. 8348,
steuert bis zu 6 Funkgeräte). Ohne Funk-Fernbedienung ist nur die manuelle Bewässerung möglich.
CARACTERÍSTICAS GENERALES - Descripción de los indicadores de led del panel. Al cabo de 30 segundos de poner las baterías o de presionar una
tecla, los indicadores de led del panel se apagan: para encenderlos de nuevo, pulse cualquier tecla.
El Hydro-4 RF se programa automáticamente mediante el mando a distancia RF (cód. 8387, controla hasta 2 dispositivos RF - cód. 8348, controla hasta 6
dispositivos RF) vendido por separado. Si no se dispone del mando a distancia RF, solo se podrá realizar el riego manual.
Per Hydro-4 RF (codice): - For Hydro-4 RF (code): - Pour Hydro-4 RF (code): - Für Hydro-4 RF (Art.): - Para Hydro-4 RF (código):
IT
UK
FR
DE
ES
90839
OK
LOW
A
F
E
B
C
D
A. Linee da programmare o in funzione
A. Zu programmierende oder aktive Kreise A. Lines to be programmed or in operation
A. Líneas por programar o en funcionamiento A. Lignes à programmer ou en marche
STATO - STATUS - ÉTAT - STATUS - ESTADO SIGNIFICATO - SITUATION - DESCRIPTION - BEDEUTUNG - SIGNIFICADO
Luce verde accesa ssa
Green light on
Lumière verte allumée de manière xe
Grüne Lampe leuchtet x
Luz verde encendida ja
Indica che l’elettrovalvola corrispondente è aperta.
Indicates that the corresponding solenoid valve is open.
Indique que l'électrovanne correspondante est ouverte.
Zeigt an, dass das zugehörige Magnetventil geönet ist.
Indica que la correspondiente electroválvula está abierta.
Luce verde lampeggiante
Flashing green light
Lumière verte clignotante
Grüne Lampe blinkt
Luz verde parpadeando
Indica la linea selezionata in manuale.
This indicates the line selected manually.
Indique la ligne sélectionnée en manuel.
Zeigt den im manuellen Modus ausgewählte Kreis an.
Indica la línea seleccionada manualmente.
B. Simbolo B. Symbol B. Symbole B. Symbol B. Símbolo
STATO - STATUS - ÉTAT - STATUS - ESTADO SIGNIFICATO - SITUATION - DESCRIPTION - BEDEUTUNG - SIGNIFICADO
Luce verde accesa ssa
Green light on
Lumière verte allumée de manière xe
Grüne Lampe leuchtet x
Luz verde encendida ja
Indica che la linea selezionata è aperta. La pressione del tasto OK chiude la linea.
This indicates that the selected line is open. Press the OK button to close the line.
Indique que la ligne sélectionnée est ouverte. La pression de la touche OK ferme la ligne.
Zeigt an, dass der ausgewählte Kreis geönet ist. Bei Drücken der OK-Taste wird der Kreis geschlossen.
Indica que la línea seleccionada está abierta. Pulsando la tecla OK se cierra la línea.

Other manuals for HYDRO-4 RF

1

This manual suits for next models

1

Other claber Lawn And Garden Equipment manuals

claber Aquauno PRATICO User manual

claber

claber Aquauno PRATICO User manual

claber Dual Select 8488 User manual

claber

claber Dual Select 8488 User manual

claber 90480 User manual

claber

claber 90480 User manual

claber AQUAUNO LOGICA 8422 User manual

claber

claber AQUAUNO LOGICA 8422 User manual

claber 90832 User manual

claber

claber 90832 User manual

claber Colibri Series User manual

claber

claber Colibri Series User manual

claber Hydro 4 User manual

claber

claber Hydro 4 User manual

claber Rotoroll Technical specifications

claber

claber Rotoroll Technical specifications

claber Rotoroll User manual

claber

claber Rotoroll User manual

claber OASIS EVOLUTION User manual

claber

claber OASIS EVOLUTION User manual

claber 8487 User manual

claber

claber 8487 User manual

claber AQUAUNO SELECT User manual

claber

claber AQUAUNO SELECT User manual

claber DUAL LOGIC User manual

claber

claber DUAL LOGIC User manual

claber AQUAUNO PRATICO PLUS User manual

claber

claber AQUAUNO PRATICO PLUS User manual

claber Aquauno PRATICO User manual

claber

claber Aquauno PRATICO User manual

claber 8423 User manual

claber

claber 8423 User manual

claber 90831 User manual

claber

claber 90831 User manual

claber TURBO-JET User manual

claber

claber TURBO-JET User manual

claber AQUAUNO VIDEO 8428 User manual

claber

claber AQUAUNO VIDEO 8428 User manual

claber 8900 User manual

claber

claber 8900 User manual

claber IDRIS User manual

claber

claber IDRIS User manual

claber OASIS EVOLUTION 8054 User manual

claber

claber OASIS EVOLUTION 8054 User manual

claber 8061 User manual

claber

claber 8061 User manual

claber Oasis 8053 User manual

claber

claber Oasis 8053 User manual

Popular Lawn And Garden Equipment manuals by other brands

Sunforce SOLAR user manual

Sunforce

Sunforce SOLAR user manual

GARDEN OF EDEN 55627 user manual

GARDEN OF EDEN

GARDEN OF EDEN 55627 user manual

Goizper Group MATABI POLMINOR instruction manual

Goizper Group

Goizper Group MATABI POLMINOR instruction manual

Rain Bird 11000 Series Operation & maintenance manual

Rain Bird

Rain Bird 11000 Series Operation & maintenance manual

Cub Cadet BB 230 brochure

Cub Cadet

Cub Cadet BB 230 brochure

EXTOL PREMIUM 8891590 Translation of the original user manual

EXTOL PREMIUM

EXTOL PREMIUM 8891590 Translation of the original user manual

Snapper 690179 installation instructions

Snapper

Snapper 690179 installation instructions

Exmark SAR481KA30 Operator's manual

Exmark

Exmark SAR481KA30 Operator's manual

Yazoo/Kees Z12 Operator's manual

Yazoo/Kees

Yazoo/Kees Z12 Operator's manual

Makita EM408MP Original instruction manual

Makita

Makita EM408MP Original instruction manual

Exmark Quest Bagger Setup instructions

Exmark

Exmark Quest Bagger Setup instructions

Manitou Systems AS960 Operator's manual

Manitou Systems

Manitou Systems AS960 Operator's manual

Vertex 1/3 HP Maintenance instructions

Vertex

Vertex 1/3 HP Maintenance instructions

GHE AeroFlo 80 manual

GHE

GHE AeroFlo 80 manual

Land Pride Post Hole Diggers HD25 Operator's manual

Land Pride

Land Pride Post Hole Diggers HD25 Operator's manual

Yazoo/Kees Z9 Commercial Collection System Z9A Operator's & parts manual

Yazoo/Kees

Yazoo/Kees Z9 Commercial Collection System Z9A Operator's & parts manual

Premier designs WindGarden 26829 Assembly instructions

Premier designs

Premier designs WindGarden 26829 Assembly instructions

Snapper 1691351 installation instructions

Snapper

Snapper 1691351 installation instructions

manuals.online logo
manuals.online logoBrands
  • About & Mission
  • Contact us
  • Privacy Policy
  • Terms and Conditions

Copyright 2025 Manuals.Online. All Rights Reserved.