74.039.CL12 9
Lumino
Press
• Kalibrierung der Farbpositionen (rot - weiss/violett - blau)
• Calibrating the illuminating color positions colors (red - white/purple - blue)
• Calibrazione dei colori luminosi (rosso – bianco – blu) per la regolazione della temperatura
• Calibrage des couleurs (rouge – blanc – bleu) pour le réglage de la température
Press
Press Press
1 x
1 x
2 x
1 x
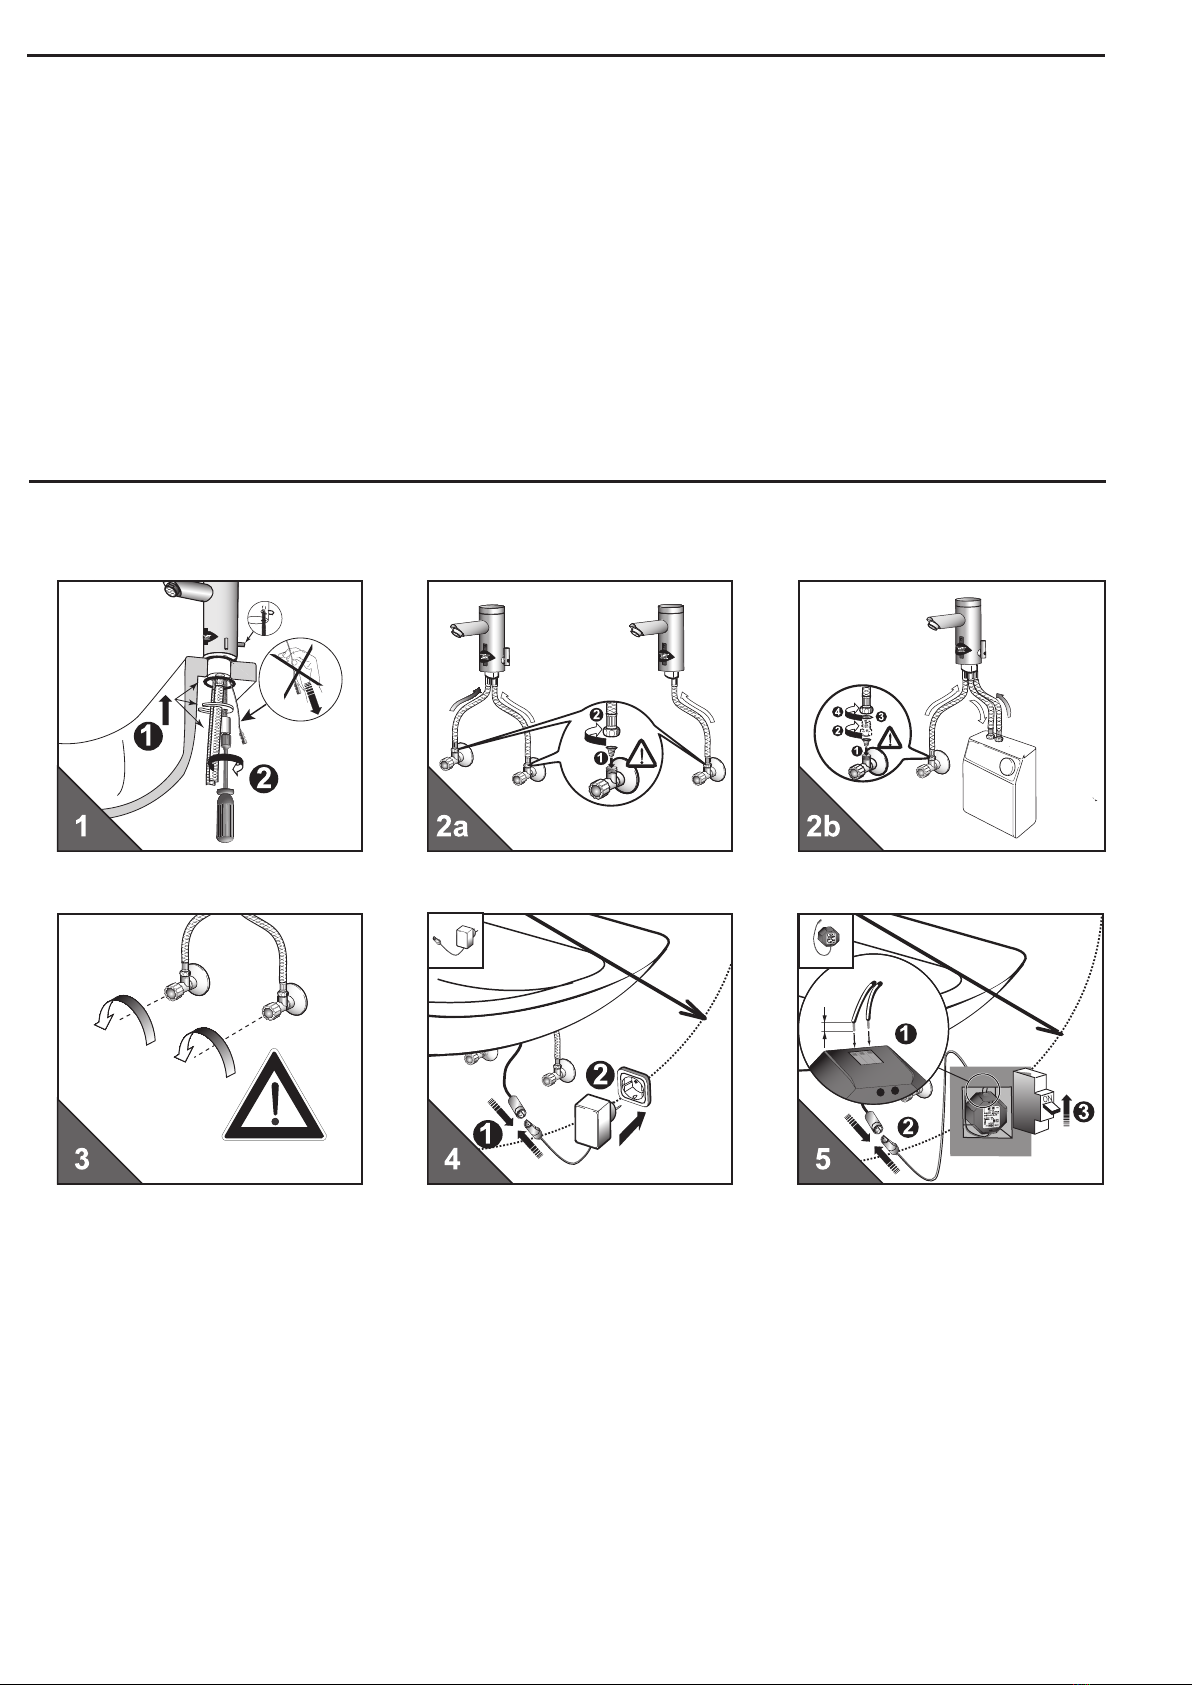
• Armaturendeckel entfernen ...
• Remove top cover ...
• Rimuovere il coperchio del miscelatore...
• Enlevez le couvercle...
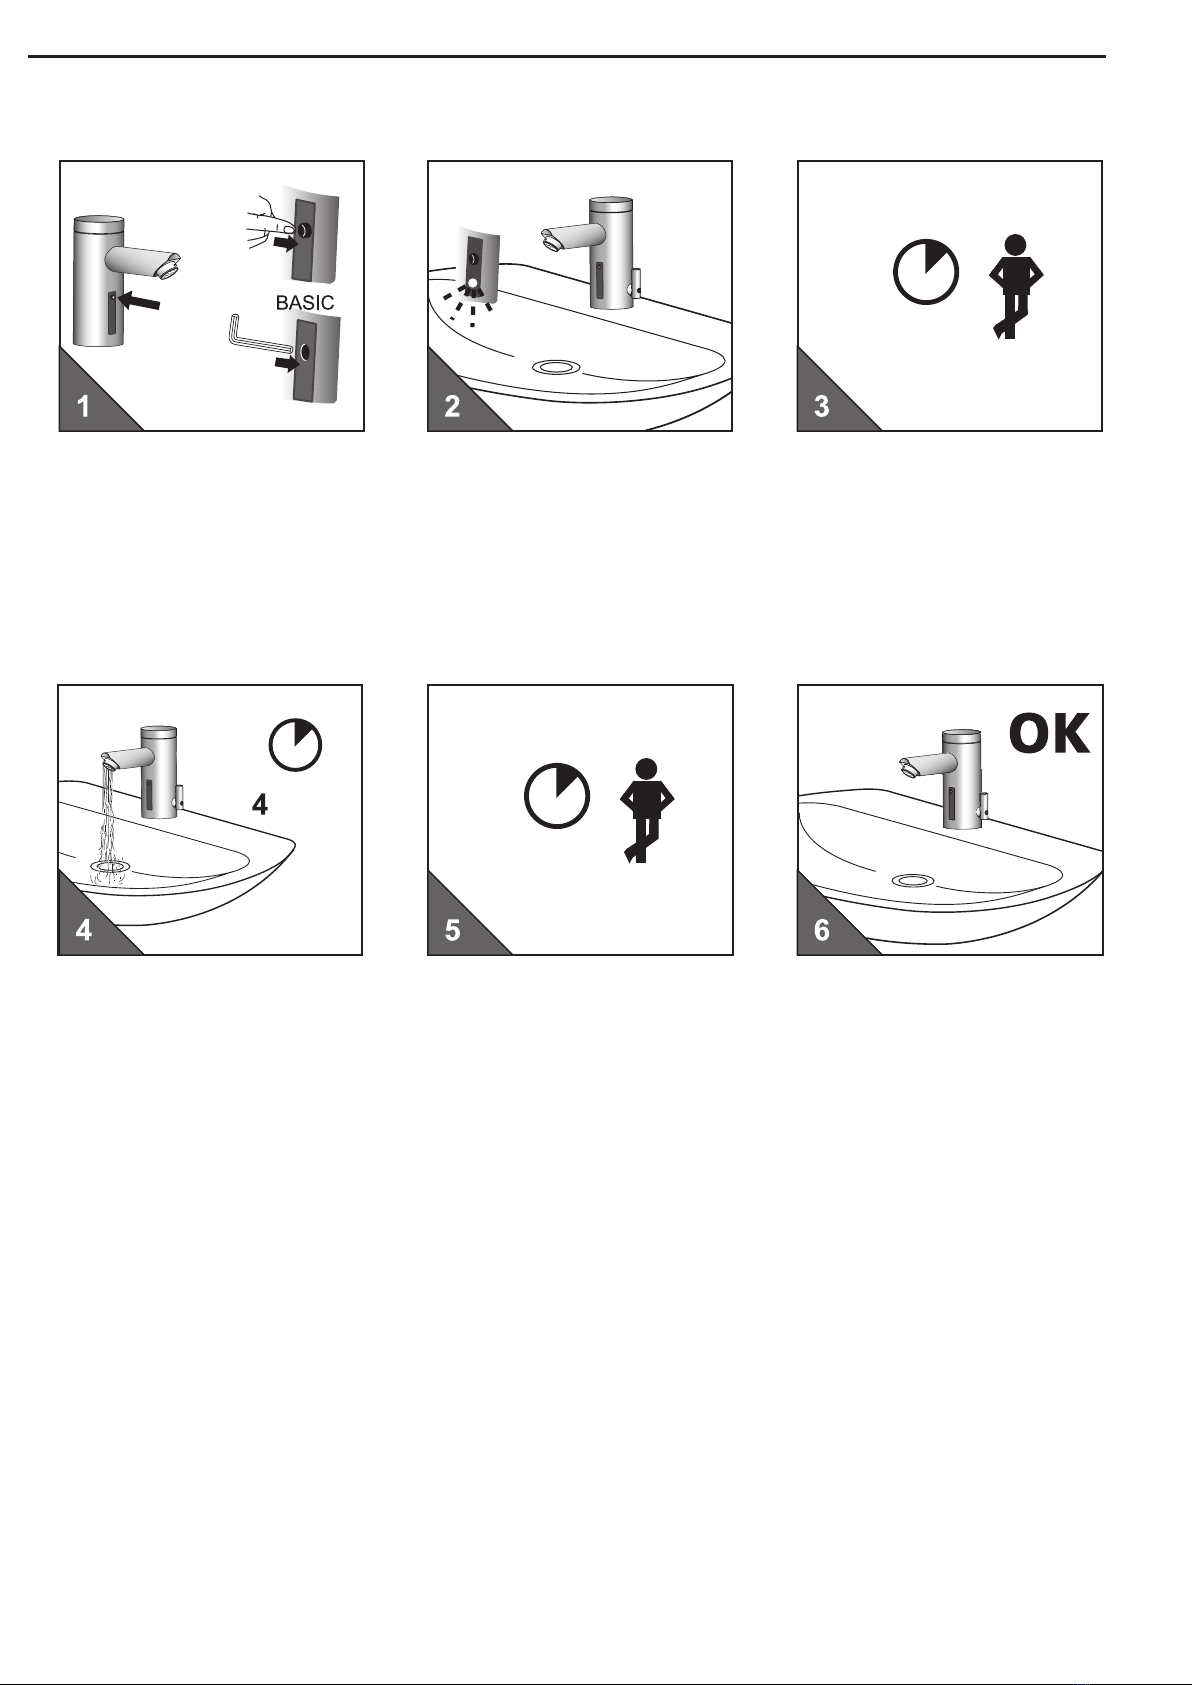
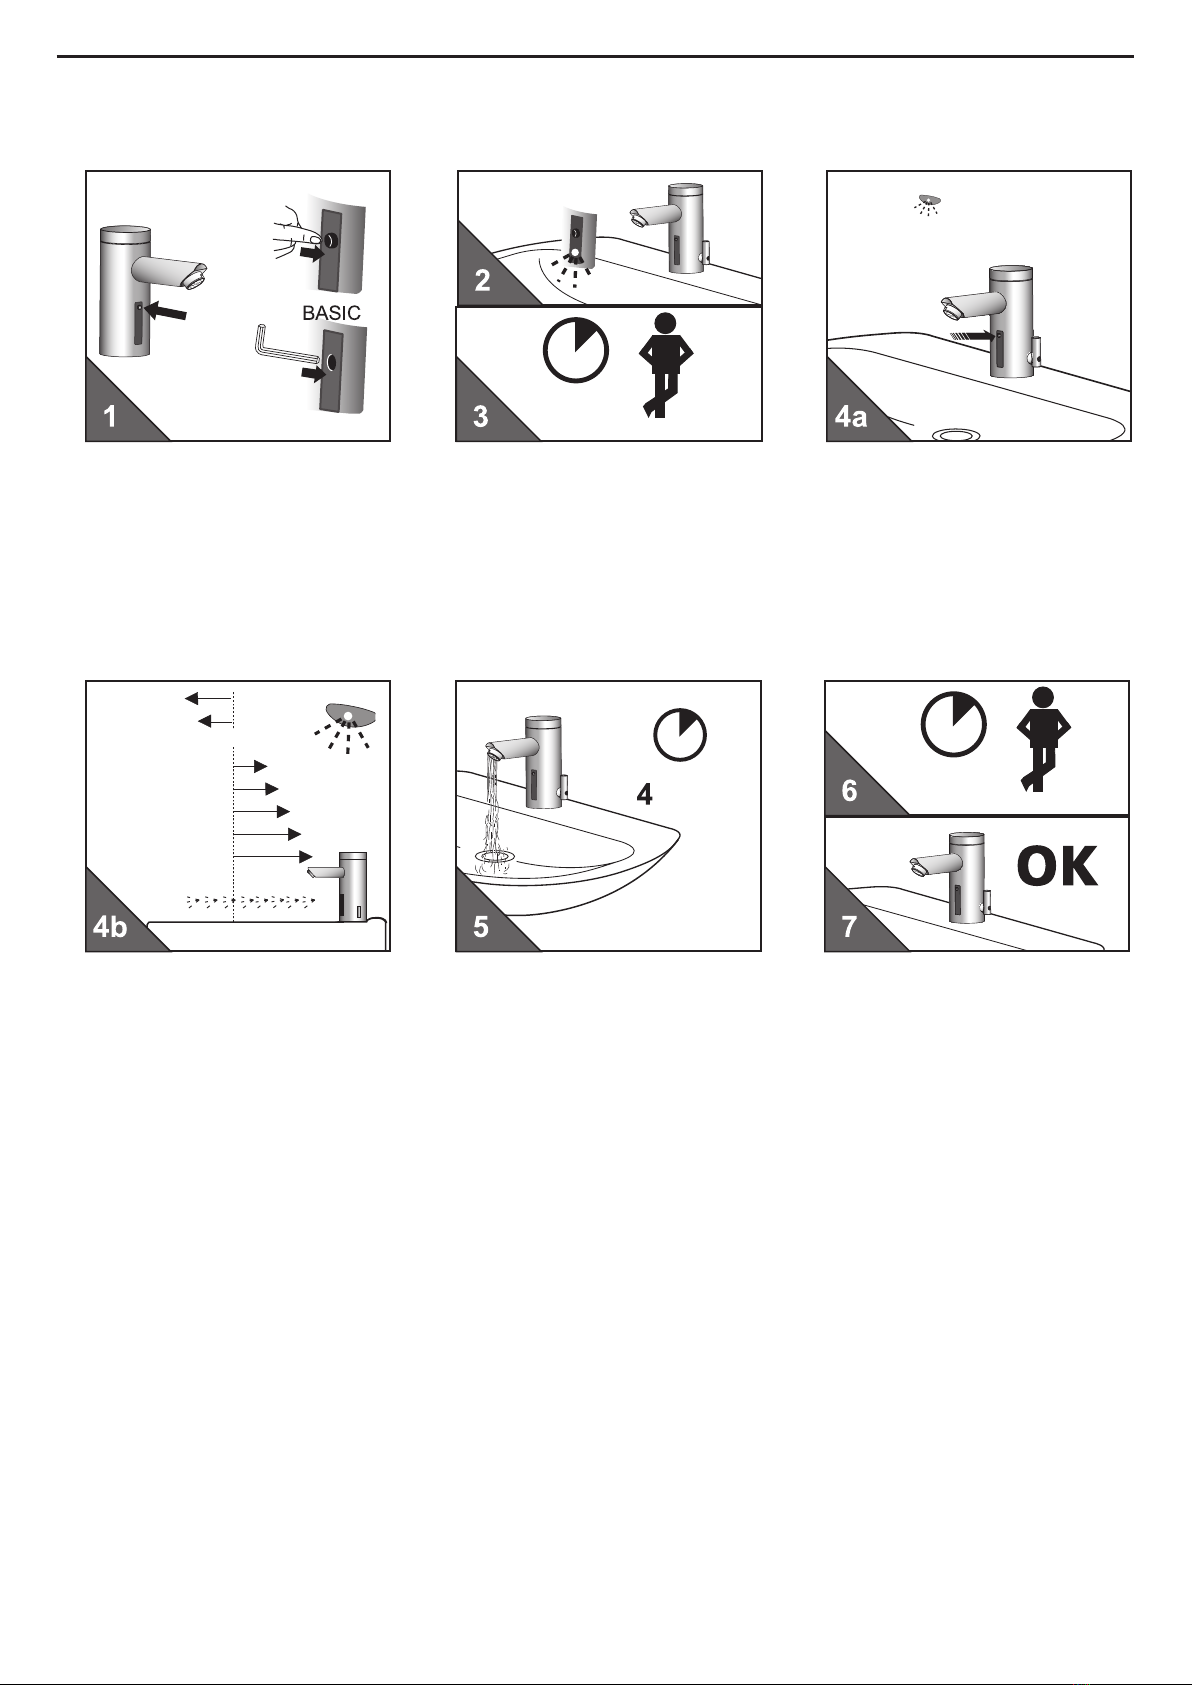
... 2x Taste kurz drücken ...
... Press button twice and release .....
... Premere 2 volta il tasto ...
... Appuyer 4 fois sur la touche ..
... Lichtring blinkt rot ...
... illuminant ashes red ...
... L‘anello luminoso lampeggia in rosso ...
... L’anneau lumineux clignote en rouge ...
... Position für „rot“ am Temperaturverstell-
hebel einstellen und 1x Taste drücken ...
... adjust mixing lever for position „red“ and
press button once ...
... Selezionare la posizione „rosso“ sulla
leva del regolatore di temperatura e pre-
mere 1 volta il tasto ...
... Mettez le levier de réglage de la tempé-
rature sur « rouge » et appuyez 1 fois sur
la touche ...
... Lichtring blinkt weiss ...
... illuminant ashes white ...
... L‘anello luminoso è acceso e di colore
bianco ...
... L’anneau lumineux s’allume en blanc ...
... Position für „weiss“ am Temperaturverstell-
hebel einstellen und 1x Taste drücken ...
... adjust mixing lever for position „white“ and
press button once ...
... Selezionare la posizione „bianco“ sulla leva
del regolatore di temperatura e premere 1
volta il tasto ...
... Mettez le levier de réglage de la tempé-
rature sur « blanc » et appuyez 1 fois sur la
touche ...
... Lichtring blinkt blau ...
... illuminant ashes blue ...
... L‘anello luminoso è acceso e di colore
blu...
... L’anneau lumineux s’allume en bleu...
.. Position für „blau“ am Temperaturverstell-
hebel einstellen und 1x Taste drücken ...
... adjust mixing lever for position „blue“ and
press button once ...
... Selezionare la posizione „blu“ sulla leva
del regolatore di temperatura e premere 1
volta il tasto ...
... Mettez le levier de réglage de la tempé-
rature sur « bleu » et appuyez 1 fois sur la
touche ...
.... Armaturendeckel montieren.
... x top cover.
... Montare il coperchio del miscelatore.
... Montez le couvercle.