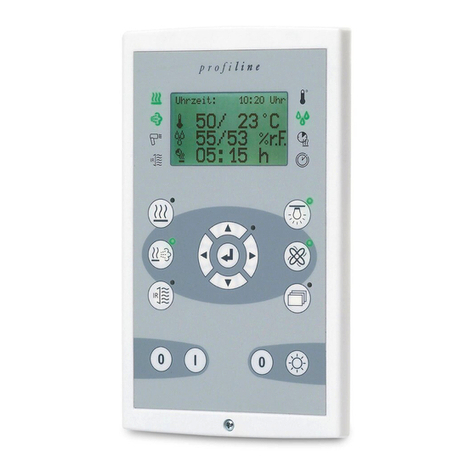
clare ClareOne CLR-C1-PNL1 User manual

clareONE Wireless Security and
Smart Home Panel User Manual
Last modified: 10/21/19
DOC ID - 1871 • Rev 01 • DRAFT 00.07

Copyright
© 21OCT19 Clare Controls, LLC. All rights reserved.
This document may not be copied in whole or in part or otherwise
reproduced without prior written consent from Clare Controls, LLC.,
except where specifically permitted under US and international
copyright law.
Trademarks and
patents
The clareONE name and logo are trademarks of Clare Controls,
LLC.
Other trade names used in this document may be trademarks or
registered trademarks of the manufacturers or vendors of the
respective products.
Manufacturer
Clare Controls, LLC.
7519 Pennsylvania Ave., Suite 104, Sarasota, FL 34243, USA
FCC compliance
This equipment has been tested and found to comply with the limits
for a Class B digital device, pursuant to part 15 of the FCC Rules.
These limits are designed to provide reasonable protection against
harmful interference in a residential installation. This equipment
generates, uses and can radiate radio frequency energy and, if not
installed and used in accordance with the instructions, may cause
harmful interference to radio communications. However, there is no
guarantee that interference will not occur in a particular installation. If
this equipment does cause harmful interference to radio or television
reception, which can be determined by turning the equipment off and
on, the user is encouraged to try to correct the interference by one or
more of the following measures:
•Reorient or relocate the receiving antenna.
•Increase the separation between the equipment and receiver.
•Connect the equipment into an outlet on a circuit different from
that to which the receiver is connected.
•Consult the dealer or an experienced radio/TV technician for
help.
EU compliance
Complete additional sections according to the governing laws and
standards for the intended marketplace.
EU directives
1999/5/EC (R&TTE directive): Hereby, Clare Controls, Llc. declares
that this device is in compliance with the essential requirements and
other relevant provisions of Directive 1999/5/EC.
2002/96/EC (WEEE directive): Products marked with this symbol
cannot be disposed of as unsorted municipal waste in the European
Union. For proper recycling, return this product to your local supplier
upon the purchase of equivalent new equipment, or dispose of it at
designated collection points. For more information see:
www.recyclethis.info.

2006/66/EC (battery directive): This product contains a battery that
cannot be disposed of as unsorted municipal waste in the European
Union. See the product documentation for specific battery
information. The battery is marked with this symbol, which may
include lettering to indicate cadmium (Cd), lead (Pb), or mercury
(Hg). For proper recycling, return the battery to your supplier or to a
designated collection point. For more information see:
www.recyclethis.info.
Contact information
For contact information, see www.clarecontrols.com.


clareONE i
Content
Important information...ii
Limitation of liability...ii
Introduction...1
Packages contents...1
Installing the panel...1
clareONE setup wizard...12
clareONE Panel menus...21
clareONE menu bar...21
clareONE status bar...22
clareONE quick settings menu...23
Security...25
Security user management...26
Operating security...35
Favorites...40
Activity...44
Settings...45
Setting options...46
User Settings...50
Installer Settings...70
Emergency...90
Glossary...95
Appendices...96
Sensor installations and specifications...96
clareONE Keyfob Setup Sheet...97
Specifications...98
clareONE Door/Window Sensor Installation Sheet...99
clareONE PIR Motion Sensor Installation Sheet...102
Pin function...103
Specifications...103

ii clareONE
Important information
Limitation of liability
To the maximum extent permitted by applicable law, in no event will Clare
Controls, LLC. be liable for any lost profits or business opportunities, loss of use,
business interruption, loss of data, or any other indirect, special, incidental, or
consequential damages under any theory of liability, whether based in contract,
tort, negligence, product liability, or otherwise. Because some jurisdictions do not
allow the exclusion or limitation of liability for consequential or incidental
damages the preceding limitation may not apply to you. In any event the total
liability of Clare Controls, LLC. shall not exceed the purchase price of the
product. The foregoing limitation will apply to the maximum extent permitted by
applicable law, regardless of whether Clare Controls, LLC. has been advised of
the possibility of such damages and regardless of whether any remedy fails of its
essential purpose.
Installation in accordance with this manual, applicable codes, and the instructions
of the authority having jurisdiction is mandatory.
While every precaution has been taken during the preparation of this manual to
ensure the accuracy of its contents, Clare Controls, LLC. assumes no
responsibility for errors or omissions.

clareONE 1
Introduction
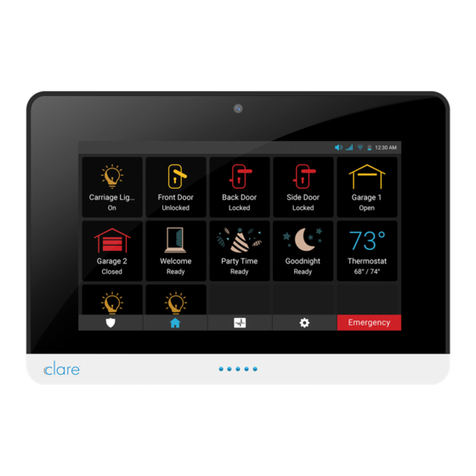
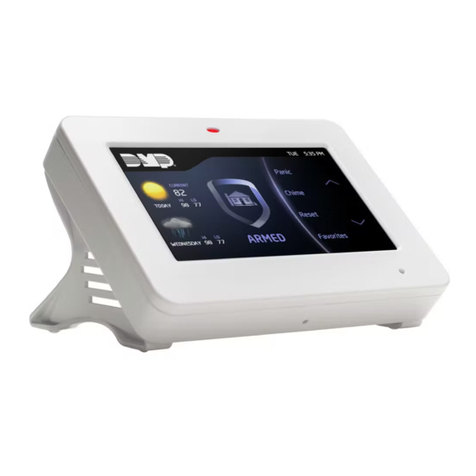
The clareONE Wireless Security and Smart Home Panel (CLR-C1-PNL1) is the
Clare Controls all in one panel combines a smart home hub with a security panel.
The clareONE is a smart home hub featuring customizable home automation and
security control, eliminating the need for separate control and customization
devices.
Packages contents
Note: Ensure all accessories are included. If not, contact your dealer.
•1 x clareONE panel (CLR-C1-PNL1)
•1 x Wall mount bracket (p/n)
•1 x Kickstand (p/n)
•1 x Power supply (p/n)
•1 x USB-C Ethernet adapter (p/n)
•1 x clareONE Quick Start Guide (DOC ID 1885)
•Mounting hardware (p/n)
Optional kits may include:
•clareONE Door/Window Sensor, white (CLR-C1-DW-W)
•clareONE Door/Window Sensor, brown (CLR-C1-DW-B)
•clareONE Keyfob (CLR-C1-KF)
•clareONE PIR Motion Sensor (CLR-C1-MOT)
•TBD
Installing the panel
Only qualified installation technicians should install the panel. Clare Controls
does not assume responsibility for damages caused by improper installation,
connection to the network, or use of the device.
Installation options
Select an installation option and powering method. The panel can be powered by
the provided power supply or using a 12 VDC (3A) direct connection.
Power options
For ClareONE panel power options, see Power options on page 11.
Note: In the case of a power outage, the battery in the panel last 24 hours.

2 clareONE
Installation option 1: Desktop
Option 1 uses the included kickstand.
To desktop mount the panel:
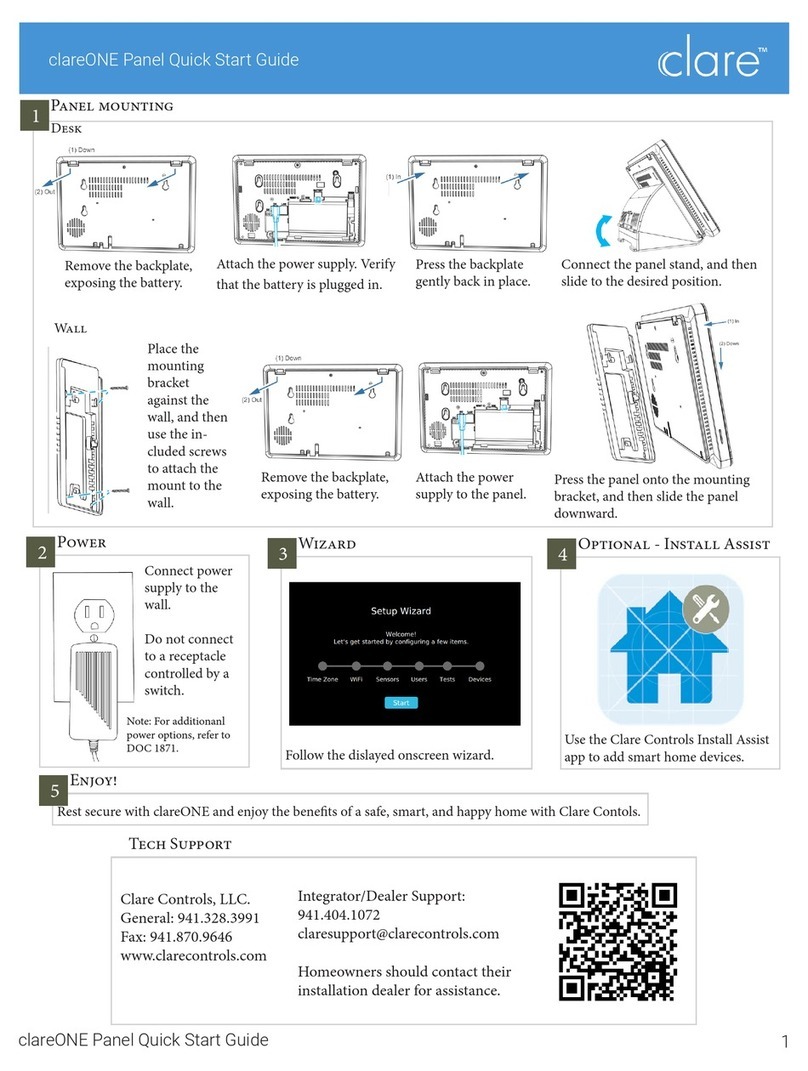
1. Remove the panel’s back plate, exposing the battery.
2. Attach the power supply to the panel. Verify that the battery is plugged in.
Note: For other power options, see Power options on page 11.

clareONE 3
3. Attach the panel’s back cover, gently pressing it into place.
4. Press kickstand to the rear of the panel, and then slide the panel down.
The stand slides into place, locking to the panel.
5. Plug the opposite end of the power supply into an electrical outlet.
The tablet automatically powers up.

4 clareONE
6. Connect the panel stand, and then slide the mount position to change the
viewing angle.
a. Press the tab in and slide the base to the desired position, locking it
into place.
Installation option 2: Wall mounted
Option 2 uses the included wall mount bracket. Use the included screws and wall
mount to mount the panel flush with the wall.
To wall mount the panel using the provided power supply:
1. Place the mounting bracket against the wall, ensuring that it is in the desired
location and close to an outlet.

clareONE 5
2. Remove the panel’s back plate, exposing the battery.
3. Attach the power supply to the panel. Verify that the battery is plugged in.
4. Attach the panel’s back cover, gently pressing it into place.

6 clareONE
5. Select an outlet or gang box.
a. Outlet: Using 4 of the included screws and a power drill, securely
attach the bracket to the wall.
b. Gang box: Using 2 of the included screws, secure the bracket to the
existing gang box.
6. Press the panel onto the mounting bracket, and then slide the panel down
until it locks into place.
7. Plug the opposite end of the power supply into an electrical outlet.
The tablet automatically powers up.
Note: Do not connect to a receptacle controlled by a switch.

clareONE 7
To wall mount the panel using a remote 12VDC 3A supply:
Note: Pictures to be added.
1. Place the mounting bracket against the wall, ensuring that it is in the desired
location and close to an outlet.
Select an outlet or gang box.
a. Outlet: Using 4 of the included screws and a power drill, securely
attach the bracket to the wall.
b. Gang box: Using 2 of the included screws, secure the bracket to the
existing gang box.
2. Run connection from the 12VDC supply to the desired installation location.
3. Place the mounting bracket against the wall, ensuring the power cable goes
through the center of the mounting bracket.

8 clareONE
4. Using 2 of the included screws and a power drill, securely attach the bracket
to the wall.
5. Remove the panel’s back plate, exposing the battery.

clareONE 9
6. Attach the power supply to the panel. Verify that the battery is plugged in.
7. Attach the panel’s back cover, gently pressing it into place.

10 clareONE
8. Press the panel onto the mounting bracket, and then slide the panel down
until it locks into place.
9. Plug the opposite end of the power supply into an electrical outlet.
The tablet automatically powers up.
Note: Do not connect to a receptacle controlled by a switch.

clareONE 11
Power supply options
TBD
Localized power
TBD
Remote
TBD

12 clareONE
clareONE setup wizard
The clareONE panel comes with the ClareHome app pre-installed. Follow the
setup wizard to connect to your home’s Wi-Fi and add sensors.
To setup the panel:
1. Tap the screen.
–or –
Press the power button on the front of the panel.
The Set Up Wizard displays.
2. Tap Start.

clareONE 13
3. Select your time zone from the drop-down, and then tap Save.
Note: ClareHome uses the location of the device for timers and events.
4. Tap the desired network, enter the password, and then tap OK.

14 clareONE
5. Tap Ok, and then add your sensors.
The sensor management page displays.
a. Tap Pair Sensor, and then select a learning method.
Other manuals for ClareOne CLR-C1-PNL1
4
Table of contents
Other clare Control Panel manuals
