Clarion FX508 User manual

DISPLAY AUDIO AM-FM /AUX-IN / USB / BT /
iPod CONTROLLER / CP & AA
READ THIS MANUAL BEFORE USING HEAD UNIT.
User´s Manual
FX508
UO-17S3413AM-01
982-1139-41
01.- PRECAUTIONS
CONTENTS
01. PRECAUTIONS............................................................................................ 1
03. FUNCTIONS
04. AUDIO SETTINGS
05. RADIO OPERATION
06. USB MUSIC MP3,WMA & AAC (M4A) FILE OPERATION
07. USB PHOTO FILE OPERATION
08. USB MOVIE FILE OPERATION
09. AUX-IN CONNECTION OPERATION
10. iPod OPERATION
11. BLUETOOTH FUNCTION
12. CAR PLAY
13. ANDROID AUTO
14.
15. RECOMMENDATIONS FOR USB DEVICES
16. FORMAT AVAILABLES
02. BUTTON DESCRIPTION.............................................................................. 3
............................................................................................... 3
...................................................................................... 4
.................................................................................... 7
.......................... 8
.................................................................. 9
................................................................... 12
.......................................................... 14
........................................................................................ 15
............................................................................ 17
.................................................................................................... 20
......................................................................................... 22
GENERAL CAUTIONS ............................................................................... 24
.............................................. 24
................................................................................ 25
....................................................................... 29
................................................................................. 29
....................................................................................... 31
20. WIRE CONNECTION GUIDE...................................................................... 33
17. USB DEVICES AVAILABLES
18. TROUBLESHOOTING
19. SPECIFICATIONS
For your safety, the driver should not watch any video sources while driving. Please note that watching video
sources while driving is prohibited by law in some countries. Also, while driving, keep the volume at a level at
which external sounds can be heard.
Do not disassemble or modify this unit. It may cause an accident, fire, or electric shock.
Do not use this unit when trouble exists, such as no screen content is visible or no sound is audible. It may
cause an accident, fire, or electric shock. In this case please contact an authorized Clarion dealer or your
nearest Clarion service center.
In case of a problem, such as any foreign material entering the unit, the unit getting wet, or smoke or strange
smell coming out from the unit etc., stop using the unit immediately, and consult your Clarion authorized dealer
or nearest Clarion service center. Continuing to use it in this condition may cause an accident, fire, or electric
shock.
When replacing the fuse only use a fuse with the same specification as the original. Using a fuse with a different
specification may cause a fire.
For the installation of this unit or a change in the installation, contact your local Clarion authorized dealer to
ensure a safe installation. Professional skills and experience is required to install these types of devices in most
modern vehicles.
As the driver, you alone are responsible for your driving safety.
In order to avoid distraction and accidents, do not operate the system while driving. Operate the system only
when the vehicle is stopped at a safe place and the parking brake is on.
Changes or modifications not expressly approved by the party responsible for compliance will void Clarion's
liability in case of an accident.
WARNING
MENU
AM 09:38
AM
09:38
Radio
USB
Audio
i
Radio Media
System Display Tone
Phone
MENU
iPod Audio
Android Auto
FX508
1

13
Electronica Clarion S.A. de C.V
Printed in Mexico / Imprimé au Mexique / Impreso en Mexico
MENU
AM 09:38
AM
09:38
Radio
USB
Audio
i
Radio Media
System Display Tone
Phone
MENU
iPod Audio
Android Auto
FX508
3
LCD / WIDGETS
03.- FUNCTIONS (Cont.)
6
1 2 35
4
6
6
7
02.- BUTTON DESCRIPTION
1Vol down button
2Vol up button
Power / Mute button
3
Home menu
4
Voice button
5
6LCD display: The display will show various widgets/
14 options available depending on the mode you are in.
7Widgets
Radio
iPod Audio
AUX Audio
Bluetooth Audio
Phonebook
Connect Phone
Call History
USB Audio
USB Photo
USB Movie
Dial Number
Select Device
2
"Made for iPod" and "Made for iPhone" mean that an electronic accessory has been
designed to connect specifically to iPod or iPhone, respectively, and has been certified by
the developer to meet Apple performance standards. Use of the Apple CarPlay logo means
that a vehicle user interface meets Apple performance standards. Apple is not responsible
for the operation of this device or its compliance with safety and regulatory standards.
Please note that the use of this accessory withiPod or iPhone may affect wireless
performance.
iPhone, iPod and Siri are trademarks of Apple Inc., registered in the U.S. and other
countries.
Apple CarPlay is a trademark of Apple Inc., registered in the U.S. and other countries.
Android Auto logo mean that electronic accessory has been designed to connect
specifically toAndroid phone 5.0 (Lollipop) or higher versions, and has been certified by
the developer to meet Google performance standards.
Android and Android Auto are trademarks of Google Inc.
The Bluetooth® word mark and logos are registered trademarks owned by Bluetooth SIG,
Inc. and any use of such marks by Electronica Clarion S.A. de C.V. is under license. Other
trademarks and trade names are those of their respective owners.
TM
TM
TM
This equipment has been tested and found to comply with the limits for a Class B digital device,
pursuant to Part 15 of the FCC Rules. These limits are designed to provide reasonable
protection against harmful interference in a residential installation. This equipment generates,
uses and can radiate radio frequency energy and, if not installed and used in accordance with
the instructions, may cause harmful interference to radio communications. However, there is
no guarantee that interference will not occur in a particular installation.
If this equipment does cause harmful interference to radio or television reception, which can be
determined by turning the equipment off and on, the user is encouraged to try to correct the
interference by one or more of the following measures:
-- Reorient or relocate the receiving antenna.
-- Increase the separation between the equipment and receiver.
-- Connect the equipment into an outlet on a circuit different from that to which the receiver is
connected.
-- Consult the dealer or an experienced radio/TV technician for help.
Improper connection of speed pulse signal may result in serius damage or injury including
electrical shock, and interference with the operation of the vehicle’s anti-lock braking system,
automatic gearbox and speedometer indication.
This device complies with Industry Canada licence-exempt RSS standard(s). Operation is
subject to the following two conditions: (1)this device may not cause interference, and(2) this
device must accept any interference, includinginterference that may cause undesired
operation of the device.
This product contain Metallic and Plastic recyclable materials that could be reused.
ABOUT THE REGISTERED MARKS, ETC

04.- AUDIO SETTINGS (Cont.)
Fader Adjustment
Balance Adjustment
Equalizer Mode Adjustment
Bass Adjustment (available only when Equalizer mode is set to USER)
Mid Adjustment (available only when Equalizer mode is set to USER)
Treble Adjustment (available only when Equalizer mode is set to USER)
Loudness
Reset
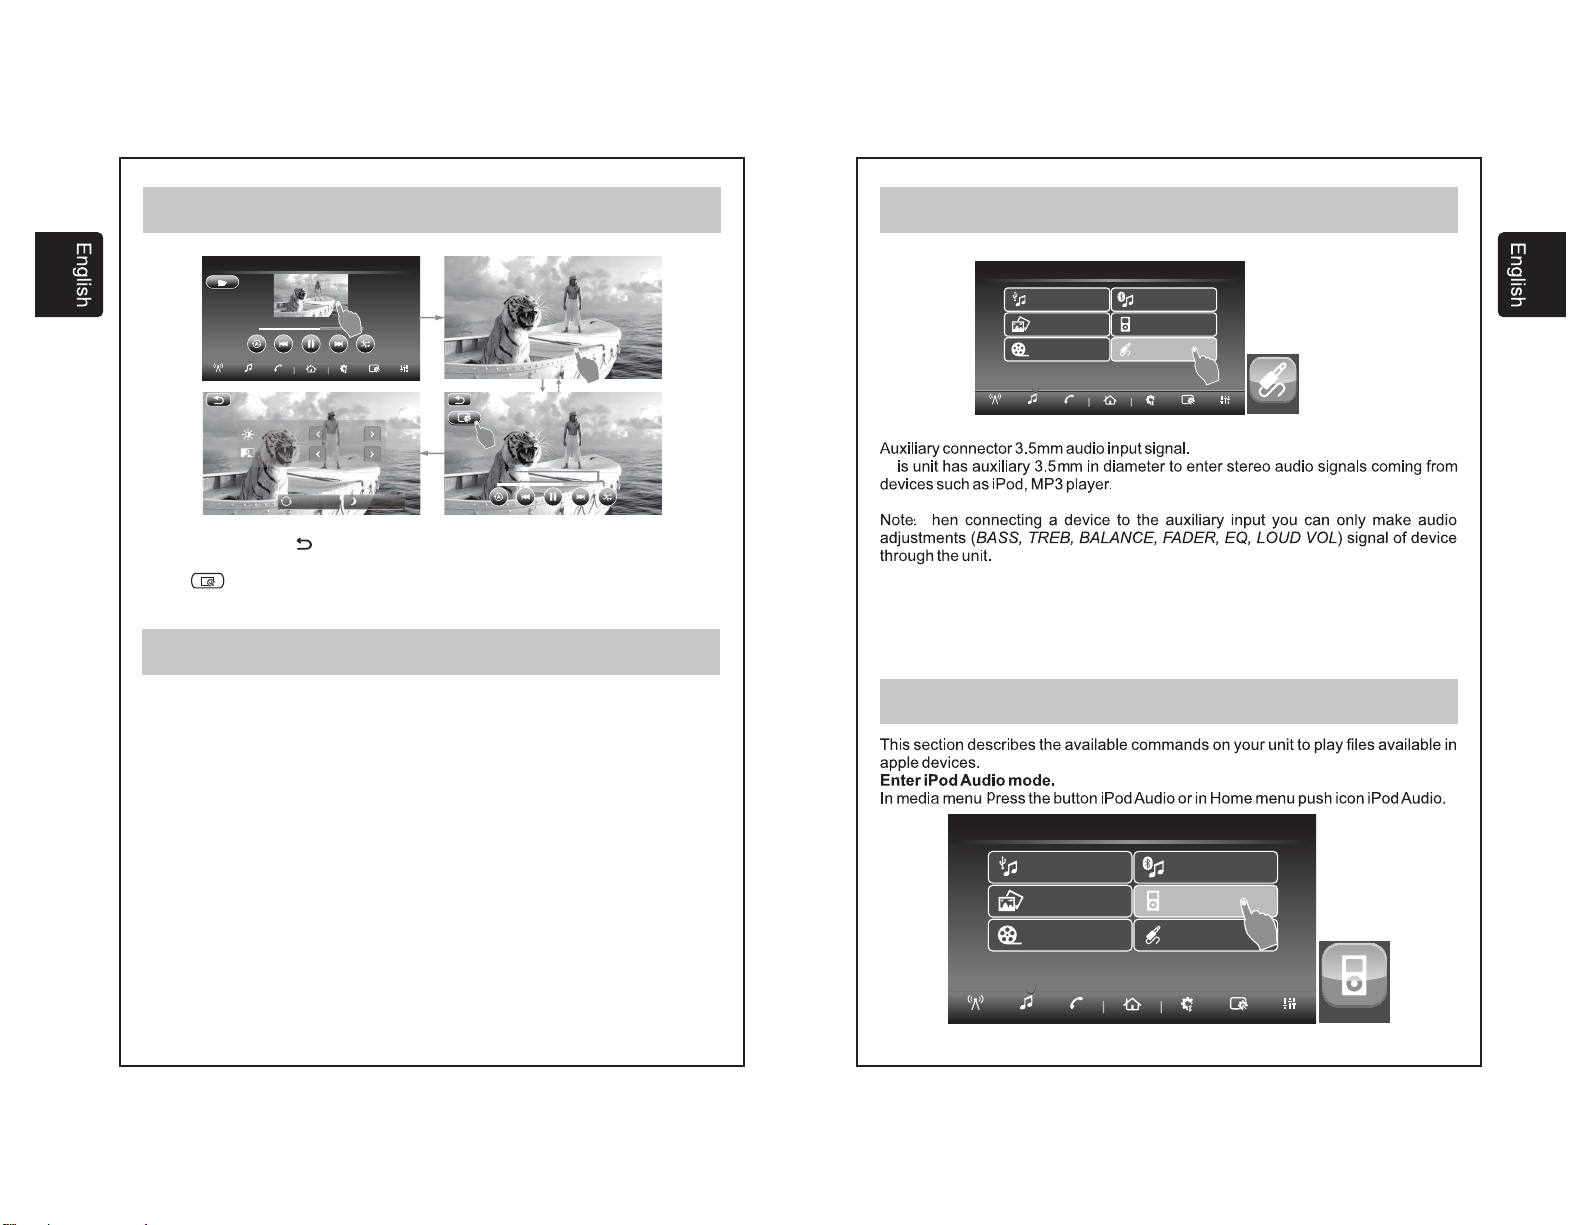
.2 SELECTING DISPLAY SETTING
Brightness Adjustment
Contrast Adjustment
Day and Night Manual Dimmer Adjustment
Reset
To adjust the fader level, press the up arrow to increase fade to the front and the
down arrow to increase fade to the rear. The value displayed will range from R5
to F5.
To adjust the balance level, press the up arrow to increase balance to the left and
the down arrow to increase balance to the right. The value displayed will range
from L5 to R5.
To adjust the preset equalizer profiles press the up and down arrows to change
between the various options. Options available are USER, JAZZ, CLASSIC,
ROCK, POP.
To adjust the level of bass, press the up arrow to increase the bass level and the
down arrow to decrease the bass level. The value displayed will range from -5 to
+5.
To adjust the mid level, press the up arrow to increase the mid level and the down
arrow to decrease the mid level. The value displayed will range from -5 to +5.
To adjust the level of treble, press the up arrow to increase the treble level and
the down arrow to decrease the treble level. The value displayed will range from
-5 to +5.
To toggle, whether loudness is on or off, simply press the on screen button.
Loudness enhances the unit's bass and treble response.
Pressing this on screen button will return all tone settings to factory default.
4
Push the Display icon in the bottom right of the main screen to access the display
setting menu where you can adjust BRIGHTNESS, CONTRAST, DAY/NIGHT
DIMMER and RESET.
To adjust brightness level, press the right or left arrows to adjust to the level
desired. The value of brightness displayed will range from -10 to +10.
To adjust contrast level, press the right or left arrows to adjust to the level desired.
The value of contrast displayed will range from -10 to +10.
To manually adjust the units dimmer to Day or Night by pressing the
corresponding button on screen.
Pressing this on screen button will return all display settings to factory default.
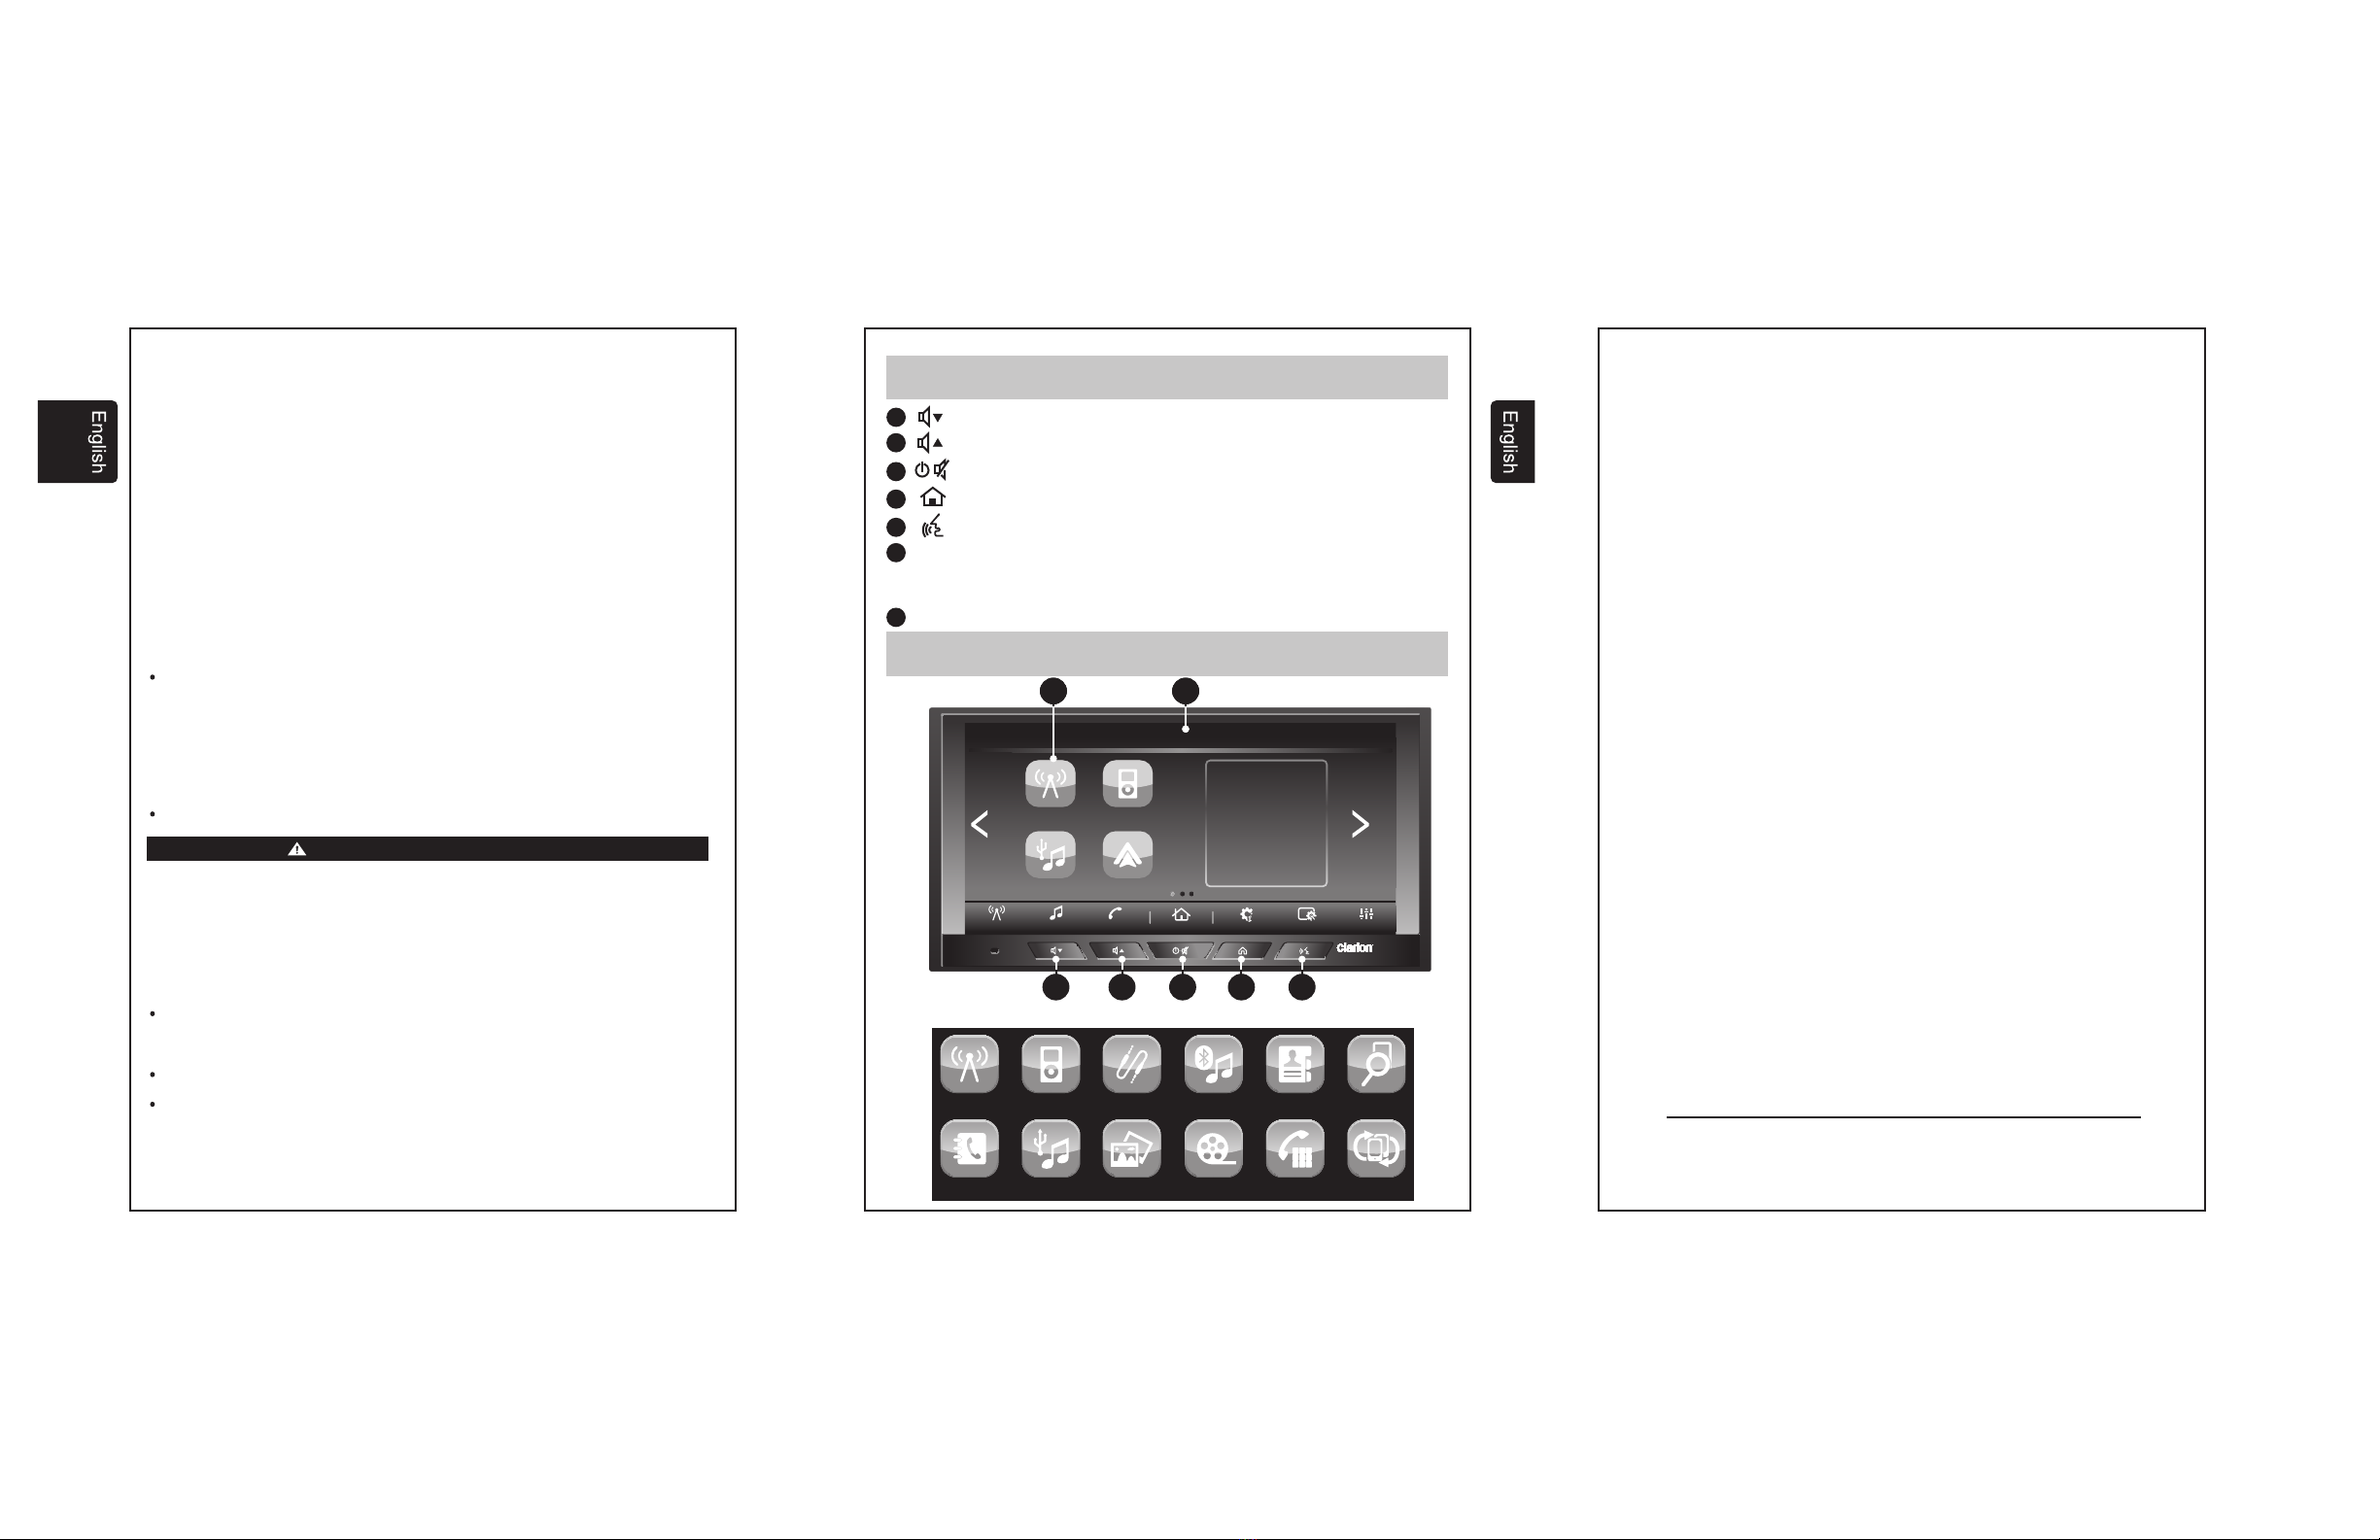
04.- AUDIO SETTINGS
POWER ON/OFF/MUTE, VOLUME UP, VOLUME DOWN
.1 SELECTING AUDIO TUNING
Push the power button to turn the unit ON, push the power button when the unit is
on to mute the audio and push and hold the power button for 2 seconds to turn
the unit OFF. Push the volume up or down button to adjust the volume level:
minimum of 0 and maximum of 40, after 5 seconds of the last adjustment the
units display will return to the previous mode.
Please note – in order to protect the driver and the vehicles speakers, the unit is
designed to always start at an initial volume level (set in the system settings)
when powered on.
4 .
Push the Tone icon in the bottom right of the main screen to access the tone
setting menu where you can adjust FADER, BALANCE, EQ MODE, BASS,
TREBLE, LOUD and RESET.
03.- FUNCTIONS
TUNE
-Preset buttons 12 AM and 18 FM
-Search/Seek tuning, Manual tuning
AUDIO
-Electronic audio controls
-Bass and treble controls
-Balance control 4 way.
-Loudness
-4 modes of pre-equalization (User, Pop, Rock, Classic, Jazz)
-Output power 20 W x 4 Ch
USB PLAYER
-Repeat control
-MP3/WMA searching control
-Forward and Backward
-Random Control function
GENERAL
-Display audio information
-Mode selector Radio/AUX/USB/iPod/BT
-Voltage operation 13.2 +/- 5%
45

6
4
Press the System icon in the bottom of the main screen to access the system
setting menus and the left and right arrows to move between the various menus.
Use the left and right arrows to select the system language from English (ENG),
Spanish (ESP) and French (FRE).
Toggles whether a beep tone is heard when a button is pushed.
Toggles whether the unit will scroll to show complete song/track information when
it is too long to fit on the main screen.
When checked this option keeps the unit ON for 10 minutes after the ACC is
turned from ON to OFF.
When checked this option will allow you to charge your mobile devices (max 1.5
Amp). You will not be able to playback from the device while charging.
Use the left and right arrows to set the volume level at which the radio will start at
whenever the unit is powered on. Values can range from 0 to 40.
Use the left and right arrows to increase or decrease the volume level of attached
external devices. Values can range from 0 to +3.
Use the left and right arrows to increase or decrease the volume level from
external announcement devices. Values can range from -10 to +10.
Use the left and right arrows to choose the volume mode to be used based on the
speed of the vehicle (requires connection to vehicles speed sensor). Values –
OFF, Low, Mid, High.
This allows you to change the order of the widgets on the Home Menu.
.3 SELECTING SYSTEM SETTING
Language Selection
Beep Sound
Text Scroll
Ignition Option
Quick Charge
Initial Volume
Aux Volume Adjustment
Navigation Volume Adjustment
Speed Volume Adjustment
Edit Home Menu
04.- AUDIO SETTINGS (Cont.)
7
05.- RADIO OPERATION
This section describes the operation in Radio Mode.
In Home Menu Press the button Radio or icon Radio.
Enter Radio mode.
AM1-AM2-FM1-FM2-FM3
Clock
Ver.Info
This option in the systems menu allows you to adjust the clock on the main
screen. Hours, Minutes, AM/PM and 12/24H modes can all be selected on this
screen.
This allows you to see the version numbers of the software installed in the unit.
04.- AUDIO SETTINGS (Cont.)
Band Selection
Manual Tuning
Seek Tuning
Scan Tuning
Autoscan Presets
This unit has 2AM and 3 FM bands each capable of storing up to 6 preset stations. To
change the band, simply tap the band button on screen. Each time it is tapped it will
change the band as indicated below.
Use the and the buttons on screen to adjust reception one frequency step up or
down in the current band.
Use the and the buttons to activate the seek function of the tuner. The tuner
will automatically search up or down depending on the button pressed and stop at
the first strong signal it finds in the current band.
Push the SCAN button on screen to activate the SCAN function, the SCAN icon on
the screen will flash while scanning and the unit will automatically scan the current
band stopping at each strong signal it finds for 10 seconds before resuming
scanning. Push SCAN again to disable this function.
Push and hold the SCAN button for 3 seconds to activate the AUTOSCAN function.
When activated the unit will automatically scan the band and program the Presets 1
through 6 with the first six strong signals it finds. It will then play each new preset for 5
seconds before returning to preset 1.
i
Media
System Display Tone
AM1
AM 09:38
Phone
MENU
BAND
SCAN
530
KHz
SCAN
Radio
600 1000 1400 1600 1710530
1
12
23
34
45
56
6

8
This section describes the available commands to control and play music files
through USB.
When a USB device is inserted the unit will automatically play saved music in the root
folder. Alternatively when a USB device is already connected you can either press
the USB Audio widget on the Home menu or the USB Audio on screen button on the
Media menu.
Type of files supported: Check table 1 in section 16
Pushing the button on screen will rewind the current track to its beginning. If it
pressed again before 3 seconds has elapsed it will go to the beginning of the
previous track and so on. In this way it is possible to skip multiple tracks simply by
pressing the button repeatedly.
Pushing and holding the button on screen will fast rewind the current track.
Release button to resume play.
Pushing the button on screen will skip to the beginning of the next track.
Pushing and holding the button on screen will fast forward the current track.
Release button to resume play.
. - FORMATAVAILABLES
Previous Track and restart.
Fast Rewind.
Next Track
Fast Forward.
05.- (Cont.)RADIO OPERATION
06.- USB MUSIC MP#,WMA, & ACC (M4A) FILE OPERATION
Setting Presets
Selecting Presets
To set a radio channel to a preset simply push and hold the on screen preset for
at least 3 seconds while tuned to the channel you are trying to store. There a 6
presets available per band.
Simply by pressing the on screen preset the unit will tune to the station stored.
i
Media
System Display Tone
Media
AM 09:38
Phone
MENU
Radio
USB Audio
USB Photo
iPod
Bluetooth Audio
USB Movie
Rear AUX
9
Folder Navigation
Repeat and Random Function
To navigate through your folders touch the folder icon and use the navigation
icons on screen to move up and down through your files one page at a time
and to move to the first or last file in the folder. Select the file you would like
to access by touching the filename on the screen.
06.- MP#, WMA & AAC (M4A) FILE OPERATION
(Cont)
07.- USB PHOTO FILE OPERATION
This section describes the available commands to control and display photo images
through USB
Type of files supported: Check table 2 in section
In Media Menu Press the button USB Photo or in Home menu push icon USB Photo.
16. - FORMATAVAILABLES
Enter Photo mode.
Random Play OFF (Default)
A
Repeat all tracks (Default)
1
Repeat selected track Random Play ON
F
Repeat selected folder Random ON within a folder
F
i
Media
System Display Tone
Media
AM 09:38
Phone
MENU
Radio
USB Audio
iPod
Bluetooth Audio
USB Movie
Rear AUX
USB Photo

10
7.1 THUMBNAIL SCREEN
On the thumbnail screen you can use the and buttons to view thumbnails
of your photos and configure either the repeat or random functions.
07.- USB PHOTO FILE OPERATION (Cont.)
Previous Image
Next Image
Repeat and Random function
Press the button to display the previous image/folder.
Press the button to display the next image/folder.
Random Play OFF (Default)
A
Repeat all images (Default)
1
Repeat selected image Random Play ON
F
Repeat selected folder Random ON within a folder
F
A
i
Media
System Display Tone
USB Photo
AM 09:38
Phone
MENU
Radio
ice_cream.jpg
Track
1/74
Folder
1/5
11
Folder Navigation
7.2 FULL SIZE SCREEN.
To navigate through your folders touch the folder icon and use the navigation
icons on screen to move up and down through your files one page at a time
and to move to the first or last file in the folder. Select the file you would like
to access by touching the filename on the screen.
Touch the thumbnail on screen to change to full screen mode. Touching the
screen when in full screen mode will toggle the full screen navigation menu.
07.- USB PHOTO FILE OPERATION (Cont.)
i
Media
System Display Tone
USB Photo
AM 09:38
Phone
MENU
Radio
ice_cream.jpg
Track
1/74
Folder
1/5
1
2
Day
Night
00
00
Brightness
Contrast
RESET

12
07.- USB PHOTO FILE OPERATION (Cont.)
Use the return button to return to thumbnail view or full size view from the
settings sub menu.
You can use the zoom in and zoom out on the image. (Please note this
will disable the function)
Press to enter the settings sub menu where you can adjust Brightness,
Contrast and Day or Night dimming.
Press the button to display the previous image in full screen and Press the
button to display the next image in full screen.
Pressing the button will display images using the current repeat and random
function settings.
This section describes the available commands on your unit to play video files
through USB.
Type of files supported: Check table 3 in section
In Media menu press the button USB Movie or in Home menu push icon USB Movie.
16.- FORMATAVAILABLES
Enter Movie mode.
08.- USB MOVIE FILE OPERATION
i
Media
System Display Tone
Media
AM 09:38
Phone
MENU
Radio
USB Audio
USB Photo
iPod
Bluetooth Audio
USB Movie
Rear AUX
13
08.- USB MOVIE FILE OPERATION (Cont.)
Folder Navigation
8.2 FULL SIZE SCREEN.
To navigate through your folders touch the folder icon and use the navigation
icons on screen to move up and down through your files one page at a time
and to move to the first or last file in the folder. Select the file you would like
to access by touching the filename on the screen.
Touch in the image in order to change full screen mode.
8.1 THUMBNAIL SCREEN
Tthis screen shows thumbnails, if any, of the video files on USB.
i
Media
System Display Tone
USB Movie
AM 09:38
Phone
MENU
Radio
Life of pai.avi
Track
1/74
Folder
1/5
01:28:34 / 02:17:45
i
Media
System Display Tone
USB Movie
AM 09:38
Phone
MENU
Radio
Life of pai.avi
Track
1/74
Folder
1/5
01:28:34 / 02:17:45
F
1
F
Repeat all track (Default)
Repeat selected track
Repeat track in folder
Random play off (Default)
Random play on
Random ON in folder
Full Screen mode
Detail Explanation of Layout
a b
e
cd
1
2 3-143-25
Buttons
NO. DESCRITION TYPE REMARK
1
2
3
4
5
Folder
Repeat
Next/Prev
Play
Random Play
Image
Image
Image
Image
Image
Enter Folder List
A : Repeat all track (Default)
F : Repeat track in folder
1 : Repeat selected track
Go to Next/Previous movie
Long key : FR / FF
Play/Pause
Random OFF : Random OFF(Default)
Random ON : Random ON
Folder Random : Random ON in folder
Icon & Text
NO. DESCRITION TYPE REMARK
a
b
c
d
e
Title
Present time
Thumbnail view
File name
File/Folde info
Image
Image
Font
Font
Font
Indicate Title
Indicate present time
Playing in Thumbnail view
Indicate File name
Indicate File/Folder info

08.- USB MOVIE FILE OPERATION (Cont.)
Use the return button to return to thumbnail view or full size view from the
settings sub menu.
Press to enter the settings sub menu where you can adjust Brightness,
Contrast and Day or Night dimming.
In the Media menu press the Rear Aux button.
Enter Aux Audio mode.
09.- AUX-IN CONNECTION OPERATION
i
Media
System Display Tone
USB Movie
AM 09:38
Phone
MENU
Radio
Life of pai.avi
Track
1/74
Folder
1/5
01:28:34 / 02:17:45
1
1
1. Menu appears in bottom side by touching
picture in Full screen mode.
RESET
Night
00
00
Brightness
Contrast
2
2. Bottom Menu disappears by touch
(Return back to full screen mode)
Presente play time / Finish time
01:28:34 / 02:17:45
14 15
09.- AUX-IN CONNECTION OPERATION (Cont.)
10.- iPod OPERATION
Th
The reverse, track selection, etc... depend on connected device. In case which
external device are connected to access this feature you must use the
.
MEDIA /
AUX AUDIO BUTTON ON THE LCD
W
i
Media
System Display Tone
Media
AM 09:38
Phone
MENU
Radio
Rear AUX
USB Audio
USB Photo
iPod
Bluetooth Audio
USB Movie
Rear AUX
i
Media
System Display Tone
Media
AM 09:38
Phone
MENU
Radio
USB Audio
USB Photo
iPod
Bluetooth Audio
USB Movie
Rear AUX
iPod Audio

16
10.- iPod OPERATION (Cont.)
Switching to iPod Audio can be done through the Media menu or through the Home
menu. When the iPod is not connected the iPod Audio widget and menu selection
will not be accessible. The unit will automatically read an iPod when it is connected
through the USB port and the unit is powered on.
Disconnecting your iPod will return the unit to its previous function i.e. Radio.
Pushing the button on screen will rewind the current track to its beginning. If it
pressed again before 3 seconds has elapsed it will go to the beginning of the
previous track and so on. In this way it is possible to skip multiple tracks simply by
pressing the button repeatedly.
Pushing and holding the button on screen will fast rewind the current track.
Release button to resume play.
Pushing the button on screen will skip to the beginning of the next track.
Pushing and holding the button on screen will fast forward the current track.
Release button to resume play.
Push the folder icon to access the iPod menu where you will be able to access your
playlists and songs in various categories.
File Navigation
Previous Track and restart.
Fast Rewind.
Next Track
Fast Forward.
iPod Menu
17
Connection
Selection
Delete
Phonebook
Radio
Playlist
Artist
Album
Genre
Song
Compser
Audiobook
Podcast
iPod menu
11.- BLUETOOTH FUNCTION
Note: Recomendation to play with original wire
Pairing your phone
Select Device
Delete device from list
Remove all connections
Phonebook
On the Phone menu press the Connection button on screen to start pairing the
LCD will display “Searching….”for approximately 2 minutes. Using your phones
settings menu select FX508 from the Bluetooth devices list in order to pair with
the head unit. You may be prompted to allow downloading of your Contact
information.
The head unit is capable of storing up to 5 different mobile Bluetooth devices.
You can use this menu to select which mobile device your unit is active with.
Within the selection menu you can delete any of the stored Bluetooth devices by
pressing the Delete button by the device's name and confirming Yes or No.
Also in the selection menu you can remove all connections by pressing the
Remove all connections button and confirming OK.
Once connected your mobile device's contact list will be downloaded each time
the head unit is powered on. Confirmation may be required on some phones.
By pressing the Phonebook on screen button you will be able to access all the
entries in your phone's contact list.
To make a call simply press the contact name on screen and confirm by selecting
which phone number to dial.
11.1 PHONE MENU

18
11.- BLUETOOTH FUNCTION (Cont.)
Call History
Received call
Calls Made
Missed call
Dial Number
Call answering
Go back to previous menu
BACK
Hanging up
Audio handling while in calling mode
or
Press Call History to access your phone's call history. The history can be filtered
using the on screen buttons on the left of the screen.
Will list the contact info of up to 10 of the last calls received. You can make a call by
selecting a contact from the list.
Will list the contact info of up to 10 of the last made. You can make a call by selecting
a contact from the list.
Will list the contact info of up to 10 of the last missed. You can make a call by
selecting a contact from the list.
Use the dial number menu button on screen to manually enter a phone number using
the on screen keyboard. Press to complete the call.
You can answer incoming calls directly from the head unit hearing the caller through
the vehicle's speakers. When a call comes in, the display will show the contact name
or number calling along with the and icons. Press to answer the call
and to hang up/reject the call.
In every action is possible go back to previous menu pushing button.
To end the call, once you have finished talking with the caller, simply press the
large icon on the LCD screen.
Pushing the Speaker mute on screen button will mute the vehicle speakers
transferring the audio back to the cell phone speaker. This can be toggled back
and forth.
Pushing the Mute Mic on screen button will mute the units internal/external
microphone so that the caller cannot hear what happens in the vehicle. This can
also be toggled so to restore normal communication.
Dial Number
Call History
19
11.- BLUETOOTH FUNCTION (Cont.)
11.2 AUTOMATIC CONNECTION TO RADIO.
11.3 PLAYING MUSIC VIABLUETOOTH
Enter BluetoothAudio mode.
A mobile device that has been previously paired and connected to the head unit will
automatically re-connect every time the head unit is powered on after a short delay.
When connected cell phone signal strength and battery strength icons appear in the
top right of the LCD screen.
This section describes the available commands on your unit to play files available
during Bluetooth connection.
In Media menú press the button Bluetooth Audio or in Home menu push icon
BluetoothAudio.
Activation by touch : Function
2. Speaker mute on 2. Mic mute on
3. Calling with phone 3. Operation mic mute
i
Media
System Display Tone
Media
AM 09:38
Phone
MENU
Radio
USB Audio
USB Photo
Bluetooth Audio
iPod
Bluetooth Audio
USB Movie
Rear AUX

11.- BLUETOOTH FUNCTION (Cont.)
If a device, previously paired and connected by Bluetooth to the radio, has a BT
audio profile its audio files can be played on the unit.
It is sometimes necessary to initiate BT audio from the phone depending on your
phone settings in order to play music files. Otherwise this can automatically be done
through the head unit's BTAudio widget.
It is possible to navigate tracks with the on screen and buttons.
Different information will automatically appear on the main screen about the track
being played such as Title,Artist,Album.
To switch the unit from using its internal microphone to an external microphone or
vice versa –
1. Select the settings menu
2. Select MIC External (toggle on for external, toggle off for internal)
3. Press Update which will restart the head unit
4. After the restart the unit will use the microphone as selected.
11.3.1 Rewind and fast forward
11.3.2 Track information
Internal/External Microphone
12.- Apple CarPlay
Available on select cars, Apple CarPlay is a smarter, safer way to use your
iPhone in the car. Apple CarPlay takes the things you want to do with your iPhone
while driving and puts them right on your car's built-in display. You can get
directions, make calls, send and receive messages, and listen to music, all in a
way that allows you to stay focused on the road. Just connect your iPhone and
go.
Apple CarPlay features Siri voice control and is specially designed for driving
scenarios. Apple CarPlay also works with your car's controls buttons, or
touchscreen. And the apps themselves have been reimagined for the car, so you
can use them while your eyes and hands stay where they belong.
Connecting any Apple CarPlay capable device to the unit via USB will automatically
bring up the units Apple CarPlay screen or if it is already connected by pressing the
Apple CarPlay widget on the main screen.
Apple CarPlay features Siri voice control and is specially designed for driving
scenarios. Apple CarPlay also works with your car's controls buttons, or
touchscreen. And the apps themselves have been reimagined for the car, so you
can use them while your eyes and hands stay where they belong.
12.1 Enter Apple CarPlay mode.
12.- Apple CarPlay (Cont.)
12.2 Navigation in Apple CarPlay mode.
The navigation inApple CarPlay mode depends for availability applications by Apple
company.
For more information. Check website. http://www.apple.com/ios/carplay/
Or synchronize it with Radio. Apple CarPlay also allows you to use other audio apps
you download the podcasts and iPhone to play music or listen to the radio. Use the
"Now Playing" screen to control playback, or use the controls on the wheel of your
car.
MAPS: Get step-by-step, get traffic conditions and know the approximate travel
time. Apple CarPlay generates possible destinations from addresses of your email,
your text messages, contacts and calendars, and based the places you go often.
You can also search for a location or use the locations included in your bookmarks.
You can even use other apps for obtaining directions. Apple CarPlay tell you when to
redisplay your information.
PHONE: Apple CarPlay uses iPhone contacts to
help you make calls. Use the "Show contacts" for
your favorite display, your recent calls, your
contacts list, keyboard and voice mail.
MUSIC: Use Music to access music from your
iPhone (including songs, artists, albums and
playlists).
12.2 PRINCIPAL Apple CarPlay MODE
MESSAGES: When you open Messaging, Siri is automatically activated to read your
incoming messages or allows you to dictate a new message. Let Siri help you send,
listen and reply to text messages.
NOW PLAYING: When exist some music aplication is playing, in this menu is
possible to access directly.
RETURN: In main screen for Apple CarPlay application is include CLARION icon, push
this button in order to return to main screen for Head Unit, or disconnect apple device.
PODCAST: Use the Podcasts app to listen to podcasts on the iPhone
AUDIOBOOKS: Use the Audiobooks app to listen Audiobooks on the iPhone.
SIRI AND MENU: Use this button to play Siri and return to main menu
NOTE: For play CP is recommended use original wires for faster data transferences.
iPhone
Connect
9:38 Phone Music Messages
Now Playing
Mapa
380
Podcasts Audiobooks
LTE
1
Clarion
9:38 Phone Music Messages
Now Playing
Mapa
380
Podcasts Audiobooks
LTE
1
Clarion
2120

22
13.- Android AutoTM
The Android Auto was designed with safety in mind. With a simple and intuitive
interface, integrated steering wheel controls, and powerful new voice actions, it's
designed to minimize distraction so you can stay focused on the road.
To use Android Auto , you need an Android Auto compatible vehicle or
aftermarket radio and an Android phone running 5.0 (Lollipop) or higher. When
you connect your Android phone to the compatible vehicle or radio, Android
Auto
will display applications on the vehicle's screen. For more information about
Android Auto compatibility, please visit
Connect by USB terminal the device compatible with Android Auto application and
the screen in Head Unit change to set up settings in mobile device in order to match
information between both devices.
After this settings configuration the Head Unit and mobile device are playing in
AndroidAuto application.
The setting configuration is exclusively for 1 time, after that if mobile device is
TM
TM TM
TM
TM
TM
TM
st
support.google.com/androidauto
13.1 Enter Android Auto mode.1 time
TM st
13.2 PRINCIPAL Android Auto MODE
TM
MAPS: Get step-by-step, get traffic conditions and know the approximate travel
time. Android Auto generates possible destinations from addresses of your email,
your text messages, contacts and calendars, and based the places you go often. You
can also search for a location or use the locations included in your bookmarks.
You can even use other apps for obtaining directions. Android Auto tell you when to
redisplay your information.
PHONE:AndroidAuto uses Phone contacts to help you make calls. Use the "Show
contacts" for your favorite display, your recent calls, your contacts list, keyboard and
voice mail.
MAIN: Use this button to return to beginning menu
TM
TM
TM
Connecting
Android
Phone
Current location
Party Cloudy
LTE
3:33
93° 93°
76°
Track04
TCD-782(MP3)
Google Play Music
Maps Phone Main Google
Music
Menu
3:39
11° 12°
7°
Home
Cloudy
23
13.- Android Auto (cont.)
TM
Note: For play Android Auto is recommended to use original USB
wires for faster data transferences (the cable provided with the Android
device or the same brand) and the wire should be in good condition.
TM
GOOGLE MUSIC: Use Music to access music from your Phone (including songs,
artists, albums and playlists). Or synchronize it with Radio. Android Auto also
allows you to use other audio apps you download the podcasts and Phone to play
music or listen to the radio.
MENU: In this menu is possible to see different setting in Android Auto App.
If the settings are done, is possible to enter to Android Auto mode, pushing
Android Auto icon in main screen in Head Unit.
Note. If in mobile device reset information Android Auto equipment connected
previously, must be necessary setting configiration again.
The navigation in Android Auto mode depends for availability applications by
Google company.
For more information. Check webside. https://www.android.com./auto/
In menu screen for Android Auto application is include Return CLARION icon,
push this button in order to return to main screen for Head Unit, or disconnect
Android Auto device.
TM
TM
TM
TM
TM
TM
TM
TM
13.3 Navigation in Android Auto mode.
13.4 Exit from Android Auto mode
TM
TM
More car apps
Return to Clarion
Roadside assistance
LTE
3:05

24
14.- GENERAL PRECAUTIONS
1. - This device has highly-sensitive buttons; avoid applying excessive force as
this can damage the unit and reduce button life.
2. - Do not open the unit. The devices interior parts cannot be repaired by the
user. Please contact your dealer or an authorized service center if there is an
issue.
3. - Use a soft, dry cloth to clean the control panel and screen, NEVER use rough
cloth, thinner, gasoline, alcohol etc. If absolutely necessary use a soft damp cloth
and carefully clean the unit.
4. - Do not insert foreign objects (screwdrivers, knives, metal objects etc.) into the
units inputs as they may damage the device voiding the warranty.
15.- RECOMENDATIONS FOR USB DEVICE
When using USB devices:
1.- Only use certified USB devices with this device.
2.- To prevent damage to the USB device either change the mode to another (non-
USB) mode or power off the unit.
3.- The head unit is capable of reading USB protocols 1.1 and 2.0. Verify your device
is compatible.
4.- If the USB device cannot be read by the unit please confirm the following:
a.The USB device has been properly formatted.
b.Make sure only MP3, WMA or AAC files are stored in the corresponding MP3,
WMAand AAC file folders
5.- You are using a certified USB cable to attach the USB device to head unit.
25
16.- FORMAT AVAILABLES
AUDIO
Table 1
FILE
FORMAT BIT RATE SAMPLING SUPPORT STATUS
8 - 384 Kbps 8 - 48 Khz OK
WMA9 8 - 384 Kbps 8 - 48 Khz OK
WMA10 Pro Not Support
WMA Lossless Not Support
FLAC Flac 8 - 384 Kbps 8 - 48 Khz Not Support
32 - 384 Kbps 32/44.1/48 Khz OK
32 - 256 Kbps 16/22.05/24 Khz OK
32 - 384 Kbps 32/44.1/48 Khz OK
32 - 160 Kbps 16/22.05/24 Khz OK
32 - 320 Kbps 32/44.1/48 Khz OK
8 - 160 Kbps 16/22.05/24 Khz OK
8 - 64 Kbps 8/11.05/12 Khz OK
RA 16 - 320 11-48 Not Support
RM 20 - 32 44.1 Not Support
ACC
WMA
MP3

26
16.- FORMAT AVAILABLES (Cont.)
PICTURE
Table 2
FILE
5000x5000 OK
6000x6000 OK
800x500 OK
576x852 OK
496x340 OK
1024x819 OK
1920x1200 OK
800x500 OK
1440x900 OK
593x830 OK
790x850 OK
502x397 OK
1024x768 OK
1345x1600 OK
1024x768 OK
1024x768 OK
301x206 OK
800x500 OK
800x500 OK
1920x1200 OK
800x600 OK
1024x768 OK
1600x1200 OK
1600x1200 OK
690x537 OK
800x800 OK
JPG
27
16.- FORMAT AVAILABLES (Cont.)
PICTURE
Table 2
FILE
FORMAT
1000x1000
5000x5000 OK
370x315 OK
500x433 OK
725x999 OK
240x320 OK
600x450 OK
240x320 OK
400x400 OK
300x400 OK
725x660 OK
555x416 OK
553x415 OK
256x256 OK
256x256 OK
256x256 OK
256x256 OK
1945x1219 OK
4090x4090 OK
5000x5000 OK
GIF
PNG

16.- FORMAT AVAILABLES (Cont.)
PICTURE
Table 2
FILE
246x184
443x441 OK
512x481 OK
300x240 OK
200x200 OK
720x480 OK
512x416 OK
512x488 OK
128x128 OK
3224x2448 OK
5000x5000 OK
6000x6000 OK
8000x8000 OK
BMP
28 29
16.- FORMAT AVAILABLES (Cont.)
17.- USB DEVICES AVAILABLES
VIDEO
Table 3
Media Video
(Max.) (Max.)
Audio Audio Support
ASF WMV3(9) 10Mbps 15 - 30 720x480 MP3
WMA11 MP3 : 8 - 320 Kbps OK
H264 5000Mbps 15 - 30 1280x720 OK
MPGV
H264 5000Kbps
15 Mbps
WMV (CV1) WMV3(9) 10Mbps 720x480
H264 5000Kbps OK
MP4V 15Mbps OK
MPG MPGV 15Mbps 15 - 30 1280x720 MP3 MP3 : 8 - 320 Kbps OK
WMV3(9)
WMVA
WMVP
H264 5000 Kbps 15 - 30 1280x720 MP3
AAC
AAC : 8 - 384 Kbps
MP3 : 8 - 320 Kbps OK
MP3 : 8 - 320 Kbps
WMA9 : 8 - 384 Kbps OKWMVWMV 10Mbps 15 - 30 720x720 MP3
WMA11
15 - 30 1280x720 MP3
AAC
AAC : 8 - 384 Kbps
MP3 : 8 - 320 Kbps
MP4
OKMP4V
15 Mpbs
AVI 1280x720
MP3
AAC
WMA17
AAC : 8 - 384 Kbps
WMA9 : 8 - 384 Kbps
MP3 : 8 - 320 Kbps
OK
15 - 30
OKMPGE4 MP4V 10 Mbps 15 - 30 1280x720
Video
MKV
MP3
AAC
U8/U16
MP3 : 8 - 320 Kbps
AAC : 8 - 384 Kbps
MP3
AAC
WMA16
AAC : 8 - 384 Kbps
MP3 : 8 - 320 Kbps
No Model code No Model code No Model code
1DT101G2/32GBZ 32G 5 DT101G2/2GBZ 2G 9 Sony USB
USM4GL 4G
2DT101G2/16GBZ 16G 6 Sony USB
USM32GL 32G 10 Sony USB
USM2GL 2G
3DT101G2/8GBZ 8G 7 Sony USB
USM16GL 16G 11 Sandisk 16G
4DT101G2/4GBZ 4G 8 Sony USB
USM8GL 8G 12 Sandisk 32G
18.- TROUBLESHOOTING
General
Problem Cause Measure
Power does not turn on. (No
sound is produced.) Fuse is blown. Replace with a fuse of the
same amperage. If the fuse
blows again, consult your store
of purchase.
Incorrect wiring. Consult your installation center.

30 31
18.- TROUBLESHOOTING (Cont.)
CarPlay / Android Auto
Problem Cause Measure
USB Device
Problem Cause Measure
USB device cannot be inserted. The USB device has been
inserted with wrong direction. Reversing the connection
direction of the USB device, try
it again.
The USB connector is broken. Replace with a new USB
device.
USB device is not recognized. The USB device is damaged. Disconnect the USB device
and reconnect. If the device
is still not recognized, try
replacing with a different USB
device.
Connectors are loose.
No sound heard with the
display “NO FILE”shown. No MP3/WMA file is stored in
the USB device. Store these files properly in the
USB device.
Sound skips or is noisy. MP3/WMA files are not
encoded properly. Use MP3/WMA files encoded
properly.
Bluetooth
Problem Cause Measure
Cannot pair the Bluetooth
enable device with the car
audio system.
The device does not support
the profiles required for the
system.
Use another device to connect.
The Bluetooth function of the
device is not enabled. Refer to the user manual of the
device for how to enable the
function.
The audio quality is poor after
connection with a Bluetooth
enabled device.
The Bluetooth reception is
poor. Move the device closer to the
car audio system or remove
any obstacle between the
device and the system.
TFT Screen
Problem Cause Measure
The image is not displayed. The parking brake is not
engaged. Check that the parking brake is
The operating condition is not
good. The temperature inside the
vehicle may be 0°C or lower. Set
to an appropriate temperature
The display is dark.
The headlight of the vehicle
is lit The display is made dark at
night to prevent the glare
(When the headlight of time
vehicle is lit in the daytime, the
engaged.
(25°C or so) and check it again.
display gets dark).
Malfunction to application of
CarPlay / Android Auto.
Some application needs mobile
data to work properly.
Activate the mobile data or
connect to WiFi.
Using generic USB wire that do
not fast data transferences or
wrong condition.
Replace the USB wire to original
USB wire for faster data
transferences (the cable
provided with the iPhone /
Android device or the same
brand) and the wire should be in
good condition.
19.- SPECIFICATIONS
FM Tuner
Frequency Range: 87.9 Mhz to 107.9 Mhz
Usable Sensitivity: 8 dBµV
Stereo Separation: 25 dB (1 kHz)
Frequency Response: 30 Hz to 14 kHz
AM Tuner
Frequency Range: 530 kHz to 1,710 kHz
Usable Sensitivity: 30 dBµV
Audio/Video Input
Audio input voltage: 2 V
Video input voltage: 1.0 V @75
≤
Ω
Audio input sensitivity (at 2 V output)
High: 235 mV
Mid: 650 mV
Low: 1.3 V
Audio/Video output
Video output voltage: 1.0 V @75Ω
Screen Size: 6.95" wide type
Pixels: 1,152,000
Resolution: 800 x 480 x 3 (RGB)
Bluetooth
Specification: Bluetooth Ver. 3.0
Profile: HPF1.5 (Hands Free Profile)
A2DP (Advanced Audio Distribution Profile)
PBAP (Phone Book Access Profile)
USB
Specification: USB 2.0 (FS)
Playable Audio format:
MP3,WMA,AAC,FLAC,RA,RM
Playable Video format:
AVI,MP4,MPG/MPEG,ASF,MKV,WMV,MOV
General
Power source voltage:
14.4 VDC (10.8 to 16 V allowable)
Ground: Negative
Consumption: 15A
Note: Specification and design are subject to change without notice
for further improvement.

32 33
19.- SPECIFICATIONS (CONT.)
FX508 dimensions:
FX508 weight: 2 kg
5.3" 136.2 mm
1" 27 7 mm.
0.8" 21.2 mm
3.4" 87.2 mm
7.2" 184 mm
6.7" 170 mm
4.4" 112 mm
3.8" 96 mm
19.- ESPECIFICATIONS
20.- WIRE CONNECTION GUIDE
Note:
Before installing, be sure to disconnect the negative cable of the car battery.
When connect all accessories and USB cable, be sure to fix with the clamp.
14
B+
GND
ACC
SPEED
ILL +
-ILL
+SPK FL
-SPK FL
+SPK RL
-SPK RL
SPK FR +
-SPK FR
+SPK RR
-SPK RR
PARKING
ANT
VCC WHEEL REMOTE
iPod/iPhone
Lightning cable (included with iPod/iPhone)

34 35
19.- ESPECIFICATIONS
20.- WIRE CONNECTION GUIDE (Cont.)
TUBE LABEL
Ø3 5 1P JACK.
+B
GND
ACC
SPEED
ILL +
ILL -
SPK FL +
SPK FL -
SPK RL
+
SPK RL -
-
SPK FR
+
SPK RR
SPK RR
-
PARKIN
G
ANT
VCC
WHEEL REMOTE
200 20±
FUSE 15A
*1
Note:
The phone interrupt will mute the audio if the lead receives a negative or ground
signal
*1: This product is connected here to detect the distance the vehicle travels.
Always connect the vehicle’s location display.
+
SPK FR
19.- ESPECIFICATIONS
20.- WIRE CONNECTION GUIDE (Cont.)
PIN
NO WIRE COLOR NAME
YELLOW
BLACK
PINK
ORANGE(WHITE)
B +
1
2
3
19
20
4
5
6
7
8
9
10
11
12
13
14
17
18
15
16
ORANGE(BLACK)
WHITE(BLACK)
GREEN(BLACK)
RED
WHITE
GREEN
GRAY(BLACK)
GRAY
PURPLE(BLACK)
PURPLE
GRASS-GREEN
BLUE
NC
NC
BLACK
GND
ACC
SPEED
ILL +
ILL -
SPK FL +
SPK FL -
SPK RL +
SPK RL -
SPK FR +
SPK FR -
SPK RR +
SPK RR -
PARKING
ANT VCC
-
-
WHEEL REMOTE
20AWG
20AWG
20AWG
20AWG
20AWG
20AWG
20AWG
20AWG
20AWG
20AWG
20AWG
20AWG
20AWG
-
-
1P SHIELD
1P SHIELD
16AWG
16AWG
18AWG
3M
-
-
200mm
200mm
200mm
200mm
200mm
200mm
200mm
200mm
200mm
200mm
200mm
200mm
200mm
200mm
200mm
200mm
200mm
DESCRIPTION LENGTH
WHITE
1
3
5
7
9
11
13
15
17
19
2
4
6
8
10
12
14
16
18
20

36 37
04.- AJUSTES DE AUDIO
ENCENDIDO Y APAGADO 3, AUMENTAR VOL 2, DISMINUIR VOL 1.
.1 SELECCIÓN DE AJUSTES DE AUDIO
Presione el botón 3 para Encender la unidad, ó presione durante 2 sec para
Apagar la unidad. Presione el botón 2 para aumentar el nivel de volumen ó
presione 1 para disminuir el nivel de volumen: El minimo es 0 y el maximo 40,
después de 5 segundos del ultimo ajuste, el volumen indicado en la pantalla
regresara a su modo previo.
Cómoda función de encendido.
Para proteger sus oidos y bocinas, este equipo fue diseñado para cuando usted
Encienda la unidad y previo a que estuviera escuchando a muy alto volumen,
encienda y tenga un nivel de volumen confortable.
4 .
Presiona el icono del Menú inferior, cada vez que presione este icono, en
la pantalla indica los diferentes modos de ajuste de audio FADER, BALANCE,
EQ MODE, BASS, MID, TREBLE, LOUD, RESET.
03.- FUNCIONES
SINTONIZADOR
-Botones de Memoria 12 AM y 18 FM
-Búsqueda de sintonía, ascendiendo o descendiendo bandas
AUDIO
-Controles de audio electrónicos
-Controles de Graves y Agudos
-Control de Balance
-Control de Sonoridad (Loud)
-Pre-equalizacion 4 modos (Usuario, Pop, Rock, Clásico, Jazz)
-Potencia de salida 20 W x 4 Ch
REPRODUCTOR DE USB
-Control de Repetición de pistas
-Control de búsqueda de MP3/WMA
-Adelanto y Retraso
-Control de función Aleatoria
GENERAL
-Información del Radio con Pantalla
-Modo Radio/AUX/USB/iPod/BT
-Voltaje de Operación 13.2 +/- 5%
Español
Español
04.- AJUSTES DE AUDIO (Cont.)
Ajuste de FADER
Ajuste de BALANCE
Ajuste de ECUALIZADOR
Ajuste de MIDLE
Ajuste de BASS
Ajuste de TREBLE
Ajuste de LOUDNESS
Ajuste predeterminado
4.2 SELECCIÓN DE AJUSTE DE PANTALLA
Ajuste de Brillo
Ajuste de Contraste
Ajuste de luz de Día o Noche
Ajustar el nivel de FADER, presione los botones arriba o abajo para ajustar el
nivel deseado. El FADER en la pantalla indica R5 y F5.
Ajusta el nivel de Balance presione los botones arriba o abajo para ajustar el
nivel deseado. El nivel de BALANCE en la pantalla indica R5 y L5.
Ajustar el Balance de ECUALIZADOR, presione los botones arriba o abajo para
ajustar el nivel deseado. La opción disponible es USER, JA CLASSIC,
ROCK, POP.
Ajustar el nivel MIDLE, presione los botones arriba o abajo para ajustar el nivel
deseado. El nivel MIDLE indica en el pantalla un mínimo –5 y máximo +5.
Ajusta el nivel BASS, presionando el botón arriba o abajo para ajustar el nivel
deseado. El nivel BASS indica en la pantalla un Mínimo –5 Máximo +5.
Ajustar el nivel TREBLE, presionando el botón arriba o abajo para ajustar el
nivel deseado. El Nivel TREBLE indica en la pantalla un Mínimo –5 y Máximo
+5.
Mientras se escucha música a un nivel bajo de volumen, esta característica
mejorará la respuesta de sonidos de graves y agudos para compensar las
características del oído humano.
Regresa los cambios aplicados a configuración de fábrica.
Ajustar el nivel de brillo, presionando el botón derecho ó izquierdo ajustando el
nivel deseado. El nivel de Brillo indicado en la pantalla Mínimo –10 y Máximo
+10.
Ajustar el nivel de contraste, presionando Botón Derecho o Izquierdo ajustando
el nivel deseado. El nivel de Contraste indicado en la pantalla mínimo –10 y
máximo +10. .
Ajusta el nivel de luz en el LCD, presiona el botón DÍA / NOCHE.
ZZ,
K M

38 39
Español
Español
04.- AJUSTES DE AUDIO (Cont.)
Regresa los cambios aplicados a configuración de fábrica.
Esta opción da la opción de escuchar el sonido BEEP al pulsar los botones en
pantalla.
Esta opción le permite ver la información completa de la pista actual cuando la
información tiene varios caracteres y no es posible mostrar en una sola pantalla.
Esta opción permite ver las guías de información cuando la cámara trasera esta
activada (modo reversa). Esta unidad cuenta con la opción de adaptar cámara
trasera, para más información consultar con su agente de ventas.
Esta opción permite encender la unidad durante 10 min, aún con el switch de
ignición esta apagado.
Esta opción le permite cargar la batería de los dispositivos móviles con un
máximo de 1.5 Amper, mientras esta función esta activada, la reproducción por
USB no es posible.
Esta opción le permite elegir diferentes idiomas con el fin de mostrar la
información (Inglés, Español, Frances).
Esta opción le permite seleccionar el volumen inicial al encender la unidad.
Esta opción le permite aumentar o disminuir el nivel de volumen de los
dispositivos externos presionando derecha o izquierda para ajustar el nivel
deseado, mínimo 00 y máximo +3.
Esta opción le permite elegir el nivel de volumen de anuncio de voz de los
dispositivos externos, pulse los botones derecha o izquierda para ajustar el nivel
deseado, el mínimo y el máximo +10, -10.
Esta opción incrementa el nivel de volumen según la velocidad del auto. (Bajo,
Medio, Alto).
Ajuste Predeterminado
4.3 SELECCIÓN DE AJUSTES DEL SISTEMA
Ajuste del sonido BEEP
Ajuste de desplazamiento de texto
Ajuste guías de Aparcamiento
Ajuste de encendido
Carga rápida
Lenguaje
Volumen inicial
Ajuste de volumen auxiliar
Ajustar volumen de navegación
Ajuste de velocidad de volumen
K M
04.- AJUSTES DE AUDIO (Cont.)
Esta opción le permite modificar el orden de los iconos en el Menú de inicio.
Esta opción le permite ajustar la hora del reloj, por Hora, Minuto, AM/PM ó elegir
12 o 24 Horas.
Esta opción le permite ver la información de la unidad.
Editar menú de inicio
Ajustar reloj
Información de versión
05.- OPERACIÓN DE RADIO
En esta sección se describe el funcionamiento en el modo de radio.
En Menú Inicio Pulse el botón de Radio o icono de Radio en el menú principal.
ENTRAR AL MODO RADIO
Selección de Sintonización
Búsqueda manual de estaciones de radio AM y FM
(descendente/ascendente)
Busqueda Automática de estaciones de radio AM y FM
Esta unidad tiene disponibles 3 bandas FM y 2 bandas AM con la posibilidad de
guardar en cada una de ellas 6 estaciones como sintonizada, para seleccionar y
escuchar cuando se desea ver la memorización de emisoras de radio.
La banda de sintonización cambia cada vez que se pulsa el botón BAND en el se
puede seleccionar la banda deseada, la pantalla mostrará el cambio de la banda,
los cuales tienen el siguiente orden.
Para sintonizar manualmente las estaciones de radio presione selección
descendente y selección ascendente encontrando manualmente la estación de
radio requerida.
La unidad buscará y reproducirá la señal más fuerte, al presionar el botón y .
(descendente/ascendente)
AM1-AM2-FM1-FM2-FM3
i
Media
System Display Tone
AM1
AM 09:38
Phone
MENU
BAND
SCAN
530
KHz
SCAN
Radio
600 1000 1400 1600 1710530
1
12
23
34
45
56
6
Table of contents
Languages:
Other Clarion Car Video System manuals

Clarion
Clarion VZ709 Repair manual

Clarion
Clarion VT800B User manual

Clarion
Clarion CC4001U User manual

Clarion
Clarion VZ709E Installation guide

Clarion
Clarion VZ309 Repair manual

Clarion
Clarion NX602 User manual

Clarion
Clarion NX404E User manual

Clarion
Clarion MAX678RVD Repair manual

Clarion
Clarion PU-2354A User manual

Clarion
Clarion VRX815 User manual

Clarion
Clarion NX409 Repair manual

Clarion
Clarion VT1000B User manual

Clarion
Clarion VRX613R User manual

Clarion
Clarion VX405 User manual

Clarion
Clarion VRX775VD Repair manual

Clarion
Clarion NX502A User manual

Clarion
Clarion NX602 Repair manual

Clarion
Clarion NX404E User manual

Clarion
Clarion VX316AU User manual

Clarion
Clarion VX402A User manual