Clas Ohlson PT15 User manual

EnglishSvenskaNorskSuomi
MP3/WMA Player
MP3/WMA-spelare
MP3/WMA-spiller
Mp3-/WMA-soitin
Art.no. Model
38-3471 PT15 Ver. 200908


3
English
MP3/WMA Player
Art.no. 38-3471 Model PT15
Please read the entire instruction manual before use and save it for future reference.
We reserve the right for any errors in text or images and for making any necessary
technical changes to this document. If you should have any questions concerning
technical problems please contact our Customer Services.
Contents
1. Safety........................................................................................... 3
2. Product description..................................................................... 3
3. Buttons and functions................................................................. 4
4. Getting started............................................................................. 5
5. Basic operation ........................................................................... 7
6. Operation ..................................................................................... 8
7. Converting video to other formats............................................ 18
8. Care and maintenance.............................................................. 19
9. Troubleshooting......................................................................... 19
10. Disposal ................................................................................... 20
11. Specifications.......................................................................... 20
1. Safety
• Prolonged exposure to high volume can damage your hearing.
• Never expose the device to direct sunlight, sources of heat, moisture or rain.
• Never expose the device to knocks or blows.
• Never place the device beside magnets such as loudspeakers.
2. Product description
2.1 System requirements
• Pentium 200 MHz or greater
• Windows 98SE/2000/ME/XP/VISTA
• 120 MB of available hard disk space
• USB port
• CD reader

4
English
1
2
3
5
12
10
7
4
6
11
9
8
3. Buttons and functions
1. USB port
2. FUNC – Acts as an enter/exit function for the music mode
3. Colour display
4. [V+] – Up/Volume up
5. Reset hole
6. []– Left/Previous/Quick search backwards (hold in button)
7. Headphone socket (3.5 mm stereo)
8. [V-] – Down/Volume down
9. []– Right/Next/Quick search forward (hold in button)
10. [ ] – Press and hold in to turn the player on/off
11. [] – Play/Pause/Confirm. Press and hold in to come to the main menu. Press and
hold in to unlock the buttons.
12. MIC – Built-in microphone

5
English
4. Getting started
4.1 Connecting to the computer
The device can be connected to or disconnected from the computer without having to
turn the computer off. The device will automatically be allocated a device letter by the
computer. The MP3 player does not have to be restarted before transferring files.
The following installation instructions apply for Windows XP with Service Pack 2 installed.
4.1.1 Installation using Windows XP
1. No extra driver is required for Windows XP.
2. Connect the supplied USB cable to a vacant USB port on your computer and then
to the USB port (1) on the player.
3. The computer will automatically detect the player as a “Removable Storage
Device” and allocate it a letter in “My Computer”.
4.1.2 Transferring files
When a connection has been made pictures, music and videos can be transferred
to the device.
1. Select the files on your computer. Right-click and Copy the files.
2. Double-click on the device’s symbol (e.g. “F”). The device symbol allocated to your
computer may vary depending on the configuration of your computer.
3. Right-click on the device and select Paste.
General advice:
• You can also use the “drag and drop” method to copy or transfer files between
your computer and the device.
Sorting files
• The player can sort your files into alphabetical order and play them in this order
unless another order has been chosen (random playback).

6
English
4.1.3 Disconnecting the player
1. Double-click on Safely Remove
Hardware on the task bar.
2. Select USB Mass Storage Device and
then click on Stop.
4. The player can now be safely removed
from the USB port.
N.B. Do not remove the device from the USB port when data is being transferred to or
from the memory. The built-in flash memory could become damaged.
4.2 Charging the battery
The device has a built-in rechargeable battery. The status of the battery is indicated by
the battery symbol in the upper right-hand corner of the display. When the symbol ap-
pears empty it is time to recharge the battery. A USB charger cable is provided
for recharging the battery.
1. Connect the USB cable to a vacant USB port on your computer and then to the
USB port on the device.
2. When the battery symbol appears full the battery is fully charged.
Important:
• Charge the battery fully before using it for the first time.
• It takes approximately four hours to fully charge the battery.
• Charge the battery as soon as the “Low Battery” message is displayed.
• Release the USB cable when the battery is fully charged. Overcharging the battery
will shorten its life.
• The battery can discharge if the device is not used for a long time (more than 3
months). To avoid the battery becomming discharged, it should be fully charged
every second or third month.
3. Select Audio Player USB Device and
then click on OK.

7
English
5. Basic operation
5.1 Turning the device on and off
To turn on – Push and hold [ ] for three seconds.
To turn off – Push and hold [ ] for three seconds.
Note:
• If you are using the player for the first time after it has been reset, you will need
to select a display language using the [V+] and [V-] buttons, and then confirm by
pressing [].
• When the player is connected to the computer it can also be turned off by pressing
and holding in the [ ] button.
5.2 Adjusting the volume
Press [V+] to increase, and [V-] to decrease the volume.
5.3 Before use
• Download files to the device as described in section 4.1.2 Transferring files.
• Make sure that the battery is charged and that your earphones are plugged into
one of the jacks.
• If the device is turned off, press and hold [ ] to turn it on.
5.4 Button lock
The button lock prevents unwanted button activity. Press and hold in [] to activate
the button lock. Please note that the button lock activate automatically after a set time
(the set time can be adjusted).
5.5 Resetting
If the player needs to be reset, press into the reset hole using a pointed metal object.

8
English
1
2
3
4
5
6
7
8
10
9
6. Operation
Key to the main menu selection:
1. Press and hold in []to enter the main menu from another application.
2. Use [V+] and [V-] to browse the menu selection: MUSIC, PHOTO, VIDEO, FM
RADIO, VOICE, E-BOOK, FILE BROWSE and SETUP.
3. Press in []to confirm and select the highlighted function.
4. Press and hold in [] to exit the menu.
1. Music Music playback
2. Photo Picture viewer
3. Video Video playback
4. Voice Recording and playback of speech.
5. FM Radio Listening to and recording from the radio
6. Mic. Record Recording via the built-in microphone
7. E-Book Text file reader
8. File browse View all files
9. Setup Settings
6.1 Music
6.1.1 Display Key
1. Current track information
(file name/ID3 tag)
2. Progress bar
3. Current track/total number of tracks
4. Title
5. Clock
6. Button lock
7. Elapsed time/ total time
8. Repeat mode
9. Volume level
10. Battery level

9
English
6.1.2 Listening to music
1. Enter the main menu by
pressing and holding in [].2. Select MUSIC using [V+]/[V-],
and confirm using [].
3. Press []to start/pause playback.
- Use []and []to select the desired track.
- Press and hold [] and [] to fast forward or rewind.
6.1.3 Opening the functions menu
1. In music mode, press FUNC once to enter the functions menu. Press FUNC again
to exit the menu.
2. Press []or []to choose from All Songs, Repeat Mode, Equalizer, Classification,
Play rate, 3D, ACL and Back.
3. Press []to confirm.
Key to the functions menu:
• All songs: Shuffles all the songs on the playlist. Select SHUFFLE ALL and then
press []to shuffle the songs. Select PLAYLIST and then press []to confirm.
Then press [V+] or [V-] to select a song or folder. Press []or []to either play
the song or open the selected folder. Press []to go back.
• Repeat – Repeats a track, all tracks or a folder. Random playback Use [V+] and
[V-] to select from: No repeat, Repeat One, Repeat All, Folder Normal, Folder All
Repeat and Folder Shuffle All. Press [] to confirm or press []to go back.
• Equalizer – Select from 6 pre-programmed equalizer settings (Normal, Pop, Rock,
Classic, Jazz, Bass) or configure your own mode (Custom EQ). Use [V+] and [V-]
to make a selection. Press [] to confirm or press []to go back.

10
English
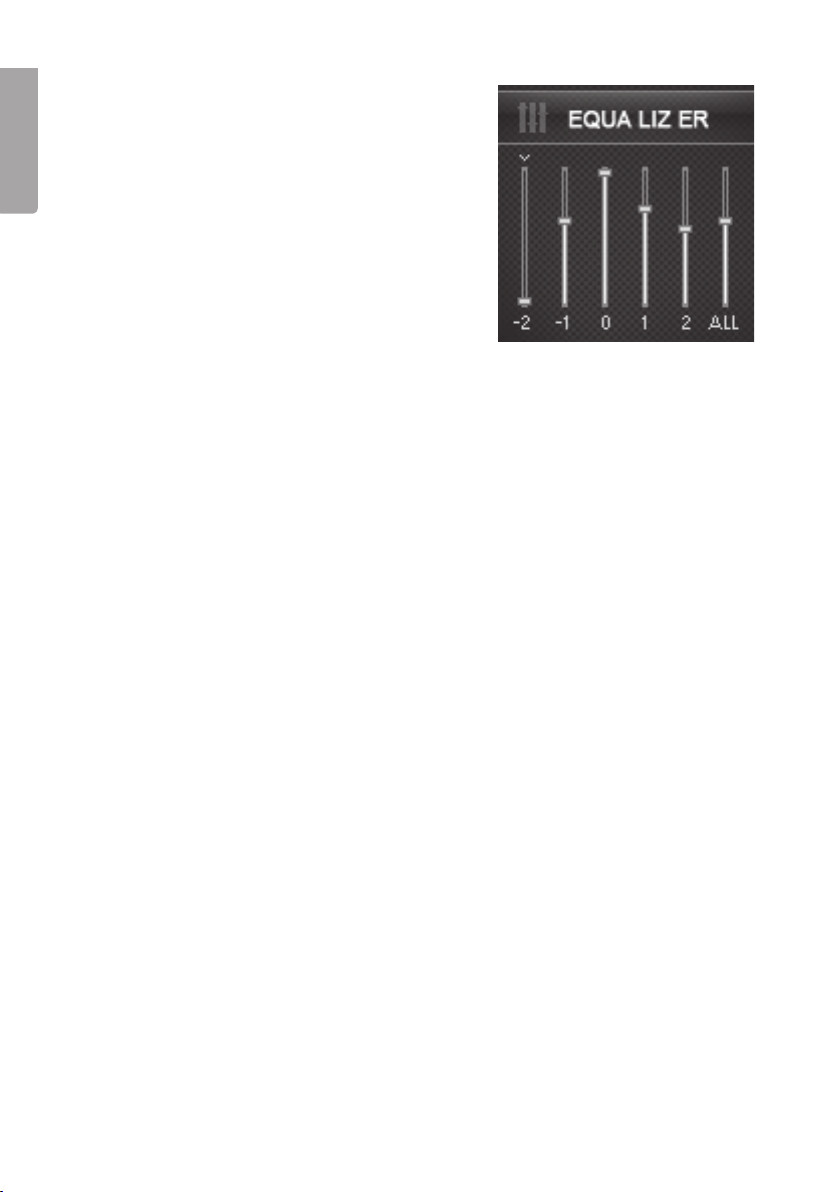
Configuring your own equalizer setting:
1. Select Custom EQ and confirm
using [].
2. Use []and []to highlight the bar
(frequency range) you wish to change.
3. Change the setting value using [V+]
and [V-].
4. Continue in the same way with the
other bars.
5. Press []to save your settings.
• Classification – Classify your songs by genre, artist, album, and titel. Select
CLASSIFICATION and YES. Confirm by pressing []. When you have finished, use
[V+] and [V-] to make your selection, confirm using [].
• Play rate – Changes the rate of play. Use [V+] and [V-] to make a selection. Press
[] to confirm or press []to go back.
• 3D – To activate the 3D effect, (gives the sound an extra dimension) use [V+] and
[V-] to select OFF or ON, confirm using []or press []to go back.
• ACL – To activate ACL, use [V+] and [V-] to select OFF or ON, confirm using []
or press []to go back.
• Back – Return to the song.
Note: The Play rate setting cannot be altered in WMA format.
6.2 Lyrics
This player supports the display of lyrics during playback. Only lyrics in LRC format
can be displayed. To add lyrics, do as follows:
1. Download the “.lrc” lyric file from the Internet.
2. Make sure that the lyric file has the same name as the music file.
3. Copy both files to the same folder in the player.
6.3 Picture Viewer (Photo)
The picture viewer supports playback of pictures in formats of JPG or BMP.

11
English
6.2.1 Viewing
1. Press and hold in []to come to the
main menu.
2. Use [V+] and [V-] to select PHOTO
and then press [O]. The list of images
will then be displayed.
3. Select an image or a folder using [V+]
and [V-] press []to open it.
4. Press FUNC, then press []or []to
select BACK and confirm using []to
go back.
Image viewing options:
• Browse: Use [V+] and [V-] to select the next/previous image.
• Photo function menu: Press FUNC to come to the functions menu.
In the functions menu:
1. Press []or []to choose between Slide Show, Manual Scan and Back.
Press []to confirm.
- Slide Show: Plays your images as a slideshow.
- Manual Scan: Browse your images using [V+] and [V-].
- Back: Go back.
6.4 Video (Movie)
The built-in video player can play videos in MTV format. Videos can be converted to
MTV format using the converter programme on the accompanying CD-ROM.
See section 7. Converting video files.
6.4.1 Listening to music
1. Press and hold in []to come to the
main menu.
2. Use [V+] and [V-] to select VIDEO and then
press [O]. The video list is displayed.
3. Select a video or a folder using [V+] or [V-]
and then press []to play or open it.
4. Press []to go back.

12
English
Video viewing options:
• Pause/resume play: Press []to
pause playback. Press once more to
resume playback.
• Change video: Press []or []to
change to the previous/next video.
• Fast forward/rewind: Press and hold
in []or []to rewind or fast forward
in a video.
• Adjust the volume: Press [V+] or [V-]
to raise or lower the volume.
• Exit: Press and hold in []to return to
the list in the menu.
6.5 Radio (FM)
6.5.1 Listening to the radio
1. Go to FM RADIO in the
menu by pressing [].
2. Select MUSIC using [V+]/[V-],
and confirm by pressing [].

13
English
1
2
3
4
5
6
7
8
9
6.5.2 Key to the display
1. Current playing frequency
2. MONO or STEREO indicator
3. Frequency indicator
4. Clock
5. Button lock indicator
6. FM region
7. Channel
8. Volume level
9. Battery status
Use FUNC to select one of the following functions: Manual Scan, Auto Scan, Band, Save
Station, Del Station, Record. Navigate using []and []and confirm by pressing [].
6.5.3 Manual channel searching
• Use []and []to search for channels manually.
6.5.4 Automatic channel searching
• Press and hold []or []to automatically search for a channel with a strong signal.
6.5.5 Automatic saving of radio stations
• Press FUNC, then press []or []to select Auto Scan. Confirm by pressing [].
The searching for and saving of radio stations with strong enough signal strength
will commence and “Searching…” will be shown in the display.

14
English
6.5.6 Selecting FM region
The correct frequency range/band needs to be
chosen for your region.
US (USA) (87.5-108.0 MHz)
EUROPE (Europe) (87.5-108.0 MHz)
JAPAN (Japan) (76.0-90.0 MHz)
1. Press FUNC to enter the radio menu.
2. Use []and []to make a BAND selection,
press [O] to confirm.
3. Use [V+] and [V-] to select region (US,
EUROPE or JAPAN). Confirm by pressing [].
4. Press []to exit the radio menu.
6.5.7 Saving stations manually
Saving a station:
1. Use []and []to select the Save
Station option, confirm by pressing [].
2. Use [V+] and [V-] to select YES and then
save the station by pressing [O].
Deleting a station:
1. Use []and []to select the Del
Station option, confirm by pressing [].
2. To delete a station, use [V+] or [V-] to select
YES or NO, then press [] to confirm.
Recording:
1. Use []and []to select Record, press
[O] to confirm.
2. Press []to start recording FM.
3. To pause recording, press []to resume
recording, press []again.
4. Press [ ] to save the recording and
return to FM radio.
Note:
- The recorded files are saved in the
player’s FM folder as WAV files and
can be listened to in the VOICE mode.
- FM recording stops automatically if
there is not enough memory or if the
battery power is too low. The date is
saved automatically.
- The volume is not adjustable
during recording.

15
English
Back:
1. Return to FM radio by pressing []or []to
select BACK and then press []to confirm.
6.6 Recording using the microphone Record
Recording a passage of speech:
1. Go to the main menu by
holding in [].
2. Select VOICE using [V+]/[V-], and
confirm using [].
• Pause/resume recording: Press []to pause the recording. Resume recording by
pressing []again.
• Saving your recording: Press [ ] to save the recording and return to recording mode.
Note:
- The recorded voice files are saved in the player’s VOICE folder as WAV files
(format: MIC00001.WAV, MIC00002.WAV).
- Recording stops automatically when the memory is full or when the battery
power level is too low. Data which is already recorded will be stored
automatically along with the date.

16
English
Setting the recording quality
1. Press and hold in []to come to the
main menu.
2. Use [V+] and [V-] to select SETUP and then
press [O]. The SETUP menu will be displayed
on screen.
3. Use []or []to select Record Setting
and then press []. The following options will
be shown.
• Long Time: Uses least memory, Normal
• Normal Quality: Uses less memory, Better
• High Quality: Uses a lot of memory, Best
4. Use [V+] and [V-] to make a selection.
5. Press []to confirm.
6. Push FUNC to return to the main menu.
Whilst in VOICE mode, press FUNC to enter the voice functions mode.
1. Use []or []to choose between Record, Playlist and Back.
2. Press []to confirm.
3. Press FUNC to exit.
- Record: Use []or []to select RECORD and then press []to
begin recording.
- Playlist: Use [V+] and [V-] to select a voice file and then press [O]to
begin playing it.
- Back: Go back.
6.7 E-Book
The device supports the playback of files in TXT format. Other formats must be saved
as TXT format before transfer to the device.
Note:
If stopped the player will remember the last page
and open this page next time the e-book viewer
is started.
1. Press and hold in []to come to the
main menu.
2. Use [V+] and [V-] to select E-BOOK and
then press [O].
3. Select a folder and file using [V+] or [V-] and
then press []to open it and see the files.
4. Press [] to go back without confirming.

17
English
• Automatic page turner: Press []to start the automatic page turner (4-second
intervals). Press [O]again to turn off this function.
• Turning pages: Press [V+] or [V-] to turn the page.
• Fast forward/rewind: Press and hold in [V+] or [V-] to fast forward or rewind.
• Exit: Press []to go back.
• E-Book functions menu: Push FUNC. Use []or []to select a percentage of
the e-book and then press [], the player will then go to the page number in the
e-book corresponding to the chosen percentage.
6.8 Settings (SETUP)
1. Whilst in standby or playback
mode, press and hold in []to
come to the main menu.
2. Use [V+] and [V-] to select
SETUP and then press [].
3. Use []or [] to select something from SETUP.
4. Then press []to enter the sub-menu.
5. Use [V+] and [V-] to make an adjustment.
6. Press []to confirm. Press [] to go back without confirming.
Settings Description
TIME Adjust the time/date and choose a time zone.
POWER Set the length of time before the power automatically shuts off
following a period of inactivity. Choose from: 15, 30, 60, 90, 120
minutes, Close = no automatic shut off.
LANGUAGE Sets the display language.
DISPLAY
SETTING Set the light and time for the backlight.
Choose from: 15, 30 seconds, 1 minute, Close = always on.
RECORD
SETTING Setting the recording quality.
SYS
TOOLS Delete a file from the player, format, reset, display system
information, update playlists and arrange files.
HOLD TIME Set the time before the button lock activates if no button has been
pressed. Choose from: 10, 30 seconds, 1, 3, 5 minutes, Off.
BACK Exit and return to the main menu.

18
English
7. Converting video to other formats
The built-in video player can play videos in MTV format. The file formats AVI, WMV,
MEPG1, Quick Time, MPEG2, RealMedia, MPEG4 and 3GP can all be converted with
the aid of the included conversion program.
7.1 Running the Video Converter
1. Insert the supplied CD into the computer’s CD-ROM drive.
2. Double-click on VideoConvert.exe in the MTV Video Converter folder on the CD.
The video converter window appears on the screen.
The video converter The open box
7.2 Converting a Video Clip
1. Start the program as instructed above.
2. Click on Input Video, and then select files from the list.
Note: To add MP4 files, select All Files (*.*) in the File of type box, and MP4 files
will also be displayed in the Open box.
3. Click on Output Video to select an output directory.
4. Click on Advanced Setting. Select 128 x 128 in the Output Frame Size box and
select MTV in the Output Format box.
5. Click on Start Conversion.
Click on Help for detailed instructions.
Note:
• In order for your video to play, you must select 128 x 128 or less in the Output
Frame Size box (Advanced Setting). Otherwise, the message “Device Not
Support” will appear on the screen when you run the file.
• You will need to install the relevant codecs before you can run “Video Converter.
exe”. Otherwise, the message “Load Video Failed!” will appear on the screen when
you try to convert files. Click on OK and download codecs from the Internet.
• Codecs are not included.

19
English
8. Troubleshooting
The player does not start
• Recharge the battery.
Files cannot be downloaded to the player
• Check the connection between the player and computer.
No sound from the earphones
• Check the volume and that the earphones are connected correctly.
• Check that the music file format is supported by the player.
Recordings cannot be made
• Make sure that there is enough available memory.
The text shown on the display is abnormal
• Make sure that you have selected the correct language.
• Reset the player by pushing in the RESET button using a pencil or the end of
a paper clip.
The buttons do not work
• The key lock may be activated.
• Reset the player by pushing in the RESET button using a pencil or the end of
a paper clip.
Poor radio reception
• Check that the earphones are connected correctly. The earphone cable serves as
an aerial.
• Adjust the position of the player and earphones. Move to another location where
the radio reception is better.
• Electrical devices in the vicinity of the player might interfere with the reception.
Turn off possible sources of interference or move to another location.
9. Care and maintenance
Use a soft damp cloth to clean the product. Do not use cleaning solutions or solvents.

20
English
10. Disposal
Follow local ordinances when disposing of this product. If you are unsure of how to
dispose of this product, please contact your municipality.
11. Specifications
Display 1.44″, CSTN Colour
Resolution 128 x 128
Music format MP3/WAV/WMA
Picture format JPG/BMP
Video format MTV
MP3 bit rate 8-320 kbps
WMA bit rate 5-320 kbps
Recording format WAV
Frequency response 20 Hz – 20 kHz
Power supply Built-in rechargeable battery, 190 mAh (up to 12 hours music
playback or 4 hours video)
Memory 2 GB
Size 85 x 45 x 13.2 mm
Weight Approx. 26.8 g (without accessories)
This manual suits for next models
1
Table of contents
Languages:
Other Clas Ohlson MP3 Player manuals

Clas Ohlson
Clas Ohlson BBU125EMR User manual

Clas Ohlson
Clas Ohlson CDM32 User manual

Clas Ohlson
Clas Ohlson MP734AF User manual

Clas Ohlson
Clas Ohlson MPCD-122 User manual

Clas Ohlson
Clas Ohlson MP611 User manual

Clas Ohlson
Clas Ohlson COBY MP-CD521 User manual

Clas Ohlson
Clas Ohlson KA10 User manual

Clas Ohlson
Clas Ohlson MH606 User manual

Clas Ohlson
Clas Ohlson LD05-2GB User manual

Clas Ohlson
Clas Ohlson BM366 User manual