manuals.online logo
Brands
  1. Home
  2. •
  3. Brands
  4. •
  5. Claypaky
  6. •
  7. Lighting Equipment
  8. •
  9. Claypaky Display Line C52146 User manual

Claypaky Display Line C52146 User manual

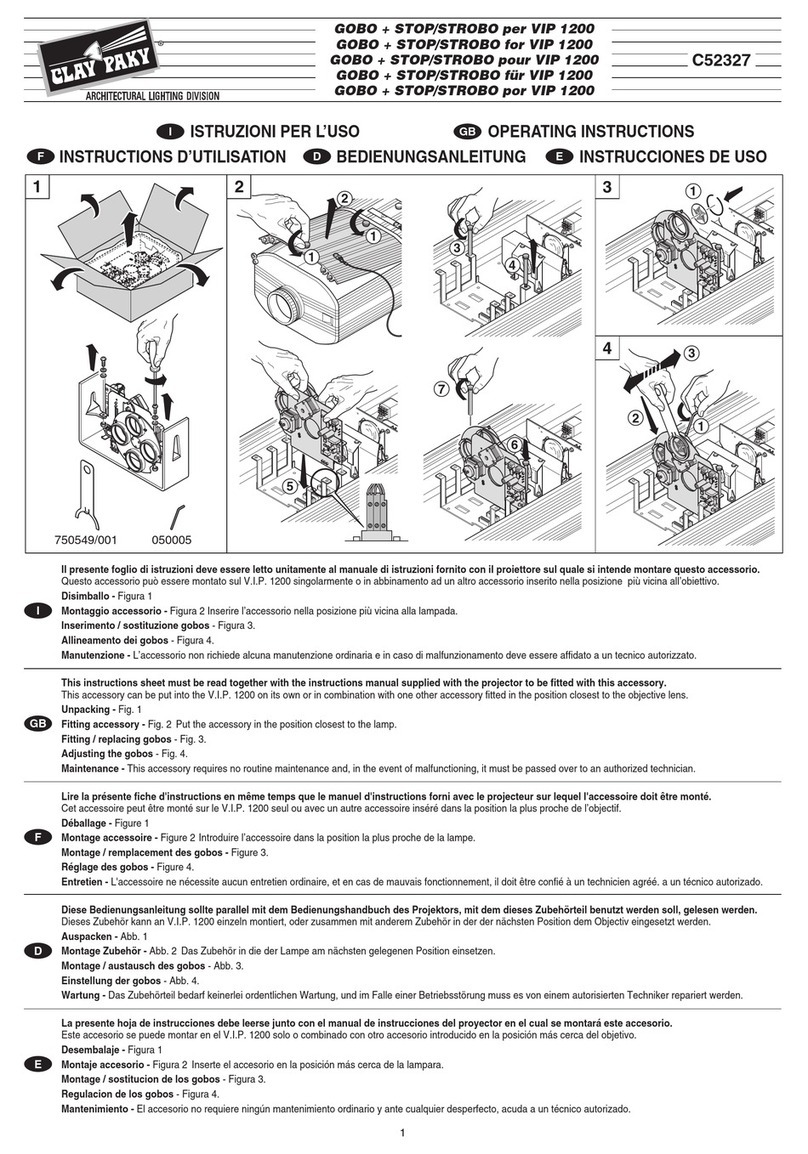
ISTRUZIONI PER L’USO
EFFETTO FOTOGRAFICO A ROTAZIONE CONTINUA (C52146)
DISPLAY LINE
Rev. 1 09/00 Cod. 099569
ITALIANO
®
B
AA
A
A
1 3 5
2 4
6
EFG
BC
AD
Il presente foglio di istruzioni deve essere letto unitamente al manuale di istruzioni fornito
con il proiettore sul quale si intende montare questo accessorio.
Questo accessorio puòessere montato sulle guide elettrificate dei proiettori V.I.P. DIA e
V.I.P. 150 PFC in abbinamento con il supporto portaobiettivo (fornito di serie con il proiettore) e
con un obiettivo.
Puòessere montato singolarmente o in combinazione con altri accessori.
MONTAGGIO SINGOLO
V.I.P. DIA:Fig.1-L’accessorio deve essere collocato al di sopra delle due guide elettrificate (A)
con la ruota rivolta verso il corpo illuminante il piùpossibile contro il corpo del proiettore, in
modo che il flusso d’aria prodotto dalla ventola (B) investa completamente la ruota
stessa (Fig. 2).
V.I.P. 150 PFC:Fig.3-L’accessorio puòessere collocato al di sopra oppure al di sotto delle due
guide elettrificate (A) con la ruota rivolta verso il corpo illuminante il piùpossibile contro il corpo
del proiettore (Fig. 4).
Assicurarsi che l’interruttore (C) sia in posizione di spento «O».
Fig. 5 - Ruotare verso l’esterno le due mollette di fissaggio (D), inserire l’accessorio sulle guide
(A) nella posizione indicata, quindi fissarlo ruotando verso l’interno le mollette di fissaggio (D)
fino allo scatto.
MONTAGGIO IN COMBINAZIONE CON ALTRI ACCESSORI
Fare riferimento alle istruzioni per l’uso degli altri accessori. Come norma generale fare
attenzione, nel montaggio, a non far entrare in contatto fra loro le parti in movimento dei diversi
accessori.
FUNZIONAMENTO
L’accessorio funziona in maniera automatica, per avviarlo posizionare su «I»l’interruttore (C).
SOSTITUZIONE RUOTA EFFETTO
Fig. 6 - Allentare il volantino (E), sfilare il disco (F) ed estrarre la pellicola (G).
Ripetere le operazioni in senso inverso per inserire la nuova pellicola.
MANUTENZIONE
L’accessorio non richiede alcuna manutenzione ordinaria e in caso di malfunzionamento deve
essere affidato a un tecnico autorizzato.La pulizia periodica dei dischi di supporto va effettuata
con un panno morbido inumidito di acqua e sapone neutro. La pulizia della pellicola fotografica
va effettuata con un panno antistatico.
CORREZIONE DI SEMPLICI ANOMALIE DI FUNZIONAMENTO
La ruota effetto non gira regolarmente:
•
Verificare che il proiettore sia acceso e che l’interruttore (C) dell’accessorio sia in posi-
zione «I».
•Accertarsi che vi sia contatto fra le mollette di fissaggio (D) e le guide elettrificate (A).
•Accertarsi che la ruota non sia bloccata dal contatto con altri accessori.
Si notano aloni sulla proiezione:
•Effettuare l’operazione di pulizia periodica.
OPERATING INSTRUCTIONS
PHOTOGRAPHIC EFFECT WITH CONTINUOUS ROTATION (C52146)
ENGLISH
This instructions sheet must be read together with the instructions manual supplied with
the projector on which you plan to fit this accessory.
This accessory may be fitted on the electrified rails of the V.I.P. DIA and V.I.P. 150 PFC
projectors, in combination with the lens holder mounting (provided as standard with the
projector) and a lens.
It can be mounted on its own or in combination with other accessories.
SINGLE ASSEMBLY
V.I.P. DIA: Fig. 1 - The accessory must be placed above the two electrified rails (A) with the
wheel facing the light fitting as close as possible to the projector body, so that the air flow
produced by the fan (B) completely hits the wheel (Fig. 2).
V.I.P. 150 PFC: Fig. 3 - The acessory can be placed above or below the two electrified rails (A)
with the wheel facing the light fitting as close as possible to the projector body (Fig. 4).
Check that the switch (C) is on «O».
Fig. 5 - Turn the two fixing clips (D) outwards, insert the accessory on the guides (A) in the
position shown, and then secure it by turning the fixing clips (D) inwards until they click home.
MOUNTING IN COMBINATION WITH OTHER ACCESSORIES
Refer to the operating instructions for the other accessories.As a general rule, pay attention when
fitting that the moving parts of the different accessories do not come into contact with each other.
OPERATION
The accessory operates automatically; to start turn the switch (C) to «I».
REPLACING THE EFFECT WHEEL
Fig. 6 - Loosen the handwheel (E), remove the disc (F) and extract the film (G).
Repeat the operation in reverse order to insert the new film.
MAINTENANCE
The accessory requires no routine maintenance and, in the event of malfunctioning, it must be passed
over to an authorized technician. The mounting discs should be periodically cleaned with a soft cloth
soaked with water and a neutral soap.The photographic film should be cleaned with an anti-static cloth.
CORRECTING STRAIGHTFORWARD OPERATING TROUBLE
The wheel does not turn properly:
•Check that the projector is on and the switch (C) of the accessory is on «I».
•Check that there is contact between the fixing clips (D) and the electrified rails (A).
•Check that the wheel is not jammed by contact with other accessories.
Rings are seen on the projection:
•Perform the periodical cleaning operation.
INSTRUCTIONS D'UTILISATION
EFFET PHOTOGRAPHIQUE A ROTATION CONTINUE (C52146)
FRANÇAIS
Lire la présente fiche d'instructions en même temps que le manuel d'instructions fourni
avec le projecteur sur lequel l'accessoire doit être monté.
Cet accessoire peut être montésur les guides électrifiés des projecteurs V.I.P.DIA et V.I.P.150 PFC
avec le support d’objectif (fourni de série avec le projecteur) et avec un objectif.
Il peut être montéseul ou en combinaison avec d'autres accessoires.
1215
3 8 9 4 5101211 1416
67
13
MONTAGE SEUL
V.I.P. DIA: Fig. 1 - L'accessoire doit être placéau-dessus des deux guides électrifiés (A) avec le
disque orientévers le corps éclairant et le plus possible rapprochédu corps du projecteur, de façon
àce que le flux d’air générépar le ventilateur (B) atteigne entièrement le disque (Fig.2).
V.I.P. 150 PFC: Fig. 3 - L'accessoire doit être placéau-dessus ou au-dessous des deux guides
électrifiés (A) avec le disque orientévers le corps éclairant et le plus possible rapprochédu
corps du projecteur (Fig.4). S’assurer que l’interrupteur (C) est en position éteinte «O».
Fig. 5 - Tourner les deux ressorts de fixation (D) vers l'extérieur, placer l'accessoire sur les
guides (A) dans la position indiquée, le fixer ensuite en tournant vers l'intérieur les ressorts de
fixation (D) jusqu'au déclic.
MONTAGE EN COMBINAISON AVEC D'AUTRES ACCESSOIRES
Se reporter aux instructions pour l'utilisation des autres accessoires. En règle générale, veiller
pendant le montage àce que les parties en mouvement des différents accessoires n'entrent pas
en contact entre elles.
FONCTIONNEMENT
L’accessoire fonctionne en automatique. Pour le démarrer, positionner sur «I»l’interrupteur (C).
REMPLACEMENT DISQUE EFFET
Fig. 6 - Desserrer la molette (E), désenfiler le disque (F), puis extraire la pellicule (G).
Répéter ces opérations dans l’ordre contraire pour introduire la nouvelle pellicule.
ENTRETIEN
L'accessoire ne nécessite aucun entretien ordinaire, et en cas de mauvais fonctionnement, il
doit être confiéàun technicien agréé. Pour le nettoyage périodique des disques de support,
utiliser un chiffon doux imbibéd’eau et savon neutre. Nettoyer la pellicule photographique avec
un chiffon antistatique.
CORRECTION DE SIMPLES ANOMALIES DE FONCTIONNEMENT
Le disque effet ne tourne pas correctement:
•
S'assurer que le projecteur est alluméet que l'interrupteur (C) de l'accessoire est sur la position «I».
•S'assurer qu'il y a un contact entre les ressorts de fixation (D) et les guides électrifiés (A).
•S'assurer que le disque n'est pas bloquépar un éventuel contact avec d'autres accessoires.
En cas de halos sur la projection:
•Effectuer l'opération de nettoyage périodique.
BEDIENUNGSANLEITUNG
FOTOEFFEKTSTRAHLER MIT DAUERDREHUNG (C52146)
DEUTSCH
Diese Bedienungsanleitung sollte parallel mit dem Bedienungshandbuch des Projektors,
mit dem dieses Zubehörteil benutzt wird, gelesen werden.
Dieses Zubehörteil kann nur an den elektrifizierten Führungsstäben der Projektoren V.I.P. DIA
und V.I.P 150 PFC, in Kombination mit dem (serienmäßig mit dem Projektor mitgelieferten)
Objektivhalter und mit einem Objektiv montiert werden.
Es kann einzeln oder in Kombination mit anderen Zubehörteilen montiert werden.
EINZELMONTAGE
V.I.P. DIA: Abb. 1 - Das Zubehörteil muss oberhalb der zwei elektrifizierten Führungsstäbe (A)
angebracht werden und das Rad, das gegen den Beleuchtungskörper gerichtet ist, muss so
nahe wie möglich am Projektor sein. Dabei muss der Luftfluss, der von Lüfterrad (B)
geschaffen wird, das Rad vollständig berühren (Abb. 2).
V.I.P. 150 PFC: Abb. 3 - Das Zubehörteil muss ober- oder unterhalb der zwei elektrifizierten
Führungsstäbe (A) angebracht werden;dabei muss das Rad, das gegen den Beleuchtungskörper
gerichtet ist, so nahe wie möglich am Projektor sein (Abb. 4).
Sicherstellen, dass der Schalter (C) sich in abgeschalteter Position «O»befindet.
Abb. 5 - Die zwei Befestigungsfedern (D) nach außen drehen, das Zubehörteil in der
vorgeschriebenen Stellung an den Führungsstäben (A) einsetzen, dann blockieren; dazu die
Befestigungsfedern (D) nach innen drehen, bis sie einrasten.
MONTAGE IN KOMBINATION MIT ANDEREN ZUBEHÖRTEILEN
Auf die Bedienungsanleitungen der anderen Zubehörteile Bezug nehmen.Als allgemeine Regel
gilt, dass bei der Montage darauf zu achten ist, dass die beweglichen Teile der verschiedenen
Zubehörteile nicht miteinander in Berührung kommen.
EINSCHALTEN
Das Zubehörteil wird in Betrieb gesetzt, indem der Schalter (C) auf «I»gestellt wird.
AUSTAUSCH DES EFFEKTRADES
Abb. 6 - Das Handrädchen (E) lockern, die Scheibe (F) abnehmen und die Folie (G) herausziehen.
Die Arbeitsschritte in umgekehrter Reihenfolge wiederholen, um die neue Folie einzulegen.
WARTUNG
Das Zubehörteil bedarf keinerlei ordentlichenWartung, und im Falle einer Betriebsstörung muss
es von einem autorisierten Techniker repariert werden. Die regelmäßige Reinigung der
Trägerscheibe wird mit einem weichen mit Wasser und neutraler Seife getränkten Tuch
duchgeführt. Die Reinigung der Fotofolie erfolgt mit einem Antistatik-Tuch.
KORREKTUR EINFACHER BETRIEBSSTÖRUNGEN
Das Effektrad dreht nicht regelmäßig:
•
Prüfen, ob der Projektor eingeschaltet ist und ob der Schalter (C) des Zubehörteils auf «I»steht.
•Sicherstellen, dass zwischen den Befestigungsfedern (D) und den elektrifizierten
Führungsstäben (A) Kontakt besteht.
•Sicherstellen, dass das Rad nicht von anderen Zubehörteilen blockiert wird.
Ränder an der Projektion:
•Regelmäßig reinigen.
INSTRUCCIONES DE USO
EFECTO FOTOGRÁFICO DE ROTACIÓN CONTINUA (C52146)
ESPAÑOL
La presente hoja de instrucciones debe leerse junto con el manual de instrucciones del
proyector en el cual se montaráeste accesorio.
Este accesorio puede montarse en las guías electrificadas de los proyectores V.I.P. DIA y
V.I.P. 150 PFC junto con el soporte portaobjetivo (que se suministra de serie con el proyector)
y un objetivo.
Es posible montarlo sólo o en combinación con otros accesorios.
MONTAJE INDIVIDUAL
V.I.P. DIA: Fig. 1 - El accesorio debe colocarse encima de las guías electrificadas (A) con la
rueda orientada hacia el cuerpo luminoso lo más posible contra el cuerpo del proyector, de
manera que el flujo de aire producido por el ventilador (B) se dirija completamente hacia
la misma rueda (Fig. 2).
V.I.P. 150 PFC: Fig. 3 - El accesorio debe colocarse encima o debajo de las dos guías
electrificadas (A) con la rueda orientada hacia el cuerpo luminoso lo más posible contra el
cuerpo del proyector (Fig. 4)
Compruebe que el interruptor (C) estéen la posición apagado «O».
Fig. 5 - Gire hacia afuera los dos clips de fijación (D), monte el accesorio en las guías (A) en la
posición indicada, luego fíjelo girando hacia adentro los clips de fijación (D) hasta que se
enganchen.
MONTAJE EN COMBINACIÓN CON OTROS ACCESORIOS
Consulte las instrucciones de uso de los demás accesorios. Como norma general, durante el
montaje, tenga cuidado de que las partes móviles de los diversos accesorios no se toquen entre sí.
FUNCIONAMIENTO
El accesorio funciona en modo automático, para encenderlo, ponga el interruptor (C) en la
posición «I».
SUSTITUCIÓN DE LA RUEDA DE EFECTO
Fig. 6 - Afloje la maneta (E), saque el disco (F) y extraiga la película (G).
Repita estas operaciones en orden contrario para montar la nueva película.
MANTENIMIENTO
El accesorio no requiere ningún mantenimiento ordinario y ante cualquier desperfecto, acuda a
un técnico autorizado.Efectúe la limpieza periódica de los discos de soporte con un paño suave
humedecido con agua y jabón neutro. La película fotográfica se debe limpiar con un paño
antiestático.
SOLUCION DE ANOMALÍAS SIMPLES
La rueda de efecto no gira normalmente:
•Compruebe que el proyector estéencendido y que el interruptor (C) del accesorio se
encuentre en la posición «I».
•Controle que haya contacto entre los clips de fijación (D) y las guías electrificadas (A).
•Observe si la rueda estábloqueada por contacto con otros accesorios.
La proyección tiene halos:
•Efectúe la operación de limpieza periódica.
CLAY PAKY
SPA
-
Via 3DVWUHQJRE- 24066HULDWH (Bergamo)Italy
Tel. +39-035-65431- Fax +39-035-76
-
Internet: www.claypaky.it

Other Claypaky Lighting Equipment manuals

Claypaky C61331 User manual

Claypaky

Claypaky C61331 User manual

Claypaky VOLERO WAVE User manual

Claypaky

Claypaky VOLERO WAVE User manual

Claypaky C61044 User manual

Claypaky

Claypaky C61044 User manual

Claypaky PIN SCAN User manual

Claypaky

Claypaky PIN SCAN User manual

Claypaky MINI XTYLOS HPE Operation manual

Claypaky

Claypaky MINI XTYLOS HPE Operation manual

Claypaky STAGE COLOR 300 User manual

Claypaky

Claypaky STAGE COLOR 300 User manual

Claypaky MINI-B SPOT User manual

Claypaky

Claypaky MINI-B SPOT User manual

Claypaky A.LEDA WASH K5 C61401 User manual

Claypaky

Claypaky A.LEDA WASH K5 C61401 User manual

Claypaky ALPHA WASH 700 User manual

Claypaky

Claypaky ALPHA WASH 700 User manual

Claypaky ALPHA SPOT HPE 1500 User manual

Claypaky

Claypaky ALPHA SPOT HPE 1500 User manual

Claypaky C52162 User manual

Claypaky

Claypaky C52162 User manual

Claypaky C61375 User manual

Claypaky

Claypaky C61375 User manual

Claypaky IGLOO - C61195 User manual

Claypaky

Claypaky IGLOO - C61195 User manual

Claypaky ALPHA SPOT 700 User manual

Claypaky

Claypaky ALPHA SPOT 700 User manual

Claypaky Alpha Spot 575 HPE User manual

Claypaky

Claypaky Alpha Spot 575 HPE User manual

Claypaky STAGE COLOR 300 User manual

Claypaky

Claypaky STAGE COLOR 300 User manual

Claypaky HY B-EYE K25 TEATRO User manual

Claypaky

Claypaky HY B-EYE K25 TEATRO User manual

Claypaky C61325 User manual

Claypaky

Claypaky C61325 User manual

Claypaky A.LEDA WASH K10 CC User manual

Claypaky

Claypaky A.LEDA WASH K10 CC User manual

Claypaky ALPHA SPOT HPE 1500 ST User manual

Claypaky

Claypaky ALPHA SPOT HPE 1500 ST User manual

Claypaky DISPLAY C52145 User manual

Claypaky

Claypaky DISPLAY C52145 User manual

Claypaky ALPHA WASH 300 User manual

Claypaky

Claypaky ALPHA WASH 300 User manual

Claypaky IGLOO User manual

Claypaky

Claypaky IGLOO User manual

Claypaky A.LEDA B-EYE K10 User manual

Claypaky

Claypaky A.LEDA B-EYE K10 User manual

Popular Lighting Equipment manuals by other brands

ProLights LUMIPAR7QTOUR user manual

ProLights

ProLights LUMIPAR7QTOUR user manual

Heitronic 38205 installation instructions

Heitronic

Heitronic 38205 installation instructions

Artecta Ribbon Series user manual

Artecta

Artecta Ribbon Series user manual

Viabizzuno M4 led spot short manual

Viabizzuno

Viabizzuno M4 led spot short manual

Martin Exterior Projection 500 user manual

Martin

Martin Exterior Projection 500 user manual

Soundoff Signal UltraLite EL3D02A00(x) owner's manual

Soundoff Signal

Soundoff Signal UltraLite EL3D02A00(x) owner's manual

Coemar ReLite Led Kit VariWhite 250 user manual

Coemar

Coemar ReLite Led Kit VariWhite 250 user manual

Chauvet Hemisphere 5.1 user manual

Chauvet

Chauvet Hemisphere 5.1 user manual

BEARWARE 302540 manual

BEARWARE

BEARWARE 302540 manual

Ignition WAL-L Z150 COB RGBW user manual

Ignition

Ignition WAL-L Z150 COB RGBW user manual

Star Headlight & Lantern 255 Series quick start guide

Star Headlight & Lantern

Star Headlight & Lantern 255 Series quick start guide

Ares Perseo 30 RGB Assembly instructions

Ares

Ares Perseo 30 RGB Assembly instructions

GTD GTD-L372P user manual

GTD

GTD GTD-L372P user manual

Pool Technologie JUSTPH user manual

Pool Technologie

Pool Technologie JUSTPH user manual

JB Systems APOLLO Operation manual

JB Systems

JB Systems APOLLO Operation manual

Pool Cover Specialists INFINITY 4000 installation guide

Pool Cover Specialists

Pool Cover Specialists INFINITY 4000 installation guide

Principal LED STREET WRAP Install instructions

Principal LED

Principal LED STREET WRAP Install instructions

HEPER DRAGO Forward Installation & maintenance instructions

HEPER

HEPER DRAGO Forward Installation & maintenance instructions

manuals.online logo
manuals.online logoBrands
  • About & Mission
  • Contact us
  • Privacy Policy
  • Terms and Conditions

Copyright 2025 Manuals.Online. All Rights Reserved.