Cleanfix Falcon Guide

Safety, Operation and Maintenance Manual for Falcon (RA 530 B); Version 1.0
Safety, Operations & Maint. Manual
Cleanfix®Falcon
(RA 530 B)
This unit is intended for commercial use
This manual is furnished with each new RA 530 B.
It provides necessary operation and maintenance instructions.
READ AND FOLLOW ALL INSTRUCTIONS, WARNINGS AND CAUTIONS BEFORE AND WHEN
USING THIS AUTO-SCRUBBER. THE MACHINE MAY ONLY BE USED BY PERSONS WHO HAVE
BEEN INSTRUCTED IN ITS HANDLING AND EXPRESSLY ENTRUSTED WITH THE OPERATION
THEREOF.
All information and specifications printed in this manual are current at the time of printing. However,
because of Cleanfix’ policy of continual product improvement, we reserve the right to make changes at
any time without notice.

Safety, Operation and Maintenance Manual for Falcon (RA 530 B); Version 1.0 2
WHEN THE MACHINE IS DELIVERED
This auto-scrubber will afford you many years of
trouble-free operating satisfaction, provided it is
given proper care. All parts are passed rigid
quality control standards prior to their being
assembled to the finished product. Prior to
packaging, your auto-scrubber was again
inspected for assurance of flawless assembly.
This auto-scrubber is protectively packed to
prevent damage in shipment. When the machine
is delivered carefully check the carton for signs
of damage. Unpack the machine from the carton
and inspect it for any possible damage.
Only a visual examination will reveal damage
that may have occurred in transit. If damage is
discovered, immediately notify the transportation
company that delivered your auto-scrubber and
request an inspection. As a shipper we are
unable to report any claim for damage. You
must origin any claim within 5 days of delivery.
Be sure to keep the carton, packing inserts,
packing list and carrier's receipt until the
inspector has verified your claim. CLEANFIX’
LIABILITY CEASES WHEN THE SHIPMENT IS
PICKED UP BY THE CARRIER. Cleanfix will
furnish any information needed to expedite the
claim process.
GENERAL PRECAUTIONS
FAILURE TO FOLLOW PRECAUTIONS AND WARNINGS MAY CAUSE SERIOUS INJURY TO
THE OPERATOR AND CAUSE DAMAGE TO MACHINE, WHICH CAN VOID WARRANTY.
TO REDUCE RISK OF FIRE, ELECTRIC SHOCK OR INJURY: READ ALL INSTRUCTIONS
BEFORE AND WHEN USING THIS AUTO-SCRUBBER.
•The auto scrubber may only be operated by
persons who have been fully trained and
authorized to use it.
•This is NOT a toy. Close attention is
necessary when used around or near
children.
•Use only as described in this
safety/operations manual. Use only
manufacturer’s recommended attachments
and accessories.
•Do not use this auto-scrubber with
damaged cables or plugs. If the auto-
scrubber is not working as it should,
because it has been dropped, damaged, left
outdoors or dropped into water, contact
authorized service center or factory.
•Do not handle the plugs of the auto-
scrubber with wet hands.
•Store auto-scrubber indoors in a dry area.
Do not expose to freezing temperatures.
•Do not put any objects into openings. Do not
use with any opening blocked; keep free of
dust, lint, hair and anything that may reduce
air flow.
•Keep hair, loose clothing, fingers and all
parts of body away from openings and
moving parts.
•Any manner of working that represents a
safety hazard must be refrained from.
•The usage of the auto-scrubber is subjected
to national regulations.
•Do not use the auto-scrubber to pick up
flammable or combustible liquids such as
gasoline or use in areas where they may be
present. Do not pick up anything that is
burning or smoking, such as cigarettes,
matches or hot ashes.
•Do not use where anesthetics or oxygen is
used.
•Replace damaged or worn parts
immediately with genuine original equipment
parts to maintain safety and to protect your
limited warranty.
•Do not pressure-wash the auto-scrubber, as
it may cause a short circuit, damage to
components and/or operator injury.
•Never drive over steps!
To Avoid Electric Shock, Do Not Expose to Rain. Store Indoors.
WARNING

Safety, Operation and Maintenance Manual for Falcon (RA 530 B); Version 1.0 3
GENERAL PRECAUTIONS (cont.)
•Never drive over power cords! Danger of
electric shock!
•In elevators always turn-off unit with key and
lower brushes to prevent unit from moving.
•Whilst operating, caution is to be exercised
with respect to third parties, especially
children.
•Wear sturdy footwear.
•When cleaning and servicing the machine,
changing parts or converting to a different
function, turn off the drive and withdraw the
key from the key switch.
•Besides the operating instructions and the
national rules for safety in the work place,
we also recommend that the unwritten rules
of safe working should be respected. Using
the auto scrubber on public roads, paths
and any other outdoor surface is prohibited.
TRANSPORT
•The applicable user and safety
instructions/regulations, in particular for
those pertaining to load-bearing capacity,
must be observed when transporting the
machine in elevators.
•Raise the brushes by means of the foot
lever before transporting the auto-scrubber.
•Notice: The brushes should also be lifted
during working breaks and during charging
operations. The life expectancy of the
brushes and pads will be increased.
•To prevent the batteries from spilling the
machine should not be tilted more than 45
degrees to the back.
•Take care when moving the machine over
thresholds and landings – this may damage
wheels and the squeegee assembly. Please
ensure that the brush unit and the squeegee
assembly are raised. To lift/carry the
machine grab it by the handle and
underneath the front outside cover of the
machine.
•Make sure that the temperatures during
transportation are never below 32°F / 0°C.
•When transporting in elevators, their safety
regulations and precautions are to be
respected as well as the maximum load
capacity of the elevator.
GRADIENTS, STEPS AND THRESHOLDS
•NEVER drive auto-scrubber over steps.
•Do not use the auto-scrubber on inclines
exceeding 4% unless higher inclines are
approved in the operating instructions.
Always use extreme caution when moving
the auto-scrubber on ramps or inclines.
•Do not change directions on inclines.
•Do not park the auto-scrubber on inclines.
•Care should be taken when driving the
machine over thresholds or sills as damage
may occur to the brushes, wheels and
squeegee assembly. It is advisable to lift the
brushes and the squeegee assembly.
CLEANING CHEMICALS AND HAZARDOUS DUST/LIQUID
•Attention must be paid to the manufacturer’s
safety instructions when using cleaning and
care chemicals. Wear safety glasses and
clothing if necessary.
•The danger of using easily flammable, toxic,
health-damaging, caustic or irritating
substances is expressly pointed out.
•Do not use the auto-scrubber for surfaces
that can release dust and liquids that are
hazardous to health.
•Only use low foaming and non-inflammable
cleaning agents, which do not include
hazardous components.

Safety, Operation and Maintenance Manual for Falcon (RA 530 B); Version 1.0
GENERAL PRECAUTIONS (cont.)
SAFETY INSTRUCTIONS FOR BATTERY-OPERATED MACHINES
•Observe the safety and accident prevention
regulations pertaining to the handling and
installation of batteries.
•Observe the operating and handling
instructions of the battery manufacturer.
•Before charging, check the battery cables
and the charger cable and replace them if
necessary.
•Smoking is strictly PROHIBITED when
charging batteries.
•Avoid open flames, flying sparks and
glowing objects.
•Keep the room in which machine/batteries
are charged well ventilated. Highly explosive
toxic gas is generated when the batteries
are being charged.
•Open all cavities, covers and lids etc. in
which the explosive gas can gather.
•Open recovery tank.
•Fire fighting/prevention equipment must be
within reach.
•Eating and drinking is PROHIBITED in
rooms where batteries are being charged.
•After handling batteries, immediately wash
hands thoroughly.
•Do not touch or pour away battery acid.
•Never spill or touch battery acid. Never lay
metallic parts or tools onto the batteries.
Danger of short circuit, fire and explosion!
SOURCES OF DANGER
•Do not run the brushes when the machine is
stationary as it may cause damage to the
surface being cleaned.
•Care should be taken when driving the
machine over thresholds or sills as damage
may occur to the brushes, wheels and
squeegee assembly. It is advisable to lift the
brushes and the squeegee assembly.
•When transporting in elevators, their safety
regulations and precautions are to be
respected as well as the maximum load
capacity of the elevator.
PLACE OF WORK
The working place of the operator is behind the handle of the machine.
CARE OF AUTO-SCRUBBER
This auto-scrubber is designed to be safe when
used to perform cleaning functions as specified.
Should damage occur to electrical parts, the unit
should NOT be used until the damage is
repaired by the manufacturer or an authorized
service center. This will avoid further damage to
the auto-scrubber or injury to the user.
These instructions are for your protection and
information.
PLEASE READ CAREFULLY! Failure to follow
instructions or precautions could result in injury
or damage to the user and/or the auto-scrubber.
SAVE THESE INSTRUCTIONS!

Safety, Operation and Maintenance Manual for Falcon (RA 530 B); Version 1.0 5
INTENDED USE
•Only use for wet cleaning of water-
resistant floor coverings in building
interiors.
•Do not use the auto-scrubber on public
roadways.
•The autoscrubber is not to be used at
temperatures under 32°F (0°C).
•The water temperature may not exceed
122°F (50°C).
•Any other use is considered to be
improper. The manufacturer is not
liable for any resulting damage; all risks
are the responsibility of the user.
•The appropriate accident prevention
rules, as well as other known
regulations for health and safety in
operation, must be respected.
•Use for intended purpose also includes
adherence to the manufacturer’s
operating, service and maintenance
regulations.
•Modifications made to the auto-scrubber
by the user releases Cleanfix from all
liability for resulting damage.
•Floor coverings must be checked for
suitability for this cleaning method
before using the auto-scrubber!
•Pay attention to surface pressure in
case of point-elastic floors such as
gymnasium floors. Check that the
wheels will not damage the surface.
•Cleanfix does not accept liability for
damage caused to the machine and
floor covering being cleaned if wrong
brush and chemicals have been used
BEFORE USING THE AUTO-SCRUBBER
QUICKGUIDE
1. Check that the machine is in proper
condition.
2. Remove obstacles, such as furniture
etc. from the area to be cleaned. Large
pieces can be removed to opposite end
of the room from where you start
cleaning.
3. All covers, hoods and lids must be
correctly attached and closed. Make
sure all switches are in the OFF
position.
4. Fill the machine with clean water using a
clean bucket or a hose attached to a
water source.
5. Add the chemical required. Check the
label for the correct dilution portions.
6. Before plugging the batteries in all
switches must be in the OFF position.
All cables and connectors must have
proper protection from spray water.
7. Check all cables for damage and signs
of aging at regular intervals. The auto-
scrubber may only be used if the battery
cables are in perfect condition.
CHECK IF COMPLETE
•Machine
•Squeegee assembly
•Scrub brushes or pad driver and cylindrical brush
•Operations manual

Safety, Operation and Maintenance Manual for Falcon (RA 530 B); Version 1.0 6
BEFORE USING THE AUTO-SCRUBBER
INSTALLING THE BATTERIES
•Open recovery tank by tilting sideways.
•Put in batteries with metal poles facing
each other.
•Battery clamps are marked with either + or
- . Connect – clamp attached to black
cable (coming from the machine) to the
nearest – pole on the batteries and
tighten.
•Connect + clamp attached to the red cable
(coming from the machine) to the nearest
+ pole on the batteries and tighten.
•Take the short, red jumper cable and
connect the respective clamps ( + and - )
to the remaining poles and tighten.
•Plug in red plug into machine plug.
CHARGING THE BATTERIES
•Turn machine off with the main switch and
with the key.
•Empty recovery tank completely and tilt
sideward.
•Remove charging plug from machine.
•Connect cable of charger with battery cable.
•Turn-on battery charger.
When using gel batteries (maintenance free) the waste water tank can be left closed
during the charging process. Using wet batteries (lead-acid batteries), the waste water
tank must be kept tilted OPEN during the entire charging process.
ATTENTION! The manufacturer takes no responsibility when batteries spill occurs!
Metal parts in batteries and battery cells are always live. Exercise extreme
caution when handling and installing batteries.
Make sure that at no time a short circuit is created when installing the batteries.
WARNING
- +
+ -
Machine

Safety, Operation and Maintenance Manual for Falcon (RA 530 B); Version 1.0 7
BEFORE USING THE AUTO-SCRUBBER (cont.)
PREPARATIONS FOR WORK
Depending on the type of operation the machine must be equipped respectively with the correct brushes
or pad-holders and pads.
•Place squeegee (E1) into the holder.
•Fix squeegee with the two star handle
screws (E2).
•Connect hose from the squeegee to the
waste water tank cover.
•Lower the squeegee with lever (A10).
•Fill the clean solution tank with water and
the cleaning agent required for the specific
task (Dilution rates will be on the label of the
cleaning solution). The maximum capacity of
the clean solution tank is 12 gal. (45 liters).
•Set the solution flow rate with the knob (C1)
(recommended position 1-2)
FUNCTIONAL PARTS AND ACCESSORIES
A. General view
1. Controls
2. Handle
3. Dome
4. Guide wheel
5. Solution flow regulating valve
6. Brush assembly side roller
7. Squeegee assembly
8. Disc brushes
9. Cylindrical brush
10.Lever to raise/lower squeegee assembly
11.Recovery tank
12.Solution tank bladder
13.Drain hose for recovery tank
14.Brush operation lever
B. Controls
1. Key switch
2. Operating LED
3. Low battery signal
4. Vacuum push button
5. Brush push button
6. Solution push button
C. Adjustments and connectors
1. Solution flow valve
2. Quick disconnect for external
solution hose
3. Cylindrical brush access plate
D. Brushes
1. Disc brushes
2. Cylindrical brush
E. Rear view
1. Squeegee assembly
2. Knob for fixation of squeegee
3. Angle adjustment for squeegee
assembly
4. Foot lever for raising brushes
5. Battery container
7. Solution bladder drain hose
F. Front view
1. Brush pressure adjustment
2. Supporting bar / Kick stand
G. Access to battery/component
compartment

Safety, Operation and Maintenance Manual for Falcon (RA 530 B); Version 1.0 8
FUNCTIONAL PARTS AND ACCESSORIES
A
E
D
G
F
CB
1
10
13
12
7
9 8
6
4
11
3
2
5
1
3
2
5 64
1
3
2
1
2
6
4
1
7
5
3
2
2
1
14

Safety, Operation and Maintenance Manual for Falcon (RA 530 B); Version 1.0 9
OPERATING THE AUTO-SCRUBBER
OPERATION
The controls have clear symbols for the function they control.
•Turn the key for main switch (B1).
•Turn on the different applications in the
following order by pressing switches:
1. Push button for solution pump (B6), if
necessary adjust water flow (C1)
2. Push button for brush motor (B5)
3. Push button for vacuum motor (B4)
•By pulling the brush operation lever (A14) the
machine will start moving forward.
•Drive the first 10 to 15 feet to test the water
flow as well as the chosen brushes or pads
and make sure that these meet the
requirement to properly clean the floor.
•At the same time check the vacuuming
performance. If necessary adjust the
squeegee angle (E3).
•If the auto scrubber should run forward too
fast or too slow it can be regulated with the
screw for adjusting the brush pressure (F2).
The screw is at the front on the right side
(seen from the operator’s position). The
adjustment can be set between a pressure of
35 and 70 lbs.
Turning the screw upwards ¬Decreases
pressure
Turning the screw downwards ¬Increases
pressure
IMPORTANT INFORMATION
•When the machine is not being operated,
immediately turn of the brush in order to
avoid damage to floor surface.
•If either liquid or foam leaks from machine
unintentionally, immediately switch off the
machine.
•Brush wear is automatically adjusted for by
the weight of the entire brush support.
•In case of foam in the recovery tank add
defoamer to prevent foam entering the tube
of the vacuum motor.
•Check filling level regularly and empty
recovered water in time. Make sure enough
water is dispensed whilst running the
brushes or pads as these should never be
run dry.
•Use brushes, pads and accessories as
described in this operations manual. Failure
to comply with this can be hazardous.
REPLACING DISC BRUSHES OR PAD DRIVER
Tilt the machine backwards and place it on the
kickstand for replacing brushes (F1) underneath
the front of the machine. The kickstand is on the
front left side (seen from operators view).
All disc brushes and pad holders are removed
by turning the left one clockwise and right one
counter-clockwise and by pulling them
downwards.
To insert the brushes or pad holders, place the
pins on the brushes into the holes of the drive
disc underneath the machine. Fix the brushes or
pad holders by quickly turning the left one
counter-clockwise and the right one clockwise.
Important
•The direction of rotation of the left brush is
clockwise and the right brush counter-
clockwise.
•The brush pressure can be adjusted with the
screw for adjusting the brush pressure (F2).

Safety, Operation and Maintenance Manual for Falcon (RA 530 B); Version 1.0 10
OPERATING THE AUTO-SCRUBBER (cont.)
REPLACING THE CYLINDRICAL BRUSH
To remove the cylindrical brush, remove two
screws on the metal plate on the right side of the
machine (C3). Pull the metal plate outwards.
The brush can be removed from the metal plate
by pulling it off. Mount the new brush onto the
metal plate and place back into the housing.
Make sure that the connections for correct fitting
of the brush, which are at the other end of the
housing fit onto the brush.
When the metal plate is correctly fitted, tighten
the two screws securely back into position.
WORKING WITH EXTERNAL TOOLS/ACCESSORIES
•Disconnect the hose between the recovery
tank cover and the squeegee assembly.
•Attach the vacuum hose used with the
external tool to the connector of the recovery
tank.
•Connect the solution hose used with the
external tool to the quick disconnect (C2).
•Set the solution flow rate (C1) to position „0“.
•Connect the external tool to the hoses.
•Push button for the pump (B6) and for the
vacuum motor (B4).
•Hard-to-reach areas, stairs and corners can
now easily be cleaned with the external tool.
FINISHING THE JOB
•Turn off the solution flow (B6).
•Turn off brushes (B5).
•Turn off vacuum motor (B4).
•Raise squeegee with lever (A10).
•Tilt the machine backwards and place it on
the kickstand (F1) underneath the front of the
machine. Remove brushes or pads and pad
driver and rinse thoroughly with clean water.
•Remove machine from kick-stand back to
normal upward position.
•Rinse and clean recovery tank cover with
clean water.
•Clean below the machine with a damp cloth.
•Fill solution tank with approximately 1 gallon
of clean water.
•Attach water drain hose to connector (C2).
•Set the solution flow rate (C1) to „0“.
•Turn on pump (B6).
•Pump out coming water into a bucket or a
drain.
•Clean entire machine with a damp cloth.
•Remove squeegee assembly from the holder
and clean it.

Safety, Operation and Maintenance Manual for Falcon (RA 530 B); Version 1.0 11
APPLICATIONS AND WORKING METHODS
1. Working methods Effective cleaning is achieved by
following a few guidelines,
combined with your own
experience in particular areas.
Correct use of special
accessories will increase the
cleaning effect. Some basic
instructions can be found below.
2. Applications The machine is suitable for:
•Deep cleaning of non-sensitive hard floors surfaces.
•Daily cleaning of non scratch-proof hard floor surfaces.
•Daily maintenance cleaning, normal soiled floors.
3. Chemicals •Basic cleaner, deep cleaner
•Floor cleaner, maintenance cleaner, oil and grease remover
•Floor cleaner, scented cleaner
4. Accessories •Squeegee assy.
•2 x disc scrub brushes
•1 x cylindrical brush
•Brush (soft)
•Pad driver
•Pad white
•Pad red
•Pad blue
•Pad black
•Battery (lead-acid and gel)
•Battery charger
FREEZING TEMPERATURE PRE-CAUTIONS
If it becomes necessary to store or transport the
unit where temperatures could drop below
freezing (32° F), the solution lines and valves
must be protected from freezing with a solution
of automotive radiator antifreeze.
1. Mix ½ gallon of water and ½ gallon of
anti-freeze and pour into the solution
tank.
2. Switch on machine with key switch (B1),
set the solution flow rate to “1” (C1) and
turn on solution pump (B6).
3. Let pump run until anti-freeze mixture is
coming out of machine.
4. To prevent damage to unit, allow the
auto-scrubber to reach room
temperature before using. The anti-
freeze MUST be flushed out of the
solution system with clean water before
auto-scrubber is used on a cleaning job;
otherwise, the floor may be damaged.
STORAGE OF AUTO-SCRUBBER
Always store the auto-scrubber in a dry,
protected area at temperatures above freezing.
This auto-scrubber should be stored in an
upright position. Objects should not be stored or
stacked on top of unit.
This unit should not be stored in vehicles or
areas where extreme heat or cold occurs.

Safety, Operation and Maintenance Manual for Falcon (RA 530 B); Version 1.0 12
MAINTENANCE AND REPAIR
•Only do maintenance work described in
this manual.
•Always use original spare parts.
•WARNING! Do not make any technical
alterations to auto-scrubber. This can
put your safety at risk and will cease the
warranty.
•Always contact authorized service
center or factory for other maintenance
and repair work.
After every use Weekly When required
Thoroughly flush solution lines
with clean water ●
Rinse solution and recovery tank
with clean water ●
Clean solution filter ●
Clean recovery tank filter ●
Clean squeegee assembly ●
Inspect squeegees for wear;
replace if necessary ●
Replace brushes / pad drivers ●
Check battery ●
Charge battery ●
If you maintain the machine carefully it will stay in good working condition for a long period of time.
Regularly check the machine for any wear and tear.
•Before repairing machine disconnect any chargers attached and unplug batteries from machine.
•Repairs and any type of service may only be done by an authorized service center or factory
personnel.
Always disconnect cord before
cleaning and maintaining the
auto-scrubber.
WARNING

Safety, Operation and Maintenance Manual for Falcon (RA 530 B); Version 1.0 13
INSTRUCTIONS FOR GEL AND LEAD-ACID BATTERIES
•Only carry out work on batteries
according to battery manufacturer’s
instructions.
•Wear safety glasses and clothing when
working on batteries.
•Observe the accident prevention rules
and regulations.
•Smoking is strictly prohibited.
•Keep battery away from open flames,
glowing objects and sparks, otherwise
there is a danger of explosion and fire.
•Immediately rinse any acid splashed
into eyes or onto skin out or off with
plenty of clean water. Then immediately
consult a physician.
•Wash out clothing contaminated with
acid with water.
•Avoid short circuits! Explosion and fire
hazard!
•WARNING! Metal parts in the battery
cells are always live. Therefore, do not
put/store objects or tools on the battery.
•Electrolyte is extremely caustic. Contact
with the electrolyte is not possible during
normal operation.
•In the event of destruction of the casing
of maintenance-free gel batteries, the
bound electrolyte released is just as
caustic as the liquid electrolyte.
•Acid and/or batteries filled with acid
must not be handled by children.
•Use only approved lifting and transport
equipment.
•Lifting hooks must not cause damage to
cells, connectors or connection
cords/cables.
1. Preparing for operation
•The batteries are to be checked to
ensure proper mechanical condition.
•Battery connectors and charging plugs
are to be connected to the proper
terminals, as otherwise the batteries and
the charging set may be destroyed.
•The connection with the battery
connectors of the machine and/or the
charger may take place only with the
key switch and/or the charger switch off.
Maintenance-free, sealed gel batteries:
The batteries are to be recharged
before being put into operation.
Lead-acid batteries:
For reasons of durability unfilled, pre-
charged lead-acid batteries should be
charged immediately before insertion.
Observe the battery manufacturer’s
instructions when doing so.
2. Discharging
•The vent openings in the machine must
not be closed or covered.
•Opening or closing of electrical
connections (e.g. plugs, connectors,
etc.) may take place only in the
currentless state with the main switches
off.
•In order to reach an optimum service
life, discharges are permissible only up
to the point at which a certain residual
capacity is reached.
•In order to avoid total discharge, the
controls of the machine contain an
automatic switch-off device which
switches off the main feed line in time
when cut-off voltage is reached and
signals this by means of a red warning
lamp. Discharged batteries are to be
charged immediately and must not be
left in the discharged state. This also
applies after partial discharging.
3. Charging
WARNING!
Only use chargers approved by Cleanfix for charging.

Safety, Operation and Maintenance Manual for Falcon (RA 530 B); Version 1.0 14
INSTRUCTIONS FOR GEL AND LEAD-ACID BATTERIES (cont.)
4. Maintenance
Maintenance-free,
sealed gel batteries Lead-acid batteries
Daily −Charge battery/batteries after every discharge or partial discharge
Weekly −Visual inspection for dirt and mechanical damage.
−Grease terminals with terminal grease (Vaseline) and check to ensure firm fit.
−No topping with water
is required for the entire
service life.
−The water consumption is influenced
by the operating conditions and the
charger used.
The water level should not fall below
the minimum mark. If necessary, top-
up with distilled water after charging.
5. Care
•Batteries are to be kept clean and dry at
all times in order to avoid leak currents
and sparking.
•For cleaning, remove batteries, wear
safety glasses and protective clothing.
Select the place of installation so that
dirty water produced during cleaning is
channeled to a suitable waste water
treatment plant.
•The cell plugs must not be unscrewed.
•The plastic parts of the batteries may
only be cleaned with water or cleaning
cloths soaked in water without additives.
After cleaning, the surface of the
batteries is to be dried (compressed air,
cleaning cloth).
6. Storage
•If batteries are taken out of service for
any length of time, they are to be stored
fully charged in a frost-free room.
•Due to the batteries’ spontaneous
discharging, recharging needs to be
done at regular intervals.
Maintenance-free, sealed gel batteries:
Gel batteries are to be recharged at
quarterly intervals.
Lead-acid batteries:
Lead-acid batteries are to be recharged
at least once a month.
7. Faults
If faults are found, the customer service staff must be informed promptly.
8. Disposal
Old batteries showing recycling symbols are re-usable commercial goods and must be channeled to
the recycling process.
All other batteries are to be disposed of as hazardous waste in accordance with existing regulations.
9. Warranty
Failure to comply with the operating and handling instructions, carrying out repairs using non-original
spare parts and attempts to carry out the repairs by the user lead to a loss of the right to make claims
under the warranty.

Safety, Operation and Maintenance Manual for Falcon (RA 530 B); Version 1.0 15
TROUBLESHOOTING
Symptom: Machine does not run! No power to the machine!
Problem: Batteries not correctly installed in machine.
Solution: Install batteries correctly in machine. Follow instructions give above (see page 8 + 11).
Problem: Internal fuse or FI protection switch tripped.
Solution: Check internal fuse and FI protection switch.
Problem: Power supply interrupted.
Solution: Have power supply checked by authorized technician.
Problem: Frayed cables, damaged plug or loose internal wiring.
Solution: Have an authorized service technician check cord and replace if necessary. Have an
authorized service technician open switch panel and check for loose wire connection.
Problem: Brush motor protection switch tripped.
Solution: Allow motor to cool, press motor protection switch pushbutton, put less clean water into
the tank.
Problem: Discharge signal transmitter has activated.
Solution: Charge batteries.
Symptom: Insufficient vacuuming power! Loss of vacuum!
Problem: Tank cover/dome not properly seated or gasket on dome damaged/worn out.
Solution: Reseat tank cover correctly or replace gasket.
Problem: Vacuum hose and squeegee assembly is clogged up with dirt, or hose is not correctly
inserted into squeegee assembly.
Solution: Remove dirt and re-attach vacuum hose.
Problem: Filter in recovery tank is clogged up.
Solution: Clean filter with clean water.
Problem: Recovery tank drain hose not properly closed.
Solution: Close properly.
Problem: Wrong angle of squeegee assembly.
Solution: Adjust angle of squeegee assembly.
Problem: Defective vacuum motor.
Solution: Have an authorized service technician replace vacuum motor.
Symptom: Poor cleaning performance!
Problem: Worn brush or pads.
Solution: Replace brush or pads.
Problem: Improper chemical for cleaning job or improper dilution.
Solution: Change chemical or adjust dilution.
Service and re
p
airs should onl
y
be
p
erformed b
y
an authorized service center.
WARNING

Safety, Operation and Maintenance Manual for Falcon (RA 530 B); Version 1.0 16
TROUBLESHOOTING (cont.)
Symptom: Motors (vacuum, brush & pump) will not run!
Problem: Faulty ON/OFF switch.
Solution: Have an authorized service technician replace switch or switches.
Problem: Loose wiring.
Solution: Have an authorized service technician trace and repair.
Problem: Faulty motor.
Solution: Have an authorized service technician replace motor.
Symptom: Little or no solution flow.
Problem: Solution lines blocked.
Solution: Flush out solution tank and lines with clean water.
Problem: Solution tank filter clogged.
Solution: Remove cover of solution line filter and clean filter screen.
Problem: Solution flow rate metering closed (set to pos. “0”).
Solution: Set to position 1 to 5.
Problem: Solution tank supply hoses kinked.
Solution: Inspect hoses.
Problem: Solution tank empty.
Solution: Refill solution tank.
Symptom: Squeegee assembly making stripes.
Problem: Worn squeegee blades.
Solution: Replace squeegee blades.
Problem: Dirt clogged under squeegee blades.
Solution: Clean squeegee blades.
Problem: Wrong angle of squeegee assembly.
Solution: Adjust angle of squeegee blades.
Symptom: Machine runs too fast or too slow
Problem: Screw for adjusting brush pressure (F2) incorrectly set.
Solution: Turn screw upwards = lift brushes (less pressure) machine runs slower.
Turn screw downwards = lower brushes (more pressure) machine runs faster.
Problem: Brushes are not touching the floor.
Solution: Lower the brushes with pedal.

Safety, Operation and Maintenance Manual for Falcon (RA 530 B); Version 1.0 17
TECHNICAL SPECIFICATIONS
Technical specifications
Technische Daten
Caracteristiques techniques
Voltage
Spannung
Tension
24 Volt DC
Runtime of batteries
Einsatzdauer pro Batterieladung
Autonomie par charge de batterie
ca./approx./env. 2-½ to 4 hrs.
Theoretical cleaning capacity
Theoretische Flächenleistung
Surface possible à nettoyer
1800 m2/h
Capacity solution tank
Inhalt Frischwassertank
Contenance réservoir eau fraîche
12 gal. / 45 lt.
Capacity recovery tank
Inhalt Schmutzwassertank
Contenance réservoir eau sale
16 gal. / 60 lt.
Cleaning path (2 brushes)
Arbeitsbreite
Largeur de travail
21 inches / 53 cm
Squeegee width
Saugbreite
Largeur d’aspiration
31.5 inches / 80 cm
Overall length
Gesamtlänge
Longueur hors-tout
41 inches / 104 cm
Overall height
Gesamthöhe
Hauteur hors-tout
39 inches / 99 cm
Overall width (machine)
Gesamtbreite (Gerät)
Largeur hors-tout (machine)
23 inches / 58 cm
Weight without batterie (with batteries)
Gewicht ohne Batterie (mit Batterie)
Poids sans batteries (avec batteries)
174 lbs. (300 lbs.) / 79 kg (136 kg)
Disc brushes
Tellerbürsten
Brosses plat
Ø 2 x 10 ½ inches / 2 x 270 mm
Walzenbürste
Cylinder brush
Brosses cylindrique
17 inches / 440 mm
Brush pressure regulation
Bürstendruckverstellung
Règlage de pression des brosses
35 – 70 lbs. / 16 - 32 kg
Traction
Antriebsart
Traction
with brushes
über Bürsten
par les brosses
Wassermenge
Waterflow
Quantité eau
0 – 0.8 gal./min. / 0 - 3 lt/min
Waterlift of vacuum motor
Unterdruck Saugmotor
Depression du moteur d’aspiration
63 inches / 180 mbar

New Machine Warranty
Copyright ©2007 Cleanfix Cleaning Systems Inc.
All rights reserved. Content is subject to change without notice. Version 5.1.
1. Limited Warranty. These terms and conditions of the New
Machine Warranty are a material part of the agreement
between Buyer and Cleanfix Cleaning Systems Inc., a New
Jersey-based corporation (hereinafter “Cleanfix”), and
supersede warranty terms and conditions in documentation
submitted by Buyer to Cleanfix. Cleanfix warrants new
machines of its manufacture against defects in material and
workmanship under normal use and service to the original end-
user purchaser. No person, agent, representative or distributor
is authorized to give any warranties on behalf of Cleanfix, or to
assume any other liability for Cleanfix in connection with any
Cleanfix machine. Cleanfix reserves the right to make changes
to its equipment without notice. The warranty coverage is
subject to the conditions below.
2. Registration of Warranty. The warranty commences on the
date of purchase by the original end-user from an authorized
Cleanfix distributor or agent, subject to proof of purchase. The
warranty commences latest, however, after six (6) months of
the purchase date by the authorized distributor or agent of
Cleanfix. Any new Cleanfix machine must be registered
immediately with Cleanfix by the original end-user customer by
fully completing and returning the warranty registration form to
Cleanfix. If proof of purchase cannot be identified through a
completed and returned warranty registration form, the warranty
commences from the date of sale to the authorized Cleanfix
distributor.
3. Warranty Coverage. Subject to conditions outlined below,
Cleanfix warrants rotationally molded PE housings and tanks on
all of its machines to be free from defects in material and
workmanship, under normal use and service for ten (10) years
to the original end-user.
Subject to conditions outlined below, Cleanfix warrants
fiberglass housings and tanks on all of its machines to be free
from defects in material and workmanship, under normal use
and service for three (3) years to the original end-user.
Under this warranty Cleanfix warrants the performance of non-
polyethylene and non-fiberglass components to be free from
defects and workmanship for up to one (1) year to the original
end-user. Parts replaced or repaired under this warranty are
warranted for the remainder of the original warranty period.
(See table below)
Rotationally molded PE housings and tanks 10 years
Fiberglass housings and tanks 3 years
Vacuum motors, brush motors, pump motors,
boards and electronics 1 year
Battery and battery charger* 1 year
* The 1 year period warranty commences with the purchase date by the
authorized distributor or agent of Cleanfix.
Service labor charges are covered for up to one (1) year from
the date of purchase through an authorized Cleanfix service
provider. A total maximum of one (1) hour travel time - equal to
one (1) hour labor rate - is covered for large machines, namely
Falcon, Raven, Eagle and larger for 90 days. No coverage is
extended for diagnosis time.
4. Product Exceptions and Exclusions. ALL vacuum cleaners
and air movers are warranted for one (1) year. No warranty is
extended for wear items, accessories and attachments
including, but not limited to, belts, brushes, pad holders,
capacitors, carbon brushes, wheels, casters, glides, clutches,
cords, filters, filter bags, gaskets, hoses, rectifiers, switches,
float switches, valves, squeegees, bearings, pulleys, relays,
actuating cables, wheels, tires, vacuum cleaner attachments.
The purchaser is assured that meticulous care has been
exercised in the selection, assembling and testing of these parts
and components before shipping. No warranty is extended for
machine finish, labels and other cosmetic parts or features.
5. Stated Warranties. Stated warranties are in lieu of all other
warranties, expressed or implied. Any statutory implied
warranties, including any warranty of merchantability or fitness
for a particular purpose, are expressly limited to the duration of
the written warranty. Cleanfix will not be liable for any other
damages, including but not limited to incidental, indirect or
special consequential damages arising out of or in connection
with the furnishing, performance, use or inability to use the
machine, including damages to persons or property. This
remedy shall be the exclusive remedy of the buyer. The
warranty is limited to the warranty.
6. Warranty is null and void for the following.
•Damage, defects, malfunction or other failures caused by
not using the electric current indicated on the spec plate,
including the use of improper extension cords.
•Damage or defect caused by accident, misuse, neglect,
abuse, fire etc., including use of incompatible or corrosive
chemicals or overloading of capacity.
•Failure caused by lack of proper maintenance and care,
including proper machine clean-up after use, proper
charging procedures for batteries.
•Failure caused by loss, damage or removal of protective
components, including, but not limited to, filters and filter
screens, tank covers and lids, skirts and bumpers, float
shut-off assemblies.
•Freezing of any water or chemical related components
(this will void all warranties on water or chemical related
components, internal or external, of the product).
•Deposits and buildup in any water or chemical related
systems due to hardness in water (this will void all
warranties on affected systems).
•Any design alterations, adjustments and/or repairs
performed on the equipment by an organization not
authorized or specified by Cleanfix.
•Use of any parts not approved by Cleanfix, including, but
not limited to, batteries, battery charger, filter bags, belts,
electric components, motors.
•Use of machine for a purpose other than which it was
designed and intended, and use of machine in excess of
design duration.
•Damage in transit.
7. Warranty Claim Procedure. If a difficulty develops during
the specified warranty period, contact the authorized Cleanfix
distributor/partner from whom the machine was originally
purchased. Do not return any products to Cleanfix unless
explicitly authorized by Cleanfix. Cleanfix may elect to require
the return of the machine or component(s) to validate the claim.
Any defective machine or component to be returned must be
shipped freight pre-paid to an authorized Cleanfix
distributor/service center.
Cleanfix will provide and charge for replacement parts, including
shipping and handling, to the original purchaser through an
authorized service center. If the part is returned within 30 days
and is found defective, the purchaser will be credited for the
cost of the replacement part including shipping and handling.
8. Term. This warranty is valid for all products sold after
January 1, 2006. A product sold before that date will be covered
by the limited warranty in effect at the date of sale to the original
purchaser.
This manual suits for next models
1
Table of contents
Other Cleanfix Scrubber manuals
Cleanfix
Cleanfix FloorMac Guide

Cleanfix
Cleanfix RA 410 E User manual
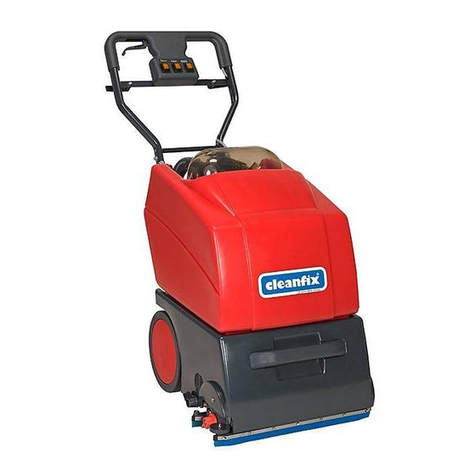
Cleanfix
Cleanfix RA 410 E User manual
Cleanfix
Cleanfix Robo 40 User manual
Cleanfix
Cleanfix RA805 User manual
Cleanfix
Cleanfix Sparrow Guide

Cleanfix
Cleanfix MasterCraft RA-300 Guide
Cleanfix
Cleanfix RA 330 IBC Instruction Manual
Cleanfix
Cleanfix RA705 IBC User manual
Cleanfix
Cleanfix RA565 IBCIBD User manual
