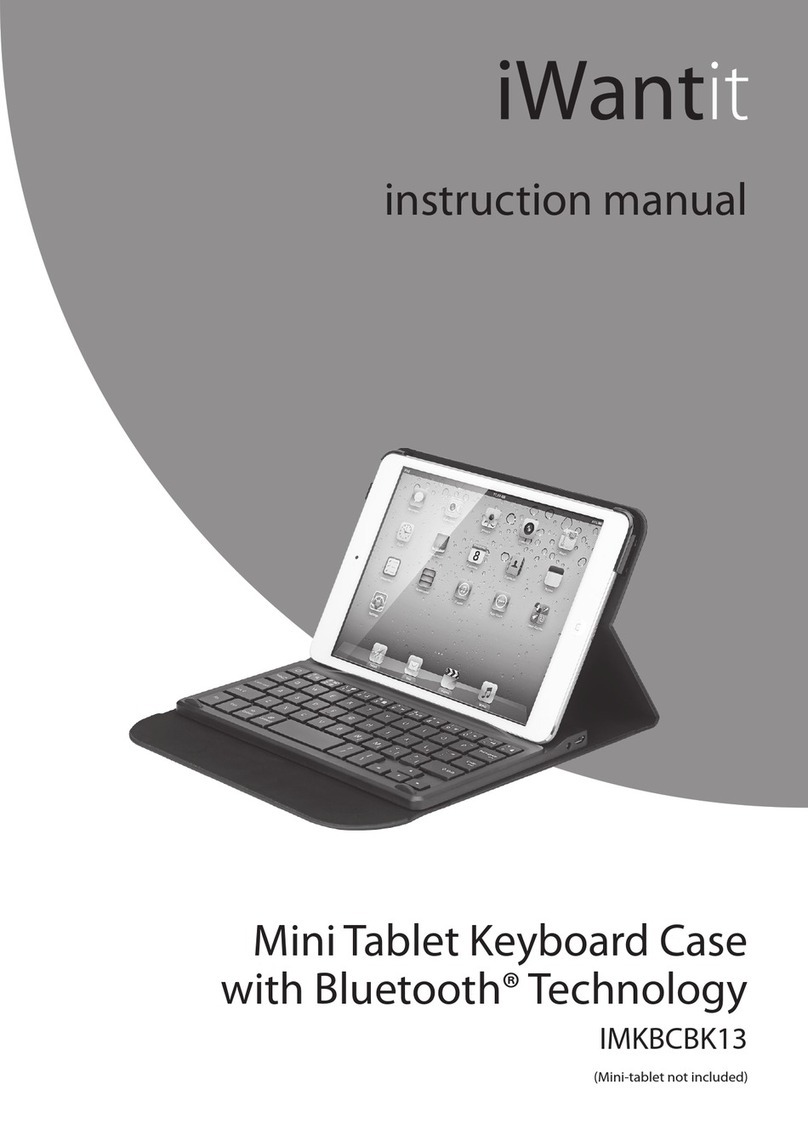
Cleankeys XWS-CKPXXW User manual

Wireless Keyboard
User Guide

2Cleankeys Keyboard User Guide

Cleankeys Keyboard User Guide 3
Contents
1. Regulatory information 4
2. About the Cleankeys®keyboard 5
2.1. Specications 5
2.2. Opening the Cleankeys box 5
3. Connecting the Cleankeys keyboard to a computer 7
3.1. Connecting the Cleankeys keyboard using a wireless connection 7
3.2. Connecting the Cleankeys keyboard using the USB cable 7
3.3. Mounting 8
4. Using the Cleankeys keyboard 8
4.1. Typing on the Cleankeys keyboard 8
4.2. Key indentations 8
4.3. Low Battery Mode 8
5. Pausing the Cleankeys keyboard 9
6. Cleaning 9
7. Disinfecting 9
8. Infection control 9
9. Checking the battery level 10
10. Charging the Cleankeys keyboard 10
11. Changing the Cleankeys keyboard volume 10
12. Changing the sensitivity of the keys 11
13. Updating the Cleankeys keyboard rmware 12
13.1. Installing the Cleankeys Update Utility 12
13.2. Using the Cleankeys Update Utility 12
13.3. Using the Cleankeys Update Utility to manually select the rmware
version 13
14. Troubleshooting 14
15. Tap Beta Test Program 18
15.1. Tap sensing 18

4Cleankeys Keyboard User Guide
1. Regulatory information
European Union Directives Conformance Statement
This device complies with the essential requirements and other
relevant provisions of directive 2004/108/EC.
FCC Rules – Part 15
Keyboard FCC registration number: XWS-CKPXXW
Wireless Receiver FCC registration number: XWS-CKD
This device complies with Part 15 of the FCC Rules. Operation is subject to the
following two conditions: (1) This device may not cause harmful interference, and
(2) this device must accept any interference received, including interference that
may cause undesired operation.
Industry Canada (IC) Notice
This Class B digital apparatus complies with Canadian ICES-003.
Cet appareil numérique de la classe B est conforme à la norme NMB-003 du
Canada.
Keyboard Certication Number IC: 8721A-CKPXXW
Wireless Receiver Certication Number IC: 8721A-CKD
WARNING
Changes or modications to this equipment not approved by Cleankeys Inc can
cause this equipment to not comply with
Part 15 of the FCC rules and void the user’s authority to operate this equipment.
Cleankeys corporate address
Cleankeys Inc.
4664 - 99 Street
Edmonton, Alberta
T6E 5H5 Canada
+1-780-702-1473

Cleankeys Keyboard User Guide 5
2. About the Cleankeys®keyboard
The Cleankeys keyboard is the ideal keyboard and trackpad for infection controlled
environments, or any place where the computer keyboard can easily become
contaminated.
The Cleankeys keyboard has a smooth top surface made from glass or acrylic. The
base is made of ABS plastic. This makes it one of the world’s easiest keyboards to
clean. Just spray and wipe, and the keyboard is spotless in seconds. The Cleankeys
keyboard is also extremely resistant to microbial growth.
The keys are both touch and tap sensitive and have an audible click for feedback.
The sensitivity can be adjusted, allowing the Cleankeys keyboard to be touched
directly or through gloves.
2.1. Specications
Keyboard Size: 14.68” x 5.64” x 0.68” (373mm x 143mm x 17mm)
Wireless Receiver Size: 1.89” x 0.68” x 0.35” (48.0mm x 17.3mm x 8.9mm)
Keyboard Weight: Glass: 2.0 lbs (0.91 kg), Acrylic: 1.6 lbs (0.73 kg)
Wireless Receiver Weight: 0.21 oz (6 gr)
Color: White
Cable: 6.8 ft. (2.0m)
Interface: 2.4 GHz wireless radio
Keyboard (Charging) Power: 5V @ 1A (max)
Wireless Receiver Power: 5V @ 22mA
Supported operating systems: Windows®, Mac, Linux, Unix
Regulatory approvals: FCC, CE, ROHS
Mounting option: Three #6-32 inserts spaced in a MIS-D 75 Vesa standard
pattern
Operating Environment: 41º F (5º C) to 95º F (35º C)
Warranty: Two year (extended options available)
2.2. Opening the Cleankeys box
The following items are in your Cleankeys keyboard box.
• Cleankeys keyboard
• wireless receiver
• battery charger
• USB cable
• Quick Reference Card
• 3 - #6-32 screws and washers
If any of these items are missing, contact you local distributor.

6Cleankeys Keyboard User Guide
Cleankeys keyboard
Back of the Cleankeys keyboard
Wireless receiver
Power
button
USB
port
Pairing
button
Pairing
LED
Pairing
button

Cleankeys Keyboard User Guide 7
3. Connecting the Cleankeys keyboard to a computer
The keyboard can be connected to the computer using a wireless connection or a
USB cable.
3.1. Connecting the Cleankeys keyboard using a wireless
connection
To connect the keyboard using the wireless connection, connect the wireless
receiver to the computer and then link the wireless receiver with the keyboard.
3.1.1. Connecting the wireless receiver
1. Turn on the computer.
2. Plug the wireless receiver into a USB port on the computer.
3. Wait for the computer to recognize the wireless receiver.
3.1.2. Linking the wireless receiver to the Cleankeys keyboard
Note: The keyboard and wireless receiver have been linked at the factory, so
there is no need to link them when you rst install the keyboard.
1. Press the power button on the keyboard.
If the keyboard does not turn on, the built in battery may need to be charged.
See 10. Charging the Cleankeys keyboard on page 10.
2. Press the Pairing button on the wireless receiver.
The LED on the wireless receiver begins to ash.
3. Press the Pairing button on the keyboard.
The wireless LED on the keyboard ashes at least once.
When the wireless receiver and the keyboard have nished pairing, the LEDs
on the wireless receiver and the keyboard stop ashing.
Note: The Pairing button on the keyboard must be pressed within 10 seconds
of pressing the Pairing button on the wireless receiver.
4. To verify the keyboard is working, touch the
caps
key.
The
caps
LED will light if the keyboard is recognized by the computer.
3.2. Connecting the Cleankeys keyboard using the USB cable
1. Turn on the computer.
2. Plug the smaller end of the USB cable into the USB port on the keyboard.
3. Plug the larger end of the USB cable into a USB port on the computer.
4. Press the power button on the keyboard.
5. Wait for the computer to recognize the keyboard.
6. To verify the keyboard is working, touch the
caps
key.
The
caps
key LED will light if the keyboard is recognized by the computer.

8Cleankeys Keyboard User Guide
3.3. Mounting
The keyboard can be placed on a counter top or mounted to a wall or bracket.
There are three #6-32 mounting inserts on the bottom of keyboard. These inserts
are compatible with the MIS-D TS VESA standard pattern. Using these mounting
inserts, the keyboard can be mounted at any angle, including vertical.
4. Using the Cleankeys keyboard
The Cleankeys keyboard has several features that are not found on standard
keyboards.
4.1. Typing on the Cleankeys keyboard
Although the keys on the Cleankeys keyboard do not move, the same typing
technique is used on the Cleankeys keyboard that is used on a standard keyboard.
The Cleankeys keyboard accomplishes this by using touch sensing technology.
4.1.1. Touch sensing
The Cleankeys keyboard uses touch capacitance technology to sense the touch of
a human nger. This means that ngers must be used to touch the keys. Touching
or tapping the keyboard with another object, a pencil for example, will not activate
a key.
However, the Cleankeys keyboard can be used with surgical gloves, or any type of
glove for that matter. Just adjust the sensitivity accordingly. See 12. Changing the
sensitivity of the keys on page 11.
4.2. Key indentations
The surface of the acrylic keyboard has shallow indentations over each key.
These indentations help to locate the position of the keys without looking at the
keyboard.
The surface of the glass keyboard does not have these indentations.
4.3. Low Battery Mode
The red Battery LED at the top of the keyboard begins to ash when the battery
charge is low.
The red LED ashes slowly (about once per second) when there is 20% of the
battery power remaining. The red LED ashes more quickly (about twice per
second) when there is 10% of the battery power remaining.
This feature is only available when using a wireless connection for the keyboard.

Cleankeys Keyboard User Guide 9
5. Pausing the Cleankeys keyboard
Before the keyboard is cleaned or disinfected, the keyboard should be paused.
When the keyboard is paused, it does not send characters when the keys are
touched or tapped. This allows for cleaning of the keyboard surface without
inadvertently pressing keys.
To pause the keyboard, hold fn and touch esc .
The pause LED ashes when the keyboard is paused.
When nished cleaning the keyboard, hold fn and touch esc .
The pause LED turns off.
6. Cleaning
The keyboard is made from ABS plastic and acrylic, or glass. It can be cleaned
with anything suitable for those surfaces. For the glass or acrylic, use a standard
glass cleaner. For the base, use any standard counter-top cleaners. Do not use
abrasive cleaners on the keyboard.
The keyboard is splash-proof, but should not be immersed in water.
Before cleaning the keyboard, hold fn and touch
esc
to pause keyboard
operation. The pause LED ashes when the keyboard is paused.
When nished cleaning keyboard, hold fn and touch esc to return the keyboard
to normal operation. The pause LED turns off.
7. Disinfecting
Refer to the Cleankeys Inc. web site for a list of recommended disinfectant
solutions.
Be sure to hold fn and touch esc to pause the keyboard operation before
disinfecting the keyboard. When you are nished, hold fn and touch esc to
return the keyboard to normal operation.
8. Infection control
The Cleankeys keyboard is a unique computer keyboard for use in any
environment where there is a high risk of contamination. Unlike hygienic keyboard
competitors, Cleankeys keyboard incorporates a smooth, at, non-porous surface
that is easy to clean. It can be wiped clean in seconds, substantially increasing
infection control and reducing staff time spent cleaning the keyboard.
Although the key indentations are easy to nd with your ngers, they are shallow
enough that they do not create cleaning shadows on the surface.
The integrated trackpad on the Cleankeys keyboard also provides signicant
advantages over a separate keyboard and mouse. Not only is there only one
device to clean and disinfect, the trackpad is easier to clean than a mouse. A
single device also reduces the risk of cross contamination.

10 Cleankeys Keyboard User Guide
9. Checking the battery level
To check the amount of charge that is left in the keyboard battery, hold fn and
touch
num
. The indicator LEDs, in the box labelled with -and +, light to show
the current battery level. Five LEDs means the battery is fully charged. One LED
means the battery should be charged soon.
10. Charging the Cleankeys keyboard
The keyboard has a built in rechargeable battery. This battery provides power to
the keyboard when using a wireless connection.
When using a USB cable to connect the keyboard, the USB port on the computer
provides the power for the keyboard. The USB port also charges the keyboard
battery. If the USB port is charging the battery, the red battery LED is lit. When
the battery is fully charged, the green battery LED is lit.
To charge the keyboard battery using the charger:
1. Plug the charger into a wall outlet.
2. Plug the wide end of the USB cable into the charger.
3. Plug the small end of the USB cable into the USB port on the keyboard.
When the battery is charging, the red battery LED is lit.
When the battery is fully charged, the green battery LED is lit.
11. Changing the Cleankeys keyboard volume
The keyboard uses sound to indicate various actions, such as key presses. The
volume of these sounds can be adjusted to match personal preference or working
environment.
To change the volume of the keyboard:
1. Hold fn and touch F9 or F10 .
The indicator LEDs, in the box labelled with -and +, light to indicate the
current volume level.
The number of LEDs that light indicates the current volume level. Five LEDs for
high volume. One LED for low volume.
2. Hold fn and touch F9 to lower the volume of the keyboard.
Hold fn and touch F10 to increase the volume of the keyboard.
To turn the volume of the keyboard off, hold
fn
and touch F9 until all ve
LEDs are off.

Cleankeys Keyboard User Guide 11
12. Changing the sensitivity of the keys
The Cleankeys keyboard uses touch capacitance technology to sense the touch of
a human nger. The sensitivity of the touch capacitance can be changed. Typically,
the sensitivity must be increased when using the Cleankeys keyboard with gloves.
The sensitivity can be set to a value from 1 to 5. When the sensitivity is 5, the
Cleankeys keyboard can sense a very light touch. When the sensitivity is 1, more
contact with the key is needed.
To change the sensitivity:
1. Hold fn and touch
F11
or F12 .
The indicator LEDs, in the box labelled with -and +, light to indicate the
current sensitivity.
The number of LEDs that light indicates the sensitivity level. Five LEDs for high
sensitivity. One LED for low sensitivity.
2. Hold fn and touch F11 to lower the sensitivity.
Hold fn and touch F12 to raise the sensitivity.
The sensitivity of the Cleankeys keyboard can be changed, but touch sensing
cannot be turned off.

12 Cleankeys Keyboard User Guide
13. Updating the Cleankeys keyboard rmware
Firmware is the software that is installed on the keyboard. This rmware provides
the features and functionality that is available on the keyboard. Occasionally, the
rmware may need to be updated to provide additional functionality or improve
performance.
To update the rmware, the Cleankeys Update Utility is required.
13.1. Installing the Cleankeys Update Utility
The Cleankeys Update Utility is available from the Cleankeys web site.
Before installing the Cleankeys Update Utility, make sure that the computer is
using the Windows XP, Windows Vista or Windows 7 and has the .Net Framework
2.0 or later installed. As well, ensure that the rewall software allows basic web
connections while the utility is running.
1. Go to the Cleankeys web site (www.cleankeysinc.com).
2. Click the link to go to the download page.
3. Download the Cleankeys Update Utility to a folder on the computer.
4. Double-click the downloaded le and follow the instructions to install the utility.
13.2. Using the Cleankeys Update Utility
1. Connect the keyboard to the computer using a USB cable.
2. Check the keyboard power light to ensure the keyboard is turned on. If the
power light is not on, press the power button to turn on the keyboard.
3. Launch the Cleankeys Update Utility.
The Welcome screen appears.
4. Click the Next button.
The Select Update Method window appears.
5. Click the Automatically Download Latest Firmware option.
6. Click the Next button.
The Cleankeys Update Utility starts downloading the latest version of
compatible rmware for the attached keyboard.
7. When the Conrm Update window appears, click the Next button.
The Cleankeys Update Utility starts to update the keyboard. When the update
it complete, the keyboard resets and start using the new rmware.
8. When the Update Successful window appears, click the Finish button.

Cleankeys Keyboard User Guide 13
13.3. Using the Cleankeys Update Utility to manually select the
rmware version
A specic version of the Cleankeys rmware can be installed. The desired version
of rmware must reside on the computer. These les have cup as a le extension.
CAUTION:
Due to different keyboard layouts and functions, it is crucial that the selected
rmware version is compatible with the keyboard. Updating the keyboard with an
incompatible rmware version can result in erratic behavior and/or the disabling
of features. It can even cause the keyboard to stop functioning. Use caution when
performing manual updates, and only under the advice of someone familiar with
Cleankeys keyboards.
1. Connect the keyboard to the computer using the USB cable.
2. Check the keyboard power light to ensure the keyboard is turned on. If the
power light is not on, press the power button to turn on the keyboard.
3. Launch the Cleankeys Update Utility.
The Welcome screen appears.
4. Click the Next button.
The Select Update Method window appears.
5. Click the Browse Computer for Firmware option.
6. Click the Next button.
The Get Firmware window appears.
7. Move to the folder that contains the rmware and then click on the rmware to
install.
8. Click the Next button.
The Cleankeys Update Utility starts downloading the rmware for the attached
keyboard.
9. When the Conrm Update window appears, click the Conrm button.
The Cleankeys Update Utility starts to update the keyboard. When the update
it complete, the keyboard will reset and start using the new rmware.
10. When the Update Successful window appears, click the Finish button.

14 Cleankeys Keyboard User Guide
14. Troubleshooting
If the keyboard is not working as expected, try one of the following procedures to
correct the problem.
14.3.1. The keyboard does not type and is connected using a USB cable
1. Check the keyboard power light to ensure the keyboard is turned on. If the
power light is not on, press the power button to turn the keyboard on.
2. Check the pause light to see if the keyboard has been paused. If pause light is
ashing, hold fn and touch
esc
to unpause the keyboard.
3. Try changing the sensitivity level of the keyboard to its highest level (level 5).
4. Check the USB cable to make sure it is properly connected to both the
keyboard and the computer.
5. Check the operating system’s USB device table (for example, Device Manager
for Windows) to make sure the keyboard is enumerated properly as an HID.
Refer to the operating system user manual or help le for information about
how to check the HID.
6. Windows, and some other operating systems, may cache the USB Descriptor
tables and it is possible for these tables to get corrupted. If this happens,
remove the Cleankeys entry from the table and restart the computer.
14.3.2. The keyboard does not type and is using a wireless connection
1. Check the keyboard power light to ensure the keyboard is turned on. If the
power light is not on, press the power button to turn the keyboard on.
2. Check the wireless LED on the keyboard. The wireless LED ashes when there
is a problem with the wireless communication.
3. Check that the wireless receiver is plugged into the computer and enumerated
properly as an HID device. Refer to your operating system user manual or help
le for information about how to check the HID.
4. Check the pause light to see if the keyboard has been paused. If pause light is
ashing, hold fn and touch
esc
to unpause the keyboard.
5. Try changing the sensitivity level of the keyboard to its highest level (level 5).
6. Try to link the keyboard and the wireless receiver. See 3.1.2. Linking the
wireless receiver to the Cleankeys keyboard on page 7.
7. Windows, and some other operating systems, may cache the USB Descriptor
tables and it is possible for these tables to get corrupted. If this happens,
remove the Cleankeys entry from the table and restart the computer.

Cleankeys Keyboard User Guide 15
14.3.3. The wireless receiver does not ash during pairing
1. When the Pairing button is pressed a click should be felt. If there is no click, try
using a paperclip or pin to press the button.
2. Remove the wireless receiver from the USB port and plug it back in.
Verify if the wireless receiver has been enumerated.
3. Remove the wireless receiver from the USB port and plug it into a different
USB port.
Verify if the wireless receiver has been enumerated.
4. Unplug the wireless receiver from the USB port.
Remove the existing HID entry from the HID table cache (for example, the
Windows Device Manager).
Restart the computer.
Plug the wireless receiver into a USB port.
14.3.4. The keyboard does not ash during pairing
1. Verify that the keyboard is not connected to the computer using a USB cable.
Connecting a USB cable between the keyboard and computer disables the
wireless connection. The keyboard can be paired with the wireless receiver
when the charger is connected to the keyboard.
2. Check the keyboard power light to ensure the keyboard is turned on. If the
power light is not on, press the power button to turn the keyboard on.
3. Verify that the keyboard has enough battery power. See 9. Checking the
battery level on page 10.
14.3.5. The keyboard does not pair with the wireless receiver
1. Check that the wireless receiver is plugged in a USB port on the computer.
2. Check the keyboard power light to ensure the keyboard is turned on. If the
power light is not on, press the power button to turn the keyboard on.
3. Make sure to press the Pairing button on the keyboard within 10 seconds of
pressing the Pairing button on the wireless receiver.
14.3.6. The keyboard does not charge when connected using a USB cable
1. Check to make sure that the computer is turned on and is not in standby or
sleep mode. These modes do not provide enough power through the USB cable
to charge the keyboard battery.
2. Check that the USB cable is properly connected to both the keyboard and the
computer.

16 Cleankeys Keyboard User Guide
14.3.7. The keyboard does not charge when connected to the charger
1. Make sure to use only the charger that came with the keyboard.
The battery light will ash if the charger is not the designated keyboard
charger.
2. Check that charger is plugged into the wall and the USB cable is properly
connected to the keyboard and the charger.
3. If the LED on the charger ashes, it indicates an error.
14.3.8. The keyboard does not make any sound
1. Hold
fn
and touch F9 to check the volume setting of the keyboard.
2. Hold
fn
and touch num to check that the battery level on the keyboard.
Charge the battery if the battery level is low.
14.3.9. The keyboard does not turn on
The battery level may too low to power the keyboard. Charge the battery. See 10.
Charging the Cleankeys keyboard on page 10.
To continue working while the battery is charging, connect the charger to the
keyboard and press the power button twice.
14.3.10. The caps or num light does not turn on
Pressing the caps or num key changes the Caps Lock or Numlock mode in the
operating system. The lights on the caps and num keys are turned on or off to
reect the mode in the operating system.
1. Check the keyboard power light to ensure the keyboard is turned on. If the
power light is not on, press the power button to turn the keyboard on.
2. Check that the keyboard is connected to the computer using either the USB
cable or the wireless receiver.
3. Check that the operating system is not stalled or frozen.
14.3.11. The numeric pad does not type numbers but moves the cursor
Check to see if the keyboard is in Numlock mode.
14.3.12. The keyboard types but the trackpad does not move the cursor
Check that the trackpad HID is not disabled in the Device Manager.

Cleankeys Keyboard User Guide 17
14.3.13. The Cleankeys Update Utility cannot nd the Cleankeys keyboard
When the Cleankeys Update Utility starts, it searches for a specic USB device that
has been enumerated with a predened Vendor ID and Product ID.
1. Verify that the keyboard is plugged into the computer with a USB cable.
2. Try to get the system to re-enumerate the keyboard by unplugging the USB
cable and plugging it back into the keyboard.
3. Check the keyboard power light to ensure the keyboard is turned on. If the
power light is not on, press the power button to turn the keyboard on.
14.3.14. The rmware is incompatible
The Cleankeys Update Utility is designed to check for compatibility between the
rmware selected and the device. It will prevent any rmware updates that are
not compatible with the device that is plugged in.
14.3.15. After updating the rmware, the keyboard is behaving strangely
Check to make sure that the rmware update is compatible with the keyboard. It
is possible to force a specic rmware update by downloading a rmware update
and then selecting the option to manually upload that rmware to the keyboard.
14.3.16. Firmware updates fail repeatedly on the keyboard
The update utility uses some basic read and write operations to upload the
rmware to the keyboard. If the update fails in the middle of this process
repeatedly, this indicates that there is something wrong with the device hardware
itself. Please consult Technical Support.

18 Cleankeys Keyboard User Guide
15. Tap Beta Test Program
Tap sensing is being offered on the Cleankeys keyboard as a Beta test.
With touch and tap sensing, unlike just touch sensing, the keys must be tapped
with to type characters. This not only provides a more familiar feel, it also allows
the users to rest their ngers on the keyboard.
To participate in the Tap Beta test program, visit our web site at
www.cleankeysinc.com.
15.1. Tap sensing
When tap sensing is turned on, the desired key must be tapped, not just touched.
When tap sensing is turned off, the Cleankeys keyboard uses only touch sensing to
sense a keystroke. If tap sensing is off, do not rest ngers on the keyboard as this
will type each key that you touch.
To turn tap sensing on or off:
1. Touch and hold fn .
The current state of tap sensing appears on the LED above tap on/off.
If the LED is on, tap sensing is on.
If the LED is off, tap sensing is off.
2. To change the current state of tap sensing (either from off to on, or on to off),
hold fn and touch F8 .
Document version 01
Table of contents
Other Cleankeys Keyboard manuals
