ClearView PA700 Operator's manual

Important
This manual must be read and fully understood
before using the Air unit. The manual must be
retained for future reference.
CE Approved to BS EN12941 : 1998
Powered Air Purifying Respirator Device,
Including a Welding Helmet with grinding
capabilities, Class TH2 P R SL Device,
CE0082.
Respiratory Protection (PAPR) for welding
User Instruction Manual
Protection respiratoire à ventilation assistée
(PAPR) pour soudage Système complet
Guide de l'utilisateur
Important
Ce manuel doit être lu et complètement
compris avant d'utiliser l'unité de ventilation. Le
manuel doit être conservé pour consultation
ultérieure.
Approuvé CE - BS EN12941 : 1998
Appareil de protection respiratoire à
ventilation assistée (PAPR), incluant un
masque de soudage pouvant convenir au
meulage, Classe TH2 P R SL Device,
CE0082.

ClearView Welding PAPR - User instruction manual02
Please read these instructions carefully before unpacking your PA700 product. Failure to
comply with the instructions in this leaflet may void your warranty and adversely affect your
health. If you have any questions regarding the suitability of this product to your task. please
contact an occupational hygienist or call the manufacturers technical help line.
Address and Telephone number information is printed at the back of this leaflet.
Compulsory Information for the use of a
powered respirator with hood type head unit
Veuillez lire ces instructions attentivement avant de déballer votre produit PA700. Le fait de ne
pas se conformer aux instructions de ce manuel pourrait annuler votre garantie et nuire à votre
santé. Pour toute question concernant la compatibilité de ce produit avec la tâche que vous
souhaitez exécuter, veuillez contacter un hygiéniste du travail ou téléphoner au soutien
technique du fabricant.
Les adresses et numéros de téléphone sont indiqués au verso de ce manuel.
Informations obligatoires associées à
l'utilisation d'un dispositif de protection
respiratoire à ventilation assistée comportant
une protection de tête de type cagoule

03
PAPR de soudage ClearView - Manuel d'instructions de l'utilisateur
Contents
page
4 1. Introduction
4 2. Approvals
4 3. Preconditions for use
6 4. System Overview
7 5. Unpacking / Assembly / Usage
12 6. Before Use
14 7. Maintenance / Cleaning
15 8. Fault finding
16 9. Storage and transportation
17 10. List of Parts and Assembly Drawing
18 11. Technical data
19 12. Warranty
Table des matières
page
20 1. Introduction
20 2. Approbations
20 3. Conditions préalables d'utilisation
22 4. Survol du système
23 5. Déballage / Assemblage / Utilisation
28 6. Avant l'utilisation
30 7. Entretien / Nettoyage
31 8. Diagnostique des problèmes
32 9. Entreposage et transport
33 10. Liste des pièces et dessin d'assemblage
34 11. Données techniques
35 12. Garantie

ClearView Welding PAPR - User instruction manual04
PA700 is a respiratory protective system which
is based on the principle of circulated over
pressured air in the hood. The belt-mounted
blower unit delivers air through a filter and via
an air hose into a headpiece (a hood or
PA700 has been designed and manufactured
to comply with EN12941: 1998 as a TH2 P R
SL device.
BS4275 (Guide to implementing an effective
respiratory protective device program), which
the user is advised to read, defines an EN12941
TH2 P R SL device as offering an Assigned
Protection Factor of 20.
PA700 can only provide this level of protection
when used with filters provided by the
manufacturer marked "PA700" and
"EN12941:1998 TH2 P R SL".
PA700 is certified with Welding helmet OHE410
which is certified to EN 175 B.
PA700 is manufactured under ISO 9001:2000
Quality System.
1.Introduction
2. Approvals
mask). The supply of filtered air creates positive
pressure inside of the headpiece, which prevents
the external contaminated air from entering the
user's breathing zone.
3. Preconditions for use
This Respirator must be used strictly in
accordance with this instruction leaflet and the
instructions supplied with the corresponding
head-units (hoods).
The user must read and understand all the
following "Instructions for Use" well to be able
to use the respiratory protective system
correctly.
When the blower unit is switched off little or no
respiratory protection is to be expected. When
the blower unit is switched off a rapid buildup of
carbon dioxide and depletion of oxygen within
the head unit may occur and so it is essential not
to use the blower unit when it is switched off.

05ClearView Welding PAPR - User instruction manual
At very high work rates the pressure in the
device may become negative at peak inhalation
flow. PA700 systems are for use only by
competent, trained personnel.
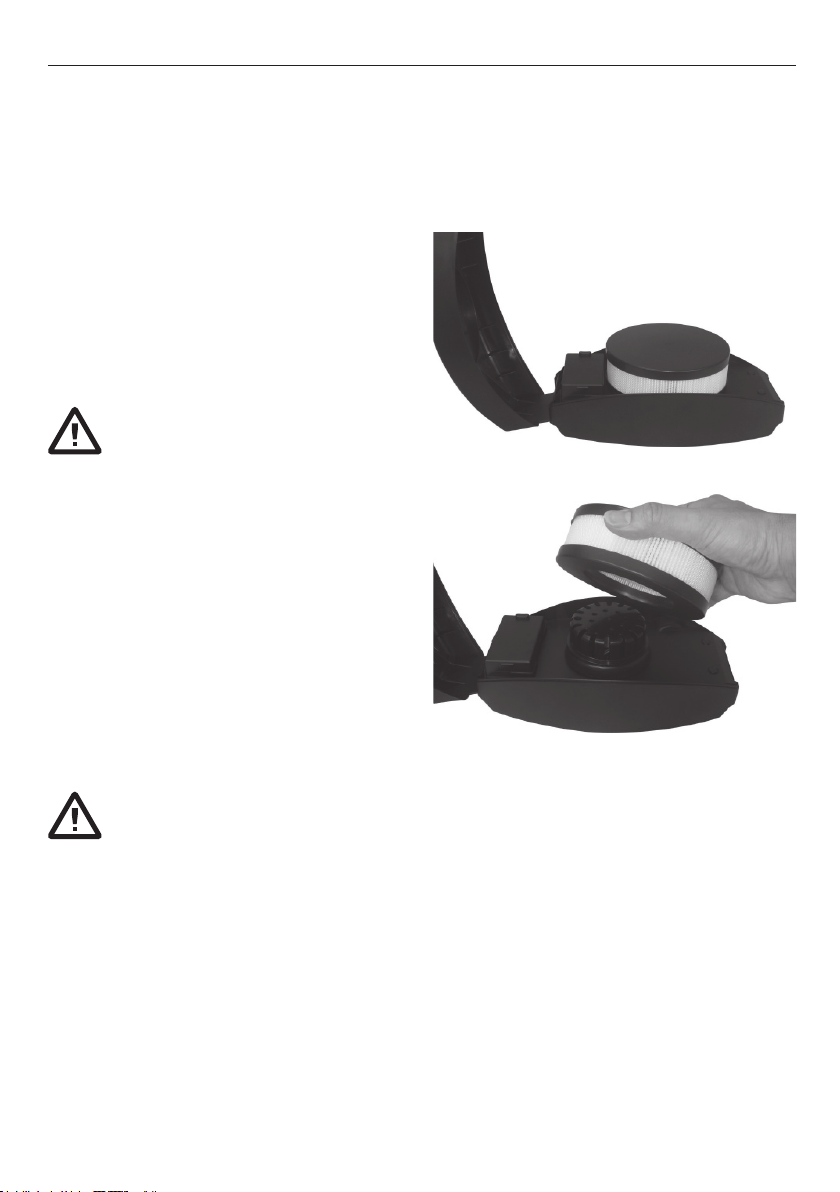
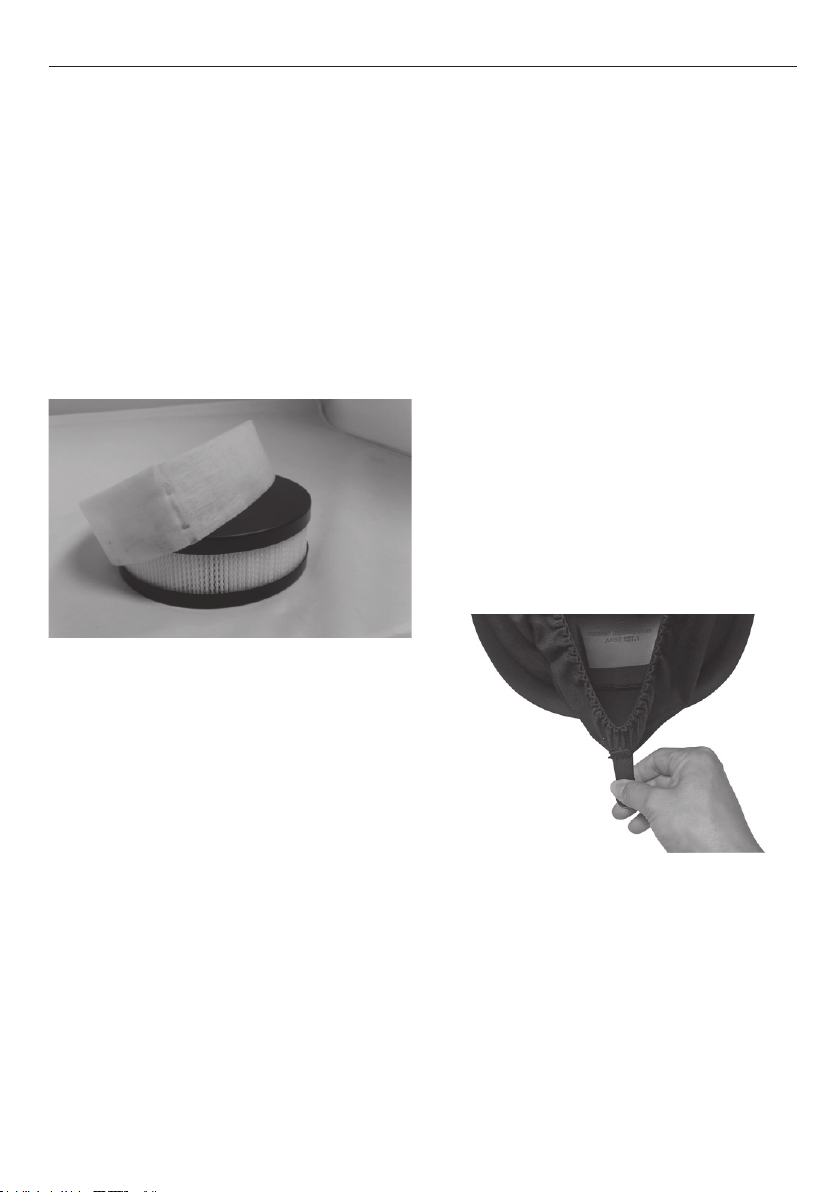
Filters should not be modified to fit different
blower units.
ATTENTION
If any of these conditions is not kept or
followed, the warranty is automatically invalid
The user is advised to leave the
contaminated area immediately if:
The Manufacturer's Minimum Design Flow
(MMDF) warning Alarm sounds.
Breathing becomes difficult.
Dizziness or distress occurs.
Any part of the system becomes damaged.
Airflow into the Head-Unit decreases or stops.
Contaminant can be smelt or tasted inside the
Head-Unit
Materials that may come into contact with
the users skin are not known to cause allergic
reactions to the majority of individuals but in the
unlikely event of a reaction, the user should
immediately leave the contaminated area,
remove the unit and seek medical advice.
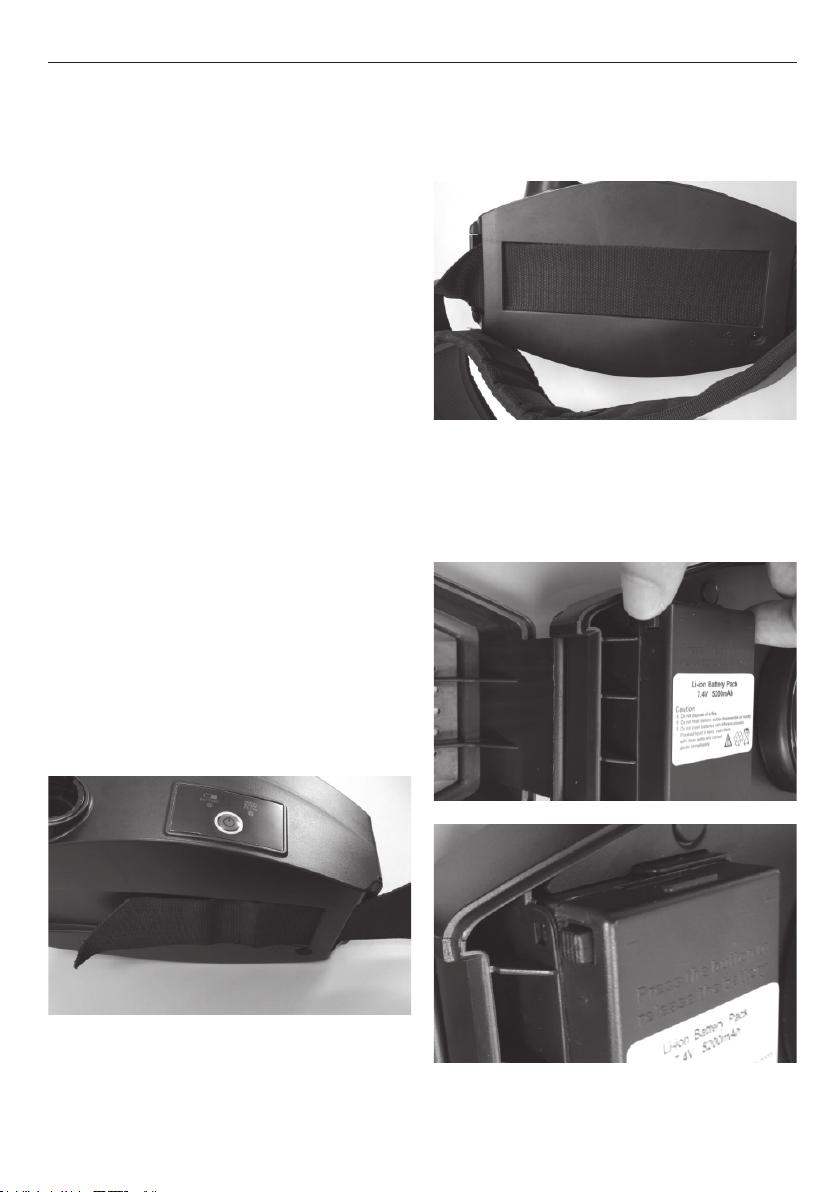
The PA700 unit is a belt mounted powered
respirator with a replaceable, disposable high
efficiency particle filter system. The system is
certified with the helmet OHE410 and the
helmet covers head sizes from 535 to 600mm
circumference.
The unit must not be used:
In an atmosphere that is immediately
hazardous to user hygiene or health and or
has oxygen content of less than 19.5% or
contains unknown substances.
In confined spaces or unventilated areas such
as tanks, pipes, canals etc.
Near to flames or sparks
In areas with danger of explosion
In an area where there are high winds.
If the blower unit stops working due to any
reason, the user must leave the contaminated
aread immediately.
It is also essential that:
Nothing is allowed to touch the moving parts
There is no attempt to modify or alter the unit
or filter in any way.
Water or other liquids DO NOT enter the unit
in any way - in particular the motor and fan,
the filter or the battery.
Make sure that the headpiece fits the user's
face perfectly. Only then the efficiency of the
system is sufficient. The protective factor of the
complete system is reduced if the seal of the
headpiece is not fitted properly, for eg. Due to
beards or long hair intervening into the seal line.
There is a possibility that the hose to the head
unit may become caught up in use. The blower
unit should be positioned on the person in such
a way as to reduce this possibility.
Filters cannot be fitted directly to the head units
and should not be adapted to do so. Correct
respiratory protection will not be provided if any
parts of the equipment are modified.

ClearView Welding PAPR - User instruction manual06
The PA700 unit contains a removable
8hr rechargeable battery pack.
The PA700 unit will warn the user when the
MMDF of 170 L/min, is not achieved with its
audible alarm.
In operation once the alarm sounds, the user
must immediately leave the work area and reach
an area nominated to be safe. The unit has visual
alarm for a low battery and a multiple alarm -
audible, visual with vibration for a blocked or
missing filter. Depending on the fault, the user
should replace the Pre Filter with a new one
(In very dusty environments the Pre Filter will
need changing frequently) and or re-charge or
change the battery for a fully charged one. If the
blocked filter alarm continues to sound the main
filter should be changed. Only when the unit will
function with the alarm switched off and the
flow rate has been tested to be acceptable,
should the user return to the work place.
The filter has been developed especially for
this unit. It is used to filter the air the user will
breathe. It is essential that the user checks the
filter for any signs of damage or deformation
that could potentially let contaminated air into
the unit. The filter must be disposed of if the
filter is damaged or if clogged to the point of
triggering the systems alarm mechanism.
The removable rechargeable battery used is a
Lithium Iron cell. When supplied the battery may
hold a small charge, the unit should be run flat
and then charged for sixteen hours before the
first use.
4. System Overview

07ClearView Welding PAPR - User instruction manual
5.1. Unpacking
Check that the package is complete and that
no part is damaged due to the transport or for
other reasons.
A package with the complete system
including accessories contains:
1. Blower unit incl. Battery and P R SL Filter
and Pre Filter
2. Belt
3. Air hose
4. Air flow indicator
5. Battery charger
6. User Instructions
5.2. Assembly
Attach the respiratory unit onto the belt: Pass
the inner strap through the back of the
blower loops. The pass through the 2 belt
loops and then through the buckle.
Fit the battery to the Blower unit: Open the filter
cover to find the battery position, then depress
the plungers both sides of the battery and clip it
into position
5. Unpacking / Assembly / Usage

ClearView Welding PAPR - User instruction manual08
5.2.1. Waist-Belt Adjustment
Put the belt around your waist with the blower
unit to the back and fasten the two ends
together.
If the belt is too loose, slide the male adjuster
down the belt, towards the female half. If the
belt is too tight. slide the male adjuster away
from the female half.
Repeat the above processes until a comfortable
and secure fit is achieved. Once the belt fits
correctly, secure any excess belt material using
the Velcro sections.
5.2.2. Particulate Filter
Use only PA700 filters and Pre Filters as supplied
by Messer.
(see page 17 for relevant part number)
It should first be ascertained by consulting an
occupational hygienist or by calling the
manufacturers technical help line as to whether
or not the PA700 Filter will offer suitable
protection from the hazard.
The respiratory power unit is equipped with a
high efficiency particle filter of class P R SL and
a Pre Filter.
As soon as the warning alarm sounds, the pre
filter should be exchanged or checked. In very
dusty area's this can be necessary on a
frequent basis.
The filters must be regularly checked (see Air
Flow Test) and replaced.
Make sure that the new filters are within their
expiry date, unused and not evidently damaged.
Loosen
Tighten

09ClearView Welding PAPR - User instruction manual
From the hygienic point of view the maximum
working time of a main filter is 180 hours and
should not be exceeded.
It is prohibited to clean the filters by
any procedure!
Warning
It is essential that the user must not confuse
the markings on the filter relating to any other
standard other than EN12941 with the
classification of the device when used with this
filter.
5.2.3. Removing the Filter
Opening the filter cover: Grip the blower and pull
up the cover from the right side of the blower.
ATTENTION
It is strictly forbidden to use any tools to open
the filter cover.
To remove the filter, pull it off the filter seal
while rotating it. Clean the unit from dust.
5.2.4. Fitting a new Filter
Inserting a new filter: Put the filter back into
position using the same rotating motion and
gently push until it fits well on the body of
the unit.
Closing the filter Cover; simply snap the cover
into place. Pay special attention to snap the
cover properly into the blower. Do not attempt
to use the blower unit without the cover fitted
correctly

ClearView Welding PAPR - User instruction manual010
5.2.5. Changing the Pre Filter
The pre filter is a sleeve which is fitted over the
main filter. To remove / replace simply pull off
the old filter and stretch the new one into
position. It's important to ensure that the filter
media of the main filter is completely covered by
the pre filter
5.2.6. Attaching the Hose to the Blower Unit
Align the pins of the Hose Bayonet connector
with the slots in the air outlet of the blower. Push
the Bayonet connector into the blower until it
reaches the bottom of the hole and then twist in
a clockwise direction until the locating pins clips
into place.
Fitting the hose to the hoods is the same
procedure.
5.2.7. Donning the Welding Helmet
First set the Welding helmets rake and adjust
the welding filter to suit (See the helmet's
user instructions)
Lift the helmet to it's upper position.
Place over the head and adjust the headgear
ratchet wheel by pushing it in and twisting
until a satisfactory tightness is achieved.
Pull the elasticated chin guard downwards and
at the same time pull the helmet down.
Ensure the elasticated chin guard fits
comfortably under the chin.
The Welding helmet is now ready for use

011ClearView Welding PAPR - User instruction manual
5.3. Usage
Switch on the unit by pressing the ON/OFF
button on the control panel.
The unit ensures a constant supply of air. The
microprocessor inside the unit automatically
regulates the motor speed to compensate
the filter clogging and the battery state. If the
microprocessor cannot keep the adjusted
airflow, the unit will sound a 'beeping' alarm (an
acoustic signal can be heard). At which
point the user must check the blower unit and
must stop working at once, leave the working
environment and reach an area nominated to be
safe and change the filter or recharge/change
the battery.
To check the alarms it is necessary to bock
off the air outlet with the palm of a hand or by
another suitable means. Then with the unit
switched on, the motor will try to compensate
by increasing the speed until the
microprocessor sounds the alarm as
described above.
With a fully charged battery in place, the unit
should function normally, but if the audible
alarm still sounds, the user must change the
filter. If the problem still persists, see chapter
8 for additional suggestions.

ClearView Welding PAPR - User instruction manual012
6. Before use
6.1. Inspection before use
Each time before starting work check that:
all components are in good condition with no
visible damage (like holes, tears etc) Replace
any damaged or worn parts. Carefully
examine the air hose, seals and the face
piece.
there is a good connection between the air
hose and the headpiece as well as the
blower unit.
there is sufficient air flow.(see 6.2.)
the air is supplied through the whole
respiratory system from the blower to
the hood.
Charge the battery before the first use. (see 6.3.)
Ensure the alarms are working correctly (see
5.3)
6.2. Air Flow Test
1. Disconnect the air hose from the Blower unit.
2. Insert the Airflow indicator into the air hose
connector and keep the hose in vertical position
at about the eye level
3. Switch the power unit on. The airflow is
sufficient only if the ball indicator reaches
the minimum flow rate level. If the indicator
sinks is below the minimum flow rate level,
it is necessary to charge the battery or
change the filter. If the problem still
persists, see chapter 8 for additional
suggestions.
Minimum
Airflow level

013ClearView Welding PAPR - User instruction manual
6.3. Batteries
Note
Batteries are delivered only partially charged,
All batteries must be charged before they are
used for the first time. The battery can be
charged separately or on the blower unit.
The charger must not be used for any other
purpose than that for which it was
manufactured. Do not charge the battery in a
potentially explosive atmosphere. The battery
charger is intended for indoor use. It must
be protected against dampness. The charger
controls the charging automatically. After the
battery has been charged, the charger switches
to the trickle charging regime and keeps the
battery fully charged. The charging time is 4 to 6
hours.
6.3.1. Battery charging
1. Check that the voltage of the electrical power
supply is correct.
2. Plug the charger into the socket. Either directly
into the blower when the battery is fitted or into
the battery directly.
3. Connect the battery to the charger. The socket of
the battery is positioned on the back side. The
charging state is indicated by a red LED diode
light.
4. After charging has been completed, the trickle
charging regime is activated: - red LED diode
goes out, the green LED diode comes on at
the moment of trickle charging
5. Disconnect the charger from the power
supply. Do not leave the charger in the
power supply if not in use!
6.3.2. Battery changing
Removing the battery is the opposite of
inserting it (as per 5.2).

ClearView Welding PAPR - User instruction manual14
The Blower unit, filter housing and head units
must all be regularly cleaned to keep them in
good working order.
For single users, the units can all be cleaned with
a cloth moistened with luke warm water and
soap.
For multiple users, the units should be
disinfected when passed from one user to
another.
Liquids must not be allowed to enter the
workings of the blower unit or get on to the
element of the filter.
Parts should be allowed to air dry. Under no
circumstances should any solvents or abrasive
cleaning agents be used. The unit must not be
dried using hot air or radiant heat.
The unit should continue to provide protection to
the designed specification, when maintained in
accordance with these instructions. Prior to each
use the user should check that the unit is free
from defects, such as cracks, split filters and
hoses, cracked visors and helmet components as
appropriate.
7. Maintenance / Cleaning

15ClearView Welding PAPR - User instruction manual
If there is a sudden change in air supply while using the PA700 system, it is necessary to
check the following:
That all parts of the air-supply system are
assembled properly.
The battery and its connector.
Whether the charger is not faulty or
malfunctioning (if so, diodes do not work).
Filters and their clogging.
That there is not a hole in the air hose.
Whether the hood seal is not damaged.
Whether the working time after a full
recharging of the battery has not decreased
(if so, it is necessary to replace the battery)
Fault
The blower unit does
not work at all
Recommendation
Charge the battery.
(if problem persists, check the
battery)
Contact your supplier.
/RZDLUIORZ
Probable reason
Entirely discharged battery.
(verify if the blower unit works with
another charged battery)
Faulty motor, circuit board or
connector
Blocked air hose or airduct.
Leakage
Battery is not charged enough
Blocked Filter of Pre Filter
Short operating time. Clogged filter.
Battery is not charged properly.
Battery cannot be
charged.
Battery cannot be
charged sufficiently.
Battery contact is damaged.
Charger is faulty.
Battery is worn out
Check and remove blockage.
Check all seals, connectors and the
air hose. Make sure that air can not
leak through holes or tears.
Charge the battery
(if problem persists, check the
battery)
Change the Pre - Filter. Then if the
problem persists change the main
filter.
Change the filters.
Charge the battery.
(If the problem persists, check
the battery)
Check the battery contact.
Contact your supplier.
Install a new battery.
8. Fault finding

ClearView Welding PAPR - User instruction manual16
When not in use or during transportation the
blower and head units should be stored in
the container in which they were provided, or
other similar container, such that it is out of
direct sunlight, not in contact with solvents and
cannot be damaged by physical contact with
hard surfaces/items. Do not store outside the
temperature range of +0°C to +40°C or with
humidity above 75%RH.
9. Storage and Transportation

17
ClearView Welding PAPR - User instruction manual
10. List of Parts and Assembly Drawing
Item Number Part Number
11320074
11320073
11320065
11320071
11320070
11320069
11320064
11320067
11320068
Description
OHE410 Face Seal
OHE410 Head Gear and Air Duct Assembly
PA700 Hose and Cover Assembly
PA 700 - Belt
PA700 Universal Charger
PA700 Battery, 7.4V, 5200mAh
PA700 Blower Unit (complete system)
PA -450 Filter
Pre Filter

ClearView Welding PAPR - User instruction manual18
This powered respirator is light-weight and easy to handle. It is equipped with a replaceable
particulate filter. The system affords reliable protection against particulates and aerosols.
Filter Symbols
R = this means the filter is reusable for more than one shift.
S = means the filter protects against solid particles.
L = means the filter protect against liquid particles.
11. Technical data
Symbols
Refer to the manufacturers
instruction manual
Store between 0 - 40°C
Best before YYYY / MM
Maximum storage Humidity <75%
Air flow
Weight with filter
Type of filter
Type of Battery
Charging Cycles
Visual (LED) and audible alarm
180 Litres/ min.
1020 grams
P R SL
Replaceable and rechargeable Li-Ion 7.4V/5200Ah
>350
for low battery voltage.
for insufficient flow rate (below 170L/min)
Actual Protection Factor (APF)
Noise level
Operating temperatures
perating time
Certification
Certified by
20
65dBA
-5 to +55°C
greater than 8 hours on minimum flow rate with a new filter
and fully charged battery in a clean environment.
NOTE
Operating time can be shortened in case of clogged filter or
undercharged battery
EN 12941:1998+A1:2003+A2:2008
Apave Sudeurope SAS, Notified Body 0082

19ClearView Welding PAPR - User instruction manual
The PA700 Blower unit is guaranteed for a
period of 12 months from date of purchase
against mechanical or electrical defects
providing the unit is returned without any signs
of abuse and all serial numbers are intact.
The PA700 battery is guaranteed for a period of
12 months from the date of manufacture.
The Company undertakes to exchange or repair
without charge, any part found to be defective
within this period. Alternatively and at it's
discretion the Company may replace.
This guarantee is subject to:
The PA700 unit has been used solely for the
purpose for which it is intended.
The PA700 unit has not been subject to misuse,
accident, modification or repair.
N.B. In the event of a claim, contact the retailer
from which the PA700 unit was purchased.
This guarantee does not cover normal wear and
tear.
This guarantee does not affect your legal rights.
All maintenance requirements to be carried out
as per chapter 7 (page 14).
12. Warranty

PAPR de soudage ClearView - Manuel d'instructions de l'utilisateur20
Le PA700 est un système de protection
respiratoire basé sur le principe de la
surpression de l'air circulant dans la cagoule.
L'unité de ventilation attachée à la ceinture
aspire l'air ambiant à travers un filtre et un
tuyau d'arrivée d'air vers la protection de tête
(une cagoule ou un masque).
Le PA700 a êtê conçu et fabriqué afin de se
conformer à la norme EN12941: 1998 en tant
que dispositif TH2 P R SL.
Le guide BS4275 (Guide to implementing an
effective respiratory protective device program),
lequel l'utilisateur devrait consulter, définit un
dispositif EN12941 TH2 P R SL comme un
appareil offrant un facteur de protection
caractéristique de 20.
Le PA700 procure ce niveau de protection
seulement lorsqu'il est utilisé avec des filtres
fournis par le fabricant et portant les mentions «
PA700 » et « EN12941:1998 TH2 P R SL ».
Le PA700 est certifié avec un masque de
soudage OHE410, lequel est certifié selon la
norme EN 175 B.
La fabrication du PA700 est conforme au
Système de qualité ISO 9001:2000.
1. Introduction
2. Approbations
L'approvisionnement d'air filtré crée une
pression positive à l'intérieur de la protection
de tête, ce qui empêche l'air contaminé
ambiant d'entrer dans la zone de respiration de
l'utilisateur.
3. Conditions préalables d'utilisation
Cet appareil respiratoire doit être utilise
en respectant rigoureusement ce guide de
l'utilisateur et les instructions fournies avec la
protection de tête correspondante (cagoules).
L'utilisateur doit lire et bien comprendre
la totalité des « instructions d'utilisation »
suivantes afin de pouvoir utiliser adéquatement
le système de protection respiratoire.
Lorsque l'unite de ventilation est éteinte, il ne
devrait y avoir aucune protection respiratoire
(ou très peu). Lorsque l'unité de ventilation est
éteinte une accumulation rapide de dioxyde
de carbone, donc une diminution de l'oxygène
disponible, a l'intérieur de la protection de tête
peut se produire. Il est donc essentiel de ne pas
utiliser l'unité de ventilation lorsque celle-ci est
hors tension.
Table of contents
Languages:
Popular Respiratory Product manuals by other brands

INTERSPIRO
INTERSPIRO QS user manual

3A HEALTH CARE
3A HEALTH CARE MINIASPEED Battery Evo Plus instruction manual

DeVilbiss Healthcare
DeVilbiss Healthcare Traveler 6910P-DR Instruction guide

Dräger
Dräger PSS AirBoss Connect quick start guide

Gima
Gima NE-M01 user manual

3M
3M Versaflo BT-60 Series User instructions