Cleyver HW25 User manual

User Manual
WIRELESS HEADSET
ODHW20/ODHW25 DECT
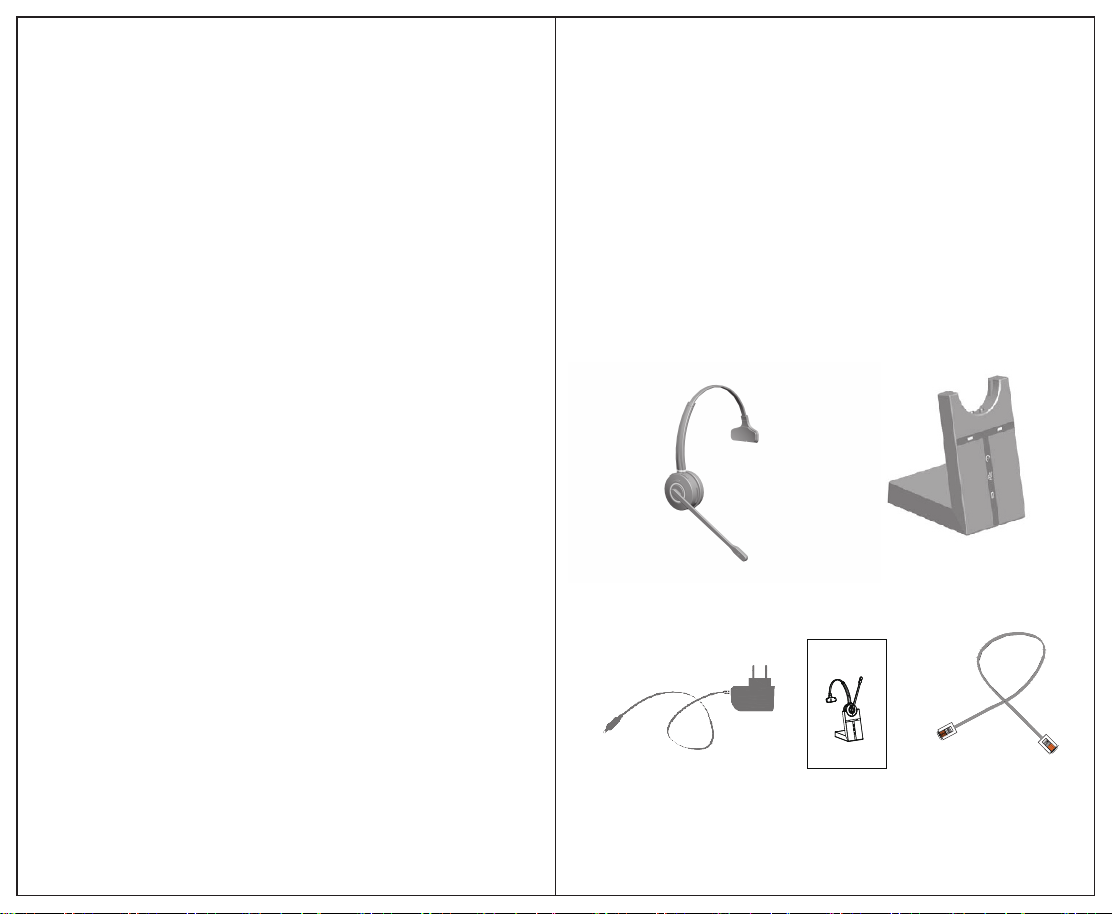
PACKAGE CONTENTS
Headset Base
Power Adapter User Manual Telephone Cable
Use r Manua l
WIRELESS HEADSET
ODHW20/ODHW25 DECT
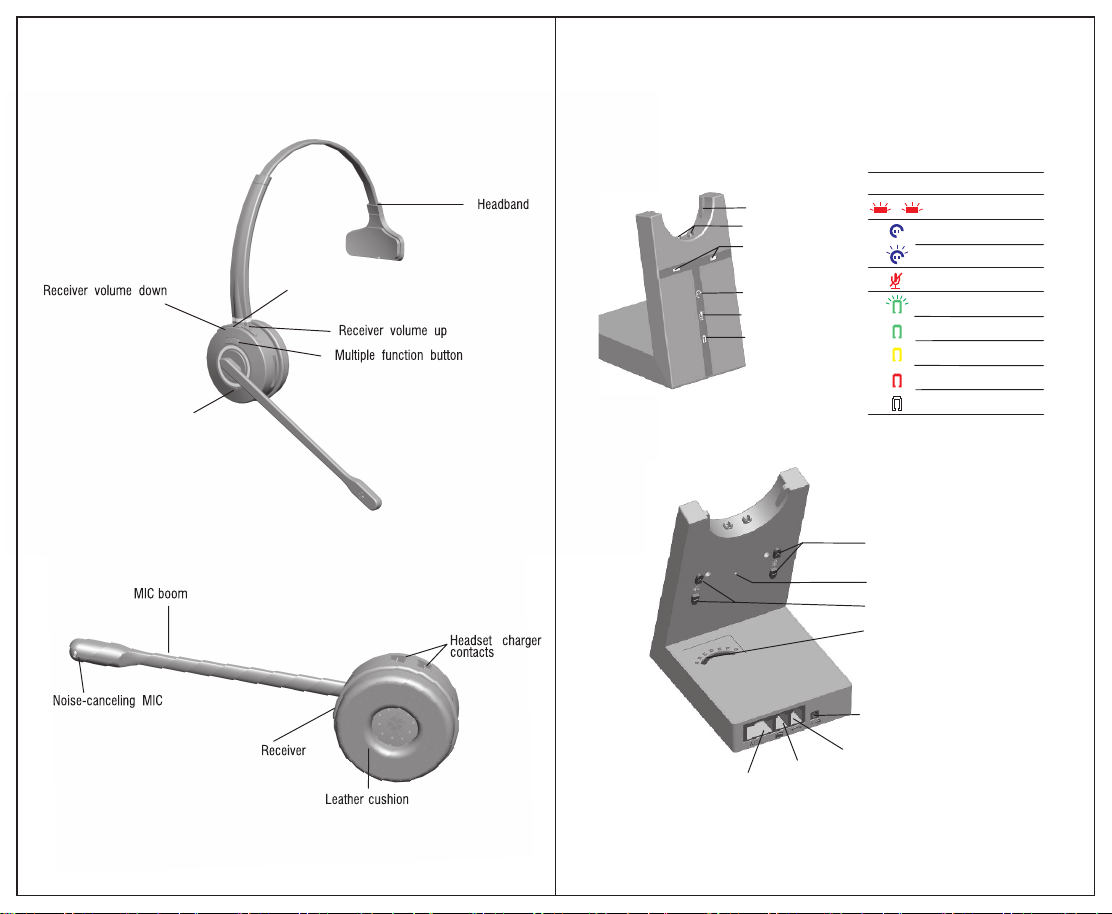
ODHW20/ODHW25 DECT HEADSET OVERVIEW ODHW20/ODHW25 DECT BASE OVERVIEW
Headset seat
Charger contacts
Online indicator
Audio link indicator
Mute indicator
Battery status indicator
Mic volume adjustment
Receiver volume adjustment
Multiple switch
Power adapter port
AUX port
Telephone port
Handset port
PAGE switch
Icon Stat us
Online
Searching for headset
Microphone muted
Battery charging
Full battery
Very low battery
Medium battery
Unknown battery status
2 3
Active audio linked between headset and base
Headset status LED
MIC mute

4 5
SET UP
1 CONNECT TO DESK PHONE
Option 1
Option 2
Or
Or
Desk Phone without Headset Port:
This desk phone does not have a dedicated
headset port.
1.On the desk phone, unplug the handset
cable from the phone body.
2.Connect the handset cable to the port
marked on the base.
3. Plug the supplied telephone cable into
the port marked on the base.
4. Connect the telephone cable into
the handset port on the desk phone.
Desk Phone with the remote Handset Lifter:
The Handset Lifter manually lifts the desk phone handset
to make or answer a call. For mounting
instructions refer to documentation
supplied with the Handset Lifter.
1.On the desk phone, unplug the handset
cable from the phone body.
2.Connect the handset cable to the port
marked on the base.
3.Plug the supplied telephone cable into
the port marked on the base.
4. Connect the telephone cable into the
handset port on the desk phone.
5.Connect the Handset Lifter cable into the port
marked AUX on the base.
Option 3
Or
Desk Phone with Headset Port:
This type of desk phone has a dedicated
headset port(usually at the back of the
phone). These phones typically have a
button on the front panel for switching
between handset and headset.
1. Plug the supplied telephone cable into
the port marked on the base.
2.Connect the telephone cable to the
headset port on the desk phone.
Option 4
Or
Desk Phone with EHS:
A EHS adapter enables an incoming
call to be answered or ended by the headset
multi-function button.
Contact your local dealer to purchase a
EHS adapter for your specific desk
phone.
1. Connect the EHS adapter as shown in
adapter documentation supplied with the
EHS. On some phones the telephone
cable will also need to be connected.
2. Call your connected desk phone using
another phone to actives the EHS
adapter. Wait 10 seconds before
answering the phone.
Pls refer to the
EHS user guide

6 7
2 CONNECT POWER ADAPTER TO BASE
3 DOCK THE HEADSET
2.1 Plug the power adapter into the port marked on the base.
2.2 Connect the power adapter to the mains power socket.
3.1 Press the multiple function button Shortly, then the LED on headset will
start flash as Blue every 3s, the headset will be powered on.
And then press the multiple function button again or dock the headset and re-lift it,
the audio link indicator will be on, which indicate the connection between
headset and base is set up correctly.
3.2 If dock correctly, the headset battery will begin charging, if needed(LED will
flash when charging ). Please charge for 20 minutes or until the battery
indicator is steady green
4. CONFIGURING THE DESK PHONE AUDIO
Receiver adjustment
MIC adjustment
CLICK
Due to the large range of desk phone brands/models, the users need to adjust the
alignment of ODHW20/ODHW25 DECT for first time using. Adjusting the alignment
will enable the ODHW20/ODHW25 DECT to function correctly with your specific desk
phone. Additionally, it is also important to adjust the microphone and receiver
volume for optimal sound quality.
4.1 Put on the headset.
4.2 Get a dial tone by pressing the headset
button on the desk phone, or by lifting
the desk phone handset.
4.3 Adjust the alignment. Adjust the multiple switch
at the back of the ODHW20/ODHW25 DECT base,
and then compare the dial tone after rotating
swthe itch from A to G.
4.4 Choose the best switch position.
Please choose the position with loud, clear
and undistorted dial tone.
4.5 Make a call. Call a friend or
colleague to test your microphone and
receiver volume. Ensure the callee does
not adjust the volume on their side.
4.6 Adjust the microphone volume using
the microphone + / - volume buttons,
if your volume is too loud or too weak
for the callee.
4.7 Adjust the receiver volume using the
receiver + / - volume buttons, if your
callee’s volume is too loud or too weak
for you.
4.8 After the configuration, end the call.

8 9
HOW TO MAKE ACALL
Make
A Call
Answer
A call
End
callA
Phone with headset port Phone with EHS or Lifter
Phone without headset port
1. Lift the headset from docking cradle,
or press the multi-function button.
2. Lift desk phone handset and put
aside .
3. Dial numbers through desk phone.
1. Lift the headset from docking cradle
or press the multi-function button.
2. Press the headset button on the desk
phone.
3. Dial numbers through desk phone.
1. Lift the headset from docking cradle,
or press the multi-function button.
2. Dial numbers through desk phone.
1. Lift the headset from docking cradle
or press the multi-function button.
2. Lift desk phone handset and put
aside .
1. Lift the headset from docking cradle,
or press the multi-function button.
2. Press the headset button on the desk
phone.
Lift the headset from docking
cradle or press the multi-function.
1. Hang up the handset of the desk
phone.
2. Dock the headset, or press the
multi-function button.
1. Press the headset button on the desk
phone.
2. Dock the headset, or press the
multi-function button.
Dock the headset, or press the
multi-function button.
DIS-PAIRING AND RE-PAIRING
Dis-pairing: Plug out the power adapter firstly, then consistently press the + at the
back of the base until re-plug in the power adapter, when the battery charging status light
flashes 3 times, the headset and the base is dis-paired. And the base will turn to searching
status automatically with the audio link indicator on. Re-pairing: Consistently press
the PAGE switch for 5s, the audio link indicator will flash to search the headset. Then
consistently press the headset mute button, when the headset status LED flashes, the
headset is in the paired status. The pairing will be successful when audio link indicator and
headset status LED power off at the same time.
CONFERENCE CALL WITH MULTIPLE HEADSETS
The ODHW20/ODHW25 DECT is able to pair with four headsets in total for conferencing:
One Master and three Secondar y headsets.
Connect the 2nd headset:
1. During the Master headset links with Base, consistently press the PAGE switch for 5s,
the Base starts to search the headset, consistently press the headset Mute button until
the headset status LED flashes, then the headset is in the pairing status. Connection will
be successful when the LED is on consistently.
2. Repeat the procedure 1 to connect the 3rd, 4th pieces of headsets.
Make Conference call
1. Tap the multi-function button on the primary headset to connect to the base when the
audio connection indicator is on.
2. For the three secondary headsets, it needs the permission from the primary headset
before entering conferencing model. Pressing the multi-function button on the secondary
headsets, then there will be a”DU” tone from the primary headset. Please press the
multi-function button on the primary headset to make the permission.
3. The audio will be shared between these headsets after getting permission from primary
headset.
4. Now you can make conference call.
Ending or leaving the conference
The primary headset user can end the conference by hanging up on the call.
The call is ended for all headsets.
The secondary headset users can leave the conference by pressing the multi-function
button on their headsets, or by docking the headset with the base. The conference call is
still active for the other headset(s) .
TECHNICAL SPECIFICATIONS
1. ODHW20/ODHW25 DECT HEADSET
Operating environment:
0˚C to +40˚C; Up to 95% Rh non-condensing.
Call control:
Multi-function button supports for answer call, end call, docking operations also answer a
nd end calls.
Volume control and microphone mute:
button controls on headset.
Audio indicators:
Tones indicate incoming calls, low battery, volume level, microphone muting and other events.
Sound quality:
DSP noise reduction; echo cancellation; tone control; wideband and narrowband audio.
Recharge:
While docked in the ODHW20/ODHW25 base.

Wireless standard:
(CAT - IQ) European DECT and U.S. DECT.
DECT range:
For European DECT, up to 120 meters from ODHW20/ODHW25 DECT Headset base to headset.
For U.S. DECT, up to 350 feet from ODHW20/ODHW25 DECT Headset base to headset.
DECT frequencies:
US DECT: 1.92 - 1.93 Ghz.
EU DECT: 1.88 - 1.90 Ghz.
Wearing-styles:
Headband
Microphone boom arm style:
Long boom arm
Speaker(s):
Wideband speaker.
Microphone:
noise-cancelling microphone.
2. Headset Battery
Battery type:
Lithium Ion-polymer.
Battery capacity:
300 ma/h, typical.
Battery talk time:
Up to 8 hours.
Battery lifetime:
Minimum 1000 charge cycles
Battery standby time:
At least 50 hours.
Operating temperature range:
-20˚C to +60˚C.
Battery charge time:
20% charge in less than 20 minutes.
50% charge in less than 45 minutes.
Full charge in less than 3 hours.
Battery shelf life:
headset battery holds charge for 6 months in the off state, before recharge is required.
3. ODHW20/ODHW25 DECT BASE
ODHW20/ODHW25 DECT base meets the following specifications.
Dimensions:
97mm x 75 mm x 120 mm
Wireless standard:
(CAT - IQ) European DECT and U.S.DECT.
Operating environment:
-0˚C to +40˚C; Up to 95% Rh non-condensing.
Recharge cradle:
Fits supplied ODHW20/ODHW25 DECT series headset.
Desk Phone connections:
RJ-09 for handset, RJ-09 for phone body (or headset port), RJ-45 for AUX
(for EHS Cable or lifter).
RJ09 alignment switch and microphone volume switch:
RJ09 alignment(clear dial tone) switch and microphone volume level set manually.
PRODUCT DISPOSAL
Please dispose of the headset according to local regulations and recycle when possible.
Do not dispose as household waste. Do not dispose of the headset in a fire as the battery
may explode.Batteries may also explode if damaged.
10 11

This manual suits for next models
2
Table of contents
Other Cleyver Headset manuals


