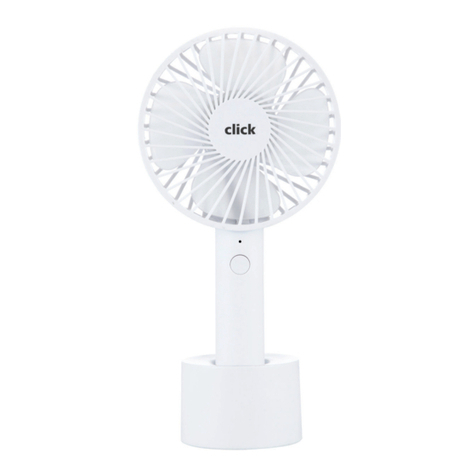
Click CMT-60W User manual


General Safety 4
Remote Control 8
Product Overview 9
Assembly Instructions 10
Remote Control 12
Operation 13
Cleaning and Maintenance 15
Troubleshooting Last Page
Specifications Last Page
Customer Helpline Last Page
CONTENTS

4
Read this manual thoroughly before you start using the product.
Store this manual, the completed warranty card, your receipt and the product packaging.
The safety precautions instructions reduces the risk of fire, electric shock and injury when
correctly complied to.
Please follow all instructions and take notice of all warnings.
Please follow instruction when installing this product in accordance with the instruction
manual. This product must be positioned in a suciently stable location, it can be potentially
hazardous due to falling when mounted and can cause injury, particularly to children if it
positioned incorrectly.
• Before installing this product, make sure your outlet voltage corresponds to the voltage
stated on the product rating label
• Do not use a damaged power cord, plug or loose outlet. Doing so may cause an
electric shock.
• Do not plug several devices into the same outlet. Doing so may cause the outlet to
overheat and start a fire. Make sure the outlet is readily accessible during operation
of the equipment.
• Do not bend, twist or kink the power cord excessively.
• Do not allow anything to rest on or roll over the power cord.
Doing so may cause a fire or an electric shock.
• Do not run the power cord near heat-producing appliances such as radiators, stoves or
irons. The excessive heat could melt the insulation and expose live wires, resulting in
fire or electric shock.
• Do not expose this product to water. The electrical insulation could be damaged
and cause electrocution. Do not touch the unit when barefoot or parts of your body are
wet or damp.
• This appliance is not intended for use by persons (including children) with reduced
physical, sensory or mental capabilities, or lack of experience and knowledge, unless they
have been given supervision or instruction concerning use of the appliance by a person
responsible for their safety.
Children should be supervised to ensure that they do not play with the appliance.
• If the supply cord is damaged, it must be replaced by the manufacturer, its service agent
or similarly qualified persons in order to avoid a hazard.
GENERAL SAFETY

5
GENERAL SAFETY INSTRUCTIONS (Cont.)
• Do not cover the ventilation openings of the product with items such as newspapers,
tablecloths, curtains etc or insert objects into the slots available on the products.
As this could result in the product temperature rising and could cause a fire.
• If you notice any unusual odors or smoke around the unit, immediately disconnect the
unit from the outlet and contact the service center. Failure to do so may result in fire
or electric shock.
• When not using the unit for long periods of time or when you are moving the unit
please ensure to disconnect the power supply from the wall socket.
• Please beware that Dust could accumulate over time on the unit and cause it to generate
heat and or deteriorate insulation, which in turn may result in an electrical fire.
• Batteries from the remote control must be only removed by an adult, the adult must
ensure to keep them out of reach of infants and children. Seek medical attention
immediately if a child has swallowed a battery.
• To maintain the product do not use any chemical or cleaning agent or wet cloth, please
only ensure to utilize a dry cloth to wipe it down from marks or dust and only after
unplugging the product from the power socket.
• Please ensure to contact our call center for any repair or service required for the products
not doing so will make warranty on your product void.
• We assume no liability for any eventual damages to property or injury to persons caused
by misuse of the product or noncompliance with these instructions.
Please make sure upon positioning this product, the place is:
• Not wet or damp and Well ventilated
• Away from direct sunlight or products.
• Do not place containers with liquids, if liquid falls inside the products it may result in
short-circuit, fire or electric shock.
• Do not place small metallic objects on top of the unit or block the openings as it will
reduce operating eciency of the air con with failures or damages.
• The appliance shall under no circumstances, be covered with insulating material
or similar material.
• Away from splashes or food.
• Protected from excessive dust or grease.

6
GENERAL SAFETY INSTRUCTIONS (Cont.)
• Do not use the unit outdoors. It is for indoor use only.
• WARNING: Do not cover! Do not cover the product or obstruct any opening.
Obstructing these openings causes a fire hazard, reduces the operating eciency
and may lead to malfunction or damage.
• Do not insert any objects, or your fingers, into the air outlet, and make sure to warn
children of the dangers. Keep ventilation openings clear of obstructions.
• Supervise children to ensure they do not play with the appliance. Close supervision is
necessary when any appliance is used by or near children. Cleaning and user maintenance
shall not be made by children without supervision.
• Do not use this product if it has been dropped
• Do not use if there are visible signs of damage to the product

7
GENERAL SAFETY INSTRUCTIONS (Cont.)
• Place the unit on a flat surface to reduce the risk of it tipping over. Do not tilt the
unit, always keep it upright during installation and use.
• We accept no responsibility for any eventual injuries or damages caused by
improper installation, faulty use or failure to follow the instructions.
WARNING:
• Maintenance must only be carried out by properly qualified, authorised personnel.
If the appliance requires maintenance or service, contact our after sales support
centre info@ayonz.com

8
REMOTE CONTROL
Using the Remote Control
• Do not mix old and new batteries in the remote
• Do not use dierent types of battery
• If you do not intend to use the unit for a long time, please remove batteries from the
remote to avoid accident.
• Keep batteries away from children and pets.
• Never throw batteries into a fire.
• Do not drop, or impact the remote control as it void warranty immediately.
• The remote control operate at a range of 5 to 6M eectively
• Do not expose the remote control sensor to a bright light.
INSTALLING BATTERIES
1. Open the battery box on the back of remote control, and install
2 x AAA batteries (not included).
2. Make sure to match the battery polarities ( + / - ) with the remote
control compartment.
3. Put on the back cover.

9
PRODUCT OVERVIEW
A: Control panel:
1: Power on/o button 2: Mode button 3: Speed button
4: Cooling button 5: Timer button 6: Oscillation button
B: Air outlet C: Water Scale D: Base E: Handle
F: Water Tank G: Ice Box

10
ASSEMBLY INSTRUCTIONS
1. Take out the two parts of the base from packing box. Then, align the centers
of the two parts of the base and place them in a crossed form. Rotate one of
the two bases to align its hole site and make it click into place correctly (Fig 1).
2. Fix the base on the fan body with four screws ( included),
with a screwdriver ( Fig 2).
Cable Hook: Hanging
the power cord at cable
hook when the fan is
not be used.(Fig 3)

11
ASSEMBLY INSTRUCTIONS (Cont.)
WATER FILLING AND WATER TANK CLEARANCE
MAKE SURE THE RUBBER PLUG IS STILL INSERTED UNDERNEATH PRODUCT BEFORE
FILLING WITH WATER. OTHERWISE WATER WILL SPILL UNDERNEATH.
PLUG IS USED FOR DRAINING THE WATER.
1. Please clean the water that in the water tank when you do not use
the product.
2. Clean Water tank: Open the water tank (Fig 4), use the brush or tool to clean
the water tank, and then pull out the rubber plug to sewage disposal.(Fig 6)
4. Don’t clean transducer by any metal or stiness material or scrape it to avoid
any damage
5. Don’t put acid, alkalescency, blencher scour into water tank to avoid damage
6. Do not spray the water onto control panel and its surrounding, to avoid
electrical leakage accidents.
7. When fill the water, do not exceed ‘MAX’ level at water scale. At cooling mode,
keep the water at least at ‘MIN’ level. (Fig 5)
8. Do not open the cover of Ice Box, to avoid its leakage. The Ice Box is
environmental protection material that would storage in refrigerator and
would use it repeatedly
DO NOT EXCEED
MAX WATER LEVEL.
WATER & ICE BOX
IS THE SAME LOCATION.
(Fig 5) (Fig 4)
(Fig 6)
WATER PLUG

12
1. Included batteries (the type of battery AAA).
2. The Remote Control Power button is labeled as such. All the functions performed
with the Remote Control work identically to the Manual Controls.
REMOTE CONTROL
FAN SPEED
MODE
TIMER
OSCILLATION
MODE
DISPLAY ON/OFF
COOL AIR
POWER
ON/OFF

13
OPERATION
1. Place the FAN on a stable flat surface. Plug the cord set into a 220-240V~
electrical outlet. Plug on the FAN, existing room temperature will be displayed
at display panel.
2. POWER : Turn the FAN on by pressing the ‘POWER’ button;
Turn the FAN o by pressing the ‘POWER’ button again.
3. SPEED : You can adjust the fan speed to the desired level: low, medium,
or high by pressing ‘SPEED’ . The speed setting is displayed on the LED panel
(shown in Fig. 7) .
4. MODE : Pressing the ‘MODE’ button will set the FAN into NORMAL mode,
NATURAL mode , SLEEP mode, Child mode.
- NORMAL Mode : Fan will start work at any speed you set up.
- NATURAL Mode : Fan will start work at low speed(5s) > medium
speed(5s) > high speed(5s) > medium speed(5s), it works as per this recycle.
- SLEEP Mode :
1 If you set the mode at high speed, fan will work at high speed for
30 mins, then transfer to medium speed for 30 mins and transfer
to low speed until fan stop working.
2 If you set the mode at medium speed, fan will work at medium
speed for 30 mins, then transfer to low speed until fan stop
working.
3 If you set the mode at low speed, fan will work at low speed until
fan stop working. The LED Display will turn o if you don’t control
the fan in 30 seconds, touch any button to turn on the display.
LED DISPLAY
PANEL (Fig 7)

14
OPERATION (Cont.)
- Child Mode : Fan will auto. Set up timer at 3 hours, oscillation function
will start. And it will work at high speed for 15 minutes, transfer to medium
speed for 15 minutes, then transfer to low speed until it take o. You can take
o oscillation function by manual. The LED Display will turn o if you don’t
control the fan in 30 seconds, touch any button to turn on the display.
5. TIMER : The fan is equipped with a timer that allows you to set it’s
length of operation from 1 hour to 12 hours. The LED Display will turn o if you
don’t control the fan in 30 seconds, touch any button to turn on the display.
6. OSC : Pressing the ‘OSC’ button will start and stop the oscillation
function. The symbol is displayed on the LED panel.
7. COOLING : Press ‘COOLING’ button to turn on the cold air function.
Press button again to turn o. If you want to operate the unit with water for
better cooling, open the water tank cover and fill it up to the MAX mark at the
most. Take care when doing so, to make sure, that no water enters the
product, e.g. through the air inlet.
ATTENTION ABOUT ICE BOX
When putting the ice box in the water tank (the ice box needs to be frozen for
more than 3 hours), and the cooling eect will improve
DO NOT USE COOLING MODE WITHOUT WATER. THIS CAN POTENTIALLY
DAMAGE THE UNIT.
8. DISPLAY: Can be switched o temporarily by press the LED button on
the remote or by long pressing the SPEED button on the control panel for
more than 3 seconds, the display will light up again once any control button
is activated.

15
CLEANING & MAINTENANCE
1. This can only be done by an authorized service agent such as your local dealer
or any agent qualified to undertake electrical repairs.
2. If the unit requires external cleaning make sure it is switched o and
unplugged from the mains supply. Use a soft tissue or cloth for general
cleaning. To remove more persistent dirt or grime wipe down with a cloth that
has been dampened with warm soapy water. Do not use any solvents
(such as thinners ) as these may damage the plastic casing.

TROUBLSHOOTING
If you experience problems with your product, or it appears
not to be operating correctly, check the information below for solutions
to common problems. If none of the solutions oered help you solve your
problem, please contact our support centre for advice on info@ayonz.com
Do not attempt to repair the appliance yourself!
SPECIFICATIONS
Rating 220-240V ~ 50-60Hz, 60W
Climate Class T
Weights
NET 5.10 kg
GROSS 6.10 kg
Dimensions 315 (w) x 315 (d) x 1070 (h) mm
Table of contents
Other Click Fan manuals
Popular Fan manuals by other brands

CLEANTEC
CLEANTEC LANG Instructions of use

Juwent
Juwent WD-16 instruction manual

Casablanca
Casablanca Panama 59510 Owner's guide and installation manual

Delta Electronics
Delta Electronics AFB04512HB Dimensions and installation information

Sunbeam
Sunbeam FA7400 Instruction booklet

Lasko
Lasko 4910 Important instructions & operating manual