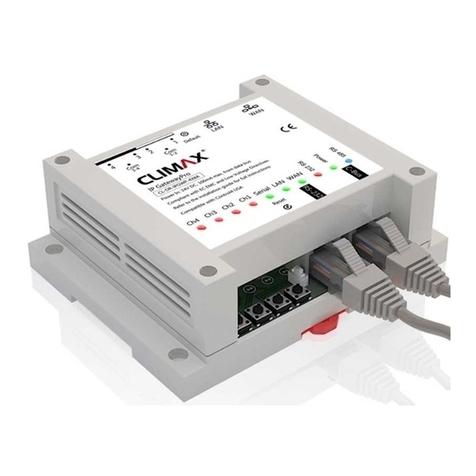
Climax ARN User manual

ARN Gateway
IP Installation Guide
Feb-20-2019

Table of Contents
1. INTRODUCTION _____________________________________________________________________ 1
1.1. SYSTEM DEPLOYMENT: ______________________________________________________________ 1
2. APPLICATION OVERVIEW _____________________________________________________________ 2
2.1. IDENTIFYING THE PARTS: _____________________________________________________________ 2
2.2. THE POWER SUPPLY:________________________________________________________________ 2
2.3. SYSTEM REQUIREMENTS:_____________________________________________________________ 3
3. GETTING STARTED __________________________________________________________________ 4
3.1. HARDWARE INSTALLATION ____________________________________________________________ 4
3.2. SOFTWARE INSTALLATION_____________________________________________________________ 4
4. CONNECTING TO WEBPAGE __________________________________________________________ 7
5. SYSTEM CONFIGURATION ____________________________________________________________ 9
5.1. SYSTEM SETTING___________________________________________________________________ 9
5.2. SMS GATEWAY SETTING ____________________________________________________________ 10
5.3. EVENT LOG ______________________________________________________________________ 11
5.4. NETWORK _______________________________________________________________________ 12
5.5. UPNP __________________________________________________________________________ 13
5.6. CHANGE PASSWORD _______________________________________________________________ 14
5.7. SMTP__________________________________________________________________________ 15
5.8. DATE &TIME _____________________________________________________________________ 16
5.9. DYNAMIC DNS ___________________________________________________________________ 17
5.10. FIRMWARE______________________________________________________________________ 18
5.11. FACTORY RESET _________________________________________________________________ 19
5.12. BACKUP AND RESTORE ____________________________________________________________ 20
5.13. SYSTEM LOG____________________________________________________________________ 21

1
1. Introduction
This manual covers the installation, programming of Climax ARN Gateway.
The ARN Gateway serves as an IP receiver for your CMS without IP receiving capability by
receiving CID/SIA report from Climax Control Panel and forward the report to CMS Automation
Software through USB-RS232 connection.
The Automation software supported includes:
SIMS / SIS / MAS / APROPOS / ALARM COMMPRO / MICROKEY / GENESIS / ABM / ALARM
SOFT / MENTOR (UK) / DICE / SMS / IT / ASPI / IBS
1.1. System Deployment:

2
2. Application Overview
2.1. Identifying the parts:
1. GSM Status LED (Green/Red)
Green LED ON –GSM Normal.
Red LED ON –GSM Fault.
(ARN Gateway does not have GSM function, please ignore this LED)
2. RS232 Connection LED (Red)
Red LED ON –RS232 disconnected
3. USB Port
For connecting USB to RS232 cable.
4. Factory Reset Button
5. Ethernet Port
6. Battery Switch
7. DC Jack
For connecting the DC 9V, 1A switching power.
8. Ethernet Cabale
9. USB to RS232 Cable
10. DC 9V 1A adaptor
11. DB9 female to female cable
2.2. The Power Supply:
The ARN Gateway requires anAC power adapter to connect to a wall outlet. Be sure only to use
an adapter with the appropriate AC voltage rating to prevent component damage. A DC 9V 1A
switching power output adaptor is provided to power the ARN Gateway

3
2.3. System Requirements:
The ARN Gateway requires a TCP/IP network environment for programming system setting.
To program ARN Gateway, the following computer system is required.
Microsoft Windows 8 or Windows 10 operating system.
Microsoft Internet Explorer 6.x, or later and Mozilla Firefox 3.0 compatible.
CPU: Intel Pentium II 266MHz or above
Memory: 32MB (64MB recommended)
VGA resolution: 800x600 or above
2.4. RS232 Connection Pin Out
DB9 Pin No.
Name
Type
1
DCD
Input
2
RXDATA
Input
3
TXDATA
Output
4
DTR
Output
5
GND
Gnd
6
DSR
Input
7
RTS
Output
8
CTS
Input
9
RI
Input

4
3. Getting Started
Read this section of the manual to learn how to set up your ARN Gateway and program system
settings over the Webpage.
3.1. Hardware Installation
Step 1. Connect the ARN Gateway to your CMS receiver with USB-RS232 cable. You will also
need a DB9 female to female crossover cable.
Step 2. Connect both ends of the DB9 cable to the USB-RS232 cable.
Step 3. Connect the Ethernet cable to ARN Gateway
Step 4. Connect the AC adaptor to ARN Gateway. ARN Gateway is now ready for ready for
operation.
3.2. Software Installation
※THIS INSTALLATION IS ONLY REQUIRED FOR FIRST TIME USER ※
1. RUNNING THE FINDER
To install the “Finder” software”
Step 1. Download the Finder software from Climax’s website.
Step 2. Double click on the Finder to initiate the installation.
Step 5. Click “Change”to select the file folder, if no change is required; click “Next”to get
ready for the installation process.
Step 6. Click “Next”to begin the Installation. Once the installation is completed, click “Finish”
to confirm.
Step 7. A new icon will be displayed on your desktop.

5
Step 8. Double click on the “Finder.exe” to start the installation. The following screen will be
displayed:
Step 9. Click on “Search”, It will start searching for recognized IP address within the Local
Network Service.
Step 10. You will be able to locate the current ARN Gateway IP address among the list,
displayed with MAC Address and Firmware version.
Step 11. Once ARN Gateway is identified, select the panel and click on “Open Web Page”to
open the panel’s configuration webpage.

6
2. CONFIGURE SETTING
The Configure setting is for you to setup the network setting manually.
Step 1. Click on Configure Setting, the following window will display:
Step 2. Enter the network information and ARN Gateway’s web user name and password.
(Default) User Name: admin
(Default) Password: admin1234
Step 3. Click on OK to confirm. When the username and password are correct, a window will
display: Status: Configure success!!

7
4. Connecting to Webpage
Step 1. Select ARN Gateway in the Finder software and click on “Open Webpage”to connect
to their webpage.
Alternatively, enter ARN Gateway’s IP address displayed in Finder into your browser’s
address section and click “GO”.
Step 2. Enter the User name & Password.
Step 3. Enter the User name & Password and then press “OK”.
User Name: admin Password: admin1234

8
Step 4. You will enter the ARN Gateway configuration webpage, the current panel information
will be displayed.

9
5. System Configuration
5.1. System Setting
The System Setting page allows you to system setting for using ARN Gateway as IP Receiver
for Climax Control Panels.
When ARN Gateway receives report from Control Panel, it will forward the report via
USB-RS232 cable to CMS receiver according to setting under this page.
Listen Port
The Listen Port is the port number the ARN Gateway receives report from. When
programming your Climax Control Panel’s report setting, use the Listen Port number set in
ARN Gateway for setting the Control Panel’s reporting port.
Socket Timeout
Set Timeout duration (at least 30 sec).
COM Baud Rate
Set the RS-232 COM port baud rate
Heartbeat
Set to Enable or Disable Heartbeat function to send heartbeat signal to receiver every 10
seconds.
Reset USB if ACK Timeout
If the receiver does not send back acknowledgment signal for heartbeat, ARN Gateway
will reset the USB-RS232 port before resending heartbeat signal. Select the number of
times the heartbeat signal acknowledge should timeout before the USB-RS232 port is
reset. If “1 time”is selected, the USB-RS232 port will be reset every time the
acknowledgement times out. If “2 times”, the acknowledgement must timeout twice in a
row for two heart beats before ARN Gateway resets USB-RS232 port, and so on.
Wait for ACK

10
Enable: WhenARN Gateway receives a report and proceed to forward to report to CMS, it
will wait until receiving ACK signal from CMS before sending ACK signal to the Control
Panel. This guarantees that the Control Panel will always receive correct ACK signal and
know whether the report was successful.
Disable: When ARN Gateway receives a report and proceed to forward to report to CMS,
it will send back an ACK signal to the Control Panel without waiting for theACK signal from
CMS.
Line no. / Receiver no.
Program the Line number and Receiver number used by ARN Gateway to forward the
report to CMS. This is used for the CMS to recognized from which gateway the report was
sent.
Notify Email
Set an email account for receiving any error notification (This function is currently
reserved).
After finishing all setting, press “OK”to confirm the change.
5.2. SMS Gateway Setting
This function is disabled for ARN Gateway, please ignore.

11
5.3. Event Log
The Event Log records and displays all received reports from Climax Control Panel, and
commands received from Home Portal Server for sending SMS commands. Amaximum number
of 1000 events are stored in ARN Gateway.

12
5.4. Network
This page is for you to configure network settings.
DHCP
On: If DHCP is set to On, the Network will obtain the IP address automatically with a
valid Network DHCP Server. Therefore, you won’t need to do any settings. You can
only set DHCP to On if your Network environment supports DHCP. It will automatically
generate all information.
Off: If DHCP is set to Off, you neet to enter the Network information manually for IP
Address, Subnet mask, Default gateway, Default DNS. Please make sure that you
have obtained all required values according to your Network environment. Please
contact your local service provider for more information.
After finishing above settings, click “OK”to confirm.

13
5.5. UPnP
UPnP is Universal Plug and Play, which opens networking architecture that leverages TCP/IP
and the Web technologies to enable seamless proximity networking in addition to control and
data transfer among networked devices in the home, office, and public spaces.
Enable UPnP Device:
ARN receiver supports UPnP. Once selected, you will be able to see this device via any
UPnP discovery tool (e.g. Window XP).
Enable UPnP Port Redirect:
The device will try to find an UPnP-supported router and set up the port to redirect to the
router.
Port Forwarding:
1. Local Port
2. External Port
3. Protocol
After finishing above settings, click “OK”to confirm.

14
5.6. Change Password
The Administrator page allows you to program the user name and password used for accessing
the ARN Gateway’s configuration webpage.
User Name: The current user name used to log into ARN Gateway webpage.
To change the user name, enter a new name in the field
New Password: If you want to change the password, enter the password in this field.
Maximum character allowed is 20.
Repeat Password: Repeat the password again in this field
After finishing above settings, click “Change Password”to confirm.
Press OK to confirm change, press Reset to return to clear setting.

15
5.7. SMTP
Program the mail server related settings. The email account you set here would be used to send
notification email. (SMTP function is currently reserved)
Server: set the mail server (max. 60 digits/alphabets).
Port: set the port number (max. 5 digits/alphabets).
User: set the mail account name (max. 30 digits/alphabets).
Password: set the password corresponding to the mail account name (max. 30
digits/alphabets).
From: set the email address according to your mail sever and account name. If your mail
server supports other email address, you can enter the email address here. (max. 30
digits/alphabets).
Using TLS/SSL encrypted channels (Secure SMTP):If your mail server uses TLS or
SSL encryption method for secure transfer, please click the box to enable the setting
After finishing above settings, press “OK”to confirm.

16
5.8. Date & Time
Set your date, time and timezone in this page.
Date & Time:
Set your current date and time and click “OK”to confirm, or “Reset”to undo change.
Time Zone:
Select your time zone and click “OK”to confirm, or “Reset”to undo change.
Internet time:
The system will automatically synchronize with an internet time server. Tick the check box
to enable this function. Available server options: pool.ntp.gov, time.nist.gov and
tick.usno.navy.mil..
Press OK to confirm change, press Reset to return to clear setting.

17
5.9. Dynamic DNS
This page is used to check ARN Gateway’s public IP. Setup your Control Panel’s Report setting
according to the public IP address displayed in this page to send report to ARN Gateway.
Dynamic DNS Server: Default server: http://checkip.dyndns.org
Press OK to confirm change, press Reset to clear setting.

18
5.10. Firmware
This page is for you to update your ARN Gateway firmware.
Step1. Select the firmware file in your computer
Step2. Click “Apply”to upload the firmware file to ARN Gateway.
Step3. It takes a short time to complete update, do NOT power off during the process.
Step4. Once updating is complete, the ARN Gateway will reboot automatically.
Table of contents
Other Climax Gateway manuals
Popular Gateway manuals by other brands

SMC Networks
SMC Networks DOCSIS 3.0 Commercial Cable Modem Gateway... Specifications

ZyXEL Communications
ZyXEL Communications Prestige 660H Series user guide

Zoom
Zoom X5V 1610 quick start guide

SSS Siedle
SSS Siedle SG 650-0 Product information

KYLAND Technology
KYLAND Technology KGW3101 user manual

Midas
Midas 926 Gateway Light user manual