manuals.online logo
Brands
  1. Home
  2. •
  3. Brands
  4. •
  5. Clou
  6. •
  7. Indoor Furnishing
  8. •
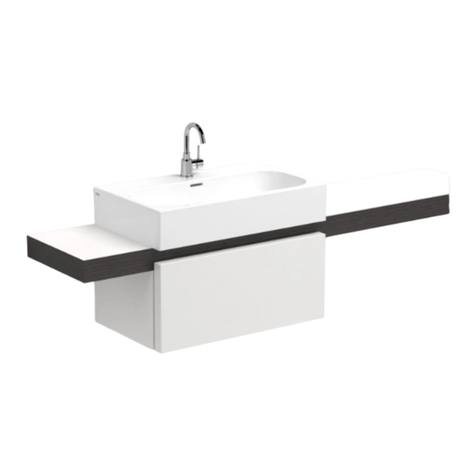
  9. Clou hammock CL/07.66.204.50 User manual

Clou hammock CL/07.66.204.50 User manual

Montage instructies
Installation Instructions
Notice de montage
Montageanweisungen
Dimensions in mm, for reference only / 08.09.2016 / rev_04 www.clou.nl
hammock_dresser 40 cm
CL/07.66.204.50, CL/07.66.204.55
bath findings
- Alvorens de montage te beginnen moet de volledigheid
van de levering gecontroleerd worden. Tevens moet ook op
transportschade gecontroleerd worden, te late schademel-
dingen (> 1 dag na levering) worden niet aanvaard.
- De meegeleverde bevestigingsartikelen zijn geschikt voor
gestucte of betegelde, massieve muren die voldoende
draagkracht hebben. Voor andere muren dient men zelf
bevestigingsartikkelen te voorzien en dient de muur mo-
gelijk verstevigd te worden.
- Clou behoudt zich het recht voor technische en optische wijzigingen aan te brengen
t.o.v. afgebeelde producten.
- Door wijzigingen in de productie kan het zijn dat gegeven afmetingen niet meer cor-
rect zijn. Alle vermelde afmetingen in deze handleiding dienen te worden geverifi-
eerd alvorens de actie uit te voeren.
- Clou b.v. kan niet verantwoordelijk worden gesteld voor de gevolgen van onaange-
past gebruik, onaangepast transport of beschadigingen veroorzaakt door tussenop-
slag.
- De van toepassing zijnde garantievoorwaarden gelden steeds.
- De montage dient uitgevoerd te worden door 2 personen waarvan minstens één vak-
kundig opgeleid persoon.
- Alle maten zijn in mm.
- Before starting with the mounting check whether the
delivery is complete. At the same time the delivery should
be checked for damage due to transportation, damage
reports that are too late (> 1 day after delivery) will not be
accepted.
- The included fixing media are suited for plastered or tiled
solid walls with enough supporting power. For other walls
the used fixing media is at own responsibility, and the
wall might need reinforcement.
- Clou reserves the right to introduce technical and visual changes with respect to the
depicted images.
- Due to changes in production it is possible that given dimensions are no longer cor-
rect. All mentioned dimensions in this manual should be verified before executing
the action.
- Clou b.v. can not be held responsible for the results of improper use, improper trans-
portation or any damage caused during interim storage.
- The current terms of guarantee are always valid.
- The installation has to be performed by at least 2 persons of whom at least one
should be a skilled professional.
- all dimensions are in mm.
NL
EN
- Avant de procéder au montage, veuillez contrôler si l’article
livré est complet. Veuillez aussi contrôler des dommages
éventuels causés par le transport, nous n’acceptons pas de
réclamations dues à des dégâts causés par le transport au-
delà de 1 jour après livraison.
- Les fixations livrées avec les articles sont destinés pour
montage sur un mur massif porteur, finition stuc ou carrelé.
Pour d’autres finitions ou murs plus faibles, prévoir d’autres
fixations et éventuellement consolider le mur si nécessaire.
- Clou se réserve le droit pour tout changement technique ou optique par rapport à la
photo représentant le produit.
- Des changements de production peuvent faire en sorte que les dimensions affi-
chées ne correspondent plus, nous vous prions de vérifier avant de procéder à toute
action.
- Clou BV ne peut être tenu responsable pour usage non approprié des articles, trans-
port inadéquat ou dommage causés à votre entrepôt en attente de livraison.
- Les conditions de garanties en vigueur restent toujours valables.
- Le montage doit être effectué par 2 personnes dont une au moins soit un corps de
métier.
- Toutes les mesures affichées sont en mm.
- Vor Beginn der Montage überprüfen Sie bitte, ob die Liefe-
rung vollständig ist bzw. ob durch den Transport Schäden
entstanden sind. Diese Überprüfung muss direkt am Liefertag
erfolgen. Sollte ein Schaden festgestellt werden, muss dieser
unmittelbar nach der Lieferung, spätestens (> 1 Tag nach Liefe-
rung) angezeigt werden.
- Die im Lieferumfang enthaltene Beschreibung, für verputzte
oder geflieste massive Wände, sind ausschließlich für Wände
mit genügend und ausreichender Tragfähigkeit geeignet und
vorgesehen. Bei Wänden mit einer geringe Tragfähigkeit erfolgt die Montage auf eigene
Verantwortung. Hier empfehlen wir eine zusätzliche Unterstützung durch spezielle Be-
festigungslösungen
- Clou behält sich das Recht auf technische und optische Änderungen in Bezug auf die
dargestellten Bilder vor.
- Aufgrund von Änderungen in der Produktion ist es möglich, dass angegebene Maße nicht
mehr korrekt sind. Alle genannten Dimensionen in diesem Handbuch sollten vor der
Ausführung der Maßnahme überprüft werden.
- Clou B.V. ist nicht verantwortlich für die Ergebnisse des unsachgemäßer Gebrauch,
unsachgemäßer Transport oder Schäden, die während Zwischenlagerung verursacht
werden.
- Die aktuelle Garantiebedingungen sind immer gültig.
- Die Installation muß von mindestens 2 Personen durchgeführt werden, wobei 1 Person
bereits vorhandene Fachkenntnisse hat.
- Alle Dimensionen erfolgen in mm Angaben.
FR
DE
Inhoud levering:
Content of delivery:
Contenu de la livraison:
Inhalt der Anlieferung:
Benodigd gereedschap:
Required tools:
Outils requis:
Erforderliche Werkzeuge:
Tijdens de installatie moet men voorkomen dat het opper-
vlak van het product beschadigd raakt door harde voorwer-
pen op het product te leggen.
During installation one has to prevent damaging the surface
of the product due to placing hard objects on the product.
Pendant l’installation on doit empêcher endommager la
surface du produit dû à placer des objets durs sur le pro-
duit.
Während der Installation soll verhinderd werden das harte
Gegenstände die Oberfläche der Produkten beschädigen.
Gebruiksvoorschriften:
zie ook de onderhoudsvoorschriften op www.clou.nl
User’s instructions:
See also the maintenance guides at www.clou.nl
Instructions d’utilisation:
Voyer aussi les instructions de maintenance sur www.clou.nl
Gebrauchsanweisungen:
Wartungsanweisungen finden Sie auf unsere Homepage
www.clou.nl
8x
8x
1x
2x
1x
max.
15 kg
hammock_dresser 40 cm
CL/07.66.204.50, CL/07.66.204.55
Dimensions in mm, for reference only / 14.06.2016 / rev_02 www.clou.nl
400
297
60
300
389
480
503
18
222
hammock_dresser 40 cm
CL/07.66.204.50, CL/07.66.204.55
Dimensions in mm, for reference only / 14.06.2016 / rev_03 www.clou.nl
900
110 110
885
1900
750
max. 725
min. 695
1_
Monteer eerst de meubel(s) onder
de wastafel(s) en daarna de overige
meubels conform diens handleidin-
gen. Begin dan pas aan de installa-
tie van de 40cm ladekast.
Start with mounting the furniture
underneath the washbasin(s) first,
then the other furniture in accord-
ance with its instructions. Only then
start installing the 40cm dresser.
Commencez à installer le(s)
meuble(s) sous le(s) lavabo(s), sui-
vante les autres meubles. Et puis,
commencez l’installation du com-
mode 40cm.
Montieren Sie erst die Kommoden
unter den Waschtisch, danach die
übrigen Kommoden konform der
Montageanweisungen. Beginnen Sie
erst dann mit der Installation der
40cm Kommode.
2_
Duidt met potlood en waterpas
de middellijn van de ladekast
aan.
Mark with pencil and level the
centreline of the dresser.
Marquer avec un crayon et avec
un niveau la ligne de centre de
la commode.
Markieren Sie mit einem Blei-
stift und mithilfe der Was-
serwaage die Mittellinie des
Kommode.
centre
X mm
centre
3_
Duidt met potlood en waterpas
de gewenste hoogte Y van de
ladekast aan. (aangeraden: Y =
900 mm)
Mark with pencil and level
the prefered height Y of the
dresser. (recommended: Y =
900 mm)
Marquer avec un crayon et avec
un niveau la hauteur souhaitée
Y de la commode. (recomman-
dé : Y = 900 mm)
Markieren Sie mit einem Blei-
stift und mithilfe der Wasser-
waage die gewünschte Höhe Y
des Kommode. (Empfohlener
Wert: Y = 900 mm)
4_
Duidt met potlood de plaatsen
aan waar u gaten moet boren.
Het is aangeraden de gegeven
afmetingen na te meten.
Mark with pencil the spots to
drill holes. It is recommended
to verify the given dimensions.
Marquer avec un crayon les
endroits de perçage des trous.
Il est recommandé de mesurer
encore les dimensions indi-
quées.
Markieren Sie mit einem
Bleistift die Stellen an denen
Löcher gebohrt werden müs-
sen. Es wird empfohlen, die
angegebenen Abmessungen
nachzumessen.
Y-line
38 mm
89 mm
38 mm
132 mm 132 mm
52 mm
Y mm
Y mm
ø 10 mm
5_
Boor de gaten voor de beugels
(ø 10 mm).
Drill the holes for the supports
(ø 10 mm).
Percer les trous pour les sup-
ports (ø 10 mm).
Bohren Sie die Löcher für die
Unterstutzungen (ø 10 mm).
6_
Steek de pluggen in de gaten
en bevestig de bevestigingspla-
ten met de schroeven.
Insert the dowels in the holes
and mount the mounting
plates with the screws.
Enfoncer les chevilles dans les
trous et fixer les plaques de
montage avec les vis.
Bringen Sie die Dübel in den
Löchern an und befestigen Sie
die Montageplatten mit den
Schrauben.
7_
Haal de lade uit de ladekast
door ze naar voor en omhoog
te trekken. Verwijder ook de
afdekkapjes.
Remove the drawer by pulling
it forward and upward. Also
remove the plastic covers on
the sides.
Retirez le tiroir de la commode
en le tirant et en le relevant.
Retirez aussi les couvercles en
plastique sur les côtés.
Nehmen Sie die Schublade aus
der Kommode, indem Sie diese
heraus und dann nach oben
ziehen. Entfernen Sie auch die
Kunststoffabdeckungen an die
Seiten.
8_
Plaats de bevestigingsbeu-
gels van de ladekast over de
bevestigingsplaten.
Place the mounting brack-
ets of the dresser over the
mounting plates.
Placer les supports de fixa-
tion de la commode sur les
plaques de montage .
Setzen Sie die Befestigungs-
bügeln von der Kommode
über die Montageplatten.
A
B
9_
Stel de positie van de ladekast
bij. Met bout A regelt men de
hoogte van de ladekast, met
bout B de afstand tot de muur.
Adjust the position of the
dresser. With bolt A you regu-
late the heigth of the dresser,
with bolt B you adjust the
distance to the wall.
Ajuster la position de la com-
mode. Avec le boulon A régler
la hauteur de la commode,
avec boulon B régler la dis-
tance au mur.
Stellen Sie die Position der
Kommode ein . Mit Bolz A re-
geln Sie die Höhe der Kommo-
de, mit Bolz B regeln Sie den
Abstand zur Wand.
10_
Indien van toepassing, verbind de
ladekasten (niet bij de open lade-
kast 400). Boor bij beide ladekasten
het voorste blinde gat door. Monteer
vervolgens met patentbout en huls.
If applicable, connect the dressers
(not for open drawer 400). At both
dressers, drill the blind hole at the
front. Connect with the bolt and
sleeve.
Le cas échéant, connectez les com-
modes (pas pour armoire ouverte
400). Percez les trous borgne des 2
commodes. Connectez avec boulon
et manchon.
Verbinden Sie die Kommoden
miteinander (nicht für das offene
Schrank gedacht ). Bohren Sie die
Vorderseite an, um somit die beiden
Kommoden mit den beigefügten
Schraubensatz zu verbinden.
11_
Schuif de afdekkapjes terug
over de bevestigingsbeugels.
Slide the plastic covers back
over the mounting plates.
Glissez les couvercles en plas-
tic sur les plaques de mon-
tage.
Schieben Sie die Kunststoff-
abdeckung wieder auf die
Montageplatten.
12_
Bevestig de kraan (niet inbe-
grepen) op de wastafel maar
sluit deze nog niet aan op de
waterleiding.
Mount the tap (not included)
on the washbasin but don’t
connect it to the water supply
yet.
Fixez le robinet (non inclus) sur
le lavabo mais raccordez le pas
encore à la conduite d’eau.
Befestigen Sie die Waschti-
scharmatur (nicht im Lieferum-
fang enthalten) am Waschtisch
aber schließen Sie ihn nicht an
der Wasserleitung an.
14_
Bevestig de meubelsifon (niet
inbegrepen) en sluit nu alle
leidingen aan. Deze sifon dient
apart besteld te worden: arti-
kelnummer CL/06.53021
Attach the furniture trap (not
included) and connect all pipes
now. The trap must be ordered
separately: article n° CL/06.53021
Fixez le siphon pour meubles
(non inclus) et connectez les
tuyaux maintenant. Le siphon
doit être commandé sépa-
rément: numéro de l’article
CL/06.53021
Befestigen Sie das Möbelsiphon
(nicht im Lieferumfang ent-
halten) und schließen Sie die
Wasserleitungen an. Die Siphon
muss separat bestellt werden:
Artikelnummer CL/06.53021
13_
Bevestig de wastafel con-
form diens handleiding op het
meubel met sanitair kit. Let
op: monteer eerst de overige
meubels.
Mount the washbasin in accord-
ance with its instructions on the
furniture with silicon paste for
sanitary. Attention: mount the
remaining furniture first.
Fixez le lavabo sur le meuble en
conformité avec ses instructions
avec du mastic sanitaire. Atten-
tion: montez d’abord les autres
meubles.
Montieren Sie den Waschtisch
in Übereinstimmung mit seinen
Anweisungen auf das Möbel mit
Silikon für Sanitär. Bitte be-
achten Sie, dass erst die Möbel
montiert werden müssen!
15_
Plaats de lade terug in de
ladekast.
Place the drawer back in the
dresser.
Remettre le tiroir dans la com-
mode.
Setzen Sie die Schublade wie-
der in der Kommode ein.
NO OK
16_
Stel de hoek af d.m.v. de
stelschroef zodat het ladefront
verticaal staat.
Adjust the inclination by tur-
ning the setscrew. Make sure
the drawer front is perfectly
vertical.
Réglez l‘inclination par tour-
ner la vis de réglage jusqu‘à la
façade du tiroir est verticale.
Stellen Sie den Winkel mithilfe
der Stellschraube ein, sodass
die Kommodenfront vertikal
steht.
OKNO
18_
Stel de zijdelingse plaatsing
van het deurtje af d.m.v. de
voorste schroef te verdraaien.
Doe dit aan beide kanten.
Adjust the sideways placement
of the door by turning the front
screw. Do this on both sides.
Ajuster la position latérale de
la porte par touner le vis avant.
Faites-le en deux cotés.
Stellen Sie die seitliche Positio-
nierung der Tür ein, indem Sie
die vorderste Schraube ver-
stellen. Tun Sie dies auf beiden
Seiten.
17_
Stel de hoogte van het deurtje
af d.m.v. de achterste schroef.
Doe dit aan beide kanten.
Adjust the height of the door by
turning the back screw. Do this
on both sides.
Réglez la hauteur de la por-
te par tourner le vis arrière.
Faites-le en deux cotés.
Stellen Sie die Höhe der Tür
mithilfe der hintersten Schrau-
be ein. Tun Sie dies auf beiden
Seiten.
NO OK
20_
Plaats of verschuif alle afdek-
kapjes terug op hun plaats.
Replace or move all the plastic
covers back in place.
Placez ou déplacez tous les
couvercles en place.
Platzieren und verschieben Sie
alle Kunststoffabdeckung wie-
der an ihrem Platz.
19_
Stel de frontale plaatsing van
het deurtje af d.m.v. de schroef
aan de onderzijde van de lade-
kast te verdraaien. Doe dit aan
beide kanten.
Adjust the frontal placement of
the door by turning the screw
on the bottom of the dresser.
Do this on both sides.
Ajuster la position frontale de
la porte par touner le vis sur le
bas du commode. Faites-le en
deux cotés.
Stellen Sie die frontalen Positi-
onierung der Tür ein, indem Sie
die Schraube an der Unterseite
der Kommode zu verstellen.
Tun Sie dies auf beiden Seiten. OKNO
21_
Monteer de spiegel conform
diens handleiding.
Mount the mirror in accordance
with its instructions.
Monter le miroir en conformité
avec ses instructions.
Montieren Sie den Spiegel in
Übereinstimmung mit seinen
Anweisungen.
22_
Kit de naden tussen planchet,
wastafel en muur af met sani-
tair kit.
seal all seams between shelf,
washbasin and wall with sili-
con paste for sanitary.
Mastiquer tout les joints entre
la tablette, lavabo et le mur
avec du mastic sanitaire.
Dichten Sie alle Näht zwischen
Ablage, Waschbecken und
Wand mit Silikon für Sanitär.
Clou bv
Thermiekstraat 1
NL-6361 HB Nuth
T +31 (0)45 524 56 56
F +31 (0)45 524 60 00
[email protected]
www.clou.nl
bath findings

This manual suits for next models

1

Other Clou Indoor Furnishing manuals

Clou Frame New Wash Me shelf CL/07.41.0 55 Series User manual

Clou

Clou Frame New Wash Me shelf CL/07.41.0 55 Series User manual

Clou match me CL/07.56.003.60 User manual

Clou

Clou match me CL/07.56.003.60 User manual

Clou match me CL/08.02.002.01 User manual

Clou

Clou match me CL/08.02.002.01 User manual

Clou match me CL/07.56.151.50 User manual

Clou

Clou match me CL/07.56.151.50 User manual

Clou First CL/08.91110 User manual

Clou

Clou First CL/08.91110 User manual

Clou Look at me CL/08.06 01 Series User manual

Clou

Clou Look at me CL/08.06 01 Series User manual

Clou hold me CL/08.01.001.29 User manual

Clou

Clou hold me CL/08.01.001.29 User manual

Clou Look at Me CL/08.12.045.21 User manual

Clou

Clou Look at Me CL/08.12.045.21 User manual

Clou Look at Me CL/08.11.028.04 User manual

Clou

Clou Look at Me CL/08.11.028.04 User manual

Clou Look at Me CL/08.09.110.21 User manual

Clou

Clou Look at Me CL/08.09.110.21 User manual

Clou Sjokker SJ/09.26039.82 User manual
Clou

Clou Sjokker SJ/09.26039.82 User manual

Clou CL/07.69.104.21 User manual

Clou

Clou CL/07.69.104.21 User manual

Clou match me CL/07.56.203.50 User manual

Clou

Clou match me CL/07.56.203.50 User manual

Clou Hammock CL/07.66.417.50 User manual

Clou

Clou Hammock CL/07.66.417.50 User manual

Clou Look at Me CL/08.08.110.20 User manual

Clou

Clou Look at Me CL/08.08.110.20 User manual

Clou match me cabinet CL/07.56.203.65 User manual

Clou

Clou match me cabinet CL/07.56.203.65 User manual

Clou hammock CL/07.66.209.50 User manual

Clou

Clou hammock CL/07.66.209.50 User manual

Clou Mini Match Me CL/07.56.551.50 User manual

Clou

Clou Mini Match Me CL/07.56.551.50 User manual

Clou match me User manual

Clou

Clou match me User manual

Clou Wash Me CL/06.53021 User manual

Clou

Clou Wash Me CL/06.53021 User manual

Clou SJ/09.26039.01 User manual

Clou

Clou SJ/09.26039.01 User manual
Clou hold me CL/08.04.002.40 User manual

Clou

Clou hold me CL/08.04.002.40 User manual

Clou mini match me CL/07.56.402.50 User manual

Clou

Clou mini match me CL/07.56.402.50 User manual

Clou Look at Me CL/08.09.110.20 User manual

Clou

Clou Look at Me CL/08.09.110.20 User manual

Popular Indoor Furnishing manuals by other brands

BOBOCHIC DANAE Assembly instructions

BOBOCHIC

BOBOCHIC DANAE Assembly instructions

Home Decorators Collection V174814 Use and care guide

Home Decorators Collection

Home Decorators Collection V174814 Use and care guide

Forte CRXS94S Assembling Instruction

Forte

Forte CRXS94S Assembling Instruction

Argos 497/1630 Assembly instructions

Argos

Argos 497/1630 Assembly instructions

RATTAN WF199116AAA Assembly instructions

RATTAN

RATTAN WF199116AAA Assembly instructions

Multay SV02 Assembly instruction

Multay

Multay SV02 Assembly instruction

Courtyard Creations RTS735T Assembly instructions

Courtyard Creations

Courtyard Creations RTS735T Assembly instructions

noken PURE LINE 100207771 N899999670 instructions

noken

noken PURE LINE 100207771 N899999670 instructions

Next MALVERN 120816 Assembly instructions

Next

Next MALVERN 120816 Assembly instructions

Courtyard Creations KUS530Q Assembly instructions

Courtyard Creations

Courtyard Creations KUS530Q Assembly instructions

Happy Garden ALICE TBL05 quick start guide

Happy Garden

Happy Garden ALICE TBL05 quick start guide

John Thomas TT21 Assembly instructions

John Thomas

John Thomas TT21 Assembly instructions

Belleze Hazel 014-HG-44804 manual

Belleze

Belleze Hazel 014-HG-44804 manual

Kobalt 19004 quick start guide

Kobalt

Kobalt 19004 quick start guide

CorLiving BAF-310-B quick start guide

CorLiving

CorLiving BAF-310-B quick start guide

CS Schmal 25 Series manual

CS Schmal

CS Schmal 25 Series manual

Onespace 50-LD0105 Assembly instructions

Onespace

Onespace 50-LD0105 Assembly instructions

siena GARDEN Teramo 357.695 Assembly instruction

siena GARDEN

siena GARDEN Teramo 357.695 Assembly instruction

manuals.online logo
manuals.online logoBrands
  • About & Mission
  • Contact us
  • Privacy Policy
  • Terms and Conditions

Copyright 2025 Manuals.Online. All Rights Reserved.