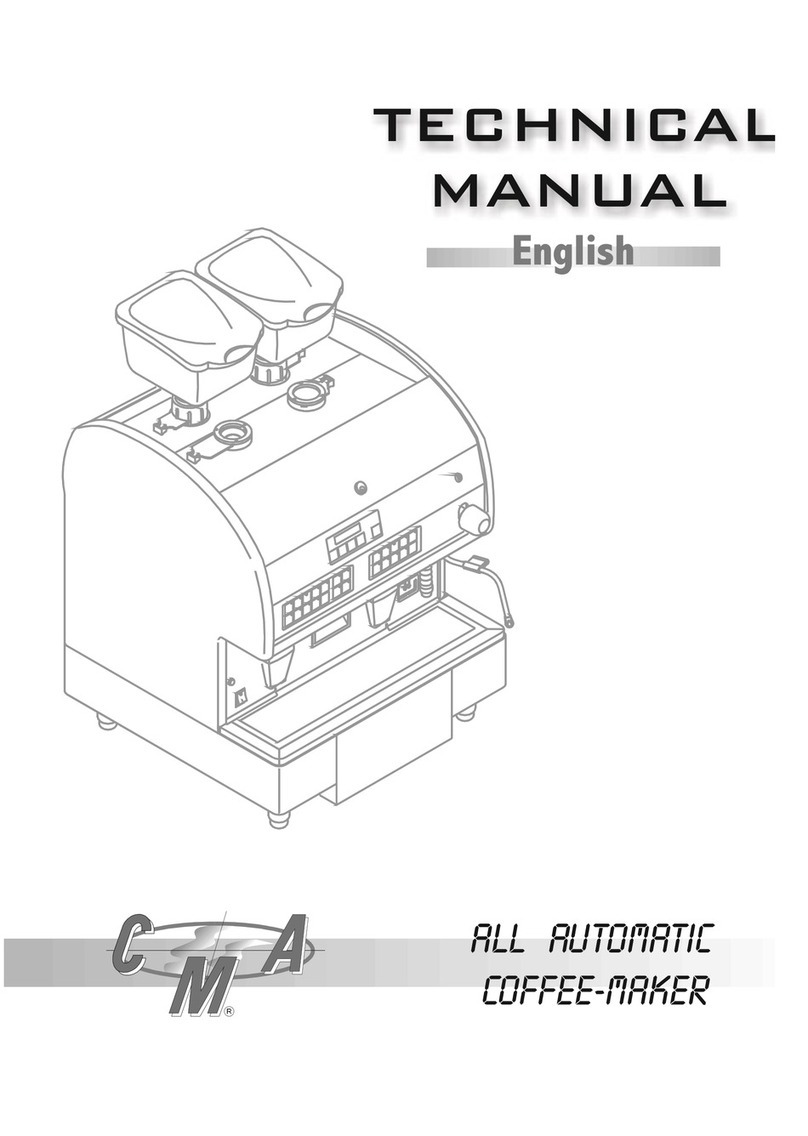
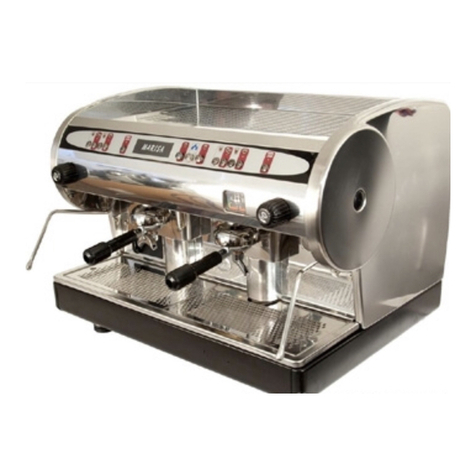
CMA Dishmachines ADRIA series User manual

E
S
PRE
SSO
CO
FFEE MA
C
HINE
USE AND MAINTENANCE MANUAL
instructions for the technician
R
ENGLISH
Via Condotti Bardini, 1 - 31058 SUSEGANA (TV) - ITALY - Tel. +39.0438.6615 - Fax +39.0438.60657 - www.cmaspa.com - [email protected]
R


SUMMARY follows
Summary
GENERAL WARNINGS..................................................................................................................................... 5
WARNINGS FOR THE INSTALLER ................................................................................................................... 5
1. TECHNICAL CHARACTERISTICS................................................................................................................ 6
2. PREPARATION OF THE MACHINE............................................................................................................ 9
2.1 UNPACKING...............................................................................................................................................................9
2.2 EQUIPMENT PREPARATION ......................................................................................................................................9
3. MACHINE INSTALLATION.......................................................................................................................10
3.1 POSITIONING ..........................................................................................................................................................11
3.2 HYDRAULIC CONNECTION FOR AEP-SMSA AEAP-SMAT SAE-SME MACHINES.........................................................11
3.3 HYDRAULIC CONNECTION OF AL-SMMA MACHINES................................................................................................11
3.4 WIRING....................................................................................................................................................................13
3.5 GAS CONNECTION (if included) ..............................................................................................................................13
3.6 STARTING THE MACHINE.........................................................................................................................................16
3.7 EXTERNAL MOTOR PUMP ADJUSTMENT .................................................................................................................17
3.8 MACHINE TUNE-UP.................................................................................................................................................17
4. Distribution machine BOILER and EXCHANGERS..................................................................................18
4.1 ELECTRIC HEATING .................................................................................................................................................18
4.2 GAS HEATING ..........................................................................................................................................................18
4.3 COMBINED GAS + ELECTRIC HEATING ...................................................................................................................18
5. COFFEE DELIVERY GROUPS .................................................................................................................18
5.1 LEVER GROUP ........................................................................................................................................................18
5.2 CARTRIDGE EXCHANGER SYSTEM...........................................................................................................................19
5.3 EXTRACTABLE EXCHANGER SYSTEM.......................................................................................................................19
5.4 CTS SYSTEM (thermosiphon system).....................................................................................................................20
5.5 BOOSTED SYSTEM..................................................................................................................................................20
6. AUTOMATIC WATER ENTRY....................................................................................................................21
7. ELECTRONIC CONTROL UNIT................................................................................................................21
8. VOLUMETRIC DOSING ...........................................................................................................................21
9. PRESSURE SWITCH...............................................................................................................................22
10. THERMOSTAT .....................................................................................................................................22
11. PUMPING SYSTEM..............................................................................................................................22
12. ANTI-FLOODING DEVICE.....................................................................................................................23
13. VALVE GROUP.....................................................................................................................................23
13.1 NEGATIVE PRESSURE VALVE ................................................................................................................................23
13.2 SAFETY OR PRESSURE RELIEF VALVE..................................................................................................................23
13.3 EXPANSION - NON-RETURN VALVE.......................................................................................................................23

SUMMARY follows
14. SOFTENERS........................................................................................................................................24
15. ELECTRONIC PUSH BUTTON PANELS.................................................................................................25
15.1 SAE - SME PUSH BUTTON PANEL.........................................................................................................................25
15.2 TH JUNIOR PUSH BUTTON PANEL ........................................................................................................................26
15.3 AEAP - SMAT TIMER PUSH BUTTON PANEL .........................................................................................................26
16. PREPARATION OF HOT BEVERAGES...................................................................................................27
16.1 MANUAL DISPENSING OF HOT WATER..................................................................................................................27
16.2 AUTOMATIC HOT WATER DELIVERY.......................................................................................................................27
16.3 DISPENSING STEAM .............................................................................................................................................27
17. CUP HEATING DEVICE.........................................................................................................................27
18. AUTOSTEAMER ...................................................................................................................................28
18.1 GENERALITY .........................................................................................................................................................28
18.2 SETTING THE TEMPERATURE ...............................................................................................................................28
18.3 ADJUSTING MILK FOAMING ...................................................................................................................................28
18.4 USE.......................................................................................................................................................................29
18.5 AUTOSTEAMER SYSTEM OPERATION....................................................................................................................30
19. HEATED STORAGE ..............................................................................................................................31
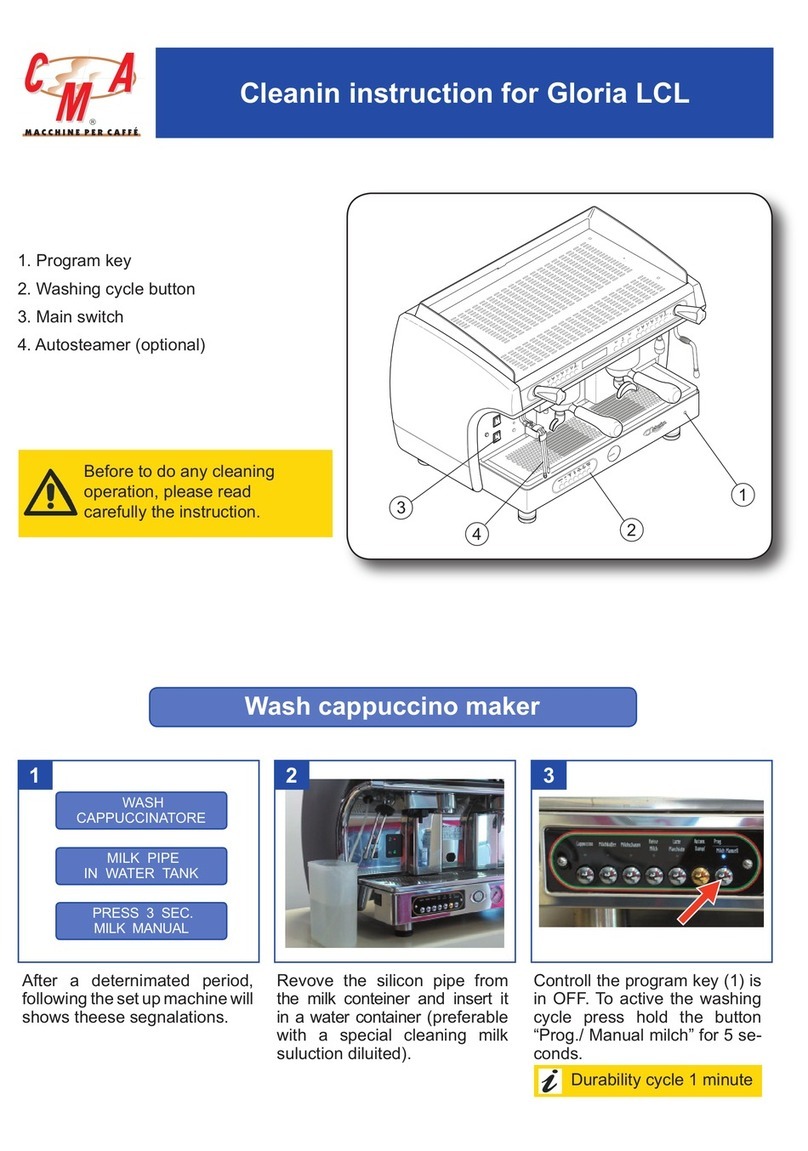
20. CAPPUCCINO MAKER..........................................................................................................................32
20.1 INSTALLATION ......................................................................................................................................................32
20.2 CLEANING .............................................................................................................................................................32
20.3 CAPPUCCINO.........................................................................................................................................................33
20.4 WARM MILK ..........................................................................................................................................................33
21. CLEANING...........................................................................................................................................34
22. CHECKS and MAINTENANCE...............................................................................................................36
23. MALFUNCTIONS and CORRESPONDING SOLUTIONS ..........................................................................38
24. LIST OF HAZARDS ..............................................................................................................................41
HYDRAULIC DIAGRAMS................................................................................................................................43
ELECTRICAL DIAGRAMS...............................................................................................................................57

GENERAL WARNINGS
The manufacturer of the equipment cannot be held responsible for damage caused by failure to oblige to the requirements below.
WARNINGS FOR THE INSTALLER
• Read this manual carefully. It provides important information on safe installation, operation and maintenance of the equipment;
•
Installation, conversion to other type of gas, and maintenance of the equipment must be carried out by personnel qualified and authorized by the
manufacturer, in compliance with safety regulations and instructions included in this manual;
• Identify the model of the equipment. The model is shown on the packaging and on the nameplate of the machine;
• Install the equipment only on sites where there is good ventilation;
• Do not obstruct the ventilation and exhaust holes on the machine;
• Do not tamper with the equipment components.
ATTENTION
After installing the machine, the installer is required to fill in the "Installation Form" that goes with the machine.
On this form must be confirmed the hygiene and safety requirements in force on the installation site and must be reported
any notes relating to changes or interventions necessary for the proper functioning of the equipment.
Filled copies of the Installation form must be kept by the user and by the installer until the end of life of the machine.
In case of withdrawal of the machine, the installer must also provide for the withdrawal of the user's Installation form.

es
p
resso co
ff
ee machine - technician instructions
6
- en
gl
is
h
R
1. TECHNICAL CHARACTERISTICS
1Boiler level-check window (*)
2Pressure gauge
3Steam pressure gauge
4Steam nozzle
52-cup filter holder
6Manual water load
7Adjustable foot
8Hot water nozzle
9Gas burner viewing window (if included)
10 Gas safety (if included)
11 Gas ignition push button (if included)
12 Machine main switch
13 Cup support grille
14 Machine on indicator light
15 Hot water knob
16 Lever groups
17 Manual delivery switches
18 Push button panels (for version SAE-SME)
DISTRIBUTION MACHINE
LEVER MACHINE
14
16
12
13
2
10
4
4
1
3
11
9
8
7
6
6
15
3
5
5
18
12
3
17
4
1
3
10
411
9
8
7
6
6
2
14
13
15
17 18
5
5
(*)In some versions the optical level is replaced
by a green light.

en
gl
is
h
-
7
R
e
s
p
resso co
ff
ee machine - technician instructions
TECHNICAL CHARACTERISTICS
The nameplate of the machine is fixed on the
base of the frame under the drain pan.
The data of the appliance can be seen also
on the label located on the package of the
machine.
VERSION JUNIOR 1 GROUP COMPACT 2 GROUPS 3 GROUPS 4 GROUPS
Boiler capacity (lt) 5 6 - 8 7 10,5 - 14 17 - 21 23
Power supply voltage(V) 120 - 230
240
120 - 230
240 - 400
120 - 230
240 - 400
120 - 230
240 - 400
120 - 230
240 - 400
230
240 - 400
Power (W) 120V 2300 2300 3000 3700 ----- -----
Power (W) 230-240-400V 2300 3000 3000 3900 5300 6300
Boiler pressure (bar) 0.8 - 1.4 MAX
Safety valve calibration (bar) 1,9
Supply water pressure (bar) 1.5 - 5 MAX
Coffee dispensing pressure (bar) 8 - 9
Operating range and storing conditions +5°C +40°C MAX 95% U.R.

es
p
resso co
ff
ee machine - technician instructions
8
- en
gl
is
h
R
INTERNAL COMPONENTS
1Boiler
2Delivery group
3Internal motor pump (if included)
4Boiler / motor pump pressure gauge
5Boiler level-check window
6Internal pump water attachment connection (if included)
7Manual water pump
8External pump water attachment connection
9Drain tub
10 Volumetric dosing device (SAE-SME)
11 Machine main switch
12 Gas system (if included)
13 Electrical heating element
14 Pressure switch
1
3
4
5
14
9
10
2
11
6
12
13
7
8

en
gl
is
h
-
9
R
e
s
p
resso co
ff
ee machine - technician instructions
2. PREPARATION OF THE MACHINE
2.1 UNPACKING
Open the packaging, taking care not to damage the machine.
Remove the machine protections and the equipment contained
in the package. Take the machine out.
If there is an external motor pump, the motor and the pump are
provided in a separate package.
2.2 EQUIPMENT PREPARATION
Motor pump
For the machines with an external motor, it is necessary to prepare the pump and the motor.
Fit the 3/8 gas connection with filter (2) at the pump inlet (arrow ) and the plain 3/8 connection (1) at the pump outlet (arrow ).
Attention: install the connection with filter (2) at the pump inlet.
Use the special washers (3) provided for the seal.
To correctly couple the pump and motor, use the appropriate joint (4) and the spacer ring (5). Lock all of this with the two clamps (6).
2
1
3
4
5
6
3
6

es
p
resso co
ff
ee machine - technician instructions
10
- en
gl
is
h
R
3. MACHINE INSTALLATION
DISTRIBUTION MACHINE
1
16
9
2
8
10
11
12
13
6
4
3
7
5
14
15

e
n
gl
is
h
-
11
R
e
s
p
resso co
ff
ee machine - technician instructions
3.1 POSITIONING
Prepare an ample support base for the machine that is suitable to support its weight (1); it is important for all terminals of connections to
the water mains (16), to the electrical mains (9) and to the gas mains (in included), to be easily reachable and in any case in the immediate
vicinity of the machine.
Make sure that there is sufficient space for placing and correctly using the appliance. If positioning the machine next to a wall, it is necessary
to ensure a minimum distance of 20 cm. between the machine and the wall.
The grinding-dosing machine (2) must be placed in the immediate vicinity of the appliance in order to allow for comfortable use of the ma-
chine.
Place the pump (13) in a protected area and away from accidental contact with the operator.
It is advisable to equip the working base of the machine with a drawer (14) for used coffee grounds. Preferably this would also have a rubber
device to tap the filter holder against.
ATTENTION
For correct operation, the machine must rest on a perfectly horizontal surface.
Any alignment adjustments of the ma-
chine must be done by adjusting the feet.(8)
ATTENTION
The water supply of the appliance must be carried out with water which is suitable for human consumption, in compliance
with the regulations in force in the place of installation. The installer must receive, from the owner/manager of the system,
confirmation that the water meets the above listed requirements.
3.2 HYDRAULIC CONNECTION FOR AEP-SMSA AEAP-SMAT SAE-SME MACHINES
1) Remove any rubber plugs which may be inserted in the tap fixtures of the softener;
2) Connect the water mains (16) to the softener inlet (10) using the hose provided;
3) rinse the resins
of the softener and check that the water, which initially comes out yellowish, comes out clean;
4) connect the softener outlet (11) to the external motor pump inlet (12);
5) connect the outlet of the motor pump (13) to the inlet of the machine (6);
LEVER MACHINE
16
6
4
3
15
7
6) connect the drain pad of the machine (4) to the sewer drain (3) us-
ing the special hose provided. Avoid overly tight bends or kinks, and
make sure that there is sufficient inclination for water to flow out of the
drain.
3.3 HYDRAULIC CONNECTION OF AL-SMMA MACHINES
1) connect the water mains(16) to the inlet of the machine (6);
2) connect the drain pad of the machine (4) to the sewer discharge
(3) using the special tube provided. Avoid overly tight bends or kinks,
and make sure that there is sufficient inclination for water to flow out
of the drain.
NOTE
All filling connections are of the 3/8 male gas type.
The drain pan is connected to a tube with an internal
diameter of 16mm.

es
p
resso co
ff
ee machine - technician instructions
1
2- en
gl
is
h
R
ATTENTION
The hydraulic connection must be made in compliance with local national standards.
On lever machines, the hydraulic connection should be made only to the water supply with a minimum pressure of 1.5 bar.
If an external tank is used, the connection pipe between the machine and the tank must not exceed 150 cm.
For the European Community: for both the hydraulic connection to the water mains as well as the connection to an external
tank, a non-return valve
(15)
must be placed up the line from the machine as set forth by standards EN 1717.
ATTENTION
During the installation of the appliance, only the components and materials supplied with the appliance are to be used.
Should the use of other components be necessary, the installer must verify their suitability to be used in contact with water used
for human consumption.
The installer must carry out the hydraulic connections in accordance with the hygiene norms and the hydraulic safety norms for
environmental protection in force in the place of installation.
FOR THE U.S.A.
The water connections and discharges must be made in accordance with the 2003 International Plumbing Code of the
International Code Council (ICC), or with the 2003 Uniformed Hydraulic Code of the
IAPMO
.
The machine must be installed together with an adequate non-return valve, as required by national regulations.
NOTE
In all machines equipped with automatic water filling, there is an automatic time control device which allows the boiler
to be filled with water within a maximum period of time. This function keeps water from flowing out of the boiler's valve
(flooding) and keeps the motor pump from overheating.
If the maximum time is not enough for the boiler to fill up completely (machines installed with 3 or 4 groups), turn the ma-
chine off and then back on, and repeat the operations shown above.
When the machine is started for the first time, it is advisable to fill the boiler manually using the knob (7).
Warnings
1)
The water supply must provide cold water for human consump-
tion (potable
water) at a pressure between 1,5 and 5 bars If
the pressure is higher than 5 bar, connect a pressure reducer
before the pump.
2) insert a tap (16) on the water mains supply so that it will be
possible to cut off water flow to the machine;
3) in order to prevent it from being damaged, it is advisable to install
the softener where it will be protected from accidental blows;
4)
to prevent the water from freezing, install the softener in rooms
with an ambient temperature of more than 5°C;
5)
if there is no softener, connect the water mains (16) directly
to the inlet of the external motor pump(12);
6) if there is an internal motor pump, connect the outlet of the
softener (11) (if there is one) or the water mains (16)
directly to the machine inlet (6);
7) when connecting the tub of the machine to the sewer drain,
avoid overly tight curves or kinks, and make sure that there
is sufficient inclination for water to flow out of the drain.
8)
the drain must be connected to an inspectionable siphon that
can be periodically cleaned in order to avoid the backflow of
unpleasant odours;
9) to avoid oxidization and damage to the machine over time, do
not use iron connections for the hydraulic connections, even if
they are galvanized.
16
11
12
6
7
15

e
n
gl
is
h
-
13
R
e
s
p
resso co
ff
ee machine - technician instructions
ATTENTION
Always connect the motor pump cable before the machine power supply cable, in accordance with the diagram provided.
Failure to comply with the instructions given above may cause serious damage to the machine and/or motor pump and
will invalidate the warranty. Carry out the electrical connections only when the machine is disconnected from the power
supply.
3.4 WIRING
It is necessary to link a safety main switch (A) on the electric panel, as required by standard regulations.
Machine with INTERNAL MOTOR PUMP
Connect the power cable as set forth in the chapter "Electrical diagrams" (the cable has a cross-section and number of wires based on the power
and voltage of the machine).
Machine with EXTERNAL MOTOR PUMP
1) Connect the cable to the motor pump (with a smaller cross section) to the connector as shown in the diagram shown alongside.
2) Connect the machine power cable (with larger cross section) as set forth in the chapter "Electrical diagrams".
CB
M
GV
B
M
GV
MP CMotor pump power cable
MP Motor pump terminal
BBlue
MBrown
GV Yellow-green
A
3.5 GAS CONNECTION (if included)
To perform the connection of the gas system follow the indications below:
• When operating on gas, the machine emits combustion fumes directly into
the surroundings where it is being used; therefore, gas-powered machines
must not be installed in rooms with a volume of less than 12 m3, as described
by the standards in use;
•
Upstream from the machine, a cut-off cock must be installed (A);
• Install a pressure reducer upstream from the gas system (B);
• Pipe connections of the gas to the machine must be made in accordance
with current standards in the country of installation using either a flexible
or rigid hose.
AB

es
p
resso co
ff
ee machine - technician instructions
14
- en
gl
is
h
R
• Connection is made with a flexible hose:
- use a hose that meets the standards in use (it is important to replace it periodically as indicated on the tube stamping).
- the hose must have a maximum length of 1 metre.
- attach the hose to the connection (1). if necessary, install the conic connector (8) and related seal (7).
- the hoses must not be placed near potential heat sources, they must not reach a temperature higher than 50°C.
- the hoses must not be subjected to traction or twisting stress, and they must not have any kinks in them. It must be possible to
inspect them along their entire length, and they must not come into contact with sharp objects or sharp corners.
• Connecting a rigid hose: connect the Ø8 copper tube Ø8 to the 1/4 gas connection (1).
• Check that the type of gas utilised corresponds to the one indicated on the gas data plate of the machine. In case of different gas, replace
the injector (2) as indicated in the Gas Table on the next page, and replace the "Preparing gas" label on the boiler cover with that cor-
responding to the gas used (supplied with the injector). Ensure correct supply pressure by connecting a manometer to the fitting (3) and
check the air pressure between the input connector to the injector by connecting a pressure gauge (6) See section "Adjusting the gas";
• Check that the air aspiration height (X) corresponds to that indicated in the Gas Table on the next page. To carry out any adjustments
proceed as follows:
- loosen the screw (4);
- move the suction cap (5) to the required height.
- tighten the screw (4).
If, when starting the burner the colour of the flame is not blue, slightly modify the air aspiration height until the correct colour is obtained.
• As soon as connection is complete, check for any gas leaks by placing a soapy solution on all connections.
ATTENTION
If you need to connect the hose to the machine, we supply a conic fitting (8) with seal (7) to be installed on the fitting
cylinder (1).
2
1
7
3
8
6
4
5XX

e
n
gl
is
h
-
15
R
e
s
p
resso co
ff
ee machine - technician instructions
GAS Table Indications for the installation of the appropriate injector and the adjustment of the air aspiration cap .
ATTENTION
Do not under any circumstances attempt to light the gas without first installing the proper injector.
Do not operate the gas burners when the boiler is empty.
NOTE (FOR ITALY)
The system and installation of the devices must be performed in conformance with the current standards UNI-CIG 8723
of the Decreto Ministeriale dated the 12 April 1996.
ATTENTION (FOR GERMANY)
The following requisites must be observed for installation:
• Regulation in terms of work area and the fire department
• Rules in terms of the work place
• Technical rules for suction in terms of fireproofing
• Work sheet DVGW G634 “technical rules for kitchens -gas devices”
• Work sheet DVGW G600 “technical rules for gas installations”
• Technical rules (TRF) for installation with liquid gas
• Rules in terms of accident prevention
• Rules of the Organization that distributes the gas
Gas type
Pressure
of
connection
Min
Pressure
input
injector
Hole for
injector
of the burner
Adjustment
of suction
cap
of the air
Minimum
power
Q min
Maximum
Power
Q n
Maximum
consumption
Model mbar mbar 1/100 mm mm kW kW m3/h kg/h
1 Group
G20 20 1,7 100 1 0,47 1,67 0,177 -
G25 20 1,7 110 1 0,47 1,67 0,177 -
G25 25 2,4 100 1 0,47 1,55 0,164 -
G30/G31 28-30/37 3,5 60 3 0,47 1,40 - 0,110
G30/G31 50 3,5 60 3 0,47 1,80 - 0,142
2 Groups
G20 20 1,9 110 1 0,69 2,03 0,215 -
G25 20 2,1 135 1 0,69 2,52 0,267 -
G25 25 2,7 110 1 0,69 1,88 0,199 -
G30/G31 28-30/37 5,5 75 3 0,69 2,20 - 0,174
G30/G31 50 6,1 65 3 0,69 2,10 - 0,167
3 Groups
G20 20 2,3 135 1 1,16 3,06 0,323 -
G25 20 2,3 145 1 1,16 2,91 0,308 -
G25 25 3,5 135 1 1,16 2,85 0,302 -
G30/G31 28-30/37 6,1 80 3 1,16 2,51 - 0,199
G30/G31 50 11,3 75 3 1,16 2,84 - 0,225
4 Groups
G20 20 2,5 145 1 1,30 3,55 0,376 -
G25 20 2,5 160 1 1,30 3,55 0,376 -
G25 25 3,8 145 1 1,30 3,30 0,349 -
G30/G31 28-30/37 6,8 85 3 1,30 2,85 - 0,225
G30/G31 50 11,3 75 3 1,30 2,85 - 0,225
ATTENTION
When operating on gas, the machine emits combustion fumes directly into the surroundings where it is being used;
therefore, gas-powered machines must not be installed in rooms with a volume of less than 12 m3, as described by the
standards in use;
In closed rooms, always provide ventilation openings to release any possible gas leaks.

es
p
resso co
ff
ee machine - technician instructions
16
- en
gl
is
h
R
Gas adjustment
To perform the adjustment of the gas proceed as follows:
1) Switch on the gas system;
2) remove the locknut (A) and loosen the regulator screw (B) by 2 turns;
3) act on the regulator pin (C) in order to have the maximum opening for the flow f gas; wait for boiler pressure to reach 1.4 bar (see boiler
pressure gauge);
5) act on the regulator pin (C) and turn it clockwise until the burner flame is barely visible (pilot flame) and enough to maintain the ther-
mocouple active; check the minimum pressure through a gauge located on the joint (D);
6) wait for the pressure in the boiler to reduce down to 1 bar (see boiler pressure gauge);
7) act on the adjustment screw (B) turning it clockwise until the flame is up to maximum;
8) tighten the locknut (A) to lock the screw of the regulator (B).
9)
wait for the operating pressure of the boiler indicated on the pressure gauge of the machine, to reach the working value of about 1-1.2 bar.
If you want to increase or decrease operating pressure in the boiler, proceed as above, varying the parameters as follows:
to decrease:
• obtain a pressure in the boiler of about 1.0-1.2 bar, adjusting the minimum to 0.9 bar and maximum to 1.3 bar.
to increase:
• obtain a pressure in the boiler of about 1.2-1.4 bar (this is the maximum recommended pressure limit), adjusting the minimum
to 1.1 bar and maximum to 1.5 bar.
To check the pressure at the inlet of the injector, connect a pressure gauge to the connection (D).
NOTE
The gas system is useful in heating the water in the boiler. It does not, except in special cases, substitute the electrical heating
system, but rather works along with it. For machines with levers, operation may be either electric or gas.
3.6 STARTING THE MACHINE
Before starting the machine, make sure that the level of water in the boiler is higher than the
minimum level on the level-check window (1). If there is no water (first installation or after boiler
maintenance), it is necessary to fill the boiler in advance, so as to prevent overheating of the
heating element. Proceed as follows:
1
A
C
D
B

e
n
gl
is
h
-
17
R
e
s
p
resso co
ff
ee machine - technician instructions
ATTENTION
• during the machine's warm-up phase (roughly 20 minutes), the negative pressure valve will release steam for a few seconds until the
valve itself closes.
• before using the machine, run dry deliveries with the filter holder attached for a few seconds to release any air which may be in the
circuit, so that the delivery groups are completely heated.
• before using the machine, dispense a few servings of coffee to test the grinding and to check the operating pressure of the machine
12
0
3
1
0
2
Switch
Power switch
3.7 EXTERNAL MOTOR PUMP ADJUSTMENT
To adjust operating pressure proceed as follows:
• Operate a coffee delivery switch;
• Adjust the pressure by turning the screw located on the pump (3) so as to obtain a pres-
sure of between 8 and 9 bar. Tightening the screw increases the pressure, and loosening it
reduces the pressure. Check the pressure by means of the pressure gauge(4) located on
the front part of the machine;
• turn off the delivery switch;
3.8 MACHINE TUNE-UP
When installation is complete, the appliance has to be started, brought to the nominal working condition and left for 30 minutes in the "ready
to operate" condition.
Afterwards, the appliance has to be turned off and emptied of the first water introduced in the whole hydraulic circuit, to eliminate possible
initial impurities.
Then the appliance must be once again loaded and brought to the nominal working conditions.
After having reached the "ready to operate" condition, the following operations have to be performed:
a) for each coffee unit, carry out a continuous delivery, in order to release at least 0.5 liters of the coffee circuit. In the case of several dis-
pensing points matched with the same exchanger/coffee boiler, divide the volume on the base of the number of the dispensing points;
b)
release the whole volume of hot water inside the boiler (3 liters for 1GR, 6 liters for 2GR, 8 liters for 3GR, 11 liters for 4GR), by performing
a continuous delivery from the appropriate nozzle. In the case of several dispensing points, divide the volume on the base of the number
of the dispensing points;
c) continuously release steam for at least 1 minute for each steam dispensing point;
When installation is complete, the installer must write a report about the performed operations compiling the Installation Instructions provided
with the machine.
4
Switch
Open the water tap of the water mains and of the softener.
Using manual fill (2) fill the boiler with water until the optimal level is restored.
Turn the switch to position “1” and wait for the machine to warm up completely.
Power switch
Open the water tap of the water mains and of the softener.
Turn the switch to position “1” (electrical power supplied to the pump for automatic boiler filling
and machine services) and wait for the boiler to be automatically filled with water.
Turn the switch to position“2” (full electrical power supplied, including the heating element in the
boiler) and wait for the machine to warm up completely.

es
p
resso co
ff
ee machine - technician instructions
18
- en
g
lish
R
4. Distribution machine BOILER and EXCHANGERS
The boiler is constructed in copper sheet metal (1), to which the heat exchangers are assembled which in turn are connected to the delivery
group. Water for coffee delivery is taken directly from the heat exchanger. During delivery, cold water is sent to the inside of the exchanger
by means of the motor pump. Inside the heat exchanger, cold water and the pre-existing hot water are mixed, thus obtaining optimal water
temperature for coffee infusion.
5. COFFEE DELIVERY GROUPS
The delivery group and the heat exchanger are the fundamental components in obtaining
espresso coffee. Specifically, the purpose of the group is to dispense the coffee.
4.1 ELECTRIC HEATING
The water is heated in the boiler by means of an electrical heating element immerged in
the water(2).
4.2 GAS HEATING
Gas heating is obtained by supplying the flame of the burner located under the
boiler.
4.3 COMBINED GAS + ELECTRIC HEATING
In machines equipped with both systems, it is possible to combine the heating types.
5.1 LEVER GROUP
The lever group uses the boiler pressure and water. This system does not require heat
exchangers.
When the lever (1) is lowered, the spring (2) inside the group is compressed: the piston
(3) raises, allowing water to enter the pre-infusion jacket. When the lever is released,
the piston compresses the water to 8-10 bar, allowing delivery of espresso coffee. The
non-return ball valve (4) keeps water from flowing back into the boiler (5).
2
1
3
2
4
5
1
Phase 1
Lowering the lever.
Phase 3
Release of lever
and delivery of
the coffee.
ATTENTION
Do not replace the heating element with a more powerful one. Before making any modifications, contact the manufacturer.
Phase 2
Pre-infusion for 3÷5
seconds.

e
n
g
lish -
19
R
e
s
p
resso co
ff
ee machine - technician instructions
5.3 EXTRACTABLE EXCHANGER SYSTEM
Heating of the delivery group is provided by direct contact with the boiler. Water used for delivery of coffee is taken from a so-called "extract-
able" exchanger which is immersed in the water of the boiler:
• the activation of the solenoid valve and of the pump allows cold water to enter the exchanger(1).
• from the exchanger (1) the boiler water is carried to the group (2) for delivery;
• the pump allows the increase of the pressure of the water flow up to 8-9 bar.
The version of the extractable exchanger for the Italian market does not include the intake device (3) and the seal (4).
If necessary, the exchanger can be replaced without having to remove the flange: loosen the screws, remove the delivery group from the boiler
and remove the exchanger. These operations should be carried out after the machine has been switched down and has cooled off: always
replace the seals.
5.2 CARTRIDGE EXCHANGER SYSTEM
Heating of the delivery group is provided by direct contact with the boiler. Water used for delivery of coffee is taken from a so-called "cartridge"
exchanger which is immersed in the water of the boiler:
• the activation of the solenoid valve and of the pump allows cold water to enter the exchanger(1);
• from the exchanger (1) the boiler water is carried to the group (2) for delivery;
• the pump allows the increase of the pressure of the water flow up to 8-9 bar.
If necessary, the exchanger can be replaced by removing the flange and disconnecting the relative pipes of the hydraulic circuit.
These operations should be carried out after the machine has been switched down and has cooled off: always replace the seals.
Water inlet
Coffee delivery
2
1
Water inlet
Coffee delivery
1
Italian market
version
2
3
4

es
p
resso co
ff
ee machine - technician instructions
20
- en
g
lish
R
5.4 CTS SYSTEM (thermosiphon system)
In this system, the delivery group (1) is heated by a thermosiphon circuit (2) connected to the heat exchanger (3). The same water is used
for the coffee delivery, thus ensuring the same temperature for all coffee servings:
• activation of the solenoid valve and of the pump allow cold water to enter the exchanger (3) through the injector (4);
• from the exchanger (3) the boiler water is carried to the group (4) for delivery;
• the pump allows the increase of the pressure of the water flow up to 8-9 bar for delivery.
The injector (4) and the flow reducer (5) are important components for
the operation of the delivery group.
To increase the coffee extraction temperature, remove the flow reducer(5)
or replace it with one of a greater diameter. To decrease the temperature,
replace it with one of a smaller diameter.
If necessary, the exchangers can be replaced by removing the flange and
disconnecting the relative pipes of the hydraulic circuit. These operations
should be carried out after the machine has been switched down and has
cooled off: always replace the seals.
5.5 BOOSTED SYSTEM
Heating of the delivery group is provided by direct contact with the boiler.
Water used for delivery of coffee is taken from an exchanger which is
immersed in the water of the boiler and attached to the flange:
• the activation of the solenoid valve and of the pump allows cold
water to enter the exchanger(1).
• from the exchanger (1) the boiler water is carried to the group
(2) for delivery;
• the pump allows the increase of the pressure of the water flow up
to 8-9 bar.
The exchanger can be replaced without having to remove the flange:
loosen the screws, and detach the flange that holds the exchanger.
Perform these operations when the machine is off and is cool. Always
replace the seals.
Water inlet
Coffee delivery
1
2
3
at rest
1
2
3
Water inlet
Coffee delivery
in delivery
3
4
5
This manual suits for next models
24
Table of contents
Other CMA Dishmachines Coffee Maker manuals

CMA Dishmachines
CMA Dishmachines Espresso Coffee Machine User manual

CMA Dishmachines
CMA Dishmachines Gloria LCL Configuration guide

CMA Dishmachines
CMA Dishmachines Sara AK User manual

CMA Dishmachines
CMA Dishmachines GLORIA User manual

CMA Dishmachines
CMA Dishmachines MARISA User manual

CMA Dishmachines
CMA Dishmachines Luna User manual

CMA Dishmachines
CMA Dishmachines AKC User manual

CMA Dishmachines
CMA Dishmachines MARISA User manual

CMA Dishmachines
CMA Dishmachines AK User guide

CMA Dishmachines
CMA Dishmachines AK User manual