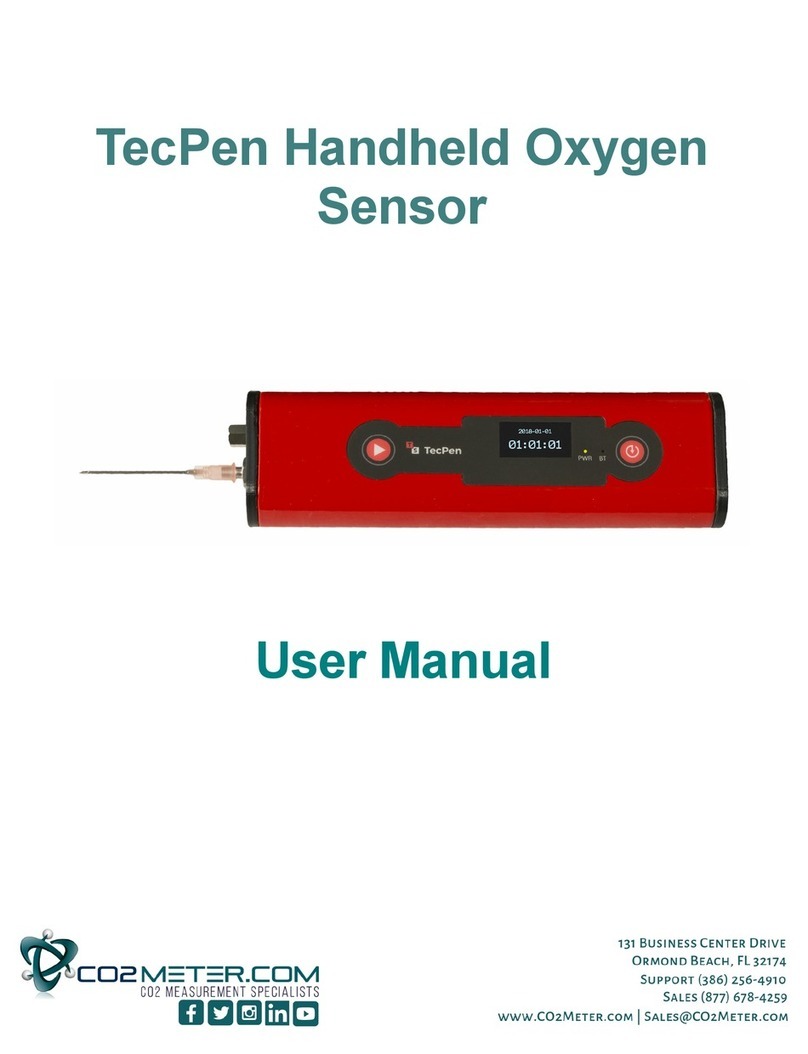
Co2meter TecPen User manual

TecPen
Handheld Oxygen Sensor
User Manual
MM Rev. 1 01/15/20
Z:\Marketing\Marketing\Website Documents\Products
Online\TS-200 TecPen
1

CONTENTS
Safety and Security...........................................................................................................................3
General Safety Instructions........................................................................................................3
Warning Symbols.......................................................................................................................4
Introduction
.....................................................................................................................................5
Package Contents
..........................................................................................................................5
Layout & Controls.............................................................................................................................6
Operation..........................................................................................................................................7
Operating Principle....................................................................................................................7
Before You Begin.......................................................................................................................7
Turning the TecPen On..............................................................................................................7
Taking a Measurement..............................................................................................................7
Turning the TecPen Off..............................................................................................................7
Saving Data......................................................................................................................................9
Default Operation
.....................................................................................................................9
Output Data File Format ............................................................................................................9
Exporting Saved Data Files .......................................................................................................9
Customizing the Data File Format.............................................................................................10
Menu Options..................................................................................................................................10
Change Data File Format (Recipes)..........................................................................................10
Set Date and Time....................................................................................................................10
View Measurement Data Display..............................................................................................10
View Device Status...................................................................................................................10
Calibration
.......................................................................................................................................11
Display............................................................................................................................................12
Maintenance...................................................................................................................................13
Cleaning ..................................................................................................................................13
Device Status Codes......................................................................................................................13
TroubleShooting
............................................................................................................................14
Support...........................................................................................................................................15
Warranty.................................................................................................................................. 15
Contact Us...............................................................................................................................15
2
Technical Data..................................................................................................................................8

Safety and Security
General Safety Instructions
•Before operating this device, read the operating instructions very carefully and keep them in
a safe place.
•Use the device exclusively for commercial use and the intended purpose. This device is not
intended for personal use. Do not use it outdoors (unless it is intended for conditional
outdoor use). Keep it away from heat, direct sunlight, moisture (never immerse in liquid) and
sharp edges. Do not use the device with wet hands. If the device has become damp or wet,
switch off the device immediately and, if connected, disconnect the mains plug from the
power supply. Don't reach into the water.
•Always turn off the appliance and unplug the appliance from the wall outlet (pull the plug, not
the cable) when not in use, attaching accessories, for cleaning or in case of malfunction.
•Check the device and cable regularly for damage. Do not put a damaged device into
operation.
•Do not repair the device yourself, but visit an authorized specialist company. In order to
avoid hazards, only have the defective device or power supply replaced or exchanged by the
manufacturer or our customer service.
•Only use original accessories.
•The device must not be opened during operation.
•Never immerse the device in water or other liquids.
•The device must be kept out of the reach of children.
•Do not fill with solvents, alcohol or cleaning agents, you may damage the device.
•If the device is brought into a room with a large temperature difference to the environment,
an acclimatization period of 1-2 hours should be observed.
•Protect the device from dirt.
•Never store the cannula without protection.
•Be careful when using the cannula. Risk of injury!
•Never drop the appliance from a great height.
•The device is designed for the invasive measurement of closed containers. The object to be
measured is subsequently damaged and must not be reused.
T
his device may not be modified, neither in terms of its construction
nor with regard to the
safety devices without the express written
consent of the manufacturer. CO2Meter, Inc. is not liable for damage
resulting from unauthorized modifications.
The operator must obtain the opinion of the manufacturer in order to
make any modifications. As manufacturers, they have the legal
responsibility for all these measures. Accordingly, the original
manufacturer is released from his liability for any modifications
made without express written consent.
3

Warning Symbols
Warnings usedthroughout thisdocumentcanbeclassified according totheextentofahazardous
situation. Theclassificationisbasedon an assumption as to how probable the occurrence of a
hazardous situation is and what consequences are associated withit.
There are four classes of warnings.
DANGER indicates an imminently hazardous situation which, if not avoided, will
result in death or serious injury.
WARNING indicates a potentially hazardous situation which, if not avoided, could
result in death or serious injury.
CAUTION indicates a potentially hazardous situation which, if not avoided, may result in minor
injury.
CAUTION indicates a situation which, if not avoided, may result in machinery
damage.
This symbol draws your attention to important, useful and helpful information.
4

Introduction
The TecPen Handheld 0-5% Oxygen Sensor is designed to provide fast, accurate
measurements of oxygen content in closed or pierceable containers. It uses an optical gas
sensor with LED display as well as Bluetooth and USB connectivity. This makes it an
excellent tool for:
•
Food packaging in protective gas atmosphere (MAP packaging)
•
Headspace of vials, cell breeding vessels, infusion containers, syringes
•
Micro-bioreactor systems
Package Contents
Quantity
Item
Part
number
1
TecPen
1
Belt Bag
2
Particulate Filters
CM-0118
2 Cannula 25/0.8
1 USB Cable TS R1 HH 003
1 USB Protection
Cover TS R1 HH 004
1 USB Flash Drive
1
Instruction Manual
On flash drive
12
Septum
TS R1 HH 006
1 Flexible Extension TS R1 HH 007
1 Calibration Certificate On flash drive
TS R1 HH 008
5

Layout & Controls
1.
Start Device - Press button: start measurement
2. OLED Display
3. PWR (Power) LED - Lights up when the device is switched on
4. BT (Bluetooth) LED - Lights up when a Bluetooth connection is established
5.
Memory Button - saves measurement
6.
On/OffButton - press briefly: switch on device, hold down: switch off
7. USB Port -
8. Sampling Gas Inlet (Cannula)
9.
GasOutlet
6

Watch your
Operation
IMPORTANT! If the device is taken to a room with a significantly different ambient temperature, an
acclimatisation period of 1-2 hors is required.
Operating Principle
The principle of opto-chemical oxygen detection using TecPen is based on the change in emission
of fluorescent radiation from the fluorescent dye depending on the oxygen concentration. The dye
is excited and the resulting fluorescence event isabsorbed. The duration ofthis fluorescence event
-the so-called lifetime - depends on the amount ofadsorbed oxygen in the sensor layer and can
therefore be used todetermine the oxygen concentration.
Before You Begin
In a known gas with no particulate matterand no condensation the cannula (syringe) may be
connected directly tothe TecPen.However, in most cases before taking a measurement the hose
and filter should be attached to the TecPen to prevent contamination of the gas chamber. To do
this,place the hoseon the gas inlet (8) and fasten the filter to the other end of the hose. Attach the
cannula to the front of the filter.
Watch Your Step!
The back of the filter has a Luer lock closure. This must be turned into the
intended connection of the hose for proper installation.
Turning the TecPen On
Press the On/Off button to turn on the unit. The TecPen shows the battery status and an
oxygen value of 0.00%. This is a placeholder and not an actual measurement result.
The unit can be switched off by pressing the On/Off button for at least two seconds.
Taking a Measurement
The cannula is used to puncture the packaging to be measured. After inserting the cannula briefly
press the start button to to take a measurement. The measurement is automatically
terminated after 10 seconds. If the measuring time needs to be extended after the first
measurement has been completed press the start button again.
After eachmeasurement is completed put the protectivecap on the cannula to avoid injury.
Turning the TecPen Off
The unit can be switched off by pressing the On/Off button for at least two seconds.
7

TS-System TecPen Weld O2 TecPen Weld CO2
0-2000ppm 0-100% CO2
Range Accuracy
0-500 ppm 2% Measured
value = ± 10 ppm
500-1000 ppm
1000-2000ppm
3% Measured
value = ± 30 ppm
4% Mv*
0,05
<15s
400mL/min
-10°C/ +120°C
Gas
5V USB and LiPo Accu
Accuracy
±70 ppm +/- 5% of
measured value
(100% Range ±300 ppm
+/-5% of measured value
0,05
<1min
400mL/min
-25°C/55°C
Gas
5V USB and LiPo Accu
> 3h
USB
> 3h
USB
Measurement range
Resolution
Responsetime at 25°C
Pump flow
Max. Pressure
Temp. range Min./
Max Medium
Power supply
Lifetime
Data Interface
Temperature
Compensation Display
Cleaning Parts
touching sample
Connection
Case
Degree of Protection
Delivery Guarantee
20 bis 60°C
OLED Display
no organic solvents, 70% EtOH
St.1.4404 / PTFE / glass USB/
Bluetooth 4.0 aluminum
anodized
IP54
Sensor (calibrated)
25-60°C
OLED Display
no organic solvents, 70%
EtOH
St.1.4404/ PTFE/ Glas
USB/ Bluetooth 4.0
aluminum anodized
IP54
Sensor (calibrated)
Technical Data
8

Saving Data
Default Operation
After each measurement is completed, the currently displayed measured value can be stored in the
internal memory of the TecPen by briefly pressing the memory key . By default a new data file is
created each day using the date as the file name and the measured oxygen level and a time stamp
as data.
Output Data File Format
The TecPen outputs a comma-delimited text file (.txt) with a header row that can be imported
into any spreadsheet program. The data file format is as follows:
Data Label
Example
Date
2019-03-15 (YYYY-MM-DD format)
Time
14:33:30 (hours:minutes:seconds 24 hr.
clock)
Product_Number
123456 (user defined)
Product_Name
NAME56789ABCD (user defined)
Product_EAN
0123456789ABC (user defined)
Product_Oxygen_Value
0.53472 (range 0-5%)
Amplitude
14016 (signal strength for error checking)
Tau
64.610248 (signal life for error checking)
Temperature[°C]
25.187500 (Centigrade only)
Battery_Level[%]
86 (range 0-100%)
Device Status
0=Normal (see device status codes)
Exporting Saved Data Files
Data log files can be exported via USB:
1. Connect the TecPen to a PC using the supplied USB cable.
2. Press the On/Off button to turn on the unit.
3. Copy the files from the TecPen using your PC’s file manager.
4. Remove the TecPen USB device following the operating system instructions.
Watch Your Step!
Before unplugging the USB cable the TecPen must be ejected properly like any
other standard USB device to avoid damaging the TecPen’s internal file system. If
the TecPen is unplugged from the USB port without first selecting the “Safely
Remove Hardware and Eject Media” option all data still on the device may be lost.
9

Customizing the Data File Format
The Product_Number, Product_Name and Product_EAN fields can be customized so that multiple
TecPens can be used and all will have different names in the data files. All data files can be further
customized by selecting different “recipes” from the menu.
To get started, you must have a file named Rezepte.csv loaded on the TechPen’s internal memory
card (Rezepte is German for Recipe). The sample file may be modified, or you can create a
rezepte.csv file in any spreadsheet program that can save a .csv file. For example:
A
B
C
1
100ABC
Scanner1
12345
2
200DEF
Scanner2
67890
The 3 alpha-numeric fields (do not use commas) in the table will replace the Product_Number,
Product_Name and Product_EAN fields in your output data files. By default, the first row will be
used. If you want to select a different recipe, you must do so from the menu options after you have
turned the TecPen on and before you begin collecting data.
Menu Options
In addition to the main screen the TecPen has 4 menu options screens that can be accessed by
pressing and holding the memory button.
Change Data File Format (Recipes)
1. Hold the memory button for 2 seconds to access the menu.
2. Tap the memory button to scroll down or the start button to scroll up to select a
recipe.
3. Press the memory button for 2 seconds to confirm and save the setting.
Set Date and Time
1. Hold the memory button for 2 seconds to access the menu.
2. Press the memory button to switch to the date and time screen.
3. Press the start buttonfor 2 seconds; the year is underlined.
4. Press the memory button to scroll down or the start button to scroll up to select the
year.
5. Press the start button for 2 seconds to save and go to the next field
6. Press the memory button for 2 seconds to confirm and save the setting.
View Measurement Data Display
1. Hold the memory button for 2 seconds to access the menu.
2. Press the memory buttonto switch to the View Data Display screen.
3. Press the memory button for 2 seconds to confirm and save the setting.
View Device Status
1. Hold the memory button for 2 seconds to access the menu.
2. Press the memory button to switch to view the Device Status code (see below).
3. Press the memory button for 2 seconds to confirm and save the setting.
10

Calibration
The TecPen uses pure nitrogen gas for zero point calibration.
1. In order to adjust the zero point, a gas volume with overflow must be pierced and the
TecPen purged with nitrogen.
2. Press and hold the start button and the memory button are alternately until the
pump is activated
3. A screen will appear with the text "Recalibration 0%?" followed by "NO".
4. Briefly press the start buttonto switch between "YES" and "NO".
5. If "NO" is selected, the operation is aborted by pressing and holding the memory key .
6. If "YES" is selected, let the unit calibrate for at least 5 minutes.
7. Press and hold the memory key to confirm.
Watch your step!
Calibration may only be carried out with class 5.0 or purer nitrogen or the
quality of the oxygen measurement results cannot beguaranteed.
Watch your step!
After zero-point calibration theoriginalcalibrationvaluesareoverwritten.Ifthe
calibration has not been carried out correctly, the original valuescan only be
restored by CO2Meter support.
While calibration can be carried out by the user, adjusting the zero-point may only be carried
out by CO2Meter Service.
11

Display
Screen 1
main
screen
battery level
measured value
Temporary:
Memory/Log Indicator
Indicator for current
measurement
Screen 2
recipe administration
Consecutive / internal
number
product name,
EAN code
Screen 3
Date &
Time
date
time (24 hour clock)
Screen 4
measurement data
display
amplitude life temperature
Screen 5
info screen
serial number
device status
code
Zero point adjustment
Selection option YES
/
NO
Select YES/NO
In normal use, The TecPen has 5 screens that can be viewed by pressing and
holding the MEMORY button. It is not possible to switch through the screens in
reverse order.
Note: Zero-point adjustment may only be carried out by the manufacturer service.
12

Maintenance
Cleaning
•The unit can be cleaned externally with isopropanol and a fine, soft cloth. Never immerse the
device in water or other liquids.
•Do not clean the unit with ultrasonic cleaner.
•Do not fill with solvents, alcohol or cleaning agents, they may damage the device.
ISO Certification
The instrument must be returned annually to the manufacturer for recalibration in accordance with
ISO:9000 certification.
Device Status Codes
1. normaloperation
2. UART buffer overrun
3. Temperature sensor error
4. Not specified
5. SD card not recognize
Watch yourstep!
If the TecPen displays one of the error codes above during operation turn
off the device and contact the manufacturer immediately.
Battery
The tecpen includes LiPo batteries which are used for the entire TecPen product family. The
duration per battery charge depends on how and under what circumstances the devices are used.
Charge the battery using the supplied USB cable. Once the battery is fully charged, remove the
battery from the charging cable. Do not charge the battery longer than necessary (overnight). This
may cause the charging capacity to decrease more quickly, and the battery to overheat or
become defective.
Changing Sensor Spot
Changing the sensor spot should be done by a qualified and trained person. Before changing the
spot make sure that the device is switched off and not connected to the Computer or to a power
supply.
Turn around your device and you will see on the rear a black circular unit with a diameter of
around 8mm and a slot. This unit contains the sensor spot. Take out this unit by turning it counter
clockwise with a suitable screwdriver.
Take the new unit with gloves and DO NOT TOUCH THE FRONT SIDE of the unit. Place the unit
into the device and make sure it is inserted straight. Afterwards turn the unit clockwise with a
suitable screwdriver into the device until the sealing ring is under a light pressure. Do not keep on
turning with all your might, you will destroy the thread.
IMPORTANT! If error codes 1, 2 or 4 appear switch off the device, wait a few moments and
then switch it back on. If the same error message appears after switching it back on, contact
the manufacturer immediately.
13

Problem What to do
1 The Display shows **** after
measurement
Value is above sensing range, 0-5%
2 The PWR lights do not light up after
switching on
Does the display show the main screen?
Yes: The LED light might be broken.
No: Battery is empty?
Display has an error.
3 The Display shows BATT Battery is empty
4 The Display remains black after
switching on
Charge the device and try to switch it on again
5 Did you disconnect your device properly from the
Computer the last time?
Yes: The battery might be empty.
No/ I don’t know: Please contact TecSense.
6 The device is connected to the
power supply but the BT light do
not light up
If the device is switched off during connected to a power
outlet, the BT light do not light up but the device is
charged.
7 The device is connected to the
Computer but I cannot find it
You have to switch on the device before connecting to
the computer. (Manual)
If the device is switched on you cannot find it eiter,
please contact TecSense.
8 The measured value is not saved Did you press the LOG button (Chapter 4.2)
Did you observe the LOG sign on the display?
Yes: Please contact TecSense
No: Read chapter 4.2
9 The log file shows a wrong date
The log file shows a wrong time
Check screen 3, of the date and time on the device is
set. To change date/time follow chapter see page. 8
10 The measured value varies between
two measurements
Was the measurement in a room with a different
temperature and did the device has time to acclimatize?
11 The device is not measuring Example: Can you hear the pump?
Troubleshooting Guide
14

Support
The quickest way to obtain technical support is via email. Please include a clear, concise
definition of the problem and any relevant troubleshooting information or steps taken so far, so
we can duplicate the problem and quickly respond to your inquiry.
Warranty
The sensor comes with a ninety (90) day warranty starting from the date it was shipped to the buyer.
For more information visit our website:
https://www.co2meter.com/pages/terms-conditions
Contact Us
If the troubleshooting guide above doesn’t help you solving your problem or for
more information, please contact us using the information below.
(386) 256-4910 (M-F 9:00am–5:00pm EST)
www.CO2Meter.com
131 Business Center Drive Ormond
Beach, FL 32174 (386) 872 - 7665
Ref. No.:062017
Yes: Did you follow operation procedure?
No: Contact CO2Meter.com
Is the display showing *****
(see 1. In Problem Finder List)
Is the display showing MEAS?
Yes: Check screen 4 if there is a value of amplitude
(higher 0)
No: Contact CO2Meter.com
15
Other manuals for TecPen
1
Table of contents
Other Co2meter Accessories manuals
Popular Accessories manuals by other brands
PCB Piezotronics
PCB Piezotronics IMI SENSORS 641B62 Installation and operating manual
Selve
Selve i-R operating instructions

PCB Piezotronics
PCB Piezotronics 356A25 Installation and operating manual
E+E Elektronik
E+E Elektronik EE75 user manual

Alpina
Alpina SF-5086 Instructions for use

NEO Coolcam
NEO Coolcam iDoorbell Quick installation guide
