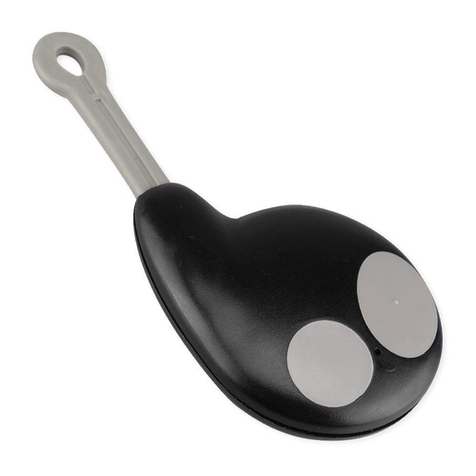
Cobra 777 User manual

Art. 1046
MANUALE UTENTE
USER MANUAL
BEDIENUNGSANLEITUNG
MANUEL POUR L'UTILISATEUR
GEBRUIKSAANWIJZING
MANUAL DE UTILIZACION
CAR SECURITY

AB
OK
C
mod. 7777
AB
AB
A
AB
B
10"
mod. 7727
B
A
B
A
A
10"
C
OK
B
A
B
A
B
mod. 7777
mod. 7727
fig
3
fig
4
AB
B
A
mod. 7777
mod. 7727
AB
B
A
mod. 7777
mod. 7727
fig
2
fig
1

GB
D
F
NL
E
I


Gentile cliente,
Nel ringraziarla per la scelta fatta la informiamo che abbiamo
realizzato questo prodotto per facilitarLe le operazioni di chiusura
e apertura porte della sua auto.
Infatti, per mezzo dei radiocomandi - che Le verranno consegnati
dopo l'installazione del prodotto - sarà possibile compiere queste
operazioni ad una distanza di circa 10 metri.
Inoltre nel caso la sua vettura sia dotata di una particolare
predisposizione (Comfort), Le sarà possibile eseguire - sempre a
distanza - la chiusura e l'apertura dei vetri elettrici.
Legga questo manuale con attenzione: trarrà la massima
soddisfazione dal prodotto acquistato.
Le consigliamo inoltre di conservare questo manuale insieme ai
documenti dell'auto per una più facile consultazione in caso di
necessità.
Qualora si manifesti un problema si rivolga direttamente al suo
installatore di fiducia.

6
INTRODUZIONEINTRODUZIONE
INTRODUZIONE
Questo sistema di apertura e chiusura porte è controllato da un radiocomando
ad alta sicurezza che emette un codice variabile di nuova generazione. Questa
nuova tecnologia offre un elevatissimo grado di protezione contro ogni tentativo
di riproduzione del codice.
I
l radiocomando permette di azionare il sistema fino ad una distanza di circa10 metri.
In alcune circostanze si può verificare una riduzione della portata a causa di
interferenzegeneratedaaltrefonti(es.radioamatoricheoperanonellastessabanda).
In caso di mancato funzionamento avvicinarsi il più possibile al veicolo. Se il
radiocomando continua a non funzionare eseguire la procedura di
risincronizzazione.
Se é prevista la chiusura dei vetri da radiocomando (Comfort) raccomandiamo
di effettuare questa operazione restando vicini al veicolo in modo tale che si
verifichi in condizioni di sicurezza.
COMPLEMENTICOMPLEMENTI
COMPLEMENTI
Il sistema da Lei acquistato può essere completato dal seguente modulo:
2980:2980:
2980:2980:
2980: Modulo alzavetriModulo alzavetri
Modulo alzavetriModulo alzavetri
Modulo alzavetri
Al momento della chiusura delle porte sarà possibile eseguire la chiusura dei vetri .
È adatto a qualsiasi tipo di auto con vetri elettrici.
CHIUSURA DELLE PORTECHIUSURA DELLE PORTE
CHIUSURA DELLE PORTE
•
Premendo il pulsante 'A' del radiocomando si bloccano le porte. (Fig. 1)(Fig. 1)
(Fig. 1)(Fig. 1)
(Fig. 1)
• Gli indicatori di direzione lampeggiano due volte.
CHIUSURA VETRI "CONTROLLATA"CHIUSURA VETRI "CONTROLLATA"
CHIUSURA VETRI "CONTROLLATA"
Se Ia vostra vettura é provvista di funzione "Comfort" (chiudendo la porta lato
guida con la chiave si chiudono anche i vetri) è possibile riprodurre la funzione
con il radiocomando mantenendo premuto il pulsante 'A'
La chiusura dei vetri si interrompe al rilascio del pulsante. (Fig. 1)(Fig. 1)
(Fig. 1)(Fig. 1)
(Fig. 1)
IMPORTANTE:IMPORTANTE:
IMPORTANTE: I VETRI ELETTRICI IN MOVIMENTO POSSONO
RAPPRESENTARE UN PERICOLO. ASSICURARSI CHE
NESSUNO SIA VICINO ALLA VETTURA.

7
APERTURA DELLE PORTEAPERTURA DELLE PORTE
APERTURA DELLE PORTE
• Premendo il pulsante 'B' del radiocomando si sbloccano le porte. (Fig. 2)(Fig. 2)
(Fig. 2)(Fig. 2)
(Fig. 2)
• Gli indicatori di direzione lampeggiano una volta.
N.B.N.B.
N.B.N.B.
N.B. In talune vetture (Golf / Passat) il pulsante 'B' ha la funzione apertura vetri,
che si ottiene mantenendo premuto il pulsante.
PILA DEL RADIOCOMANDO SCARICAPILA DEL RADIOCOMANDO SCARICA
PILA DEL RADIOCOMANDO SCARICA
Se con uno dei pulsanti premuti il LED lampeggia per breve tempo oppure in
modo irregolare significa che la pila si sta scaricando. Provvedere alla
sostituzione della pila come indicato in figura 3figura 3
figura 3figura 3
figura 3.
1.1.
1.1.
1. Per cambiare la pila aprire il guscio del radiocomando, avendo cura di far
leva nella zona indicata con “OPEN”.
2.2.
2.2.
2. Estrarre la pila.
3.3.
3.3.
3. Attendere 10 secondi ca.
4.4.
4.4.
4. Inserire la pila nuova rispettando la polarità e avendo cura di toccarla con
le dita solo sulle pareti laterali .
5.5.
5.5.
5. Richiudere il guscio e premere 2 volte il pulsante 'A' del radiocomando
verificando la risposta del sistema. Effettuare la prova vicini al veicolo.
6.6.
6.6.
6. Gettate la pila scarica negli appositi contenitori di raccolta.
MALFUNZIONAMENTO DEL RADIOCOMANDOMALFUNZIONAMENTO DEL RADIOCOMANDO
MALFUNZIONAMENTO DEL RADIOCOMANDO
(Esecuzione della procedura di risincronizzazione)(Esecuzione della procedura di risincronizzazione)
(Esecuzione della procedura di risincronizzazione)
Se il radiocomando non funziona, verificato che la pila sia carica, effettuare ad
una distanza di 1 metro circa dal veicolo le seguenti operazioni (fig. 4)(fig. 4)
(fig. 4)(fig. 4)
(fig. 4):
A)A)
A)A)
A) Premere entrambi i pulsanti del radiocomando fino a che il LED diventa da
lampeggiante a spento. Rilasciare i pulsanti (il LED si accende in modo fisso).
B)B)
B)B)
B) Premere il pulsante 'A' del radiocomando e verificare che il LED lampeggi.
La procedura di risincronizzazione è terminata.
C)C)
C)C)
C) Premere nuovamente il pulsante 'A' del radiocomando per verificare che il
prodotto funzioni correttamente.
I
FUNZIONI RADIOCOMANDOFUNZIONI RADIOCOMANDO
FUNZIONI RADIOCOMANDO Pulsante APulsante A
Pulsante APulsante A
Pulsante A Pulsante BPulsante B
Pulsante BPulsante B
Pulsante B
Chiusura porte ••
••
•
Apertura porte ••
••
•
Chiusura vetri ••
••
•
I
I
CONDIZIONI DI GARANZIA
Il prodotto é coperto da garanzia di 12 mesi a partire dalla data di acquisto
certificata dallo scontrino di cassa o da una fattura.
La garanzia non si applica se il prodotto risulta danneggiato da
installazione non corretta, danni dovuti a caduta o trasporto, a negligenza
e comunque a cause non imputabili a difetti di fabbricazione. In caso di
errata installazione del sistema, il costruttore non darà alcun indennizzo
per danni - di qualunque natura e diretti od indiretti - verso persone o
cose.
Per beneficiare della garanzia, bisogna rivolgersi al venditore autorizzato
con la prova di acquisto che riporti la relativa data.

Dear customer,
Thank you for your preference. This product is designed to make
it easier for you to lock and unlock the doors of your car.
The radio controls you will be given after the product has been
installed, will allow you to carry out these operations at a
distance of about 10 meters.
If your car is equipped with a particular function called Comfort,
you will also be able to use the remote control to open and close
the electric windows.
Rear this handbook very carefully to get the utmost satisfaction
out of the product you have purchased.
You are also advised to keep the handbook together with the car
documents so that it can be easily consulted when required.
Contact your dealer if any faults arise.

10
INTRODUCTIONINTRODUCTION
INTRODUCTION
This door locking and unlocking system is operated by a high-security radio
control that issues a new generation variable code. This new technology offers a
very high degree of protection against all attempts to duplicate the code.
The radio control allows the system to be activated from up to a distance of
about 10 meters.
The range may be less in certain circumstances, owing to interference generated
by other sources (e.g. C.B. enthusiasts operating on the save wave band).
If the radio control fails to operate, stand as near as possible to the vehicle.
Carry out the re-synchronizing procedure if the radio control still fails to operate.
If the windows are also wound up via the radio control (Comfort), remember to
carry out this operation while standing near the vehicle so that the procedure
occurs in security conditions.
ADDITIONAL MODULEADDITIONAL MODULE
ADDITIONAL MODULE
The system you have purchased can be completed with the following module:
2980:2980:
2980:2980:
2980: Window winding moduleWindow winding module
Window winding moduleWindow winding module
Window winding module
The windows can be wound up while the doors are locked.
This module is suitable for any type of car with electrically operated windows.
DOOR LOCKINGDOOR LOCKING
DOOR LOCKING
• Press button “A” on the radio control to lock the doors (Fig. 1)(Fig. 1)
(Fig. 1)(Fig. 1)
(Fig. 1)
• The turn indicators will blink twice.
“CONTROLLED” WINDOW WINDING“CONTROLLED” WINDOW WINDING
“CONTROLLED” WINDOW WINDING
If your car has the “Comfort” function (the key can also be used to wind up the
windows when the door on the driver’s side is locked), this can be reproduced
with the radio control by pressing button “A”.
Window winding stops when the button is released (Fig. 1)(Fig. 1)
(Fig. 1)(Fig. 1)
(Fig. 1).
IMPORTANT:IMPORTANT:
IMPORTANT: ELECTRICALLY OPERATED WINDOWS MAY BE A DANGER
HAZARD WHEN MOVING. MAKE SURE THAT THERE IS NO
ONE NEAR THE VEHICLE.

11
DOOR UNLOCKINGDOOR UNLOCKING
DOOR UNLOCKING
• Press button “B” on the radio control to unlock the doors (Fig. 2)(Fig. 2)
(Fig. 2)(Fig. 2)
(Fig. 2).
• The turn indicators will blink twice.
NOTENOTE
NOTENOTE
NOTE. In certain vehicles (Golf / Passat), button “B” winds down the windows
when the button is kept depressed.
RADIO CONTROL BATTERY LOWRADIO CONTROL BATTERY LOW
RADIO CONTROL BATTERY LOW
If the LED flashes for a short time or in an irregular way when one of the buttons
is pressed, this means that the battery is low. Change the battery as indicated in
figure 3.figure 3.
figure 3.figure 3.
figure 3.
1.1.
1.1.
1. To change the battery, open the radio control taking care to lever in the zone
marked “OPEN”.
2.2.
2.2.
2. Take out the old battery.
3.3.
3.3.
3. Wait approx. 10 seconds.
4.4.
4.4.
4. Insert the new battery complying with the polarity indications and taking
care to only touch the side walls with the fingers.
5.5.
5.5.
5. Close the radio control and press button “A” twice, checking the response
from the system. Conduct the test near the vehicle.
6.6.
6.6.
6. Dispose of the old battery in one of the specially provided containers.
FAULTY OPERATION OF THE RADIO CONTROLFAULTY OPERATION OF THE RADIO CONTROL
FAULTY OPERATION OF THE RADIO CONTROL
(How to carry out the re-synchronizing procedure)(How to carry out the re-synchronizing procedure)
(How to carry out the re-synchronizing procedure)
If the radio control fails to function and having made sure that the battery is not low,
proceed with the following operations at about 1 meter from the vehicle (fig. 4)(fig. 4)
(fig. 4)(fig. 4)
(fig. 4):
A)A)
A)A)
A) Press both buttons on the radio control until the LED changes its status from flashing to
off. Release the buttons (the LED will remain permanently on).
B)B)
B)B)
B) Press button “A” on the radio control and make sure that the LED flashes. The re-
synchronizing procedure will have now terminated.
C)C)
C)C)
C) Press button “A” again to make sure that the radio control operates correctly.
I
RADIO CONTROL FUNCTIONSRADIO CONTROL FUNCTIONS
RADIO CONTROL FUNCTIONS
Button AButton A
Button AButton A
Button A Button BButton B
Button BButton B
Button B
Door locking ••
••
•
Door unlocking •
Window winding •
GB

GB
WARRANTY CONDITIONS
The product is covered by a 12 month guarantee running from the date
of purchase certified by the cash receipt or an invoice.
The guarantee shall not apply if the product has been damaged by
incorrect installation, dropping or transport, negligence and for any other
causes that cannot be ascribed to manufacturing defects. If the system
has been incorrectly installed, the manufacturer shall not be liable for
direct or indirect damages of any nature to persons or property. Contact
the authorized retailer with proof of purchase bearing the relative date
to benefit from the guarantee.

Lieber Kunde,
wir Danken Ihnen für die Wahl und unterrichten Sie, daß wir
dieses Produkt hergestellt haben, um Ihnen das Schließen und
Öffnen der Türen Ihres Autos zu vereinfachen.
Mit den Handsendern, die Ihnen nach dem Einbau des Gerätes
ausgehändigt werden, können Sie diese Vorgänge im Abstand bis
zu circa 10 Metern vornehmen.
Wenn Ihr Auto zusätzlich mit einer Komfortschließung genannten
Funktion ausgestattet ist, können Sie auch den elektrischen
Fensterheber ferngesteuert betätigen.
Lesen Sie dieses Handbuch bitte aufmerksam durch, damit Sie
dieses Produkt in vollem Umfang nutzen können.
Sie sollten es zusammen mit den Fahrzeugpapieren
aufbewahren, um es bei Bedarf schneller zu finden.
Sollte sich irgendwelche Probleme einstellen, wenden Sie sich
bitte direkt an Ihren Installateur.

14
EINLEITUNGEINLEITUNG
EINLEITUNG
Dieses System zum Öffnen und Schließen der Türen wird mit einem Handsender
betätigt, der einen hohen Sicherheitsgrad bietet. Dies ist ein Handsender mit
variablem Code der letzten Generation. Diese neue Technologie bietet einen
sehr hohen Schutz gegen jeden Versuch, den Code zu reproduzieren.
Der Handsender macht es möglich, das System in einem Abstand bis zu circa
10 Metern zu betätigen. Unter besonderen Umständen kann diese Reichweite
jedoch durch Störquellen (z.B. Funkamateure, die im gleichen Frequenzband
senden) verringert werden. Wenn der Handsender nicht funktioniert, gehen Sie
so nahe wie möglich an das Fahrzeug heran. Wenn der Handsender auch
weiterhin nicht funktioniert, muß er neu eingelernt werden.
Ist das Fahrzeug mit einer Komfortverriegelung ausgestattet, bei der auch der
elektrische Fensterheber ferngesteuert betätigt werden kann, führen Sie diesen
Vorgang bitte nur aus, wenn Sie sehr nahe am Fahrzeug stehen, damit ein
Höchstmaß an Sicherheit gewährleistet ist.
EXTRASEXTRAS
EXTRASEXTRAS
EXTRAS
Das von Ihnen erworbene System kann mit dem folgenden Modul vervollständigt
werden:
29802980
29802980
2980 Modul für FensterheberModul für Fensterheber
Modul für FensterheberModul für Fensterheber
Modul für Fensterheber
Beim Schließen der Türen kann man dann auch die Fenster schließen. Ist für
alle Fahrzeugtypen mit elektrischem Fensterheber geeignet.
SCHLIESSEN DER TÜRENSCHLIESSEN DER TÜREN
SCHLIESSEN DER TÜREN
• Drückt man die Taste ‘A’ des Handsenders, werden die Türen zugeschlossen
(Abb. 1).(Abb. 1).
(Abb. 1).(Abb. 1).
(Abb. 1).
• Die Richtungsanzeiger blinken zweimal auf.
“KONTROLLIERTES” FENSTERSCHLIESSEN“KONTROLLIERTES” FENSTERSCHLIESSEN
“KONTROLLIERTES” FENSTERSCHLIESSEN
Wenn Ihr Fahrzeug mit einer Komfortverriegelung ausgestattet ist (beim Zuschließen
der Tür auf der Fahrerseite schließen sich auch die Fenster) kann man die Funktion
mit dem Handsender erhalten, wenn man die Taste ‘A’ gedrückt hält.
Das Schließen der Fenster wird unterbrochen, wenn man die Taste losläßt (Abb. 1)(Abb. 1)
(Abb. 1)(Abb. 1)
(Abb. 1).
WICHTIG:WICHTIG:
WICHTIG:WICHTIG:
WICHTIG:DIE SICH ELEKTRISCH SCHLIESSENDEN FENSTER KÖNNEN
EINE GEFAHR DARSTELLEN. BITTE SICHERSTELLEN, DASS
SICH NIEMAND IN DER NÄHE DES FAHRZEUGS AUFHÄLT.

15
ÖFFNEN DER TÜRENÖFFNEN DER TÜREN
ÖFFNEN DER TÜREN
• Drückt man die Taste ‘B’ des Handsenders, werden die Türen aufgeschlossen
(Abb. 2)(Abb. 2)
(Abb. 2)(Abb. 2)
(Abb. 2).
• Die Richtungsanzeiger blinken einmal auf.
AnmAnm
AnmAnm
Anm.: Bei einigen Fahrzeugmodellen (Golf/Passat) hat die Taste ‘B’ die Funktion,
die Fenster zu öffnen, wobei man diese Funktion erhält, wenn man die Taste
drückt.
BATTERIE DES HANDSENDERS LEERBATTERIE DES HANDSENDERS LEER
BATTERIE DES HANDSENDERS LEER
Wenn beim Drücken der Tasten die LED-Anzeige kurze Zeit oder unregelmäßig blinkt,
bedeutet es, daß die Batterie fast leer ist. Die Batterie dann ersetzen, wie in der
Abbildung 3Abbildung 3
Abbildung 3 gezeigt ist.
1.1.
1.1.
1. Zum Ersetzen der Batterie das Gehäuse des Handsenders öffnen, wobei auf die
Stelle zu drücken ist, wo “OPEN” steht.
2.2.
2.2.
2. Die Batterie herausnehmen.
3.3.
3.3.
3. Circa 10 Sekunden warten.
4.4.
4.4.
4. Die neue Batterie unter Beachtung der Polarität einlegen. Die Batterie nur an der
Seite, nicht oben und unten abfassen.
5.5.
5.5.
5. Das Gehäuse wieder schließen und zweimal auf die Taste ‘A’ des Handsenders
drücken, um die Antwort des Systems zu prüfen. Den Test in der Nähe des Fahrzeugs
ausführen.
6.6.
6.6.
6. Die alte Batterie wie vorgeschrieben entsorgen.
BETRIEBSSTÖRUNGEN DES HANDSENDERSBETRIEBSSTÖRUNGEN DES HANDSENDERS
BETRIEBSSTÖRUNGEN DES HANDSENDERS
(Ausführung des Einlernvorgangs)(Ausführung des Einlernvorgangs)
(Ausführung des Einlernvorgangs)
Wenn der Handsender nicht funktioniert und nachdem man geprüft hat, daß es nicht
an einer leeren Batterie liegt, sind im Abstand von circa einem Meter vom Fahrzeug
die folgenden Vorgänge auszuführen (Abb. 4)(Abb. 4)
(Abb. 4)(Abb. 4)
(Abb. 4):
A)A)
A)A)
A) Auf beide Tasten des Handsenders drücken, bis die blinkende LED-Anzeige
ausgeht. Die Tasten loslassen, wobei die LED-Anzeige Konstantlicht abgibt.
B)B)
B)B)
B) Die Taste ‘A’ des Handsenders drücken und prüfen, ob die LED-Anzeige blinkt.
Dann ist der Einlernvorgang beendet.
C)C)
C)C)
C) Die Taste ‘A’ des Handsenders erneut drücken, um zu prüfen, ob die Anlage
korrekt funktioniert.
I
FUNKTIONEN DES HANDSENDERSFUNKTIONEN DES HANDSENDERS
FUNKTIONEN DES HANDSENDERS
Taste ATaste A
Taste ATaste A
Taste A Taste BTaste B
Taste BTaste B
Taste B
Schließen der Türen •
Öffnen de Türen •
Schließen der Fenster ••
••
•
D

D
GARANTIEBEDINGUNGEN
Das Gerät steht 12 Monate ab dem Kaufdatum unter Garantie, wobei
der Datum durch den Kassenbon oder eine Rechnung belegt wird.
Die Garantie gilt nicht, wenn das Produkt durch falschen Einbau, Schäden
infolge Fall oder Transport oder Nachlässigkeit beschädigt ist. Sie gilt
auch nicht bei Ursachen, die nicht auf Fabrikationsfehler zurückzuführen
sind. Bei einer falschen Installation leistet der Hersteller bei Sach- und
Personenschäden keine Entschädigung, gleich welcher Art diese sind,
ob direkt oder indirekt. Um die Garantie in Anspruch nehmen zu können,
wenden Sie sich an den Vertragshändler und weisen Ihren Anspruch
durch einen Kaufbeleg aus, auf dem das Datum steht.

Cher client,
nous vous remercions de votre choix et vous informons que nous
avons réalisé ce produit pour vous faciliter dans les opérations de
verrouillage et déverrouillage des portes de votre voiture.
Les radiocommandes qui vous seront fournies après l’installation
du produit vous permettront de faire ces opérations à une
distance d’environ 10 mètres.
Si votre voiture est équipée d’une fonction particulière (Confort),
vous pourrez commander également à distance l’ouverture et la
fermeture des vitres électriques.
Lisez attentivement ce manuel pour tirer le plus grand profit du
produit que vous avez acheté.
Nous vous conseillons de conserver ce manuel avec les
documents de la voiture pour une consultation plus facile en cas
de besoin.
Pour tout problème, veuillez vous adresser directement à votre
installateur de confiance.

18
INTRODUCTIONINTRODUCTION
INTRODUCTION
Ce système d’ouverture et fermeture des portes est contrôlé par une
radiocommande haute sécurité qui émet un code variable nouvelle génération.
Cette nouvelle technologie offre un niveau de protection très élevé contre toutes
tentatives de reproduction du code.
La radiocommande permet d’actionner le système à une distance d’environ 10
mètres.
Parfois sa portée peut diminuer à cause d’interférences provoquées par d’autres
sources (ex. radioamateurs utilisant la même bande).
En cas de mauvais fonctionnement s’approcher le plus possible du véhicule. Si
la radiocommande continue à ne pas fonctionner, refaire la procédure de
synchronisation.
Si votre radiocommande permet aussi de fermer les vitres (fonction Confort),
nous vous recommandons d’effectuer cette opération en restant le plus près
possible du véhicule, pour des raisons évidentes de sécurité.
COMPLEMENTSCOMPLEMENTS
COMPLEMENTS
Le système que vous venez d’acheter peut être complété de la manière suivante :
2980 :2980 :
2980 :2980 :
2980 : Module lève-vitresModule lève-vitres
Module lève-vitresModule lève-vitres
Module lève-vitres..
..
.
Au moment du verrouillage des portes, vous pourrez également fermer les vitres.
Il s’adapte à tout type de voiture avec vitres électriques.
VERROUILLAGE DES PORTESVERROUILLAGE DES PORTES
VERROUILLAGE DES PORTES
• Appuyez sur le bouton «A» de la radiocommande pour verrouiller les portes
(Fig. 1)(Fig. 1)
(Fig. 1)(Fig. 1)
(Fig. 1).
• Les indicateurs de direction clignoteront deux fois.
FERMETURE «CONTROLEE» DES VITRESFERMETURE «CONTROLEE» DES VITRES
FERMETURE «CONTROLEE» DES VITRES
Si votre voiture dispose de la fonction «Confort» (en fermant à clé la porte côté
conducteur, les vitres aussi se ferment), il est possible de reproduire la fonction
avec la radiocommande en appuyant sans interruption sur le bouton «A».
Il suffit de relâcher le bouton (Fig. 1)(Fig. 1)
(Fig. 1)(Fig. 1)
(Fig. 1) pour interrompre la fermeture des vitres.
IMPORTANTIMPORTANT
IMPORTANTIMPORTANT
IMPORTANT : LES VITRES ELECTRIQUES EN MOUVEMENT PEUVENT
REPRESENTER UN DANGER. ASSUREZ-VOUS QUE
PERSONNE NE S’APPROCHE DE LA VOITURE.

19
DEVERROUILLAGE DES PORTESDEVERROUILLAGE DES PORTES
DEVERROUILLAGE DES PORTES
• Appuyez sur le bouton «B» de la radiocommande pour déverrouiller les portes
(Fig. 2)(Fig. 2)
(Fig. 2)(Fig. 2)
(Fig. 2).
• Les indicateurs de direction clignoteront une fois.
N.B.:N.B.:
N.B.:N.B.:
N.B.:Sur certains voitures (Golf / Passat) le bouton «B» a la fonction lève-vitres,
obtenue en appuyant sans interruption sur le bouton.
PILE DE LA RADIOCOMMANDE DECHARGEEPILE DE LA RADIOCOMMANDE DECHARGEE
PILE DE LA RADIOCOMMANDE DECHARGEE
Si vous appuyez sur un bouton de la radiocommande et que l’indicateur LED
clignote un petit instant ou de manière irrégulière, il faut remplacer les piles.
Procéder en suivant les indications de la figure 3figure 3
figure 3figure 3
figure 3.
1.1.
1.1.
1. Pour changer la pile, ouvrez le boîtier de la radiocommande en appuyant
dans la zone indiquée par “OPEN”.
2.2.
2.2.
2. Retirez la pile.
3.3.
3.3.
3. Attendez environ 10 secondes.
4.4.
4.4.
4. Mettez la pile neuve en respectant les pôles ; veillez à ne toucher avec les
doigts que les parties latérales.
5.5.
5.5.
5. Refermez le boîtier et appuyez 2 fois sur le bouton «A» de la radiocommande
en vérifiant la réponse du système. Faites un essai près du véhicule.
6.6.
6.6.
6. Jetez la pile épuisée dans les conteneurs prévus expressément.
MAUVAIS FONCTIONNEMENT DE LA RADIOCOMMANDEMAUVAIS FONCTIONNEMENT DE LA RADIOCOMMANDE
MAUVAIS FONCTIONNEMENT DE LA RADIOCOMMANDE
(Exécution de la procédure de synchronisation)(Exécution de la procédure de synchronisation)
(Exécution de la procédure de synchronisation)
Si la radiocommande ne marche pas, après avoir vérifié que la pile n’est pas
déchargée, effectuer les opérations ci-dessous à une distance d’un mètre environ
du véhicule (fig. 4)(fig. 4)
(fig. 4)(fig. 4)
(fig. 4) :
A)A)
A)A)
A) Appuyez en même temps sur les deux boutons jusqu’à ce que l’indicateur
LED cesse de clignoter. Relâchez les boutons. Le LED restera allumé de
manière fixe.
B)B)
B)B)
B) Appuyez sur le bouton «A» et vérifiez que le LED clignote.
La procédure de synchronisation est ainsi terminée.
C)C)
C)C)
C) Appuyez de nouveau sur le bouton «A» de la radiocommande pour vérifier
que le produit fonctionne correctement.
I
FONCTIONS DE LA RADIOCOMMANDEFONCTIONS DE LA RADIOCOMMANDE
FONCTIONS DE LA RADIOCOMMANDE
Bouton ABouton A
Bouton ABouton A
Bouton A Bouton BBouton B
Bouton BBouton B
Bouton B
Verrouillage des portes ••
••
•
Déverrouillage des portes ••
••
•
Fermeture des vitres ••
••
•
F

F
CONDITIONS DE GARANTIE
Le produit est couvert par une garantie de 12 mois à compter de la date
d’achat certifiée par le ticket de caisse ou par une facture.
La garantie ne couvre pas les produits endommagés par une installation
impropre, les dommages provoqués par la chute ou le transport du pro-
duit, par négligence et toutes causes non imputables à des défauts de
fabrication. En cas d’installation erronée du système, le constructeur ne
reconnaîtra aucune indemnisation pour les dommages de quelque na-
ture que ce soit, provoqués directement ou indirectement à des person-
nes ou des choses.
Pour bénéficier de la garantie, s’adresser au revendeur agréé avec la
preuve de l’achat sur laquelle devra figurer la date.
This manual suits for next models
2
Table of contents
Languages:
Other Cobra Car Alarm manuals

Cobra
Cobra BRIDGE User manual

Cobra
Cobra 4625 User manual

Cobra
Cobra Bridge 4100 User manual

Cobra
Cobra 1046 User manual

Cobra
Cobra 4600 CAN User manual

Cobra
Cobra GLOBE 4800 CAN User manual

Cobra
Cobra 3800 GLOBE User manual

Cobra
Cobra 8185 User manual

Cobra
Cobra 4400 User manual

Cobra
Cobra GLOBE 4800 CAN User manual

Cobra
Cobra 3800 GLOBE User manual

Cobra
Cobra G100 User manual

Cobra
Cobra 4600 CAN/PLIP User manual

Cobra
Cobra Connex ICD31 User manual

Cobra
Cobra GLOBE 4800 CAN User manual

Cobra
Cobra GLOBE 3100 User manual

Cobra
Cobra Bridge 4100 User manual

Cobra
Cobra Connex Guardian 222X User manual

Cobra
Cobra AK4169 User manual

Cobra
Cobra 4627 User manual