Cocoon HE170703 User manual
Ensure you have received all of the items with your 3D Printer:
1 x 3D Printer
1 x Filament Spool Stand
1 x Power Cable
1 x USB Cable
1 x 4GB MicroSD Card
1 x Scraper
1 x PTFE Tube
1 x Hex Key Set
2 x Cable Ties
4 x 10m PLA Filament
3 x Magnetic Print Mats -
One already on printer
1 x Metal Base Mat
1 x Glue Stick
1 x Instruction Manual
1 x Getting Started Guide
1 x Warranty Card
1 x Levelling Card
GETTING STARTED GUIDE
VERSION 1
CONSTRUCT AND CONNECT
UNPACK
Carefully remove the 3D printer
from the box and place on a
clean, level work space.
Package contents are listed
above
CUT CABLE TIES
Cut the cable tie holding
the print bed to the x-axis
frame.
1 2
POWER ON
Ensure the power switch
is in the OFF position, then
insert the power supply
cable into the back of the
3D Printer. Insert the other
end into a nearby mains
power outlet. Turn on the
power outlet, then turn on
the power switch at the
back of the 3D Printer
ATTACH SPOOL
HOLDER
Unscrew and remove the outer
plastic nut from the lament
spool holder, then insert the nut
into the side slot of the printer
tower. Screw in the lament
spool holder into the side of the
printer.
NOTE: Ensure the lament spool
holder is secure and do not
overtighten
3 4
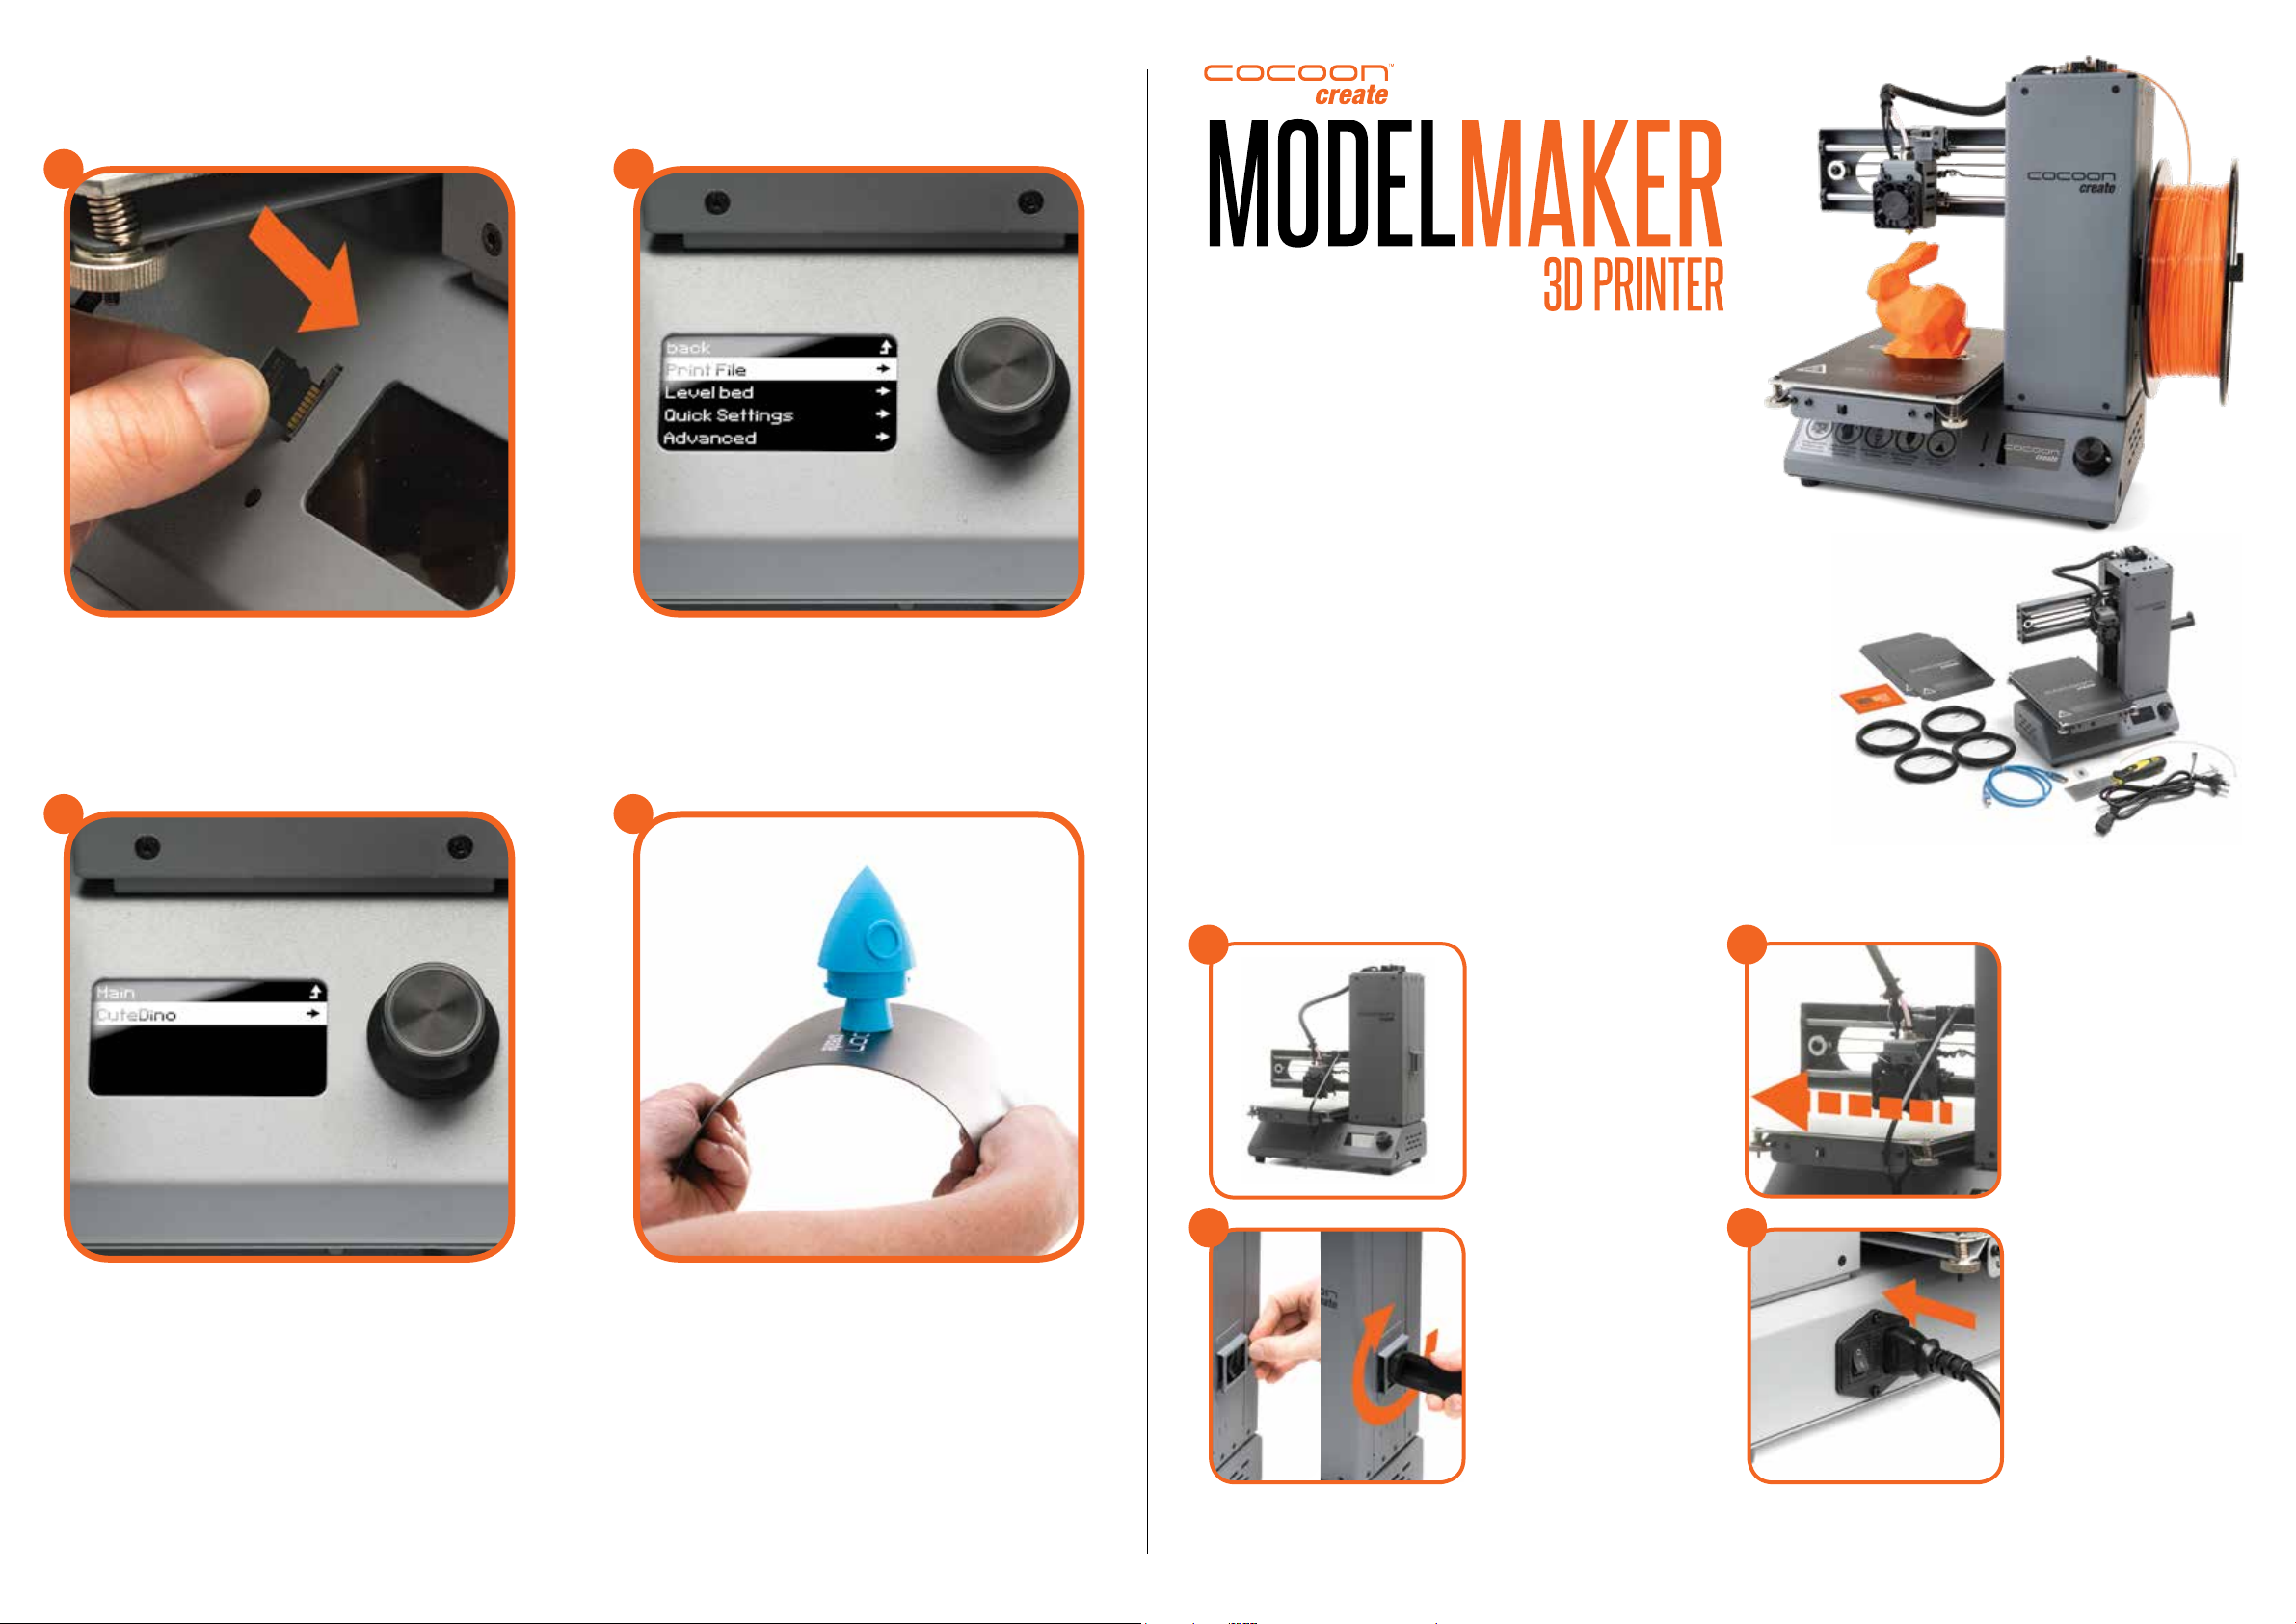
PRINTING A FILE
Insert the included MicroSD Card into the memory card
slot next to the LCD screen with the label facing to the
left as shown
1
The printer will return to the status screen and display
“Heating…” in the upper left corner of the display.
The nozzle temperature will heat until it reaches the
target temperature
Once the nozzle reaches the target temperature the
printer will automatically begin printing the le
2
Enter the Main Menu and select Print File
3
Select the le you would like to print
4
Once the print is complete, turn off your 3D Printer and wait
for the extruder to cool. After removing the magnetic print
mat from the printer base, slowly and gently bend the sides
of the mat down to raise the center of the mat and lift the
printed object

LEVELLING THE PRINT BEDADD FILAMENT
Place your roll of lament on the lament spool holder Clean off any excess lament residue from the tip of the
nozzle using the scraper
Push the dial button to access the Main Menu and
navigate to Quick Settings Change Filament Add
Filament. The extruder will automatically raise and
preheat
Enter the Main Menu and select Level Bed
1 1
3
5 5
3
2 2
4 4
Once lament is extruding from the nozzle press back to
stop extruding
On each corner, turn the corresponding thumbwheel until
you can just slide the levelling card or a piece of copy
paper between the extruder and print bed with slight
friction, about 0.1mm
After the extruder has fully preheated, hold the lament
clamp on the top of the tower and manually feed the
end of the lament through the tube until you feel some
resistance. Let go of the clamp so the motor can push
the lament through
After initializing, the level wizard will guide you through
levelling all 4 corners of your print bed. Press next to
proceed to the next screen / corner
Carefully remove any excess lament from the nozzle using the scraper. Filament is loaded and ready to print. After levelling the last corner you can return to the Main Menu or restart the levelling wizard. If this is your rst time levelling
the bed, we recommend completing the wizard again to ensure it is level
Other manuals for HE170703
1
Other Cocoon 3D Printer manuals


