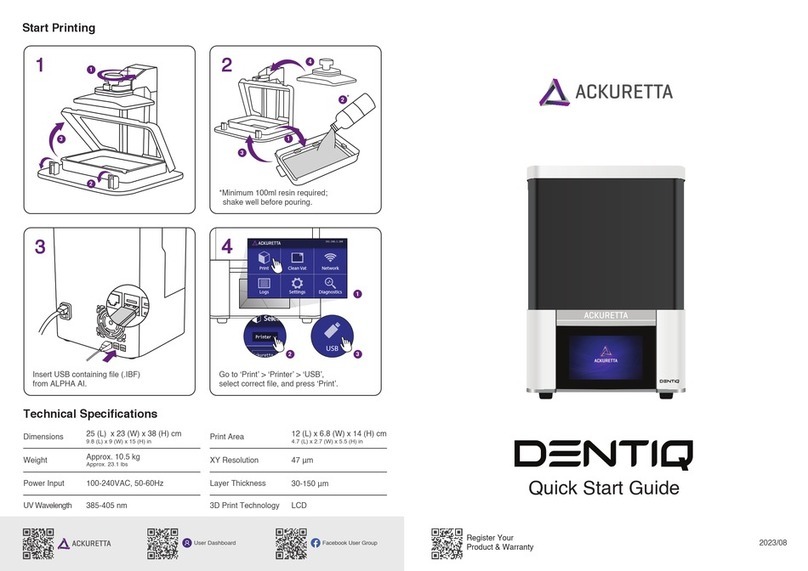
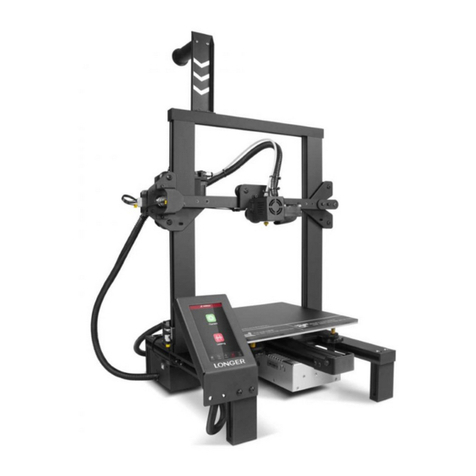
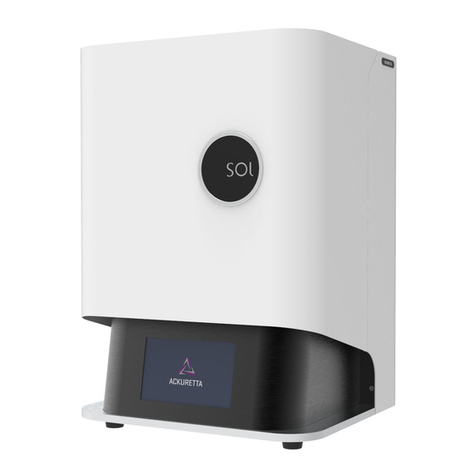
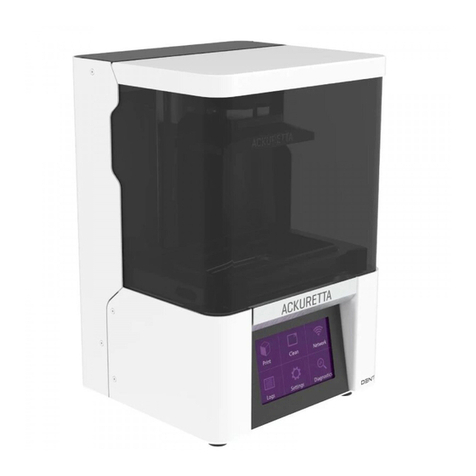
Ackuretta FreeShape 120 User manual


This product, this document, and any items associated with this product or document
are the express property of Ackuretta Technologies Pvt. Ltd. Replication or copying, in
either partial or complete form, of the product or the documentation without the
express written consent of Ackuretta Technologies Pvt. Ltd. is strictly prohibited.
Ackuretta Technologies Pvt. Ltd. reserves the right to make changes to this document
and to the product described herein without notice. Features of the product may
change without modification of this document, and this document may not describe
every feature of the product.
FreeShape 120, Alpha 3D, the Alpha 3D logo, Omega 3D, the Omega 3D logo, Ackuretta,
and the Ackuretta logo are all trademarks of Ackuretta Technologies Pvt. Ltd. Products
or company names mentioned herein besides Ackuretta-branded products are regis-
tered trademarks of their owners.
Copyright ©2019. Ackuretta Technologies Pvt. Ltd. All rights reserved.
Document Number: TM3M1EP0206
Document Version: 1.0
Product Version: FreeShape 120, firmware version 0.7.0
Release Date: March 2019

UV Light Safety
This product uses a light engine that outputs ultraviolet light in the UV-A range, with possible trace amounts in the
UV-B range. This product is compliant with the international standard ISO 3059:2012 in accordance with non-destructive
penetration testing of UV irradiance. This product encloses the light engine in opaque and UV-filtered material to
prevent UV light exposure. However, incidental UV light may extrude from the machine due to any of the following:
• Leaving the door open during usage
• Gaps or holes in the sides of the machine
• Transparent or translucent resins
During operation, do not stand near this product for prolonged periods of time, and do not look directly into the lighted area. Improper
exposure to UV light can cause painful eye and skin injuries.
UV Protective Gear
Prolonged Exposure
UV light exposure is most potentially damaging to the eyes. Wear UV-filtered glasses, goggles, or a
face shield to protect your eyes from the damaging effects.
Eye Protection
Thick Clothing
Other areas of the skin may be exposed, especially if the product is used in cramped environments.
Wear long-sleeved shirts with collars, long pants, and even cloth hats to protect your skin from
incidental exposure.
Skin Protective
Substances
Topical agents such as sunblock, sun cream, or similar substances can protect against the effects of UV
light, but these are generally designed for outdoor use. Do not rely on such substances in lab
environments, but use them as an extra layer of protection if necessary.
Gloves Skin exposure is most likely on the hands, which are oftentimes closest to the product during operation.
Wear thick cloth or rubber gloves to protect your hands from UV exposure.
Direct UV-A light into the eye can lead to irritation, temporary blindness, and the forming of cataracts
on the lens of the eye. UV-B light can compound the cataract-forming effect, and can also lead to
photokeratitis and photoconjunctivitis.
Eye Exposure
Skin Exposure Direct UV-A and UV-B light on the skin can cause localized tanning, burning of the skin, and can lead
to skin cancer in extreme long-term situations.
Resin Safety
Resins provided by Ackuretta are non-carcinogenic acrylic-based photopolymer liquids that give off a light odor. These
resins may cause skin, eyes and respiratory system irritation, and skin sensitivities or allergic reactions by skin contact.
Inhalation of a high high-vapour concentration may cause headaches and nausea. Ackuretta recommends the
following protective gear when handling photopolymer resins, whether from Ackuretta or from another company:

Resin Protective Gear
The hands are the most likely affected area when handling resins. Wear rubber, nitrile, polyvinyl
chloride, or other chemical-resistant gloves.
Gloves
Face Mask or
Respirator
If the room does not have sufficient ventilation, wear a respirator or medical face mask to protect
against inhalation or accidental exposure to the mouth.
Thick Clothing
Prolonged exposure to resin may cause irritation or may cause allergies to develop where they
previously did not seem to occur. Wear long-sleeved shirts with collars, long pants, and even cloth
hats to protect your skin from incidental exposure.
Eye Protection While using air compressors or due to usage or handling, resin may splash into the eyes. Wear protective
goggles, safety glasses with side shields, or a face shield.
Acute Exposure
This product may cause skin irritation. Symptoms may include a slightly localized redness or rash and
swelling. Repeated exposure may cause sensitization and allergic skin reaction in some individuals
resulting in contact dermatitis, severe irritation, dryness and cracking.
Skin Contact
Inhalation
This product is a suspect slight respiratory tract irritation hazard, especially if used at elevated
temperature or processes which may generate aerosols or mists. Symptoms of irritation may include
coughing, headache and nausea, mucous production and shortness of breath.
Ingestion
This product may be harmful if swallowed. It may cause nausea, headache, vomiting, diarrhoea, and/or
central nervous system effects. Keep all food in an area separate from storage and use locations.
Prohibit eating, drinking and smoking in areas where there is a potential for significant exposure to this
material. Thoroughly wash hands before eating.
Eye Contact This product may cause eye irritation. Symptoms may include excessive tearing, itching, irritation,
blinking and redness.
Chronic Exposure
Prolonged contact may cause sensitivities and allergic reactions. People with pre-existing skin conditions
may incur more significant irritation. Repeated exposure may cause sensitization and allergic skin
reaction in some individuals resulting in contact dermatitis, severe irritation, dryness and cracking.
Skin Contact
Inhalation Prolonged or repeated overexposure may cause irritation, headaches, and nausea.
Ingestion Prolonged or repeated swallowing may be a slight ingestion hazard. Chronic ingestion of high doses
has shown damage to testes in studies with animals.
Eye Contact Prolonged contact may cause redness of eye tissue.

Resins provided by Ackuretta are not readily biodegradable. Releasing these resins into the environment may be illegal according to
the regulations in the usage area.
* Properly dispose of resins in accordance with all applicable federal, state, and local regulations.
For more information, please refer to the Material Safety Data Sheet for your particular resin.
Disposal
To clean prints, Ackuretta recommends using solutions of 95% ethyl alcohol or 95-99% isopropyl alcohol (IPA). Both compounds are
colorless, transparent, and naturally give off strong odors. Both compounds have the following major safety concerns:
•Highly flammable and potentially explosive.
•Toxic and can cause adverse conditions from ingestion, inhalation, or direct contact.
•Evaporate quickly so they can become an airborne toxins.
Adverse conditions may include:
Skin Contact This product may cause skin irritation. Symptoms may include skin discoloration, dryness, and cracking.
Eye Contact This product may cause eye irritation. Symptoms may include excessive tearing, itching, irritation,
blinking and redness.
Inhalation This product is a suspect slight respiratory tract irritation hazard. Symptoms may include nose, throat,
and lung irritation, coughing, and/or shortness of breath.
Ingestion This product may be harmful if swallowed. It may cause nausea, headache, vomiting, and/or
unconsciousness. It can also affect concentration and vision.
Chronic Exposure
Skin Contact
Prolonged contact may cause sensitivities and allergic reactions. Repeated exposure may cause
sensitization and allergic skin reaction in some individuals resulting in contact dermatitis, severe
irritation, dryness and cracking. Alcohol can be absorbed through the skin and may result in
symptoms similar to those listed under acute ingestion.
Eye Contact Prolonged contact may cause redness of eye tissue.
Inhalation Repeated high exposure may affect the liver and the nervous system.
Ingestion
Occupational exposure is unlikely to cause cancer, but direct and repeated ingestion may increase
the risk of liver, esophagus, breast, prostate, and colorectal cancers. Pregnant women should not
ingest alcohol, and repeated exposure may cause spontaneous abortions, birth defects, and other
developmental problems. Repeated ingestion may also reduce fertility in males.
To avoid these potential issues, do the following:
•Store in cool, dry, and well-ventilated areas.
•Label containers with instructions regarding handling and storage.
•Keep away from any sources of heat, fire, and sparks.
•Keep away from strong oxidizers, acetaldehyde, chlorine, ethylene oxide, acids and isocyanates.
•Close containers tightly with a strong seal immediately after use.
•Dispose in accordance with all applicable federal, state, and local regulations.
Cleaning Alcohol Safety
Acute Exposure
Contents
About the FreeShape 120
36 Using the Clean Vat Function
37 Using Clean Vat from the Web Console
38 Replacing the LCD Panel
43 Replacing the Vat Film
Getting Started 05 Unboxing Your Machine
06 What You Need
08 Setup Environment
08 Calibrating Your Build Platform
11 Connecting to Your LAN or Wi-Fi Network
Printing 13 Design Your 3D Model
14 Make Your Print File
15 Attach Your Vat
16 Fill Your Vat with Resin
17 Attach Your Build Platform
17 Print Using a USB Device
20 Print Over a LAN or Wi-Fi Network
22 Print Options
Finishing Your Print 25 Remove Your Print from the Printer
25 Cleaning and Drying Your Print
26 Separate Your Print from the Build Platform
27 Cut Off Supports
27 Cure Your Print in a UV Oven
Configuring Your Printer 28 Machine Settings
31 Upgrade Settings
33 Material Settings
Maintaining Your Printer
01 Specifications
01 Features
02 Machine Overview
03 Package Contents
03 Machine Console Interface
04 Web Console Interface

About the FreeShape 120
Specifications
Machine Size 25 ×21 ×38 cm
Weight 9 kg
Printing Size 120 ×68 ×140 mm
XY Resolution 38 μm
Slice Thickness 25 - 100 μm
Resin Wavelength 405 nm
LCD
3D Printing Technology
Resin-based 3D printing has advanced in several stages, starting from laser-based SLA machines to much faster
DLP printers. Ackuretta brings its technical expertise into the next stage of printing with the FreeShape 120, a
desktop LCD printer that delivers high-resolution, smooth surface prints at a price point that is ideal for the
entry-level market.
Features
Advanced
Software
Open Material
System
Wi-Fi
Enabled
High Resolution
47 µm
Smooth Surface
Printing
Complete Workflow
Solutions
FreeShape 120 Manual
01

Machine Overview
Front Left Side Right Side
Console
Build platform
vat
Fan
Hood
Back Side
Guideway
Fan
USB ports
Ethernet/LAN portSerial number sticker
Power
port
Power
switch
FreeShape 120 Manual
02

Package Contents
Machine Console Interface
When you turn on your FreeShape 120, the machine will spend a few seconds loading, and then will arrive on
the home screen. The home screen has the following functions:
Upload files to your printer and start the printing process. For more information, see
Print Using a USB Device.
Files
Restart your printer. This is primarily used while setting up a Wi-Fi connection.
Reboot
Set up your build platform or check that your light engine is working correctly.
For instructions on how to calibrate your build platform, see Build Platform Calibration.
Settings
Wi-Fi Dongle
FreeShape 120
Power Cable
Ethernet Cable
LCD Panels (×2) Hex Key
Vat
Build platform
Vat Film Sheets (×2)
FreeShape 120 Manual
03

Connect to a Wi-Fi network or a static IP address. For instructions on how to set up a
network connection, go to Connecting to Your Network.
Network
View the FreeShape 120 print, system, and error logs.
Log History
Configure your FreeShape 120 system settings, or update your printer firmware. For
more information, see Configuring Your Printer.
Settings
If your printer encounters a problem, use the Diagnostics functions to determine the
source of the issue. For more information about FreeShape 120 diagnostics, send a
Diagnostics
Clean
If your print fails, use the Clean function to remove pieces of prints that did not stick to
the build platform during printing. The Clean function cures one layer of resin at the
bottom of the vat, and then you can easily remove that cured layer and throw away any
lingering debris with it. For more information, see Using the Clean Vat Function.
The Print screen is the home screen for the web console. You upload print files from
your computer to the Printer Memory and start prints from there. Additionally, you
can download or restart previous prints from the Print History, or from a USB device
connected to the machine from Printer USB. For more information, see Print from the
Web Console.
Print
Web Console Interface
Access the web console by connecting your FreeShape 120 to a network, either using an Ethernet cable or over
Wi-Fi. The web console has the following functions:
FreeShape 120 Manual
04

FreeShape 120
Getting Started
After you receive your FreeShape 120 printer, you will need to do a little bit of work to get your printer
up-and-running. This section describes all of the setup you need to do for your machine, so you can go from
package to printing as soon as possible.
The topics covered in this section are as follows:
1. Unboxing Your Machine
2. What You Need
3. Setup Environment
4. Calibrating Your Build Platform
5. Connecting to Your LAN or Wi-Fi Network
1. Unboxing Your Machine
A. Open the printer box.
The FreeShape 120 is visible with attached handles,
and 4 smaller boxes are to the side of it.
B. Lift the printer out of the box by the handles.
Place the printer on a sturdy table to make it easier
to remove the other parts of the packaging.
C. Remove the additional accessory boxes
from the main box.
D. Lift the hood off of the printer and place it to
the side.
FreeShape 120 Manual
05

E. Remove the machine from the rest of the
packaging.
When moving the machine, hold the bottom and
the build platform guideway. Be careful not to put
your fingers on the vat while moving. Keep the
machine vertical, without tilting it backward, so as
to not bend or displace critical components.
F. The vat film package is taped to the front of the
hood. Remove that package from the hood,
and store it in a safe place.
Do not bend vat film or touch the film directly
with your hands while moving it.
G. Put the hood back on the printer. You may
remove the plastic wrap or leave it on.
H. Remove and store the contents of the 4
accessory boxes.
CABLE: 1 Ethernet cable
and 1 power cable
TOOLS: 1 Hex key
PANEL: 2 LCD panels,
packaged in bubble wrap
One box is unmarked,
and is usually empty.
Tools
Cable Panel
Empty
box
2. What you need
Beyond the printer, you need several other items in order to make a complete print and use your printer effectively.
This section outlines the items that you need to acquire in addition to the items shipped with the printer.
A. Computer
In order to run the Alpha 3D or Omega 3D print software, you will need a computer that meets the following
minimum requirements.
FreeShape 120 Manual
06

Minimum Recommended
CPU Intel i3 2.0 GHz dual-core
AMD Athalon 2.0 GHz dual-core
Intel i7 2.6 GHz quad-core
AMD Phenom II X4/ X6 at 2.6 GHz quad-core
GPU Dedicated GPU with 1 GB RAM NVidia GeForce 830
AMD Radeon R7 M340
1920 ×1080
Display 1600 ×900
Memory (RAM) 4 GB 8 GB
Disk Space 1 GB 2 GB
Operating system Windows 7 SP1, 8.1, or 10 Windows 7 SP1, 8.1, or 10
B. Safety equipment – gloves, UV-protective glasses, and a respirator or face mask
C. Cleaning alcohol – isopropyl alcohol (99% solution) or ethyl alcohol (95% solution)
D. Resin – the FreeShape 120 is tested with all Ackuretta Qura- resins, but you may use any 405 nm resin
E. Knife or scraper – to remove prints from the build platform
F. Wire cutters or scissors – to remove supports from your prints
G. Electrical tape – to hold the LCD panel in place after replacement
H. Drying tools – air compressor is preferred, but you can also use a handheld blower or tissues for most prints
FreeShape 120 Manual
07

Consider the following when choosing where to set up your FreeShape 120 and your printing work space.
3. Setup Environment
4. Calibrating Your Build Platform
A. Temperature: 18°- 25° C
Keep your printer and your resins in a dry, temperature-controlled room around 22° C (72° F).
Resins become more viscous when they are too cold. If the environment is around 15° C (59°
F), Ackuretta recommends increasing all curing times by 15%. Even colder temperatures may
require increasing curing times further or may cause print failures.
Similarly, resins may become very thin in hot temperatures. If the environment is hotter
than 35° C (95° F), resins may overcure or may melt during the print process.
B. UV-Filtered Lighting
The UV-protected hood of the FreeShape 120 protects the resin from outside lighting while
the hood is on the printer. As you use the printer, the door will be opened many times, and
the resin will be exposed to outside light.
To protect the resin, set up the printer in a place where the lighting is controllable or covered
by a UV filter. Similarly, use the same UV filtering in your finishing space and your resin storage
location.
C. Ventilation
Resins and cleaning alcohol evaporate over time like all liquids. These substances
can be corrosive to other equipment and may be harmful if inhaled over a long time.
Keep your printer, resins, and your cleaning work space well ventilated at all times.
Avoid lingering in the same room with uncovered resins for a long period of time.
Adjust the fit of your FreeShape 120 build platform when you first open your machine. If you do not calibrate your
build platform, your prints may be uneven, or you may encounter print failures. After calibrating once for the
machine, you do not need to calibrate your build platform again, unless you use it on a different FreeShape 120,
or unless you purchase a new build platform.
Start your build platform calibration with a dry, clean vat and build platform.
FreeShape 120 Manual
08

Your FreeShape 120 comes with a build platform attached. If you remove your build platform, attach your build
platform securely before calibrating.
Turn your build platform so the hole in the top of the platform is facing toward the printer.
Pull the rubber stopper up as you slide the build platform into the guideway on the printer.
Push the handle backwards and down so the handle touches the platform.
Note:
Turn the handle backwards, not forward or to the side. If the handle is turned the wrong way, or is pushed
down too far, the build platform will become unstable, which can affect print performance.
Use the hex key to loosen the 4 hex screws on the build platform.
The build platform hangs loosely.
FreeShape 120 Manual
09

Turn on your printer and then go to Settings.
Press Z-Axis to go to the Z-Axis Adjustment screen.
Under Auto press Adjust.
Press Next.
The build platform starts to move down.
Press OK. The build platform moves back up.
When the build platform stops on the vat, press down on the build platform, so it rests flat on the vat
surface.
While holding the platform down, tighten the 4 hex screws. Interchange tightening the left side and right
side of the platform to ensure that the platform stays flat during the tightening.
FreeShape 120 Manual
10

When the build platform moves to the top, press Home.
5. Connecting to Your LAN or Wi-Fi Network
Connect to a Wi-Fi network or LAN so that you can access the printer and start up prints from your internet
browser.
The FreeShape 120 arrives with a Wi-Fi dongle attached to one of the USB ports. If you want to connect to your
Wi-Fi network, ensure that your dongle is connected before starting this process.
A. Connect your FreeShape 120 to either your router or directly to your computer using the Ethernet (LAN)
cable.
B. The FreeShape 120 automatically generates an IP address. The IP address appears on the machine console.
C. Open an internet browser while on the same network as the FreeShape 120 and type the IP address shown
into the address bar. The FreeShape 120 web console opens.
Note:
If you only wanted to establish a LAN connection, your task is complete. If you want to set up a Wi-Fi connection,
continue to the next steps.
FreeShape 120 Manual
11

D. Click the Network tab in the toolbar on the left side of the browser.
E. Turn ON the setting next to Connect printer to Wi-Fi network.
F. Select a network and press Connect.
G. If the network has a lock symbol ( ), you will be prompted to input a network password. Enter the Password
and click OK. If the connection is successful, the network will display “Connected” next to its network name.
H. Once connected, the machine console will display 2 different IP addresses:
Top IP address: Wi-Fi connection
Bottom IP address: LAN connection
FreeShape 120 Manual
12

I. You may now disconnect the Ethernet cable. Your FreeShape 120 will remember your Wi-Fi network. Only the
Wi-Fi IP address will remain on the FreeShape 120 console.
FreeShape 120
Printing
After you set up your FreeShape 120, the next step is to get your first print up and running. This section describes
the basic process for getting your printer ready and starting up a print.
The topics covered in this section are as follows:
1. Design Your 3D Model
2. Make Your Print File
3. Attach Your Vat
4. Fill Your Vat with Resin
5. Attach Your Build Platform
6. Print Using a USB Device
7. Print Over a LAN or Wi-Fi Network
8. Print Options
1. Design Your 3D Model
The most important part of using a 3D printer is having the 3D model to print from. Ackuretta printers and software
work best using 3D models saved in STL format.
The following are some examples of software you can use to make your 3D model from:
FreeShape 120 Manual
13

Dental
• ExoCAD DentalCAD
• 3Shape Dental System
Jewelry
• Gemvision RhinoGold
• 3Design Software Solution
• Dassault Systèmes SolidWorks
• Autodesk Inventor
Engineering
2. Make Your Print File
Ackuretta provides a variety of different software solutions to match your industry or application. Import your STL
or other design file into your Ackuretta software, support your print, and use the built-in slicer to make your print
file.
The FreeShape 120 supports the following Ackuretta software:
FreeShape 120 Manual
14
Other manuals for FreeShape 120
2
Table of contents
Other Ackuretta 3D Printer manuals

Ackuretta
Ackuretta DENTIQ User manual

Ackuretta
Ackuretta FreeShape 120 User manual

Ackuretta
Ackuretta SOL User manual

Ackuretta
Ackuretta DENTIQ User manual

Ackuretta
Ackuretta SOL User manual

Ackuretta
Ackuretta DENTIQ User manual

Ackuretta
Ackuretta SOL User manual

Ackuretta
Ackuretta SOL User manual

Ackuretta
Ackuretta FreeShape 120 User manual

Ackuretta
Ackuretta Diplo User manual