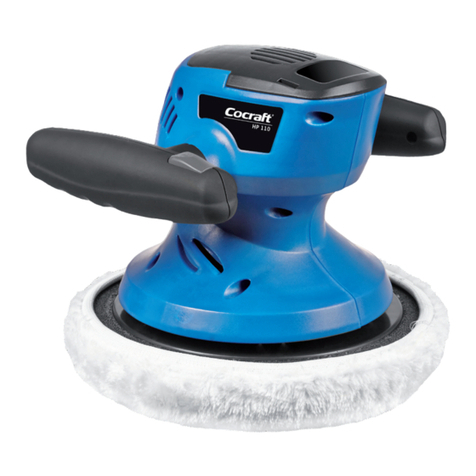
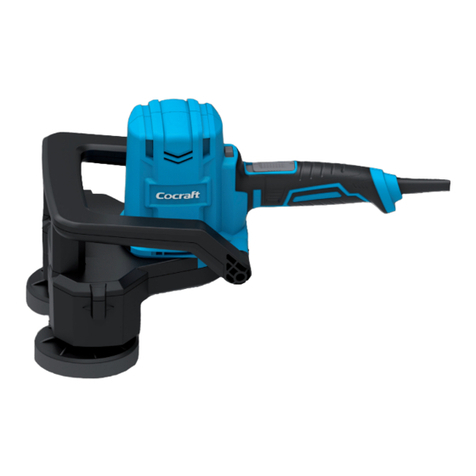
Cocraft R7171 User manual

ENGLISHSVENSKANORSKSUOMIDEUTSCH
Important!
Read the entire instruction manual
carefully and make sure that you fully
understand it before you use the
equipment. Keep the manual for future
reference.
Viktig information:
Läs hela bruksanvisningen noggrant och
försäkra dig om att du har förstått den
innan du använder utrustningen. Spara
bruksanvisningen för framtida bruk.
Viktig informasjon:
Les disse anvisningene nøye og forsikre
deg om at du forstår dem, før du tar
produktet i bruk. Ta vare på anvisningene
for seinere bruk.
Tärkeää tietoa:
Lue nämä ohjeet huolellisesti ja varmista
että olet ymmärtänyt ne, ennen kuin
alat käyttää laitetta. Säilytä ohjeet
myöhempää tarvetta varten.
Wichtiger Hinweis:
Vor Inbetriebnahme die komplette
Bedienungsanleitung sorgfältig
durchlesen und aufbewahren.
HPV 720
21 MM ECCENTRIC ORBITAL MOTION
720 W
18-3597 • 40-9901
RANDOM ORBITAL
POLISHER
POLERMASKIN POLERMASKIN
KIILLOTUSKONE POLIERER
Ver. 20151106
Original instructions
Bruksanvisning i original
Original bruksanvisning
Alkuperäinen käyttöohje
Original Bedienungsanleitung
Art.no Model
18-3597 R7171
40-9901 R7171


ENGLISH
3
Random Orbital Polisher
Art.no 18-3597 Model R7171
40-9901 R7171
Please read theentire instruction manual before using theproduct and then save
it for future reference. We reserve theright for any errors in text or images and any
necessary changes made to technicaldata. In theevent of technical problems or other
queries, please contact our Customer Services (see address details on theback).
Safety
General safety instructions for power tools
Warning: Readall theinstructions.
Failure to adhere to thefollowing instructions may lead to electric shocks, fires and/or
serious injury.
SAVE THESE INSTRUCTIONS.
Theterm “power tool” in thefollowing text refers to your handheld mains operated or
battery operatedtool.
1) Work area safety
a) Keep thework area clean and well illuminated. Cluttered and poorly lit areas
invite accidents.
b) Do not use power tools in explosive environments, such as in thepresence
of flammable liquids, gases ordust. Powertools create sparks which may ignite
dust orfumes.
c) Keep children and other bystanders away from thearea where you are using
thepowertool. Distractions can cause you to lose your concentration and control.
2) Electrical safety
a) Theplug of thepower tool must fit correctly into thewall socket.
Nevermodify theplug in anyway. Neveruse anadaptor plug together with
earthed powertools. Unmodified plugs and matching outlets will reduce therisk
of electric shocks.
b) Avoid physical contact with earthed objects such as pipes, radiators, ovens
and refrigerators. Thereis anincreased risk of electric shock if your body is earthed.
c) Do not expose thepower tool to rain or other wet conditions. Waterentering
apower tool will increase therisk of electricshock.
d) Do not abuse themainslead. Neveruse thelead for carrying, pulling or
unplugging thepowertool. Keepthelead away from heat, oil, sharp edges
and movingparts. Damaged or tangled leads increase therisk of electricshock.

ENGLISH
4
e) When using power tools outdoors, use anextension lead that is suitable for
this purpose. Theuse of anextension lead designed for outdoor use decreases
therisk of electric shocks.
f) If theuse of thepower tool in awet environment is unavoidable, awall
socket equipped with aportable residual current device (PRCD) should
beused. Useof anRCD significantly reduces therisk of electricshock.
3) Personal safety
a) Pay attention to what you are doing and use common sense when using
powertools. Neveruse power tools if you are tired or under theinfluence of
drugs, alcohol or medication. Onemoment of inattention while using apower
tool may result in aserious injury.
b) Wear protective clothing. Always wear safety glasses. Usingprotective
clothing such as dust masks, non-slip safety shoes, helmets and ear defenders
decreases therisk of injury.
c) Avoid accidental starts. Makesure that thepower switch is set to OFF before
plugging thepower tool into awall socket, fitting thebattery or picking up/
carrying thepowertool. Nevercarry apower tool with your finger on thetrigger
and never connect thepower tool to awall socket when theswitch is set to ON,
since it may result in injury.
d) Remove all service tools/keys before switching on thepowertool. Aservice
tool left on arotating part of thepower tool may result in personal injury.
e) Do not overreach. Keepproper footing and balance at alltimes. This enables
better control of thepower tool in unexpected situations.
f) Wear suitable clothing. Donot wear loose-fitting clothing or jewellery.
Keephair, clothes and gloves away from movingparts. Loose-fitting clothes,
jewellery or long hair could become caught in movingparts.
g) If equipment for theextraction and collection of dust is available, make sure
it is connected and used properly. Useof dust collection equipment can reduce
dust related hazards.
4) Use and maintenance of the power tool
a) Do not force thepowertool. Usethecorrect power tool for your application.
Thecorrect power tool will do thejob better and safer if used at therate for which
it was designed.
b) Never use thepower tool if thepower switch does not switch thetool on
and off properly. Anypower tool that cannot be controlled by thepower switch is
dangerous and must be repaired.
c) Unplug thelead from thewall socket or remove thebattery before
making any adjustments, changing accessories or storing thepowertool.
Theseprecautions reduce therisk of thepower tool starting unexpectedly.
d) Store power tools that are not being used out of children’sreach. Donot
allow people who are unfamiliar with thetool or these instructions to operate
thetool. Powertools are dangerous in thehands of untrainedusers.

ENGLISH
5
e) Properly maintain your powertools. Checkfor misalignment, binding of
moving parts, broken parts or anything else which might affect theoperation
of thepowertool. Ifany damage is noticed, have thepower tool repaired
beforeusing. Manyaccidents are caused by poorly maintained powertools.
f) Keep cutting tools sharp andclean. Properly maintained cutting tools with sharp
cutting edges are less likely to bind and are easier to control.
g) Use thepower tool, and any accessories in accordance with these
instructions, take into consideration theworking conditions and thework
that is to be performed. Use of thepower tool for apurpose other than that for
which it is intended could result in adangerous situation.
5) Service
a) Repairs and service should only be performed by qualified tradesmen, and
only with original spareparts. Thisguarantees that thesafety of thepower tool is
maintained.
Product safety symbols
Wear ear protection.
Read theentire instruction manual.
Wear eye protection.

ENGLISH
6
Specic safety precautions for polishing
• Polishing bonnets with drawstrings are not recommended, but if you are
usingone: Donot allow thepolishing bonnet or its drawstring to hang loose when
operating thepolisher. Tuckin or trim off any looseends. Looseand spinning
attachment strings can entangle your fingers or snag on theworkpiece.
• This angle polisher is only intended for dry polishing.
• Only use therecommended parts and/or accessories.
• Theangle polisher must not be used by persons under theage of 16years.
• Theangle polisher must not be used on materials containing asbestos.
a) This power tool is solely intended for thepurpose of polishing. Readall
safety warnings, instructions, illustrations, and specifications provided with
thistool. Failure to adhere to all of thefollowing instructions can result in electric
shock, fire and/or serious injury.
b) Operations such as grinding, sanding, wire brushing or cutting-off are not
recommended to be performed with this powertool. Theuse of this power
tool to perform tasks for which thetool was not intended, can lead to danger and
personal injury.
c) Never use accessories which are not designed for use with this type of tool
and which are not recommended by themanufacturer. Evenif theaccessory can
be attached to your power tool, there is no guarantee that it can be used safely.
d) Therated speed of theaccessory must at least correspond to themaximum
rated speed of thepowertool. Accessories which rotate faster than their rated
speed can break and shatter.
e) Theouter diameter and thickness of theaccessory must be within
themarked capacity of your electric handtool. Ifanaccessory is thewrong
size, it will not fit theguard and will not be able to be controlled properly.
f) Do not use adefective accessory. Inspect theaccessory and make sure there are
no splits or cracks in thegrinding wheels; cracks or wear and tear on thebacking
plates, loose or torn bristles on thesteel brush wheels. Ifyou drop your power
tool or accessory, check for damage. Iftheaccessory is damaged, use anew/
undamaged accessory. Afterinspecting thetool and attaching anaccessory, keep
yourself and others outside of thepower tool’s danger zone and let it run at full
speed for one minute. Damaged accessories will normally break during this test period.
g) Wear personal protective equipment. Depending on how you use
themachine; use avisor/face protection or safety glasses. Ifnecessary use
amask, ear protection, gloves, and apron/work clothing to protect you from
small shards of metal or splinters from thework object. Theeye protection
you use must be able to protect against flying debris produced in different working
positions. Thebreathing protection should be able to filter any particles produced by
thework. Prolonged exposure to high levels of noise can result in hearing damage.
h) Keep children at asafe distance from theworkarea. Everyone at
theworkplace must wear personal protective equipment. Debris from
theworkpiece or from adamaged accessory can fly off and injure people outside
of theimmediate workarea.

ENGLISH
7
i) Position themains lead well away from therotating accessory. Ifyou lose
control, thelead can be sliced through or become entangled and pull your hand or
arm into therotating accessory.
j) Never put thepower tool down before theaccessory has completely
stopped rotating. Arotating accessory can fasten on thework surface causing
you to lose control of thetool.
k) Never leave thepower tool switched on while carrying it at yourside.
Accidental contact with therotating accessory could snag your clothing, pulling
theaccessory into yourbody.
l) Clean theventilation ports of themotor regularly. Thefan of themotor draws dust
into thehousing. Alarge build-up of metal dust particles can lead to electrical hazards.
m) Do not use thepower tool near flammable material. Sparks can easily ignite
flammable material.
n) Do not use accessories, which require liquid coolants. Theuse of water or
other liquid coolants can result in electrocution orshock.
Kickback and related warnings
• Kickback is asudden reaction to awedged or stuck wheel, backing plate, brush,
or some other accessory. Pinching or snagging causes rapid stalling of therotating
accessory which in turn results in thepower tool thrusting violently in theopposite
direction of theaccessory’s rotation at thepoint of binding.
• Kickbacks are theresult of thepower tool being used in anincorrect manner, on
incorrect objects, or under incorrect conditions and can be avoided by observing
thefollowing precautions.
a) Hold thepower tool firmly and position your arms and body so that you
can resist kickback forces. Always use theauxiliary handle if there is one,
for maximum control over kickback or torque reaction during start-up.
Theoperator can control torque reactions or kickback forces, if proper precautions
aretaken.
b) Never place your hand near therotating accessory. Theaccessory can be
thrown back onto yourhand.
c) Do not stand in thearea, where thepower tool is likely to end up if
akickback were tooccur. Kickback will propel thetool in theopposite direction
to thewheel’s rotation at thepoint of snagging.
Outdooruse
• If thepolisher is used outdoors, it is recommended that it is plugged into asocket
protected by aresidual current device (RCD). TheRCD should be rated to trip at
acurrent of 30mA.
• Only use cables and connectors designed for outdooruse.

ENGLISH
8
1
2
3 4 5 6 7
8
10
11
9
Description
Thepolisher is intended to be used with a160mm hook and loop attachment
polishing sponge/buffingwheel.
1. Front/Rear handle
2. Ventilationports
3. Carbon brushcover
4. Speed regulator
5. Trigger lock button
6. Power trigger
7. Power lead withplug
8. Allenkey
9. Hole for Allen key used for balancing thespindle
10. Backing pad Ø 145mm
11. Polishing sponge/buffing wheel Ø 160 mm (sold separately)

ENGLISH
9
Before use
• Make sure that thepolishing wheel is securely fastened to thespindle.
• Make sure that thepolishing wheel can be turned byhand.
Operating instructions
Starting /Stopping
• Always hold thepolisher in both hands and start and stop thepolisher only when
thepolishing sponge is resting on thesurface to be polished.
• Always start polishing on thelowest speed by setting theregulator (4) to MIN
before pressing thetrigger (6). Pressin thetrigger lock button (5) if you want
thepolisher to keep running all thetime.
• Switch thepolisher off by pressing in thefront of thepower trigger (6) and then
releasingit.
Variable speed control
Set thedesired speed, from MIN to 6(max), using theregulator (4). Always begin
on thelowest speed (MIN) and increase during operation for thebest results. Ifyou
are unsure, it is agood idea to test thepolisher at different speeds on atest surface
before startingwork.
Changing polishing sponge/ bufng pad
Thevarious accessories which can be used with thepolisher are all referred to as
polishing spongebelow.
1. Unplug thepolisher and remove thepolishing
sponge (11) from thebacking pad (10).
2. Thepolishing sponge should be centred on
thebackingpad. Thisis easiest to achieve by
holding thepolishing sponge underneath and
pressing thebacking pad onto it fromabove.
Ifthepolishing sponge is fitted in this way, it is
easy to make sure that it is centred,i.e., that it
protrudes equally all theway round theedge of
thebackingpad.
Vibration level
Thepolisher normally vibrates during use due to its oscillating action.
If thepolisher vibrates agreat deal, check that thepolishing sponge is centred on
thebackingpad. Youcould also try adjusting thespeed until thepolisher vibratesless.
Thereis also away of balancing thebacking pad in relation to theweight of
thepolishing sponge (see thenext section).

ENGLISH
10
12 13
Balancing the backing pad in case of abnormal vibrations
• Thebacking pad is factory-balanced for apolishing sponge of therecommended
dimensions.
• This factory-balancing is suitable for most polishing sponges with equivalent
dimensions and normally no adjustment is necessary.
• However, if abnormally heavy vibrations are experienced when using apolishing
sponge of another size, thebacking pad can be balanced by moving
acounterweight on thespindle.
• Thecounterbalance can only be used to compensate for weight differences up to
20g from therecommended polishing sponge weight.
Thecounterweight is adjusted using theincluded Allenkey.
1. Push thebacking pad inwards
(towards thepower trigger) so
that theadjusting screw (12) is
lined up with thehole (9).
2. Insert theincluded Allen key
(8) through thehole (9) and
into theadjusting screw (12).
Turning theadjusting screw,
moves asmall counterweight
(13) in/out to compensate
for thechange in weight of
thepolishing spongeused.
- Turn theAllen key clockwise
if thenew polishing
sponge is heavier than
thepreceding sponge.
- Turn theAllen key
anticlockwise if thenew
polishing sponge is lighter
than thepreceding sponge.
Thepicture shows how to balance
thebacking pad.
12. Adjusting screw for balancing
thebackingpad.
13. Counterweight for balancing
thebackingpad.

ENGLISH
11
Polishing
Thevarious polishing products such as rubbing compound, finish cleaner, wax, polish
are all referred to below as polishing compound.
• There are several types of polishing compound which can be used, but this angle
polisher is designed for use with liquid polishing compound.
• Always read theinstructions accompanying thepolishing compound to ensure that
it is suitable for use with apolishing machine.
1. Unplug thepolisher and fit apolishing sponge onto thebackingpad. Onlyuse
clean and undamaged polishing sponges and change them if you change thetype
of polishing compound. Mostpolishing sponges are washable, so all you need to
do is have afew of them so you can wash them and reusethem.
2. Apply thepolishing compound to thepolishing
sponge. Beginby applying asmall amount of
polishing compound. DoNOT spread polishing
compound onto thesurface to be polished.
3. Place themains lead of thepolisher over your shoulder to keep it out of theway
whilst polishing. Note: Holdthepolisher in both hands so that thepolishing sponge
rests on thesurface to be polished and begin polishing on thelowest speed
setting. Movethepolisher up and down over thesurface to be polished applying
alight pressure. Keepthepolisher moving all thetime as paint finishes can be
ruined if polishers are left polishing one spot for toolong.
4. Intricate surfaces such as wing mirrors, door handles and grilles should be
polished byhand.
• Themost common mistake made when polishing is theuse of too much polishing
compound. Soaking thepolishing sponge with polishing compound will make
polishing more difficult and increase thepolishingtime. Usingtoo much polish will
shorten theuseful life of thepolishing sponge/pad.
• If thepolishing sponge detaches itself from thebacking pad, you have probably
used too much polishing compound.
Maintenance
• Disconnect theplug from thepower source before making any adjustments or
servicing.
• Always store thepolisher with thebacking pad facing up to prevent it from deforming.
• Remove thepolishing sponge from thebacking pad when you have finishedwork.
• Wash thepolishing sponge by hand and let it airdry.
• Never use abrasive cleaning agents.
• Clean theexterior of thepolisher using acloth lightly moistened with water and
amild detergent.

ENGLISH
12
• Do not use thepolisher in therain or if you have wethands.
• Ensure that theventilation openings are kept clear to prevent
themotor from overheating.
• When working in dusty conditions: Firstdisconnect thepolisher from
themains supply and then clear theventilation openings of anydust.
Responsible disposal
This symbol indicates that this product should not be disposed of with
general householdwaste. Thisapplies throughout theentire EU. Inorder
to prevent any harm to theenvironment or health hazards caused by
incorrect waste disposal, theproduct must be handed in for recycling
so that thematerial can be disposed of in aresponsible manner.
Whenrecycling your product, take it to your local collection facility or
contact theplace of purchase. Theywill ensure that theproduct is
disposed of in anenvironmentally sound manner.
Technical specications
Voltage 220–240V AC, 50 Hz
Wattage 720W
No-loadspeed Variable speed control: 2100–5000 rpm (no-load)
Action 21mm orbital motion
Backingpad Ø 145 mm hook-and-loop
Polishing sponge Recommended diameter: 160mm
Sound pressure (LpA) 85dB(A), K: 3dB
Sound power (LwA) 96dB(A), K: 3dB
Vibrationlevel 5.56m/s²
Weight 2.8kg
Protectionclass II

SVENSKA
13
Polermaskin
Art.nr 18-3597 Modell R7171
40-9901 R7171
Läs igenom hela bruksanvisningen före användning och spara den sedan för fram-
tidabruk. Vireserverar oss förev. text- och bildfel samt ändringar av tekniskadata.
Vidtekniska problem eller andra frågor, kontakta vår kundtjänst (se adressuppgifter
påbaksidan).
Säkerhet
Generella säkerhetsinstruktioner för elektriska handverktyg
Varning! Läsalla instruktioner.
Om nedanstående instruktioner inte följs kan detta leda till elektrisk stöt, brand och
allvarligskada.
SPARA DESSA INSTRUKTIONER.
Termen ”elektriskt handverktyg” ivarningstexten nedan refererar till ditt nätanslutna
eller batteridrivna handverktyg.
1) Arbetsutrymmet
a) Håll arbetsutrymmet rent och väl upplyst. Belamrade och mörka utrymmen
inbjuder till olyckor.
b) Använd inte elektriska handverktyg iexplosiva miljöer, som inärheten av lätt-
antändliga vätskor, gaser ellerdamm. Elektriska handverktyg genererar gnistor
som kan antända damm ellerångor.
c) Håll undan barn och åskådare medan du använder det elektriska handverktyget.
Störningsmoment kan göra att du tappar kontrollen.
2) Elektrisk säkerhet
a) Det elektriska handverktygets stickpropp måste passa ivägguttaget.
Modifiera aldrig stickproppen på någotvis. Använd aldrig adapter
tillsammans med jordade elektriska handverktyg. Omodifierade stickproppar
och passande vägguttag minskar risken för elektriskstöt.
b) Undvik kroppskontakt med jordade föremål,t.ex. rör, element, köksspis och
kylskåp. Detinnebär ökad risk för elektrisk stöt om din kropp är jordad.
c) Utsätt inte det elektriska handverktyget för regn eller våta förhållanden.
Omvatten tränger in iettelektriskt handverktyg ökar det risken för elektriskstöt.
d) Misshandla inte nätsladden. Använd aldrig nätsladden för att bära, dra eller
rycka stickproppen ur vägguttaget. Hållnätsladden undan från värme, olja,
vassa kanter och rörligadelar. Skadade eller trassliga nätsladdar ökar risken för
elektriskstöt.

SVENSKA
14
e) När du använder ettelektriskt handverktyg utomhus, använd enskarvsladd
anpassad för detta ändamål. Användning av enskarvsladd för utomhusbruk
minskar risken för elektriskstöt.
f) Om det inte går att undvika att det elektriska handverktyget används ifuktig
miljö, använd ettvägguttag utrustat med jordfelsbrytare. Användning av jord-
felsbrytare minskar risken för elektriskstöt.
3) Personlig säkerhet
a) Var uppmärksam på vad du gör och använd sunt förnuft när du använder
ettelektriskt handverktyg. Använd inte ettelektriskt handverktyg om du
är trött eller påverkad av droger, alkohol eller medicinering. Ettögonblicks
ouppmärksamhet när du använder ettelektriskt handverktyg kan resultera iallvarlig
personskada.
b) Använd skyddsutrustning. Bäralltid skyddsglasögon. Attvid behov använda
skyddsutrustning,t.ex. andningsskydd, halksäkra skyddsskor, hjälm och hörsel-
skydd minskar risken för personskada.
c) Undvik oavsiktligstart. Setill att strömbrytaren är iläge OFF innan du
ansluter stickproppen till vägguttaget, ansluter batteriet eller lyfter upp/bär
det elektriska handverktyget. Attbära ettelektriskt handverktyg med ettfinger
på strömbrytaren/avtryckaren eller att ansluta ettelektriskt handverktyg till elnätet
när strömbrytaren är iläge ON inbjuder till olyckor.
d) Ta bort alla serviceverktyg/nycklar innan du slår på det elektriska hand-
verktyget. Ettkvarglömt serviceverktyg på enroterande del av det elektriska
handverktyget kan resultera ipersonskada.
e) Sträck dig inte förlångt. Setill att du står stadigt med god balans helatiden.
Dettamöjliggör bättre kontroll över det elektriska handverktyget ioväntade
situationer.
f) Bär lämplig klädsel. Bärinte löst sittande kläder eller smycken. Hållhår,
kläder och handskar undan från rörligadelar. Lösakläder, smycken och långt
hår kan fastna irörligadelar.
g) Om utrustning för utsugning och uppsamling av damm finns tillgänglig, se till
att denna är ansluten och används på ettkorrektsätt. Användning av dessa
hjälpmedel kan minska dammrelateradefaror.
4) Användning och underhåll av det elektriska handverktyget
a) Pressa inte det elektriska handverktyget. Använd ettelektriskt handverktyg
som är avsett för det arbetsmoment duutför. Korrekt elektriskt handverktyg gör
jobbet bättre och säkrare med avsedd matningshastighet.
b) Använd inte det elektriska handverktyget om strömbrytaren inte slår på och
stänger av verktyget. Allaelektriska handverktyg som inte kan kontrolleras med
strömbrytaren är farliga och måste repareras.

SVENSKA
15
c) Ta stickproppen ur vägguttaget eller ta ur batteriet innan du utför några
justeringar, byter tillbehör eller lägger undan det elektriska handverktyget för
förvaring. Dessaförebyggande skyddsåtgärder minskar risken för att starta det
elektriska handverktyget oavsiktligt.
d) Förvara elektriska handverktyg som inte används utom räckhåll för barn och
låt inte personer som inte är förtrogna med det elektriska handverktyget eller
dessa instruktioner användadet. Elektriska handverktyg är farliga om de kom-
mer ihänderna på ovana användare.
e) Underhåll elektriska handverktyg. Kontrollera om något är felinställt, om
rörliga delar kärvar, om delar har gått sönder eller om något annat har inträffat
som kan påverka funktionen hos det elektriska handverktyget. Omnågot är
skadat måste det repareras före användning. Mångaolyckor beror på dåligt
underhållna elektriska handverktyg.
f) Håll skärverktyg vassa ochrena. Ordentligt underhållna skärverktyg med vassa
eggar är mindre benägna att kärva och lättare att kontrollera.
g) Använd det elektriska handverktyget, tillbehöretc. enligt dessa instruktioner,
ta hänsyn till arbetsförhållanden och till det arbete som ska utföras.
Användning av det elektriska handverktyget för arbeten andra än vad det är ämnat
för kan resultera ienfarlig situation.
5) Service
a) Låt behörig personal utföra service och reparationer, och endast med
originalreservdelar. Dettagaranterar att säkerheten på det elektriska
handverktyget behålls.
Produktmärkning med säkerhetssymboler
Använd hörselskydd!
Läs hela bruksanvisningen!
Använd skyddsglasögon!

SVENSKA
16
Säkerhetsvarningar speciellt för polering
• Polerhättor med fästsnöre rekommenderas ej, men om sådan ändå används:
Låtinte polerhättan eller dess fästsnören hänga löst när du kör polermaskinen.
Stoppa in snörenaunder polerhättan eller klipp bort lösa ändar. Lösaroterande
fästsnören kan fastna idina fingrar eller på arbetsstycket.
• Polermaskinen är endast avsedd för torr polering.
• Använd endast rekommenderade tillbehör.
• Polermaskinen får inte användas av personer yngre än 16år.
• Polermaskinen får inte användas på material som innehåller asbest.
a) Detta elektriska handverktyg är avsett för polering. Läsalla säkerhetsvar-
ningar, instruktioner, illustrationer och specifikationer som medföljer detta
verktyg. Underlåtelse att följa alla instruktioner nedan kan resultera ielektrisk stöt,
brand och allvarligskada.
b) Slipning, putsning, borstning och kapning rekommenderas inte att utföras
med detta elektriska handverktyg. Attutföra arbeten som detta verktyg inte är
avsett för kan orsaka fara och leda till personligskada.
c) Använd aldrig tillbehör som inte är speciellt avsedda och rekommenderade
av verktygstillverkaren. Ävenom tillbehöret kan monteras på ditt elektriska hand-
verktyg är det ingen försäkran om säker användning.
d) Märkhastigheten på tillbehöret måste minst motsvara den maximala hastig-
heten märkt på det elektriska handverktyget. Tillbehör som roterar snabbare än
märkhastigheten kan gå sönder och fallaisär.
e) Ytterdiametern och tjockleken på tillbehöret måste vara inom märkkapaciteten
på ditt elektriska handverktyg. Felstorlek på tillbehören kan göra att handverktyget
inte fungerar på rätt sätt och att det blir svårt att använda.
f) Använd inte ettskadat tillbehör. Inspektera tillbehören och se om det finns
flisor eller sprickor på slipskivorna, sprickor, nötningar eller slitage på stöd-
rondellen, lösa eller trasiga borst på stålborstrondellerna. Omdu tappar ditt
elektriska handverktyg eller etttillbehör, kontrollera om det finns skador eller
montera ettoskadat tillbehör. Efterinspektion och montering av etttillbehör,
placera dig själv ochev. åskådare utanför maskinens riskområde och kör
det elektriska handverktyget på fullt varvtal ienminut. Skadade tillbehör går
normalt sönder under testperioden.
g) Bär personlig skyddsutrustning. Beroende på hur du använder maskinen,
använd ansiktsskydd eller skyddsglasögon. Vidbehov, använd ansiktsmask,
hörselskydd, handskar och arbetsförkläde som skyddar mot små slippartiklar
eller flisor från arbetsstycket. Ögonskyddet ska kunna skydda mot kringflygande
skräp som bildas vid olika arbetsmoment. Andningsskyddet ska kunna filtrera
partiklar som bildas vid arbetet. Långvarig vistelse ibuller kan orsaka hörselskador.
h) Håll åskådare på behörigt avstånd från arbetsplatsen. Allasom besöker
arbetsplatsen måste bära personlig skyddsutrustning. Flisor från arbetsstycket
eller från etttrasigt tillbehör kan flyga iväg och orsaka skada utanför arbetets
omedelbara närområde.

SVENSKA
17
i) Placera nätkabeln på avstånd från det roterande tillbehöret. Omdu förlorar
kontrollen kan sladden kapas eller fastna och din hand eller arm kan dras in idet
roterande tillbehöret.
j) Lägg aldrig ifrån dig det elektriska handverktyget förrän tillbehöret har
stannathelt. Detroterande tillbehöret kan fastna iunderlaget vilket isin tur leder
till att du tappar kontrollen.
k) Ha aldrig det elektriska handverktyget påslaget när du förflyttardig.
Oavsiktligkontakt med det roterande tillbehöret kan göra att det fastnar idina
kläder och därmed dras mot kroppen.
l) Rengör regelbundet motorns ventilationsöppningar. Motorns fläkt drar åt sig
damm som kommer in under höljet. Omstora mängder metallspån ansamlas kan
detta leda till elektriskafaror.
m) Använd inte det elektriska handverktyget inärheten av lättantändliga material.
Gnistor kan antända dessa material.
n) Använd inte tillbehör som kräver kylvätskor. Användning av vatten eller andra
kylvätskor kan resultera ielektrisk stöt och livsfara.
Kast och tillhörande varningar
• Kast är enplötslig reaktion på enklämd eller fastkörd rondell, stödrondell, borste
eller något annat tillbehör. Klämning eller fastkörning orsakar ettsnabbt stopp av
det roterande tillbehöret som isin tur gör att det elektriska handverktyget tvingas
imotsatt riktning mot tillbehörets rotationsriktning vid fastkörningstillfället.
• Kast är ettresultat av att det elektriska handverktyget använts på fel sätt, för fel
saker eller under felaktiga förhållanden och kan undvikas genom att nedanstående
försiktighetsåtgärder vidtas.
a) Håll stadigt idet elektriska handverktyget och håll armarna och kroppen
så att du kan parerakast. Använd alltid hjälphandtaget om sådant finns
för maximal kontroll över kast eller reaktioner på vridmomentet vidstart.
Användaren kan kontrollera kast eller reaktioner på vridmomentet om nödvändiga
försiktighetsåtgärder vidtas.
b) Placera aldrig din hand nära det roterande tillbehöret. Tillbehöret kan få
ettkast över dinhand.
c) Ställ dig inte idet område där det elektriska handverktyget kan tänkas
hamna om det inträffar ettkast. Kastdriver verktyget imotsatt riktning mot
slipskivans rotationsriktning vid fastkörningspunkten.
Användning utomhus
• Anslut maskinen till etteluttag via enjordfelsbrytare för personskydd, speciellt vid
användning utomhus. Jordfelsbrytaren ska bryta vid max felström 30mA.
• Använd endast anslutningskablar och kopplingar som är avsedda för användning
utomhus.

SVENSKA
18
1
2
3 4 5 6 7
8
10
11
9
Beskrivning
Polermaskinen är avsedd för användning med 160 mm polersvamp/polertrissa med
kardborrefäste.
1. Främre/bakre handtag
2. Ventilationsöppningar
3. Lock över kolborste
4. Reglage för hastighetsinställning
5. Spärr för strömbrytaren
6. Strömbrytare On/Off
7. Nätsladd med stickkontakt
8. Insexnyckel
9. Hål för insexnyckel, används vid spindelbalansering
10. Polerdisk Ø 145mm
11. Polersvamp/polertrissa Ø 160 mm (säljs separat)

SVENSKA
19
Innan användning
• Kontrollera att polerdisken sitter ordentligtfast.
• Kontrollera att polerdisken kan vridas runt förhand.
Användning
Start/stopp
• Håll maskinen med båda händerna och slå på/stäng av den endast när
polersvampen/polertrissan vilar på ytan som ska poleras.
• Starta alltid polermaskinen på det lägsta varvtalet genom att justera reglaget (4) till
MIN och trycka in strömbrytaren (6). Tryckin spärren (5) för att låsa strömbrytaren
om du vill att motorn ska gå helatiden.
• Stäng av polermaskinen genom att trycka in framkanten på strömbrytaren (6) och
släppaden.
Inställbar hastighet
Ställ in önskad hastighet med reglaget (4), från MIN till 6(max). Börjaalltid med den
lägsta hastigheten (MIN) och öka hastigheten under pågående arbete till bästa möjliga
resultat. Ärdu osäker är det lämpligt att testa med olika hastigheter på enprovyta
innan arbetet påbörjas.
Byte av polersvamp/polertrissa
De olika tillbehören benämns nedan som polersvamp.
1. Dra ur stickproppen och ta bort polersvampen (11)
från polerdisken (10).
2. Polersvampen ska monteras centrerad på
polerdisken. Dettagörs enklast genom att hålla
polersvampen underst och trycka fast polerdisken
uppifrån. Ompolersvampen monteras på
detta sätt är det lätt att se till att den blir
centrerad,d.v.s. att den sticker ut lika långt på
alla sidor ompolerdisken.
Vibrationer
Polermaskinen vibrerar normalt endel vid användningp.g.a. sin oscillerande rörelse.
Om polermaskinen vibrerar väldigt mycket, kontrollera först att polersvampen är
centrerad på polerdisken. Provaockså att justera varvtalet tills polermaskinen
vibrerar mindre. Detfinns också möjlighet att balansera polerdisken iförhållande till
polersvampens vikt (se nästa avsnitt).

SVENSKA
20
12 13
Balansering av polerdisk vid onormala vibrationer
• Polerdisken är från fabrik balanserad för enpolersvamp med rekommenderad
dimension.
• Fabriksbalanseringen passar de flesta polersvampar med likvärdig dimension och
balansering behöver normalt inte utföras.
• Om onormala vibrationer upplevs vid användning av annan storlek på polersvamp
kan polerdisken balanseras genom lägesjustering av motvikten på spindeln.
• Justermånen är upp till 20 g från vikt på rekommenderad polersvamp.
Motvikten justeras med den bifogade insexnyckeln.
1. Tryck polerdisken inåt
(mot strömbrytaren) så att
justerskruven (12) är precis
innanför hålet (9).
2. Tryck in den bifogade
insexnyckeln (8) genom hålet
(9) och in ijusterskruven (12).
Genomatt vrida justeringen
skruvas enliten vikt (13) inåt/
utåt och kompenserar därmed
polersvampens ändradevikt.
- Vrid insexnyckeln medurs om
den nya polersvampen är
tyngre än den föregående.
- Vrid insexnyckeln moturs om
den nya polersvampen är
lättare än den föregående.
Bilden visar principen för finjustering
vid balansering.
12. Justerskruv för balansering av
polerdisk
13. Vikt för balansering av polerdisk
Table of contents
Languages:
Other Cocraft Sander manuals

Cocraft
Cocraft HB920D User manual

Cocraft
Cocraft DPTY95 2 Series User manual

Cocraft
Cocraft HBD500 User manual

Cocraft
Cocraft HP 110 User manual

Cocraft
Cocraft HD 180 SDGJ-SS2-180-UK User manual

Cocraft
Cocraft HRD 380 User manual

Cocraft
Cocraft LXC SA18 User manual

Cocraft
Cocraft HSD240 User manual

Cocraft
Cocraft HD 130 User manual

Cocraft
Cocraft DSB005 User manual