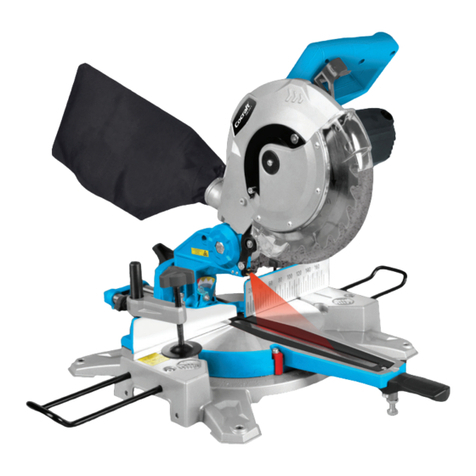
Cocraft 40-7895 User manual

ENGLISHSVENSKANORSKSUOMIDEUTSCH
Important!
Read the entire instruction manual
carefully and make sure that you fully
understand it before you use the
equipment. Keep the manual for future
reference.
Viktig information:
Läs hela bruksanvisningen noggrant och
försäkra dig om att du har förstått den
innan du använder utrustningen. Spara
bruksanvisningen för framtida bruk.
Viktig informasjon:
Les disse anvisningene nøye og forsikre
deg om at du forstår dem, før du tar
produktet i bruk. Ta vare på anvisningene
for seinere bruk.
Tärkeää tietoa:
Lue nämä ohjeet huolellisesti ja varmista
että olet ymmärtänyt ne, ennen kuin
alat käyttää laitetta. Säilytä ohjeet
myöhempää tarvetta varten.
Wichtiger Hinweis:
Vor Inbetriebnahme die komplette
Bedienungsanleitung sorgfältig
durchlesen und aufbewahren.
HM 210
VARIABLE MITRE SETTING 45° RIGHT/LEFT
1200W
18-3204 ∙ 40-7895
MITRE SAW
KAP- OCH GERINGSSÅG
KAPP- OG GJÆRESÅG
KATKAISU- JA JIIRISAHA
KAPP- UND GEHRUNGSSÄGE
Ver. 20160719
Original instructions
Bruksanvisning i original
Originalbruksanvisning
Alkuperäinen käyttöohje
Original Bedienungsanleitung
Art.no Model
18-3204 92109-UK
40-7895 92109

ENGLISH
2
1200 W Compound Mitre Saw
Art. no 18-3204 Model 92109-UK
40-7895 92109
Read through theentire user guide before using theproduct and save theguide for future reference.
We cannot accept responsibility for any errors in thetext or pictures and reserve theright to make
changes to technical data. If you have technical problems or questions, contact our customer
service (see addresses on thelast page).
Safety
General safety rules for your safety and the safety of others
• Keep thework area clean. Cluttered surfaces and workbenches can result in accidents.
• Do not use themachine in anenvironment where risks are present. Electrical machines must
not be used on damp or wet surfaces or in rain. Provide good lighting in thework area.
Provide ample air exchange where work produces dust. Never use electrical machines/tools
where they might cause fire or explosion.
• Avoid electric shock. Avoid contact between your body and earthed objects such as water
pipes, radiators, cookers etc. when using electrical machines or tools. Contact with these
may cause electric shock.
• Keep children and visitors away. All children and visitors should be kept at asafe distance
from electrical machines and tools or electric cables in thework area.
• Store themachines where children cannot get at them. When electrical machines/tools are
not in use, store them under lock and key or out of thereach of children.
• Do not force themachine. It does its job best at thefeed rate for which it was designed.
• Use thecorrect tool. Do not force atool or anattachment to perform anoperation for which
it was not designed.
• Wear suitable clothing. Do not wear loose clothing, gloves, necklaces, rings, necklaces or
other items that might get caught in rotating parts. Non-slip shoes are recommended. If you
have long hair, wear ahairnet (or equivalent).
• Always wear safety glasses. Ordinary glasses do not provide enough protection. Wear adust
filter or protective mask when doing work which produces dust.
• Use adust extraction system. If themachine is designed for it, use extraction equipment to
remove and collect dust and chips. Make sure that theequipment is used properly and is
emptied when necessary.
• Do not mistreat themains lead. Never carry themachine by themains lead. Do not unplug
themachine by tugging on themains lead. To do this, pull on theplug. Make sure that
themains lead does not come into contact with heat, oil or sharp edges.
• Secure theworkpiece properly. Use clamps or avice where possible, so that you can operate
thetool with two hands. This is safer than using one hand to hold theobject.
• Do not stretch too far. Always stand securely and properly balanced.
• Keep thetools in shape. For optimal efficiency and asafe result, make sure that they are
clean and that thecutting edges are sharp. Follow therecommendations in themanual for
lubrication and replacement of accessories. Check themains lead regularly. If it is damaged,
it must be replaced by aqualified service technician. Check all extension leads regularly for
damage. Make sure that thehandles and controls of themachine/tool are dry, clean and free
of oil, grease, etc.

ENGLISH
3
• Switch off thepower. Unplug themains lead and press theemergency stop button before
servicing and when replacing accessories such as blades, drill bits, cutters or abrasive strips.
• Make ahabit of checking that all keys and servicing tools have been removed from
themachine before you switch on thepower.
• Avoid accidental starting. Do not carry thetool by one finger on thepower switch or trigger if
thetool is plugged in. Make sure that theswitch is set to OFF when you plug in themachine.
• When working outdoors, use only extension leads intended for outdoor use. Use extension
leads with sufficient conductor area. Uncoil theentire lead.
• Use common sense and take care. Think before performing anoperation, so that you perform
it safely. Do not use themachine/tool when you are tired or affected by medicines, etc.
• Before starting thetool, check: that all guards and other parts are undamaged and work
as intended, that moving parts can turn freely and are properly aligned, that no moving
parts can get stuck, and that no fault or other circumstances have arisen that might affect
theperformance of thework. If aguard or some other part has been damaged, it must be
repaired professionally or replaced. Damaged mains leads and switches must always be
replaced by aqualified technician. Never use thetool if you cannot switch it off or start it safely.
• Use recommended accessories. Using non-recommended accessories may cause accidents
or present arisk of injury.
• Thetool conforms to current safety requirements. Repair work on thetool must only be done
by aqualified technician, using genuine spare parts; otherwise thetool may cause accidents
or present arisk of injury.
• For safety, electrical tools should be connected to thepower supply via aresidual current
device (RCD).
• Theproduct must not be modified or used for operations for which it was not intended.
Check regularly that all screws and nuts are tight.

ENGLISH
4
Product marking with safety symbols on the machine
Read theuser guide. Read this manual carefully and consider theinformation it
contains. Use themanual to get to know themachine and how to use it and to
learn thesafety rules.
Warning! Using themachine could damage your hearing. Use ear protectors
when working with themachine.
Warning! Use safety glasses or avisor to protect your eyes from flying chips.
Warning! Risk of crushing. Wear safety shoes.
Warning! Keep children away from thework area. Store themachine out of
thereach of children when it is not in use.
Warning! Keep your fingers clear of therotating blade. Take care to position your
hands safely so that they do not come into contact with thesaw blade if you lose
your balance. Never saw workpieces that are too small to be held securely.
Warning! Themachine is intended to by used by only one person at atime.
Themachine must not be used by more than one person at thesame time.
Warning! Before servicing, cleaning, etc., read theuser guide and unplug
themachine.
Special safety regulations for the compound
mitre saw
• Warning! Unplug themains lead before servicing thesaw or replacing theblade.
• Before starting thesaw, check that all its parts are working properly and that thesafety devices
provide thenecessary protection.
• Warning! Use only crosscutting blades. Make sure that thecarbide-tipped blades have negative
rake. Do not use blades with deep gaps between theteeth since theteeth may bend and foul
theblade guard. Replace adamaged blade immediately.
• Do not use thesaw until it has been completely assembled and fully installed as described in
this user guide. Check thedirection of rotation of themotor and theblade (see thearrow on
theblade guard). Check that thesaw blade does not foul themitre table in any position. Unplug
thesaw and tilt thesaw blade manually to 45° and 90°. Adjust thecutting head if necessary.

ENGLISH
5
• If you do not understand how to use thesaw, get advice from someone who does.
• Do not saw freehand. Secure theworkpiece firmly against thefence before starting to cut.
If theworkpiece is so short that your hand would be as close as about 10 cm from theblade,
secure theworkpiece with aclamp or similar device before cutting it.
• Warning! Keep your hands away from thesaw blade. Never cut small pieces. Use apusher.
• Check that theblade is properly centred and sharp and that it runs freely without vibration.
• Allow themotor to come up to speed before starting to cut.
• Keep theventilation openings of themotor clean and free from dust.
• Always make sure that all clamp screws are tight before you start to cut, even if thetable is
secured in afixed angled position.
• Make sure that theblade and collars are clean and that thespindle nut is tight. Use only
thecorrect blade collars for your saw.
• Use only 210 mm diameter blades of theright speed class (at least 5000 rpm).
• Provide suitable extra supports when cutting long workpieces.
• Always check before cutting that theblade is not cracked or damaged. If it is, replace it immediately.
• Do not use thesaw if any of its components is missing, damaged or not working properly.
If thesaw makes astrange noise or vibrates, unplug it. Arrange for aspecialist to replace
themissing or defective part before using thesaw again.
• Do not use thesaw if theguards are not in place and are not working properly.
• Never reach around or behind thesaw when it is running. Stand firmly so that you can keep
your balance at all times.
• Check that theblade can rotate freely (especially after transport and/or achange of blade)
before you plug thesaw in and start it again.
• Never lock theswitch in theON position.
• Important! When you have cut right through theworkpiece: release theswitch and wait for
theblade to stop rotating before you raise thecutting head.
• Release theswitch and wait for theblade to stop rotating before you move theworkpiece or
change asetting.
• Wait for theblade to stop rotating before you remove offcuts or trapped pieces of wood.
• Never cut ferrous metals, bricks or mortar.
• Never use thesaw near flammable gases or liquids.
• Never use solvents to clean theplastic parts of thesaw. Solvents may dissolve theplastic or
damage thematerial in some other way. Use only asoft damp cloth for cleaning.
• Before leaving thesaw, unplug it and clean it. Tidy thework area when you have finished working.
• Keep this user guide. Read it often and use it to instruct other people. Make sure that everyone
who uses thesaw has read this user guide.
• Do not expose thesaw to rain and do not use it in adamp environment.
• Provide good lighting at theworkplace.
• Wear suitable work clothes. Loose clothing or jewellery may get caught in moving parts.
• Users must be at least 18 years old. Users aged 16 must be supervised by aninstructor
when operating. Keep children away from thesaw when it is connected to apower socket.
• Keep thework area tidy. Do not leave offcuts and other rubbish lying about. Make sure that waste
pieces can be removed from thesaw blade; otherwise they may be thrown out by theblade.
• Do not distract someone who is working with thesaw.
ENGLISH
6
• Do not attempt to stop theblade rotating by pressing something against theside of theblade
when you have switched off thepower to thesaw.
• Never use saw blades that do not conform to thespecifications in this manual.
• It is important always to check that all guards covering thesaw blade are working properly.
• Never lock thelower blade guard in theopen position and never dismantle theguards of
themachine or modify their function. Never use adamaged or defective safety device.
Replace it immediately!
• Take care to position your hands safely so that they do not come into contact with thesaw
blade if you lose your balance. Never saw workpieces that are too small to be held securely.
• When working with long workpieces, use atable, roller supports, etc., to prevent themachine
tipping.
• Use suitable means to clamp circular-section workpieces so that they cannot rotate.
• There must be no nails or other foreign bodies in theworkpiece.
• Always stand away from theline of thesaw blade when using themachine, so that you
would not be struck by fragments of theblade if it were to break.
• Always press theworkpiece against thetable and thefence when sawing, so that it cannot
turn or move when you cut it.
• Never cut more than one workpiece at thesame time.
• Never attempt to remove dust, chips or trapped pieces of wood while thesaw blade is
rotating. Always switch off themachine first and unplug thepower lead, before adjusting
themachine or removing trapped pieces of wood.
• Always switch off themachine and unplug thepower lead before adjusting or cleaning
themachine or measuring theworkpiece.
• When leaving your work location, switch off themotor and unplug thepower lead.
• Electrical installation, repair or maintenance work must be done by aqualified technician.
• All guards and safety devices must be refitted immediately after repair or maintenance.
• It is important to follow themanufacturer’s instructions on safety, use and maintenance, and
to observe thetimber size limits given under Technical data.
• It is essential to follow official health and safety rules and other general safety rules.
• To avoid causing negative pressure, only use themachine in anenclosed space with adust
extraction system if there is asupply air connection.
• Only connect thesaw to a230 V socket protected by afuse or circuit-breaker rated at not
less than 10 A.
• Damaged safety devices and parts must be repaired by aqualified technician at
anauthorised service workshop.
• This machine conforms to all relevant safety regulations. Themachine may only be repaired
by aqualified technician at anauthorised service workshop, using genuine spare parts. If you
do not observe this rule, ahazardous situation may arise, exposing theuser to danger.
The package contains
• Blade wrench
• Dust bag
• Extension wings (two)
• Compound mitre saw
• User guide
• Support (for rear)
• Mitre table handle

ENGLISH
7
Description
101 102 103
104
105
106
107
108
10
1112
14
15
16
17
18
109
13
1. Fixed blade guard
2. Handle, rear
3. Handle
4. Release lever
5. Cover for carbon brush holders
6. Blade guard, movable
7. Clamp
8. Mitre table locking knob
9. Base
10. Mitre table handle
11. Mitre scale index
12. Mitre table
13. Mitre scale
14. Fence
15. Rear support
16. Stop screw for 45° tilt (bevel cuts)
17. Saw blade
18. Dust bag

ENGLISH
8
19
21
2223
24
25
26
20
19. Switch
20. Bevel scale
21. Bevel lock knob
22. Bevel scale index
23. Stop screw for 90° tilt (bevel cuts)
24. Extension wings
25. Cutting head latch
26. Spindle lock

ENGLISH
9
Assembly
1. Install theextension wings (24) on thesides of thebase (9) and secure them with thescrews
on theunderside.
2. Install theclamp (7) in one of themounting holes in thefence and secure it with alocking screw.
3. Screw on therear support (15) with thebent part downwards.
4. Install thedust bag (18) or connect adust extraction system.
Steps to be taken before the machine is used
• Themachine must be firmly mounted, for example on aworkbench or table.
• All guards and safety devices must be correctly fitted before themachine is started.
• Thesaw blade must rotate freely in every possible position.
• When working with timber that has been used before, be observant and look out for foreign
bodies such as nails or screws in theworkpiece.
• Before starting themachine, check that thesaw blade is correctly fitted and that all moving
parts operate freely.
• Check that thelocking knobs that secure thecutting head and themitre table are tight before
you start sawing.
• Before connecting themachine to apower socket, check that it is designed for thevoltage at
thesocket.
Use
Setting up the compound mitre saw
1. Releasing themitre table.
Adjust themitre table (12) and back off thelocking knob (8) about two turns. Turn themitre
table to thedesired angle with thehandle (10).
2. Setting themitre table.
Themitre table (12) has fixed positions for: 0°, 15°, 22.5°, 30° and 45°. Back off thelocking
knob (8) and set thedesired angle at theindex mark (11). Lock themitre table with
thelocking knob (8).
3. Releasing thecutting head.
Carefully press down thecutting head and pull out thelatch (25) to release thecutting head
(if it is locked in thedown position).
4. Letting thecutting head rise to theup position.
Hold thehandle and allow thespring to move thecutting head to theup position.
Check that therelease lever (4) locks themovable blade guard (6).
5. Setting thecutting head tilt.
Slacken thelocking screw (16) and set thedesired tilt (bevel). Thecutting head can be tilted
up to 45° to theleft.

ENGLISH
10
Cutting with the blade tilted 0°
1. Check that theindex mark is at 0on thescale.
2. Pull out thelatch and allow thecutting head
to move to theup position.
3. Position theworkpiece to be cut against
thefence on themitre table.
4. Press theswitch to start themotor, press
therelease lever, carefully and smoothly pull
down thehandle and let thesaw blade cut
theworkpiece.
5. When cutting is complete: release theswitch.
When themotor has stopped, thecutting
head can be raised to theup position.
Warning! Thebalancing springs of themachine
automatically raise thecutting head after cutting.
Do not let go thehandle when cutting is complete.
Hold thehandle and gently control its upward
movement.
Cutting with the blade tilted 0–45°
You can use thesaw to make bevel cuts at
angles of 0–45°.
1. Slacken thebevel lock knob. Then tilt
theblade to thedesired angle as shown on
thescale.
2. Tighten thebevel lock knob to fix
theposition of theblade.
3. Cut theworkpiece as described above.
23 16
Fine adjustment of the 0 and
45° end positions
1. Slacken thelock knob and tilt thesaw to
the0° end position.
2. Using a90° template, check theangle
between theblade and themitre table.
3. If necessary adjust theend position by
slackening thenut and turning theinternal
hexagon stop screw (23).
4. After adjusting, tighten thenut.
5. Follow thesame procedure when checking
the45° end position but use a45° template
and adjust thenut with thestop screw (16).

ENGLISH
11
Mitre cutting
You can use thesaw to make mitre cuts at
–45°/ 0°/+45°.
1. Pull out thelatch and allow thecutting head
to move to theup position.
2. Position theworkpiece to be cut against
thefence on themitre table.
3. Slacken themitre table locking knob and set
thedesired mitre angle on themitre scale.
Tighten thelocking knob.
4. Press theswitch to start themotor, press
therelease lever, carefully and smoothly pull
down thehandle and let thesaw blade cut
theworkpiece.
5. When cutting is complete: release
theswitch. When themotor has stopped,
thecutting head can be raised to theup
position.
Cutting bowed workpieces
Correct Incorrect
When cutting flat workpieces, you should check whether theworkpiece is bowed. Position it as
shown in theillustration, otherwise theworkpiece will pinch theblade at theend of thecut.
Dustbag
Thesaw has adustbag. It can be emptied by opening thezip on theunderside. Alternatively you
can connect anextraction system to thedust outlet.

ENGLISH
12
Changing the saw blade
Only use blades of therecommended type. Replace bent, cracked or otherwise damaged blades
immediately.
1. Unplug themains lead.
2. Pull out thelatch and carefully allow
thecutting head to go up.
3. Press therelease lever and swing
themovable blade guard upwards.
4. Press in thearbor lock with one
hand and turn theblade with
theother hand until theblade locks.
Keeping thearbor lock pressed
in, use thesupplied wrench to
slacken thearbor bolt (by turning it
clockwise).
5. Remove thearbor bolt and theouter
blade collar.
6. Remove thesaw blade.
7. Install thenew blade, reversing
theabove sequence of operations.
8. Clean theblade collar and arbor
bolt before assembly. Thedirection
of rotation of theblade must match
thearrow on theguard.
9. Check that thearbor lock has been disengaged by its spring.
10. Check that all guards are correctly fitted and are working properly before starting thesaw.
Warning! After changing thesaw blade, always check that theblade rotates easily in every
possible position.
Warning! Before starting themachine, remove thewrench and check that thearbor lock has
been disengaged by its spring.
Inspecting and replacing carbon brushes
Warning! Unplug themains lead before checking thecarbon brushes.
Thelife of thecarbon brushes depends on how hard themotor has been worked. Check
thebrushes after 50 hours’ running if thesaw is new or if you have fitted new brushes. After
thefirst check, inspect thebrushes every ten hours’ running until they need replacing.
How to check thecarbon brushes:
1. Remove thetwo covers, one on each side of themotor.
2. Remove thecarbon brushes, which are under thecovers.
3. Check thelength of thecarbon brushes (at least 6 mm).
4. If any brush is less than 6 mm long or if aspring or shunt
wire is scorched or damaged in any way, replace both
brushes.

ENGLISH
13
Troubleshooting
• To prevent overheating of themotor, clean it regularly with anair jet or vacuum-clean it to
remove any chips or dust that might reduce cooling.
• Connect thesaw to anearthed outlet protected by aslow-blow fuse rated at not less than 10 A.
• If themotor does not start immediately, release thetrigger/switch. Unplug themains lead and
check that thesaw blade runs freely. If it does, try starting themotor again.
• If themotor stops when thesaw is cutting: immediately release thetrigger/switch and unplug
themains lead. Free theblade from theworkpiece. Try starting themotor again.
• Check connections, overloading (several devices on thesame circuit, floodlights, etc.),
conductor area at least 1.5 mm² up to acable length of 7 metres and at least 2 mm² for
acable length of 7 to 15 metres. Thepower cable must not be more than 15 metres long.
Responsible disposal
This symbol indicates that this product should not be disposed of with general
household waste. This applies throughout theentire EU. In order to prevent
any harm to theenvironment or health hazards caused by incorrect waste
disposal, theproduct must be handed in for recycling so that thematerial can
be disposed of in aresponsible manner. When recycling your product, take it to
your local collection facility or contact theplace of purchase. They will ensure that
theproduct is disposed of in anenvironmentally sound manner.
Technical data
Motor 230 V AC, 50 Hz
Rated power 1200 W
Duty S1
No-load speed 5000 rpm
Carbide-tipped saw blade Ø 210 × Ø 30 × 2.6 mm
Number of teeth 24
Adjustable saw blade tilt (bevel cuts) 0–45° to theleft
Adjustable mitre cutting –45°/0°/+45°
LpA (sound pressure level) 89.2 dB(A), K: 3dB(A)
LwA (sound power level) 102.2 dB(A), K: 3dB(A)
Table: 390 × 135 mm
Max. timber size at 90° 60 × 120 mm
Max. timber size at 45° 60 × 85 mm
Max. timber size at 2 × 45° (double mitre) 35 × 85 mm

SVENSKA
14
Kap- och geringssåg 1200 W
Art.nr 18-3204 Modell 92109-UK
40-7895 92109
Läs igenom hela bruksanvisningen före användning och spara den sedan för framtida bruk.
Vi reserverar oss för ev. text- och bildfel samt ändringar av tekniska data. Vid tekniska problem
eller andra frågor, kontakta vår kundtjänst (se adressuppgifter på baksidan).
Säkerhet
Generella säkerhetsregler för din och andras säkerhet
• Håll arbetsutrymmet rent. Belamrade ytor och bord inbjuder till olyckor.
• Använd inte maskinen iriskfylld miljö. Elmaskiner skall inte användas på fuktiga, våta ytor
eller vid regn. Se till att belysningen är god iarbetsutrymmet. Sörj för god luftväxling vid
dammande arbeten. Använd aldrig elektriska maskiner/verktyg där de kan förorsaka brand
eller explosion!
• Undvik elektrisk chock. Undvik kroppskontakt med jordade föremål som vattenledning,
element, köksspis etc. samtidigt som du använder elmaskiner/verktyg. Kontakt med dessa
kan orsaka elektrisk chock.
• Håll undan barn och besökare. Alla barn och besökare bör befinna sig på säkerhetsavstånd
från elmaskiner/verktyg eller elkablar iarbetsutrymmet.
• Förvara maskinerna barnsäkert. Förvara elmaskiner/verktyg inlåsta eller utom räckhåll för
barn när de inte används!
• Pressa inte maskinen. Den gör jobbet bättre och säkrare med avsedd matningshastighet.
• Använd rätt verktyg. Pressa inte ettverktyg eller entillsats att göra ettarbetsmoment som
den inte är gjord för.
• Bär lämplig klädsel. Inga löst sittande kläder, vantar, halsband, ringar, armband eller andra
smycken som kan fastna iroterande delar. Halksäkra skor rekommenderas. Bär hårnät
(motsv.) om du har långt hår.
• Bär alltid skyddsglasögon, vanliga glasögon räcker inte! Använd också dammfilter eller
skyddsmask vid dammande arbeten.
• Använd utsug. Använd utsugningsutrustning för att ta bort och samla damm och spån, om
maskinen är avsedd för det, se till att utrustningen används på rätt sätt och töms vid behov.
• Misshandla inte nätsladden. Bär aldrig maskinen inätsladden. Ryck inte isladden, utan
dra istickproppen när du tar ur kontakten. Se till att nätsladden inte kommer ikontakt med
värme, olja eller vassa kanter.
• Sätt fast ämnet ordentligt. Använd tvingar eller skruvstycke där det går, då kan
du hantera verktyget med två händer. Det är säkrare än att hålla fast ämnet med ena handen.
• Sträck dig inte för långt. Se till att du hela tiden står säkert med god balans.
• Håll verktygen itrim. Se till att de är rena och eggarna vassa för optimal effekt och ettsäkert
resultat. Följ manualens rekommendationer för smörjning och byte av tillbehör. Kontrollera
nätsladden regelbundet, om den är skadad ska den bytas av enkvalificerad servicetekniker.
Syna alla skarvsladdar regelbundet så att de inte är skadade. Se till att maskinens/verktygets
handtag och reglage är torra, rena och helt fria från olja, fett etc.
• Slå av strömmen. Dra ur stickproppen och tryck in nödstopp, före service och vid byte av
tillbehör som hyvelstål, borrar, skär, slipband eller blad.
• Gör det till envana att kontrollera att alla nycklar och serviceverktyg är borttagna från maskinen
innan du slår på strömmen.

SVENSKA
15
• Undvik oavsiktlig start. Bär inte ettverktyg med ettfinger på strömbrytaren/avtryckaren om
sladden sitter iettuttag. Se till att strömbrytaren står på OFF när du sätter in stickproppen.
• Om du använder skarvsladdar utomhus, använd endast de som är avsedda för
utomhusbruk. Använd skarvsladdar med tillräcklig ledararea, rulla ut hela sladden!
• Använd sunt förnuft och var försiktig. Tänk efter innan du utför ettarbetsmoment, så att du
kan utföra det på ettsäkert sätt! Använd inte maskinen/verktyget när du är trött, påverkad av
mediciner etc.
• Kontrollera innan du startar verktyget: att alla skydd och övriga delar är oskadade och
fyller sin funktion, att rörliga delar kan rotera fritt och är rätt inriktade, att inga rörliga delar
kan fastna, att ingen defekt uppstått och andra omständigheter som kan påverka arbetets
utförande. Ettskydd eller någon annan del som skadats, skall repareras fackmässigt eller
bytas ut. Skadade nätsladdar och strömbrytare ska alltid bytas ut av fackman. Använd aldrig
verktyget om du inte kan stänga av eller starta det på ettbetryggande sätt.
• Använd rekommenderade tillbehör. Användning av ej rekommenderade tillbehör kan vålla
olyckor eller risk för personskada.
• Verktyget överensstämmer med gällande säkerhetskrav. Reparationer av verktyget ska alltid
utföras av fackman, med originalreservdelar, annars kan verktyget vålla olyckor eller risk för
personskada.
• Elverktyg bör anslutas till elnätet via enjordfelsbrytare för personskydd.
• Produkten får inte ändras eller användas till arbetsmoment som den inte är avsedd för!
Kontrollera regelbundet att alla skruvar och muttrar är ordentligt åtdragna.

SVENSKA
16
Produktmärkning med säkerhetssymboler på maskinen
Läs bruksanvisningen! Läs denna manual noga och tänk igenom informationen
som ges. Använd manualen för att bekanta dig med maskinen, dess användning
och säkerhetsregler.
Varning! Risk för hörselskada, använd alltid hörselskydd när du arbetar med maskinen.
Varning! Skydda ögonen mot flygande flisor använd skyddsglasögon eller visir.
Varning! Klämningsrisk, använd skyddsskor.
Varning! Håll undan barn från arbetsområdet och förvara maskinen utom räckhåll
för barn när den inte används!
Varning! Håll undan fingrarna från den roterande klingan. Se till att placera händerna
på ettsäkert sätt, så att de inte åker in isågklingan om du tappar balansen. Såga
aldrig ämnen som är så små att de inte går att hålla ipå ettsäkert sätt.
Varning! Maskinen är avsedd för endast enanvändare itaget.
Flera personer får inte arbeta vid maskinen samtidigt.
Varning! Läs bruksanvisningen och dra ur stickproppen innan service, rengöring etc.
Särskilda säkerhetsföreskrifter för kap och geringssåg
• Varning! Dra ur nätsladdens stickpropp före service eller byte av klinga.
• Kontrollera att alla delar fungerar tillfredsställande och att säkerhetsanordningarna skyddar
som avsett innan du startar sågen!
• Varning! Använd endast kapklingor. Se till att hårdmetallklingorna har negativ tandning.
Använd inga klingor med djupa mellanrum mellan tänderna eftersom de kan böjas och
komma ikontakt med klingskyddet. Enskadad sågklinga ska omedelbart bytas ut!
• Använd inte sågen förrän den är helt och rätt monterad enligt den här bruksanvisningen. Kontrollera
motorns och klingans rotationsriktning (se rotationspil på klingskyddet). Kontrollera att inte
sågklingan vidrör rotationsbordet inågon inställning. Dra ur stickproppen och luta sågklingan
manuellt i45° och 90°. Justera såghuvudet om det behövs.

SVENSKA
17
• Om du inte förstår hur sågen ska hanteras bör du be någon kunnig person om råd.
• Såga inte på fri hand. Fixera ämnet säkert mot anslaget på lämpligt sätt innan du börjar såga!
Om ämnet som du sågar kräver att du har ena handen så nära klingan som ca 10 cm ska du
alltid låsa ämnet iläge med entving etc. innan sågning.
• Varning! Håll händerna borta från sågklingan. Såga aldrig små bitar. Använd påskjutare!
• Kontrollera att klingan är väl centrerad, vass, löper fritt och utan vibrationer.
• Låt motorn komma upp ivarv innan du börjar såga.
• Håll motorns ventilationsöppningar rena och fria från spån.
• Se alltid till att alla tvingskruvar är åtdragna innan du börjar såga, även om bordet är fixerat
ifast vinkelläge.
• Se till att klingan och flänsarna är rena och att spindelmuttern är åtdragen, använd endast de
klingflänsar som hör till just din såg.
• Använd endast klingor med 210 mm diameter och rätt hastighetsklassning (min. 5000 v/min).
• Ordna lämpligt extra stöd vid sågning av långa ämnen.
• Kontrollera alltid före sågning att klingan inte är spräckt eller skadad. Byt omedelbart ut
ensådan klinga!
• Använd inte sågen om någon komponent till sågen fattas, är skadad eller fungerar felaktigt.
Dra ur stickproppen till sågen om den börjar låta konstigt eller vibrera. Låt enfackman byta ut
den komponent som fattas eller inte fungerar innan du använder sågen igen.
• Såga aldrig om skydden inte sitter på plats och fungerar problemfritt!
• Sträck dig aldrig runt eller bakom klingan när den roterar. Stå stadigt så att du alltid kan
behålla balansen.
• Kontrollera att klingan kan rotera fritt (särskilt efter transport och/eller klingbyte) innan du sätter
istickproppen och startar sågen.
• Lås aldrig strömbrytaren iläge ON.
• Viktigt! När du kapat helt genom ämnet: Släpp strömbrytaren och vänta tills klingan slutat
rotera innan du lyfter upp såghuvudet.
• Släpp strömbrytaren och vänta tills klingan stannat innan du flyttar ämnet eller ändrar någon
inställning.
• Ta inte bort fastnade eller avkapade bitar förrän klingan har stannat.
• Såga aldrig ijärnhaltiga metaller eller itegel eller murbruk.
• Använd aldrig sågen inärheten av lättantändliga gaser eller vätskor.
• Rengör aldrig sågens plastdelar med lösningsmedel. Lösningsmedlen kan lösa upp plasten
eller skada materialet på annat sätt, rengör endast med enmjuk, fuktad duk.
• Dra ur nätsladdens stickpropp och gör ren sågen innan du lämnar den. Se till att arbetsytan
är städad när du avslutar arbetet.
• Spar denna bruksanvisning. Titta igenom den ofta och använd den för att instruera andra.
Se till att alla personer som använder sågen läser dessa instruktioner.
• Utsätt inte sågen för regn och använd den inte ifuktig miljö.
• Ordna god belysning på arbetsplatsen.
• Använd lämpliga arbetskläder, löst hängande kläder eller smycken kan fastna iroterande delar.
• Användare ska vara minst 18 år, användare som är 16 år ska ha uppsikt av instruktör vid
användning av sågen. Håll barn borta från sågen när den är ansluten till eluttag.
• Håll ordning på din arbetsplats låt inte avkap eller annat skräp ligga framme ionödan.
Se till att spillbitarna kan avlägsnas från sågklingan, de kan annars kastas iväg av sågklingan.
• Distrahera inte personer som arbetar med sågen.
• Försök inte att stanna klingan genom att trycka något emot klingans sida när du har stängt
av strömmen till sågen.
• Använd aldrig sågklingor som inte överensstämmer med specifikationer idenna manual.
• Det är viktigt att alltid kontrollera att alla skydd som täcker sågklingan fungerar bra.

SVENSKA
18
• Lås aldrig fast skyddshuven iöppet läge och demontera aldrig maskinens skydd och ändra inte
deras funktion. Använd aldrig enskadad eller felaktig säkerhetsanordning, byt ut omedelbart!
• Se till att placera händerna på ettsäkert sätt, så att de inte åker in isågklingan om du tappar
balansen. Såga aldrig ämnen som är så små att de inte går att hålla ipå ettsäkert sätt.
• Använd ettbord, rullstöd etc. som stöd när du arbetar med långa arbetsstycken, så att inte
maskinen tippar.
• Spänn fast runda arbetsstycken med lämpliga anordningar, så att de inte kan rotera.
• Det får aldrig vara spikar eller andra främmande delar iämnet som ska sågas.
• Stå alltid vid sidan av sågklingan när maskinen används, så att inte du träffas av klingan om
den går sönder.
• Tryck alltid arbetsstycket mot bordet och anhållet vid sågning så att det inte kan vrida sig eller
röra sig under sågningen.
• Såga aldrig flera arbetstycken samtidigt.
• Försök aldrig att ta bort spån, flisor eller trä som har fastnat, när sågklingan roterar. Om du
ska justera maskinen eller ta bort bitar som har fastnat, stäng alltid av maskinen först och dra
ur nätsladdens stickpropp.
• Om du ska ändra, justera eller rengöra maskinen eller mäta arbetsstycket, stäng alltid av
maskinen först och dra ur nätsladdens stickpropp.
• Stäng av motorn och dra ur nätsladdens stickpropp när du lämnar din arbetsplats.
• Elinstallation, reparation eller underhåll ska endast utföras av yrkesman.
• Alla skydd och säkerhetsanordningar ska återmonteras omedelbart efter reparation eller underhåll.
• Det är viktigt att följa tillverkarens säkerhets-, användnings- och underhållsanvisningar, likaväl
som att följa de dimensionsanvisningar som anges iTekniska data.
• Det är nödvändigt att följa arbetsmiljöverkets regler likaväl som andra generella
säkerhetsregler.
• Använd endast maskinen med spånutsugning istängt rum, om rummet har tilluftsanslutning,
för att undvika vakuum irummet.
• Sågen ska endast anslutas till uttag med 230 V som är säkrat med min. 10 A.
• Skadade säkerhetsanordningar och delar ska bytas ut eller repareras av yrkesman hos
auktoriserad serviceverkstad.
• Denna maskin överensstämmer med alla relevanta säkerhetsbestämmelser. Maskinen får
endast repareras av yrkesman hos auktoriserad serviceverkstad med originaldelar. Om du
inte följer denna regel kan det leda till olyckstillbud och utsätta användaren för fara.
Förpackningen innehåller
• Nyckel till sågklinga
• Spånpåse
• Materialstöd (2 st.)
• Kap- och geringssåg
• Bruksanvisning
• Stöd (till baksidan)
• Handtag till geringsbord

SVENSKA
19
Beskrivning
101 102 103
104
105
106
107
108
10
1112
14
15
16
17
18
109
13
1. Fast klingskydd
2. Handtag, bakre
3. Handtag
4. Frigöringsspak
5. Lock till kolhållare
6. Klingskydd, rörligt
7. Tving
8. Låsratt till geringsbord
9. Bottenplatta
10. Handtag till geringsbord
11. Indexmärke till geringsskala
12. Geringsbord
13. Geringsskala
14. Anhåll
15. Bakre stöd
16. Stoppskruv för 45°-lutning
17. Sågklinga
18. Spånpåse

SVENSKA
20
19
21
2223
24
25
26
20
19. Strömbrytare
20. Lutningsskala
21. Låsratt för såghuvudets lutning
22. Indexmärke för lutningsskala
23. Stoppskruv för 90°-lutning
24. Materialstöd
25. Spärr för såghuvud
26. Spindellås
This manual suits for next models
4
Table of contents
Languages:
Other Cocraft Saw manuals

Cocraft
Cocraft PRO RT18-PL User manual

Cocraft
Cocraft PSR110H.1 User manual

Cocraft
Cocraft LXC CS18 User manual

Cocraft
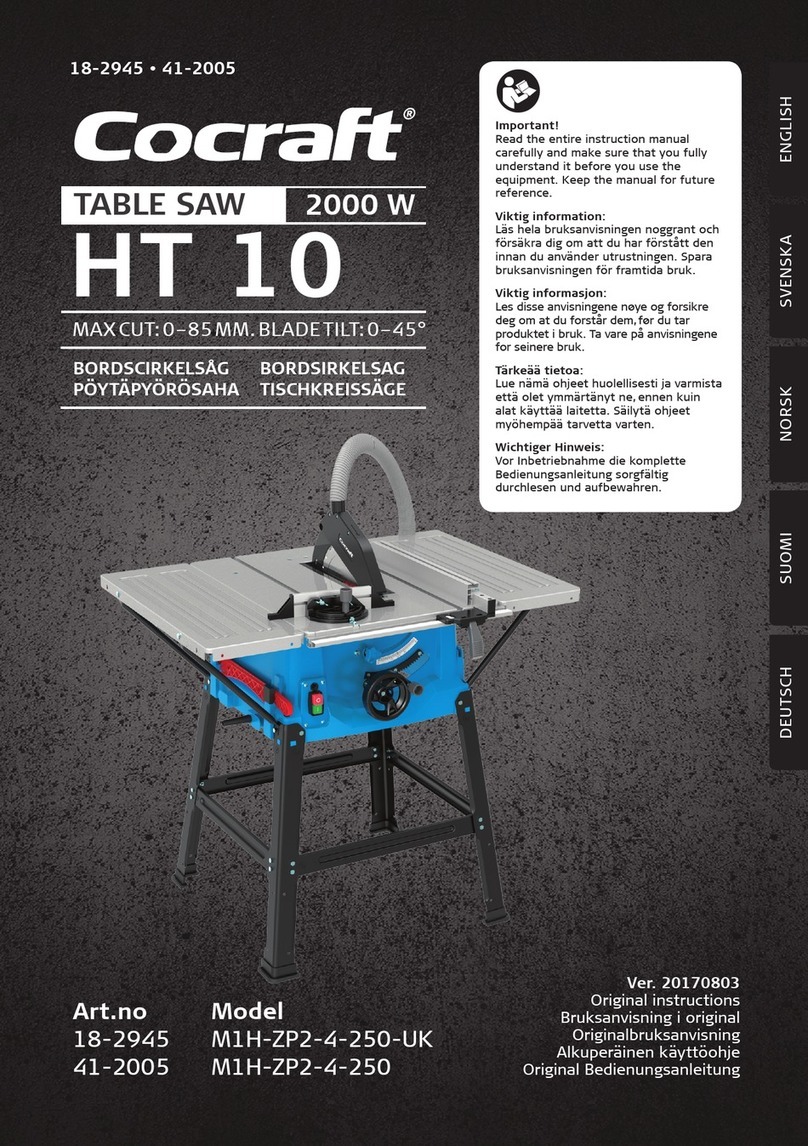
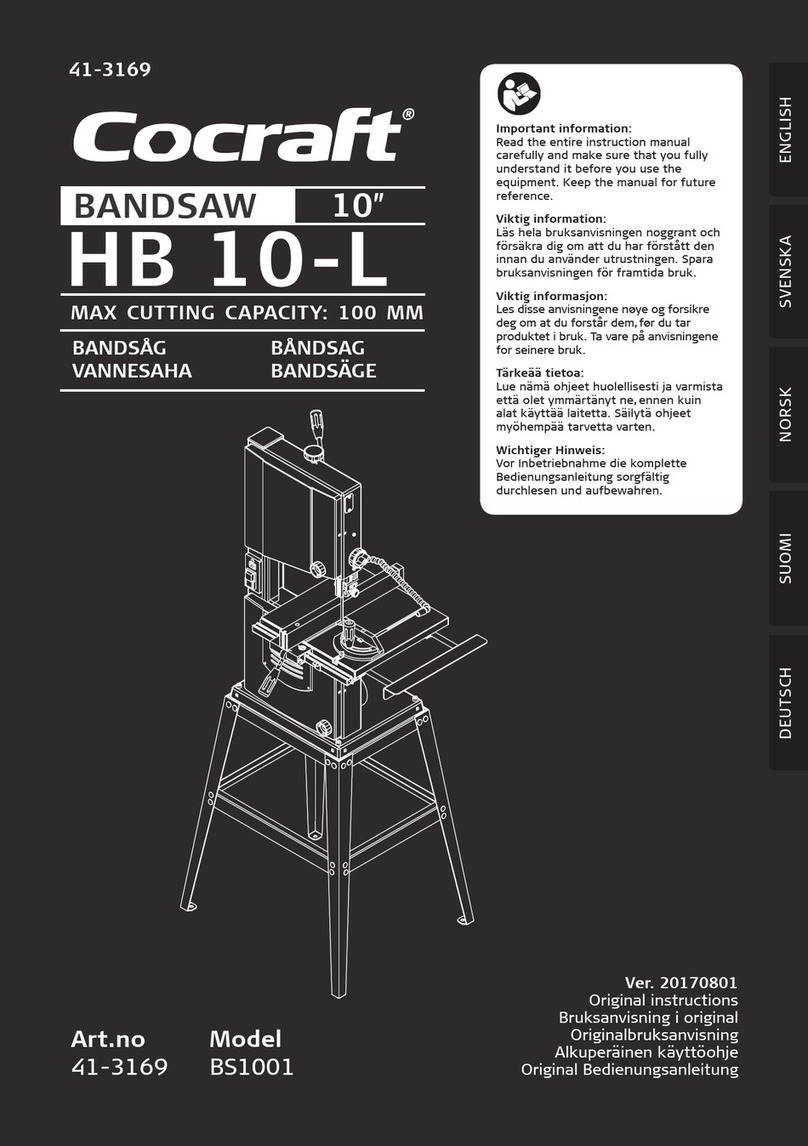
Cocraft HB 10-L BS1001 User manual

Cocraft
Cocraft PRO Series User manual

Cocraft
Cocraft HT 10 User manual

Cocraft
Cocraft HMS 210-L Series User manual

Cocraft
Cocraft LXC RS18 18V Lithium Series User manual

Cocraft
Cocraft HT 10 M1H-ZP2-4-250 User manual

Cocraft
Cocraft PSC185G User manual