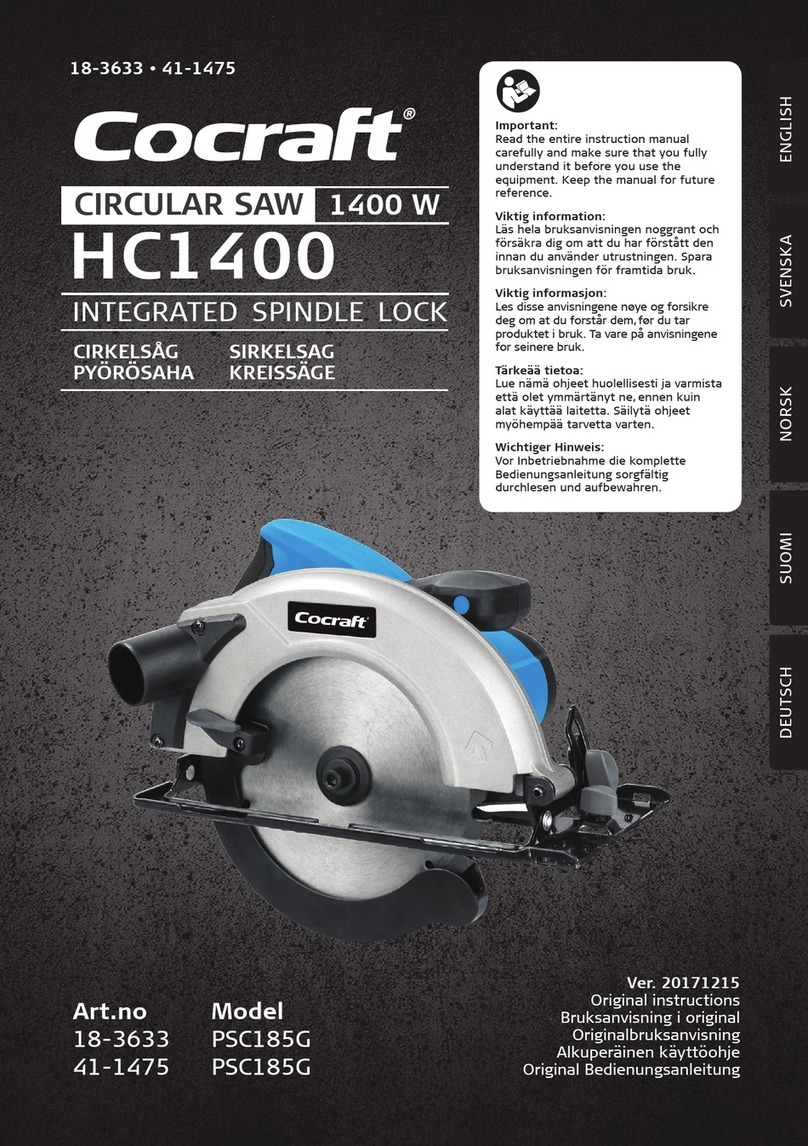
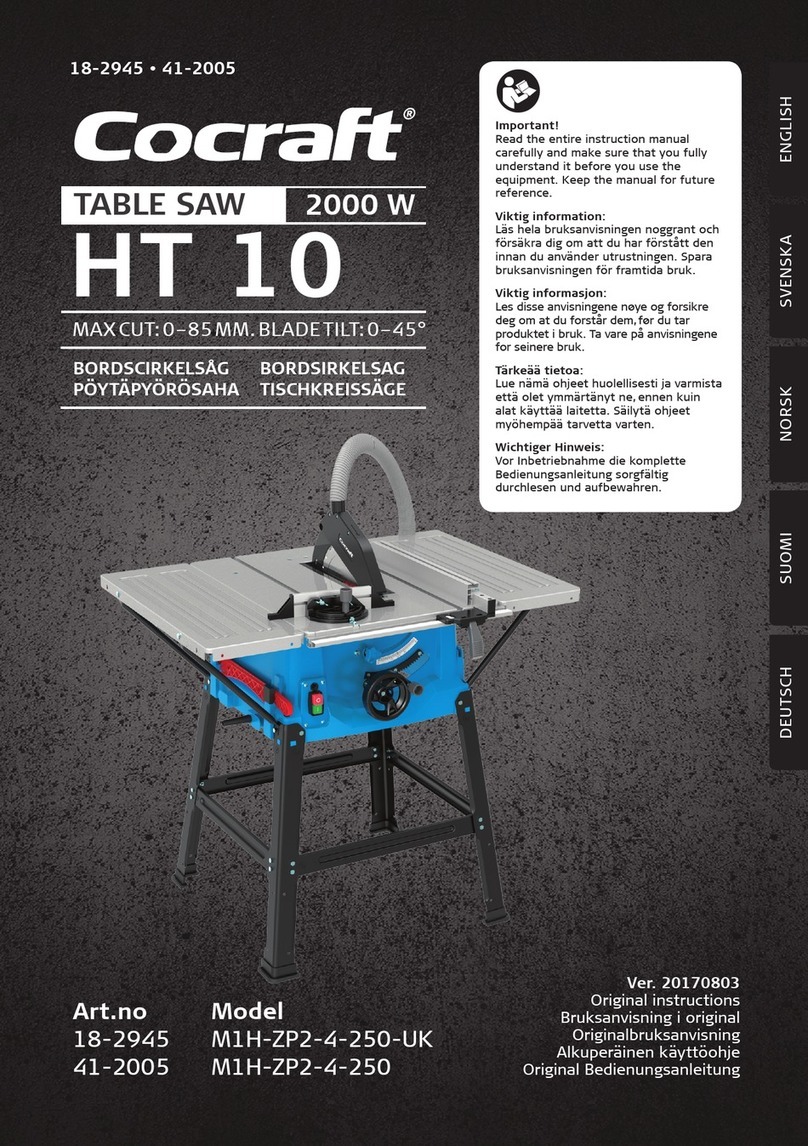
Cocraft HT 10 User manual

Important:
Read the entire instruction manual
carefully and make sure that you fully
understand it before you use the
equipment. Keep the manual for future
reference.
Viktig information:
Läs hela bruksanvisningen noggrant och
försäkra dig om att du har förstått den
innan du använder utrustningen. Spara
bruksanvisningen för framtida bruk.
Viktig informasjon:
Les disse anvisningene nøye og forsikre
deg om at du forstår dem, før du tar
produktet i bruk. Ta vare på anvisningene
for seinere bruk.
Tärkeää tietoa:
Lue nämä ohjeet huolellisesti ja varmista
että olet ymmärtänyt ne, ennen kuin
alat käyttää laitetta. Säilytä ohjeet
myöhempää tarvetta varten.
Wichtiger Hinweis:
Vor Inbetriebnahme die komplette
Bedienungsanleitung sorgfältig
durchlesen und aufbewahren.
Ver. 20200218
Original instructions
Bruksanvisning i original
Originalbruksanvisning
Alkuperäinen käyttöohje
Original Bedienungsanleitung
Art.no Model
18-2945 M1H-ZP2-4-250
41-2005 M1H-ZP2-4-250
HT 102000W
TABLE SAW
BORDSCIRKELSÅG BORDSIRKELSAG
PÖYTÄPYÖRÖSAHA TISCHKREISSÄGE
MAX CUT: 0-85 MM. BLADE TILT: 0-45°
ENGLISH
SVENSKANORSKSUOMI
DEUTSCH

For Assembly go to page 54
För Montering gå till sida 54
For Montering gå til side 54
Asennus sivulla 54
Für eine Montageanleitung, siehe Seite 54

3
ENGLISH
Table Saw
Art. no 41-2005 Model M1H-ZP5-250
18-2945 M1H-ZP5-250
Please read the entire instruction manual before using the product and then save it for future reference.
We reserve the right for any errors in text or images and any necessary changes made to technical data.
In the event of technical problems or other queries, please contact our Customer Services (see address details on the back).
Warning: Failure to follow the safety instructions could result in serious injury,
fatality or damage to the product.
Important: Read the instruction manual.
Wear ear protection.
Wear a respiratory mask.
Wear eye protection.
Wear protective gloves.
Risk of personal injury. Keep hands away from the rotating saw blade.
Protection class II. Double insulated
General power tool safety warnings
WARNING: Read all safety warnings, instructions, illustrations and specification provided with this power tool.
Failure to follow all instructions listed below may result in electric shock, fire and/or serious injury.
Save all warnings and instructions for future reference.
The term “power tool” in the warnings refers to your mains-operated (corded) power tool or
battery-operated (cordless) power tool.
1) Work area safety
a) Keep the work area clean and well lit. Cluttered or dark areas invite accidents.
b) Do not operate power tools in explosive atmospheres, such as in the presence of flammable liquids,
gases or dust. Power tools create sparks which may ignite the dust or fumes.
c) Keep children and bystanders away while operating a power tool. Distractions can cause you to lose control.

4
ENGLISH
2) Electrical safety
a) Power tool plugs must match the outlet. Never modify the plug in any way. Do not use any adapter plugs with
earthed (grounded) power tools. Unmodified plugs and matching outlets will reduce risk of electric shock.
b) Avoid body contact with earthed or grounded surfaces, such as pipes, radiators, ranges and refrigerators.
There is an increased risk of electric shock if your body is earthed or grounded.
c) Do not expose power tools to rain or wet conditions. Water entering a power tool will increase the risk of electric shock.
d) Do not abuse the cord. Never use the cord for carrying, pulling or unplugging the power tool. Keep cord away
from heat, oil, sharp edges or moving parts. Damaged or entangled cords increase the risk of electric shock.
e) When operating a power tool outdoors, use an extension cord suitable for outdoor use. Use of a cord suitable for
outdoor use reduces the risk of electric shock.
f) If operating a power tool in a damp location is unavoidable, use a residual current device (RCD) protected
supply. Use of an RCD reduces the risk of electric shock.
3) Personal safety
a) Stay alert, watch what you are doing and use common sense when operating a power tool. Do not use a power
tool while you are tired or under the influence of drugs, alcohol or medication. A moment of inattention while
operating power tools may result in serious personal injury.
b) Use personal protective equipment. Always wear eye protection. Protective equipment such as a dust mask, non-
skid safety shoes, hard hat or hearing protection used for appropriate conditions will reduce personal injuries.
c) Prevent unintentional starting. Ensure the switch is in the off-position before connecting to power source and/or
battery pack, picking up or carrying the tool. Carrying power tools with your finger on the switch or energising power
tools that have the switch on invites accidents.
d) Remove any adjusting key or wrench before turning the power tool on. A wrench or a key left attached to a rotating
part of the power tool may result in personal injury.
e) Do not overreach. Keep proper footing and balance at all times. This enables better control of the power tool in
unexpected situations.
f) Dress properly. Do not wear loose clothing or jewellery. Keep your hair and clothing away from moving parts.
Loose clothes, jewellery or long hair can be caught in moving parts.
g) If devices are provided for the connection of dust extraction and collection facilities, ensure these are connected
and properly used. Use of dust collection can reduce dust-related hazards.
h) Do not let familiarity gained from frequent use of tools allow you to become complacent and ignore tool safety
principles. A careless action can cause severe injury within a fraction of a second.
4) Power tool use and care
a) Do not force the power tool. Use the correct power tool for your application. The correct power tool will do the job
better and safer at the rate for which it was designed.
b) Do not use the power tool if the switch does not turn it on and off. Any power tool that cannot be controlled with
the switch is dangerous and must be repaired.
c) Disconnect the plug from the power source and/or remove the battery pack, if detachable, from the power tool
before making any adjustments, changing accessories, or storing power tools. Such preventive safety measures
reduce the risk of starting the power tool accidentally.
d) Store idle power tools out of the reach of children and do not allow persons unfamiliar with the power tool or
these instructions to operate the power tool. Power tools are dangerous in the hands of untrained users.
e) Maintain power tools and accessories. Check for misalignment or binding of moving parts, breakage of parts
and any other condition that may affect the power tool’s operation. If damaged, have the power tool repaired
before use. Many accidents are caused by poorly maintained power tools.
f) Keep cutting tools sharp and clean. Properly maintained cutting tools with sharp cutting edges are less likely to bind
and are easier to control.
g) Use the power tool, accessories and tool bits etc. in accordance with these instructions, taking into account the
working conditions and the work to be performed. Use of the power tool for operations different from those intended
could result in a hazardous situation.
h) Keep handles and grasping surfaces dry, clean and free from oil and grease. Slippery handles and grasping surfa-
ces do not allow for safe handling and control of the tool in unexpected situations.
5) Service
a) Have your power tool serviced by a qualified repair person using only identical replacement parts. This will ensure
that the safety of the power tool is maintained.

5
ENGLISH
WARNING
This electric tool generates an electromagnetic field during operation. This field can impair active or passive medical implants
under certain conditions. In order to prevent the risk of serious or deadly injuries, we recommend that persons with medical
implants consult with their physician and the manufacturer of the medical implant prior to operating the electric tool.
Safety instructions for table saws
1) Guarding related warnings
a) Keep guards in place. Guards must be in working order and be properly mounted. A guard that is loose, damaged,
or is not functioning correctly must be repaired or replaced.
b) Always use a saw blade guard and riving knife for every through–cutting operation. For through-cutting operations
where the saw blade cuts completely through the thickness of the workpiece, the guard and other safety devices help
reduce the risk of injury.
c) After completing working procedures where the removal of the blade guard and/or riving knife is necessary
(e.g. rebating, cutting grooves or other procedures where the workpiece needs to be turned over), the guard
must be reattached immediately. The guard helps to reduce the risk of injury.
d) Make sure the saw blade is not touching the guard, riving knife or the workpiece before the switch is turned on.
Inadvertent contact of these items with the saw blade could cause a hazardous condition.
e) Adjust the riving knife as described in this instruction manual. Incorrect spacing, positioning and alignment can
make the riving knife ineffective in reducing the likelihood of kickback.
f) For the riving knife to work, it must be engaged in the workpiece. The riving knife is ineffective when cutting workpie-
ces that are too short to be engaged with the riving knife. Under these conditions a kickback cannot be
prevented by the riving knife.
g) Use the appropriate saw blade for the riving knife. For the riving knife to function properly, the saw blade diameter
must match the appropriate riving knife and the body of the saw blade must be thinner than the thickness of the riving
knife and the cutting width of the saw blade must be wider than the thickness of the riving knife.
2) Cutting procedure warnings
a) DANGER: Never place your hands and fingers in the sawing area or close to the saw blade. A moment of
carelessness or a slip could steer your hand towards the saw blade and result in serious injuries.
b) Feed the workpiece into the saw blade only against the direction of rotation. Feeding the workpiece in the same
direction as the saw blade is rotating above the table may lead to the workpiece and your hand being drawn into
the saw blade.
c) Never use the mitre gauge to feed the workpiece when ripping and do not use the rip fence as a length stop
when cross cutting with the mitre gauge. Guiding the workpiece with the rip fence and the mitre gauge at the same
time increases the likelihood of saw blade binding and kickback.
d) When ripping, always apply the workpiece feeding force between the fence and the saw blade. Use a push stick
when the distance between the fence and the saw blade is less than 150 mm, and use a push block when this
distance is less than 50 mm. These working aids will help ensure that your hands remain a safe distance from
the saw blade.
e) Only use the push stick provided by the manufacturer, or a push stick that has been produced in accordance
with the instructions. The push stick ensures a sufficient distance between the hand and saw blade.
f) Never use a damaged or partially sawn push stick. A damaged push stick may break and lead to your hand running
into the saw blade.
g) Never work “freehand”. Always use either the rip fence or the mitre gauge to position and guide the workpiece.
“Freehand” means using your hands to support or guide the workpiece, in lieu of a rip fence or mitre gauge.
Free-handed sawing leads to incorrect alignment, jamming and kickback.
h) Never reach around or over a rotating saw blade. Reaching for a workpiece can lead to accidental contact with
the rotating saw blade.
i) Support long and/or wide workpieces at the rear and/or side of the saw table, so that they remain horizontal.
Long and/or wide workpieces tend to tilt at the edge of the saw table; this leads to a loss of control, jamming of
the saw blade and kickback.
j) Feed the workpiece steadily and evenly. Do not bend or twist the workpiece. If the saw blade jams, switch off
the saw immediately, unplug the saw and remedy the cause of the jam. IJamming of the saw blade by
the workpiece can cause kickback or stall the motor.
k) Do not remove pieces of cut-off material whilst the saw is running. The material may become trapped between the
saw blade guard and the fence the saw blade and may draw your fingers into the saw blade during removal. Switch the
saw off and wait until the saw blade has come to a standstill, before removing the material.
l) When ripping workpieces that are thinner than 2 mm, use an additional fence in contact with the table surface.
Thin workpieces can wedge under the rip fence and lead to kickback.

6
ENGLISH
3) Kickback - causes and related warnings
Kickback is a sudden reaction of the workpiece to a catching or jamming saw blade, or a cut created in the workpiece at
an angle to the saw blade, or if part of the workpiece becomes jammed between the saw blade and the rip fence or other
fixed object.
In the majority of cases, with kickback the workpiece is caught by the rear part of the saw blade, lifted off the saw table and
thrust in the direction of the operator. Kickback is the result of saw misuse and/or incorrect operating procedures or
conditions and can be avoided by taking proper precautions as given below.
a) Never stand directly in line with the saw blade. Always position your body on the same side of the saw blade as
the fence. With kickback, the workpiece may be thrust at high speed towards those persons who stand in front of, or in
line with the saw blade.
b) Never reach over or behind the saw blade to pull or support the workpiece. This can result in accidental contact
with the saw blade, or kickback can lead to your fingers being drawn into the saw blade.
c) Never hold and push the workpiece against the rotating saw blade during sawing. Pushing the workpiece against
the saw blade during sawing will lead to jamming and kickback.
d) Align the fence parallel to the saw blade. A misaligned fence will push the workpiece against the saw blade and create
kickback.
e) Use a featherboard to hold the workpiece against the table when not sawing completely through the workpiece
such as in rebating, cutting slots or ripping. The featherboard will help to hold the workpiece in the event of kickback.
f) Use extra caution when making a cut into blind areas of assembled workpieces. The protruding saw blade can saw
into objects that could cause a kickback.
g) Support large panels, in order to avoid the risk of kickback due to a pinched saw blade. Large panels may bend
under their own weight. Panels must be supported in all areas where they overhang the table surface.
h) Use extra caution when cutting a workpiece that is twisted, knotted, warped or does not have a straight edge
to guide it with a mitre gauge or along the fence. A twisted, knotted or warped workpiece is unstable and results in
incorrect alignment of the kerf with the saw blade, jamming and kickback.
i) Never saw multiple workpieces stacked on top of each other, or one behind the other. The saw blade could en-
gage in one or more parts and result in kickback.
j) When restarting the saw with the saw blade in the workpiece, centre the saw blade in the kerf so that the saw
teeth are not engaged in the material. If the saw blade binds, it can lift the workpiece and cause kickback when the
saw is restarted.
k) Always keep saw blades clean, sharp and sufficiently set. Never use warped saw blades or saw blades with
cracked or broken teeth. Sharp and correctly set saw blades minimise binding, stalling and kickback.
4) Table saw operating procedure warnings
a) Switch off the table saw and disconnect it from the power supply before removing the table insert,
changing the saw blade, making adjustments to the riving knife or the saw blade guard, and if the machine is
left unattended. Precautionary measures serve to prevent accidents.
b) Never leave the table saw running unattended. Switch the saw off and don’t leave it until it has come to
a complete standstill. An unattended running saw poses an uncontrolled hazard.
c) Set up the table saw in a location that is level and well ventilated, and where it can stand safely and remain ba-
lanced. The installation site must provide sufficient space for easily handling the size of your
workpieces. Cramped, dark working areas, and uneven, slippery floors may lead to accidents.
d) Regularly clean and remove sawdust from beneath the saw table and/or from the dust extraction system.
Accumulated sawdust is flammable and can self-ignite.
e) Secure the table saw. A table saw that is not properly secured may move or topple over.
f) Remove tools and scraps of wood from the table before switching the saw on. Distractions and potential jams
could be dangerous.
g) Always use saw blades with correct size and shape (diamond versus round) of arbor holes.
Saw blades that do not match the mounting hardware of the saw will run off-centre, causing loss of control.
h) Never use damaged or incorrect saw blade mounting materials, such as flanges, washers, screws or nuts.
These saw blade mounting materials have been specially designed for your saw, for optimum performance and
operational safety.
i) Never stand on the table saw and do not use it as a step stool. Serious injuries can arise if the tool topples or if you
accidentally come into contact with the saw blade.
j) Make sure that the saw blade is installed to rotate in the correct direction. Do not use grinding discs, wire
brushes or abrasive wheels on the table saw. Incorrect fitting of the saw blade or the use of accessories that have not
been recommended can result in serious injuries.
7
ENGLISH
Safety instructions for handling saw blades
1. Only use tools which you know how to handle.
2. Pay attention to the maximum speed. The maximum speed stated on the tool being used must not be exceeded. Keep
within the speed range if one is specified
3. Note the direction of rotation of the motor and saw blade.
4. Do not use a cracked saw blade. Never attempt to repair a cracked saw blade. Damaged blades must be replaced.
5. Do not use any loose reducing rings or bushes to reduce the size of arbor holes on circular saw blades.
6. Handle saw blades with care. It is best to store them in their original packaging or special containers. Always wear
protective gloves to improve your grip and further reduce the risk of injury.
7. Make sure that all safety devices are fitted correctly before installing the saw blade.
8. Make sure that the saw blade fulfills the technical specifications and is correctly fitted.
9. The saw blade supplied should only be used for sawing wood, never for sawing metal.
10. Always select the correct saw blade for the material to be cut.
11. Make sure that the diameter of the saw blade corresponds to the specifications of the saw.
12. Use only saw blades that are marked with an equal or higher rotation speed than that marked on the saw.
13. Use only saw blades recommended by the manufacturer which conform to EN 847-1, if intended for cutting wood or
similar materials.
14. Wear suitable personal protective equipment, such as:
- hearing protection
- protective gloves when handling saw blades.
15. WARNING: When changing the saw blade, make sure that the Kerf of the blade is not less than the thickness of
the riving knife and that the thickness of the blade is not greater than the thickness of the riving knife.
16. When sawing wood and plastics, avoid overheating the saw teeth. Reduce the feed speed to avoid the plastic melting.
Residual risks
This table saw has been constructed in accordance with the latest technology and generally recognised safety
regulations. Nevertheless, hazardous situations cannot be ruled out during operation.
• There is a risk of electric shock if unsuitable electrical equipment is used to connect the saw to the power supply.
• In addition, concealed residual risks may be present in spite of all the precautions that have been taken.
• Residual risks can be minimised by observing the safety warnings and by using the table saw for the correct purpose
and in the manner described in this instruction manual.
• Excessive feed speed and force on the workpiece during sawing will quickly damage the saw blade. This may result in
a reduction in the performance of the machine, as well as a reduction in the cutting accuracy.
• Avoid switching the machine on by accident: the power button must not be pressed in when the plug is inserted into
the wall socket
• Use the saw blade which is recommended in this manual. This will ensure the optimal performance of your saw.
• Keep your hands away from the working area when the machine is in operation.
• Before you carry out any adjustments or servicing work, turn the device off and remove the mains plug.

8
ENGLISH
1
2
3
4
5
6
78
9
10
11
12
13
14
15
16
18
17
19
A×4 D×2
B×2 C×2 E×2 F×2 G×4 H×4 I×2 JK×2 L
M N O P Q R T U V W
S
Product description
1. Leg support stay
2. Leg
3. Push stick
4. Saw table
5. Table extension
6. Mitre guide
7. Riving knife
8. Suction hose
9. Blade guard
10. Rip fence
11. Table insert
12. Saw blade
13. Guide rail
14. Blade tilt locking knob
15. Blade height/tilt angle hand wheel
16. Motor overload cut-out reset button
17. Power switch
18. Rubber foot
19. Cross member
A) Leg (A)
B) Strut (B)
C) Strut (C)
D) Table extension
E) Support strut for table extension
F) Support strut for table extension
G) Nut holder
H) Rubber foot
I) Leg support stay
J) Push stick
K) Spanners
L) Nuts and bolts
M) Saw blade lock washer
N) Saw blade flange washer
O) Saw blade flange bolt
P) Saw blade
Q) Riving knife flange bolt
R) Riving knife lock washer
S) Riving knife
T) Blade guard
U) Mitre guide
V) Rip fence
W) Suction hose

9
ENGLISH
Instructions for use
• Make sure that the saw is completely intact and correctly assembled before commencing work.
• Check that the saw blade is vertical (90°) and is not set higher than is necessary to just manage to saw through
the thickness of the workpiece.
• Regularly check that all nuts and bolts are tight.
On/off switch
Plug the mains lead into a wall socket.
Switching on: Push the green button [I] to switch the saw on.
Switching off: Push the red button [0] to switch the saw off.
No-volt release switch
The saw is equipped with a no-volt release switch which prevents it from starting automatically when the power comes back
on following a power cut. Once power has been restored the saw must be switched on again by pressing [l].
Overload safety cut-out
If the motor is overloaded due to incorrect workpiece feed or the saw blade being obstructed
by debris, the overload cut-out may be triggered.
If the overload safety cut-out switch is triggered:
1. Unplug the mains lead and let the saw cool down for at least 10 minutes.
2. Make sure that no contaminants hinder the rotation of the saw blade, brush off and
vacuum saw dust as and when required.
3. Press the overload cut-out reset button (16).
4. Switch the saw on by pressing [I].
Rip fence
Place the rip fence onto the guide rail
and lock it in place by lowering the
locking lever.
You can also decide yourself on which
side of the blade you want to place the
rip fence, to the left or right.
Loosen the wing nuts and remove the rip
fence from the rail. Position the rip fence
in the desired position and tighten
the wing nuts.
The rip fence can be attached in two ways, with the high side or the low side
facing the blade. The low side makes it easier to handle thin material such as
plywood.
NOTE! Assembly see page 54

10
ENGLISH
Setting the saw blade height
Turn the hand wheel (15) to set the desired height. Never set the blade
higher than is necessary to saw through the workpiece.
Rip cutting
Note Important
• Rehearse every step of the cutting task without turning the saw on if you are unsure how to hold the workpiece
and work safely.
• Make a test cut on a scrap piece of wood to check the setup before starting to rip cut the actual workpiece.
• Always let the saw come up to full speed before starting to cut.
• Be extra careful at the beginning of every cut.
• Hold one side of the material against the rip fence and the flat face against the surface of the table.
• Do not stand directly behind the workpiece when rip cutting. The workpiece can be thrown back towards the operator.
• Place your hands on the workpiece and press it against the table and the rip fence. Feed the workpiece into the blade in
a controlled and smooth motion.
Setting the blade tilt
Important
Check all the angles before starting to saw. Make a test cut on a scrap piece of wood to check the setup before starting to
cut the actual workpiece.
Warning:
Always use a push-stick if any of your hands comes closer than 125mm to the saw blade during the cutting process.
Never use a damaged push-stick, replace a damaged stick before resuming work. Leave the offcuts on the saw table until
the saw blade has completely stopped rotating after the saw has been switched off.
1. Undo the locking knob (14).
2. Push in the blade height/tilt angle hand wheel (15) and
set the desired angle.
3. Tighten the locking knob again.

11
ENGLISH
Mitre guide
1. Slide the mitre guide into one of the slots on the table.
2. Undo the locking knob and set the desired angle. Tighten the locking knob again.
3. If necessary, undo the two wing nuts and slide the guide fence along, making sure that it will not catch on the blade,
then tighten the wing nuts again.
Care and maintenance
• Always unplug the mains lead from the wall socket before servicing, cleaning and replacement of the saw blade.
• Clean the saw by wiping it with a damp cloth. Use only mild cleaning agents, never solvents or corrosive chemicals.
Vacuum up sawdust if necessary.
• If the saw is not to be used for an extended period, it should be unplugged and stored in a dry and dust-free location out
of reach of children.
Troubleshooting guide
The saw does not start. • Make sure that the mains lead is undamaged and properly connected to the wall socket.
• Is the wall socket energised?
• The motor overload protection has tripped. Let the motor cool down for 10 minutes and
then press the safety cut-out reset button (16). Refer to the Overload safety cut-out section.
The saw should now function normally again.
The saw overheats and
the motor overload cut-
out triggers.
• Do not overload the saw by feeding material into the blade too forcefully, let the saw do
the work at its own pace.
• Does the work task exceed the capacity of the saw?
• Debris obstructing saw blade. Disconnect the saw from the power supply and clean it.
• Make sure that the air vents of the motor are not covered with dust or debris.
• Let the motor cool down for 10 minutes and then press the safety cut-out reset button (16).
Refer to the Overload safety cut-out section. The saw should now function normally again.
Poor cutting performance. • Blunt or worn blade. Replace if necessary.
• Is the blade is fitted correctly?
The saw cut is not at
the correct angle.
Check and adjust the angles.
The workpiece binds
on the blade when rip
cutting.
Adjusting the riving knife. Refer to the Adjusting the riving knife section.
The workpiece or parts of
it are thrown backwards.
• Adjust the riving knife, refer to the Adjusting the riving knife section.
• Feed the entire workpiece past the blade before letting go of it (use a push stick if
necessary). Inspect the saw blade regularly, change if necessary.
Abnormal vibrations. • Check that all parts are correctly assembled and that all screws, bolts and nuts are tight.
• Check that the blade is in good condition and is correctly fitted.
• Check that the floor is level and that the saw has all four legs squarely on the floor.
The motor stops,
the workpiece gets burn
marks when rip cutting.
• The saw blade may be blunt, replace if necessary.
• Do not overload and feed the saw too quickly – let it work at its own pace.
• Adjust the riving knife, refer to the Adjusting the riving knife section.

12
ENGLISH
Responsible disposal
This symbol indicates that the product should not be disposed of with general household waste. This applies
throughout the entire EU. In order to prevent any harm to the environment or health hazards caused by
incorrect waste disposal, the product must be handed in for recycling so that the material can be disposed of in
a responsible manner. When recycling your product, take it to your local collection facility or contact the place of
purchase. They will ensure that the product is disposed of in an environmentally sound manner.
Specications
Power supply 220–240 V AC, 50 Hz
Power S1 1800 W, S6 25% 2000 W
No-load speed 5000 rpm
Saw blade Ø 250 mm × Ø 30 mm × 2.8 mm, 24 teeth
Riving knife 2mm
Table size 583 × 563 mm
Table size with extension 583 x 895 mm
Saw blade tilt 0–45°
Dust extraction port Ø 35 mm
Max cutting height 85 mm at 90°, 65 mm at 45°
LpA (sound pressure) 94.0 dB(A), (Uncertainty K 3 m/s²)
LwA (sound power) 107.0 dB(A), (Uncertainty K 3 m/s²)
Vibration < 1.16 m/s²
Weight approx. 22 kg
Vibration
• Themeasurement of thevibration emission level (triaxial vector sum) and thenoise level values declared in this instruction
manual have been carried out in accordance with astandardised test method described in EN60745 and can be used for
comparing one power tool with another.
• Themeasurement method may also be used for apreliminary assessment of vibration exposure.
• Thedeclared vibration emission level applies when thepower tool is used in accordance with this instruction manual.
If however, thepower tool is used for other purposes and with other accessories or has not been properly maintained,
thevibration emission level could increase significantly over thetotal working period.
• For anexact assessment of thevibration exposure, thetimes when thetool is switched off or running idle should also be
taken into account. This significantly reduces thevibration exposure over thetotal working period. Decide upon safety
measures to protect theoperator from theeffects of vibration during all types of use.

13
SVENSKA
Bordscirkelsåg
Art.nr 41-2005 Modell M1H-ZP5-250
18-2945 M1H-ZP5-250
Läs igenom hela bruksanvisningen före användning och spara den sedan för framtida bruk.
Vi reserverar oss för ev. text- och bildfel samt ändringar av tekniska data.
Vid tekniska problem eller andra frågor, kontakta vår kundtjänst (se adressuppgifter på baksidan).
Varning! Livsfara, risk för kroppsskada och skada på produkten om inte alla
säkerhetsföreskrifter följs.
Viktigt! Läs bruksanvisningen.
Använd hörselskydd.
Använd andningsmask.
Använd skyddsglasögon.
Använd skyddshandskar.
Risk för kroppsskada. Håll händerna på avstånd från den roterande sågklingan.
Skyddsklass ll. Dubbelisolerad
Generella säkerhetsinstruktioner för
elektriska handverktyg
Varning! Läsalla varningar, instruktioner, illustrationer och specifikationer som medföljer det här elektriska
handverktyget. Omnedanstående instruktioner inte följs kan detta leda till elektrisk stöt, brand eller allvarlig kroppsskada.
Spara alla varningar och instruktioner för framtida bruk.
Termen”elektriskt handverktyg” ivarningstexten nedan refererar till ditt nätanslutna eller batteridrivna handverktyg.
1) Arbetsutrymmet
a) Håll arbetsutrymmet rent och väl upplyst. Belamrade och mörka utrymmen inbjuder till olyckor.
b) Använd inte elektriska handverktyg i explosiva miljöer, som i närheten av lättantändliga vätskor, gaser eller
damm. Elektriska handverktyg genererar gnistor som kan antända damm eller ångor.
c) Håll undan barn och åskådare medan du använder det elektriska handverktyget. Störningsmoment kan göra att du
tappar kontrollen.

14
SVENSKA
2) Elektrisk säkerhet
a) Det elektriska handverktygets stickpropp måste passa i vägguttaget. Modifiera aldrig stickproppen på något vis.
Använd aldrig adapter tillsammans med jordade elektriska handverktyg. Omodifierade stickproppar och passande
vägguttag minskar risken för elektrisk stöt.
b) Undvik kroppskontakt med jordade föremål, som rör, element, köksspis eller kylskåp. Det innebär ökad risk för
elektrisk stöt om din kropp är jordad.
c) Utsätt inte det elektriska handverktyget för regn eller våta förhållanden. Om vatten tränger in i ett elektriskt
handverktyg ökar risken för elektrisk stöt.
d) Misshandla inte nätsladden. Använd aldrig nätkabeln för att bära, dra eller rycka stickproppen ur vägguttaget.
Håll nätkabeln undan från värme, olja, vassa kanter och rörliga delar. Skadade eller trassliga nätkablar ökar risken för
elektrisk stöt.
e) När du använder ett elektriskt handverktyg utomhus, använd en skarvkabel anpassad för detta ändamål.
Användning av en skarvkabel för utomhusbruk minskar risken för elektrisk stöt.
f) Om du måste använda ett elektriskt handverktyg på en fuktig plats, anslut verktyget till elnätet via en
jordfelsbrytare. Användning av jordfelsbrytare minskar risken för elektrisk stöt.
3) Personlig säkerhet
a) Var uppmärksam på vad du gör och använd sunt förnuft när du använder ett elektriskt handverktyg.
Använd inte ett elektriskt handverktyg om du är trött eller påverkad av droger, alkohol eller medicinering.
Ett ögonblicks ouppmärksamhet när du använder ett elektriskt handverktyg kan resultera i allvarlig personskada.
b) Använd skyddsutrustning. Bär alltid skyddsglasögon. Användning av skyddsutrustning som andningsskydd,
halksäkra skyddsskor, hjälm och hörselskydd vid behov minskar risken för personskada.
c) Undvik oavsiktlig start. Se till att strömbrytaren är i läge OFF innan du ansluter stickproppen till vägguttaget.
Att bära ett elektriskt handverktyg med ett finger på strömbrytaren/avtryckaren eller att ansluta ett elektriskt handverktyg
till elnätet när strömbrytaren är i läge ON inbjuder till olyckor.
d) Tag bort alla serviceverktyg/nycklar innan du slår på det elektriska handverktyget. Ett kvarglömt serviceverktyg på
en roterande del av det elektriska handverktyget kan resultera i personskada.
e) Sträck dig inte för långt. Se till att du står stadigt med god balans hela tiden. Detta möjliggör bättre kontroll
i oväntade situationer.
f) Bär lämplig klädsel. Bär inte löst sittande kläder eller smycken. Håll hår, kläder och handskar undan från rörliga
delar. Lösa kläder, smycken eller långt hår kan fastna i rörliga delar.
g) Om utrustning för utsugning och uppsamling av damm finns tillgänglig, se till att denna är ansluten och används
ordentligt. Användning av dessa hjälpmedel kan minska dammrelaterade faror.
h) Låt inte det faktum att du är van att använda elektriska handverktyg göra att du blir mindre uppmärksam på de
säkerhetsinstruktioner som gäller. Oförsiktigt handhavande kan på bråkdelen av en sekund leda till svåra kroppskador.
4) Användning och underhåll av det elektriska handverktyget
a) Pressa inte det elektriska handverktyget. Använd ett elektriskt handverktyg som är avsett för det arbetsmoment
du utför. Korrekt elektriskt handverktyg gör jobbet bättre och säkrare med avsedd matningshastighet.
b) Använd inte det elektriska handverktyget om strömbrytaren inte slår på och stänger av verktyget. Alla elektriska
handverktyg som inte kan kontrolleras med strömbrytaren är farliga och måste repareras.
c) Ta stickproppen ur vägguttaget och/eller ta bort batteriet (om det är löstagbart) innan du utför några justeringar,
byter tillbehör eller lägger undan det elektriska handverktyget för förvaring. Dessa åtgärder i förebyggande syfte
minskar risken för att starta det elektriska handverktyget oavsiktligt.
d) Förvara elektriska handverktyg som inte används utom räckhåll för barn och låt inte personer som inte är
förtrogna med det elektriska handverktyget eller dessa instruktioner använda det. Elektriska handverktyg är farliga
om de kommer i händerna på ovana användare.
e) Underhåll elektriska handverktyg och dess tillbehör. Kontrollera om något är felinställt, om rörliga delar
kärvar, om delar har gått sönder eller om något annat kan påverka funktionen av det elektriska handverktyget.
Om något är skadat måste det repareras före användning. Många olyckor beror på dåligt underhållna elektriska
handverktyg.
f) Håll verktygen vassa och rena. Ordentligt underhållna skärverktyg med vassa eggar är mindre benägna att kärva och
lättare att kontrollera.
g) Använd det elektriska handverktyget och tillbehör etc. enligt instruktionerna och på det sätt som är ämnat för
just den typen av elektriskt handverktyg, och ta även hänsyn till arbetsförhållandena och den typ av arbete som
ska utföras. Användning av det elektriska handverktyget för arbeten andra än vad det är ämnat för kan resultera i en
farlig situation.
h) Håll handtag och greppytor torra, rena och fria från olja och fett. Hala handtag och greppytor bidrar inte till att det
elektriska handverktyget kan hanteras på ett säkert sätt i situationer som du inte kunnat förutse.

15
SVENSKA
5) Service
a) Låt behörig personal utföra service och reparationer, och endast med originalreservdelar. Dettagaranterar att
säkerheten hos det elektriska handverktygetbehålls.
Varning!
Detta elektriska handverktyg avger ett elektromagnetiskt fält när det används. Detta fält kan under vissa förhållanden påverka
aktiva och passiva medicinska implantat. Personer som har medicinska implantat bör konsultera läkare och tillverkaren av
aktuellt implantat innan de använder produkten för att undvika allvarlig eller dödlig kroppskada.
Säkerhetsinstruktioner för bordscirkelsågar
1) Klingskyddsrelaterade varningar
a) Ha alltid klingskyddet monterat. Klingskyddet måste fungera normalt och vara korrekt monterat.
Ett klingskydd som sitter löst är skadat eller på annat sätt inte fungerar normalt ska repareras eller bytas ut.
b) Använd alltid klingskydd och klyvkniv vid varje arbetsmoment där arbetsstycket sågas helt igenom.
Klingskyddet och klyvkniven reducerar skaderisken vid arbetsmoment där sågklingan sågar helt igenom arbetsstycket.
c) Efter att arbetsmoment där klingskyddet och/eller klyvkniven avlägsnats (t.ex. vid falsning, olika typer av
spår eller när arbetsstycket behöver vändas) måste skyddsanordningarna omedelbart monteras tillbaka.
Skyddsanordningarna reducerar skaderisken.
d) Försäkra dig om att sågbladet inte vidrör klingskyddet, klyvkniven eller arbetsstycket innan du slår på sågen
med strömbrytaren. Att sågbladet oavsiktligt står i kontakt med dessa detaljer kan leda till en farlig situation.
e) Justera klyvkniven utifrån instruktionerna i den här bruksanvisningen. Om klyvkniven är felplacerad, felriktad eller på
annat sätt felaktigt monterad kan det göra klyvkniven mindre effektiv när det gäller att förhindra kast.
f) För att klyvkniven ska fungera måste den vara inne i arbetsstycket. Klyvkniven fyller ingen funktion om arbetsstycket
är så kort att det inte når fram till klyvkniven vid sågning. I sådana fall kan inte klyvkniven förhindra kast.
g) Använd en sågklinga som är anpassad för klyvkniven. För att klyvkniven ska fungera måste sågbladets diameter
passa till aktuell klyvkniv. Sågbladets tjocklek måste vara mindre än klyvknivens tjocklek och sågbladets skärbredd måste
var större än klyvknivens tjocklek.
2) Säkerhetsinstruktioner för sågning
a) FARA: Placera aldrig händer och fingrar i sågområdet eller i närheten av sågbladet. Ett ögonblicks oförsiktighet
eller en halkning kan leda till att din hand styrs i riktning mot sågklingan vilket kan leda till allvarlig kroppskada.
b) Arbetsstycket får endast matas mot sågklingans eller skärverktygets rotationsriktning. Om arbetsstyckets matas
med sågklingans eller skärverktygets rotationsriktning kan det leda till att arbetsstycket och din hand dras in i sågklingan.
c) Använd aldrig geringslinjalen för att stödja arbetsstycket när du utför längsgående skär. Använd heller aldrig
klyvanhållet för längsgående justering när du samtidigt gersågar med geringslinjalen. Att samtidigt stödja arbets-
stycket med geringslinjalen och klyvanhållet ökar sannolikheten för att sågbladet fastnar vilket i sin tur kan leda till kast.
d) Vid klyvning ska matarkraften på arbetsstycket alltid placeras mellan klyvanhållet och sågklingan. Använd en
påskjutare om avståndet är mindre än 150 mm och en skjutkloss om avståndet är mindre än 50 mm. Med den här
typen av hjälpmedel säkerställer du att dina händer alltid befinner sig på ett säkert avstånd från sågklingan.
e) Använd endast den påskjutare som tillhandahållits av tillverkaren, eller en påskjutare som tillverkats i enlighet
med dennes instruktioner. Påskjutaren garanterar att avståndet mellan handen och sågbladet är tillräckligt stort.
f) Använd aldrig en skadad eller delvis avsågad påskjutare. En skadad påskjutare kan brytas av vilket kan leda till att
din hand får kontakt med sågklingan.
g) Arbeta aldrig på ”fri hand” Använd alltid geringslinjalen eller klyvanhållet för att positionera och guida arbets-
stycket. Med på ”fri hand” menas att du stödjer arbetsstycket enbart med händerna istället för att använda
geringslinjalen eller klyvanhållet. Sågning på fri hand leder till felaktig sågriktning, till att arbetsstycket fastnar, och till
kast.
h) Sträck dig aldrig över eller runt ett roterande sågblad. Om du sträcker dig efter ett arbetsstycke kan det leda till att du
av misstag får kontakt med den roterande sågklingan.
i) Se till att ha extra stöd för långa och/eller breda arbetsstycken bakom eller på sidorna av sågbordet för att se till
att de ligger plant. Ett långt och/eller brett arbetsstycke har en tendens att väga upp från sågbordet vilket leder till att du
tappar kontrollen, att sågbladet fastnar och till kast.
j) Mata arbetsstycket lugnt och med jämn hastighet. Försök aldrig böja eller vrida arbetsstycket. Om arbetsstycket
fastnar, stäng omedelbart av verktyget, dra ut stickproppen ur vägguttaget och ta loss arbetsstycket. Om arbets-
stycket gör att sågbladet fastnar kan det leda till kast och till att motorn stannar.
k) Avlägsna aldrig avsågade delar från sågbordet när sågklingan roterar. Delarna kan fastna mot anhåll eller i kling-
skyddet och sågbladet kan dra dina fingrar mot sågbladet. Stäng av sågen och vänta tills sågbladet stannat innan du tar
bort avsågat material.
l) Använd ett extra anhåll som är i kontakt med sågbordet, lämpligt för ändamålet, när arbetsstycken tunnare än
2 mm sågas. Ett tunt arbetsstycke kan klämmas fast under anhållet vilket kan leda till kast.

16
SVENSKA
3) Orsaker till kast och relaterade varningar
Kast är en hastig rörelse hos arbetsstycket som beror på ett fastklämt eller blockerat sågblad eller att arbetsstycket
matats i felaktig vinkel gentemot sågbladet eller när en del av arbetsstycket fastnat mellan sågbladet och anhållet eller
annat fast objekt.
Det som vanligtvis inträffar vid kast är att arbetsstycket lyfts från sågbordet av den bakre delen av sågbladet och därmed
kastas mot operatören. Kast uppstår om sågen hanteras felaktigt och/eller om arbetsmomenten utförs felaktigt eller under
olämpliga förhållanden. Kast kan undvikas om genom att nedanstående varningar följs på rätt sätt.
a) Stå aldrig i rakt i linje med sågklingan. Stå alltid på samma sida som anhållet. Ett kast kan kasta arbetsstycket
i hög hastighet mot den som står framför eller i linje med sågbladet.
b) Sträck dig aldrig över eller in bakom sågbladet för att stödja ett arbetsstycke. Du kan oavsiktligt komma i kontakt
med sågbladet eller ett kast kan uppstå som drar dina fingrar mot sågbladet.
c) Håll och pressa aldrig den del av arbetsstycket som ska sågas av mot den roterande sågklingan. Om du pressar
den del som ska sågas av mot sågklingan kommer det leda till att delen fastnar med kast som följd.
d) Se till att anhållet är parallellt med sågklingan. Ett felmonterat anhåll kommer att klämma fast arbetsstycket mot
sågklingan och leda till kast.
e) Använd en fjäderbräda för att hålla arbetsstycket mot sågbordet när du inte sågar helt igenom det som t.ex. vid
falsning, sågning av spår eller klyvsågning. Fjäderbrädan hjälper till att hålla arbetsstycket i händelse av kast.
f) Var extra försiktig när du sågar in i dolda partier i ett arbetsstycke som sammanfogats av flera olika delar.
Sågbladet kan sticka upp och såga igenom delar som kan orsaka kast.
g) Stora skivor ska stödjas för att minimera risken för att sågbladet kläms fast med kast som följd. Stora skivor
tenderar att svikta/bågna av sin egen tyngd. Skivan måste stödas på alla de delar som finns utanför sågbordets yta.
h) Var extra försiktig om du avser att såga arbetsstycken som är vridna, ojämna, skeva eller som inte har en rak
kant som du kan använda mot geringslinjal eller anhåll. Ett vridet, ojämnt eller skevt arbetsstycke är instabilt och
orsakar kast genom att sågspåret inte blir rakt.
i) Såga aldrig mer än ett arbetsstycke åt gången vare sig de är staplade vertikalt eller horisontellt. Sågbladet kan
fatta tag i fler arbetsstycken samtidigt vilket kan leda till kast.
j) När du startar om en såg som har sågbladet i arbetsstycket, centrera bladet i sågspåret så att sågtänderna inte
har kontakt med arbetsstycket. Om sågbladet fattar tag i arbetsstycket när sågen startas kan arbetsstycket lyftas upp
vilket leder till kast.
k) Håll sågbladen rena, vassa och rätt inställda. Använd aldrig sågblad som är skeva eller sågblad med spruckna
eller utslagna tänder. Vassa och rätt inställda sågblad minimerar risken för att sågbladet fastnar, kläms fast eller ger
upphov till kast.
4) Säkerhetsinstruktioner gällande handhavande av bordscirkelsåg
a) Stäng av sågen och dra ut stickproppen ur vägguttaget när du demonterar bordinsatsen, byter sågblad, justerar
klyvkniven eller klingskyddet och när du lämnar sågen oövervakad. Förebyggande åtgärder gör att olyckor undviks.
b) Lämna aldrig sågen när den är påslagen. Slå av den och lämna den inte förrän sågbladet står helt stilla.
En påslagen oövervakad såg utgör en okontrollerad olycksrisk.
c) Placera sågen på en väl upplyst, plan yta där du har bra fotfäste och där du kan ha god balans. Sågen ska
placeras på en plats stor nog för att du på säkert och enkelt sätt ska kunna hantera alla typer av arbetsstycken.
Trånga och mörka utrymmen med hala och ojämna golv inbjuder till olyckor.
d) Se till att alltid hålla sågens underrede och utrymmet under sågbordet och/eller ev. dammuppsamlingssystem
fritt från sågspån. Sågspån som samlas på hög kan självantända.
e) Sågen måste förankras. En såg som inte är förankrad kan flytta sig och välta.
f) Ta bort verktyg, träbitar etc. från sågbordet innan sågen slås på. Lösa föremål kan distrahera eller riskera att fastna
vilket kan leda till en farlig situation.
g) Använd alltid sågblad med rätt dimension och form (runt eller diamantformat) på centrumhålet.
Sågblad som inte passar sågens monteringsdetaljer kommer att sitta ocentrerat vilket leder till förlorad kontroll.
h) Använd aldrig skadade eller felaktiga monteringsdetaljer så som distanser, brickor, bultar eller muttrar.
Medföljande monteringsdetaljer har designats speciellt för din såg för säkert användande och optimal prestanda.
i) Stå aldrig på sågen och använd den aldrig som språngbräda. Om sågen tippar eller om du av misstag kommer i
kontakt med sågklingan kan det leda till allvarlig kroppsskada.
j) Försäkra dig om att sågklingan monterats så att den roterar i rätt riktning. Använd aldrig sliprondeller, stålborstar
eller andra typer av sliprondeller på en bordscirkelsåg. Om du använder sådana tillbehör eller andra tillbehör som inta
rekommenderats av tillverkaren kan det leda till allvarlig kroppskada.

17
SVENSKA
Säkerhetsföreskrifter för sågklingor
1. Använd endast verktyg som du vet hur du ska hantera.
2. Var uppmärksam på angiven max rotationshastighet för klingan. Den maxhastighet som anges på klingan får aldrig
överskridas. Se till att klingan endast används inom angivet varvtalsområde.
3. Var uppmärksam på motorns och sågklingans rotationsriktning.
4. Använd inte spruckna sågklingor. Försök aldrig reparera en skadad sågklinga, de ska kasseras och ersättas med
en ny klinga.
5. Håll alla ytor som används för att spänna fast arbetsstycken fria från fett, olja och vatten.
6. Använd aldrig lösa reduceringsringar eller bussningar för att minska sågklingans håldiameter.
7. Se till att hantera alla sågklingor med försiktighet. De mår bäst av att förvaras i sina originalförpackningar.
Använd alltid skyddshandskar som ger bra grepp och minimerar risken för kroppsskada.
8. Försäkra dig om att alla skyddsanordningar är korrekt monterade innan du monterar sågklingan.
9. Försäkra dig om att de sågklingor du använder uppfyller de tekniska specifikationerna och att de är korrekt monterade.
10. Medföljande sågblad får endast användas för att såga i trä, aldrig i metall.
11. Använd alltid ett sågblad som är speciellt avsett för det material du avser att såga i.
12. Se till att sågbladets diameter alltid följer de specifikationer som anges för sågen.
13. Använd endast sågblad som är märkta med samma eller högre rotationshastighet än vad som anges i sågens
specifikationer.
14. Använd endast sågblad som rekommenderats av tillverkaren och som överensstämmer med EN 847-1 om de är
avsedda för sågning av trä eller linkande material.
15. Använd lämplig personlig skyddsutrustning som:
- Hörselskydd
- Skyddshandskar när du hanterar sågblad.
16. Varning! När du byter sågklinga, försäkra dig om att klingans skärbredd inte är mindre än klyvknivens tjocklek och att
sågklingans tjocklek inte är större än klyvknivens tjocklek.
17. Undvik att överhetta sågtänderna när du sågar trä eller plast. Minska matningshastigheten för att undvika att plasten
smälter.
Övriga risker
Den produkt som beskrivs i den här bruksanvisningen har konstruerats utifrån modern teknologi och
i överenstämmelse med gällande säkerhetsföreskrifter. Trots detta är det möjligt att farliga situationer kan uppstå
vid användning.
• Risk för elektrisk stöt om olämplig elektrisk utrustning används när produkten ansluts till elnätet.
• Dolda olycksrisker kan förekomma trots att alla säkerhetsföreskrifterhar följts och alla säkerhetsåtgärder vidtagits.
• Olycksrisker kan minimeras om alla säkerhetsföreskrifter följs och produkten används på det sätt som beskrivs i den här
bruksanvisningen och för de arbetsmoment för vilka den är avsedd.
• Försök aldrig pressa produkten genom att mata arbetsstycket för hårt. För hård matning kommer snabbt att förstöra
sågbladet. Detta leder till försämrad prestanda och nedsatt precision.
• Undvik att produkten startas oavsiktligt. Strömbrytaren får aldrig vara intryckt när stickproppen sätts i vägguttaget.
• Använd den sågklinga som rekommenderas i den här bruksanvisningen. Detta garanterar optimal prestanda.
• Håll händerna på avstånd från sågklingan när den roterar.
• Innan någon justering eller service utförs ska produkten slås av och stickproppen dras ut ur vägguttaget.

18
SVENSKA
1
2
3
4
5
6
78
9
10
11
12
13
14
15
16
18
17
19
A×4 D×2
B×2 C×2 E×2 F×2 G×4 H×4 I×2 JK×2 L
M N O P Q R T U V W
S
Produktbeskrivning
1. Stödstag
2. Ben
3. Påskjutare
4. Sågbord
5. Bordsbreddning
6. Geringslinjal
7. Klyvkniv
8. Sugslang
9. Klingskydd
10. Klyvanhåll
11. Bordsinsats
12. Sågklinga
13. Styrskena för klyvanhåll
14. Låsvred för vinkeljustering
15. Ratt för höjdjustering/vinkeljustering
av sågklinga
16. Återställningsknapp för motorskydd
17. Strömbrytare
18. Gummifot
19. Stag
A) Ben (A)
B) Stag (B)
C) Stag (C)
D) Bordsbreddning
E) Stödstag för bordsbreddning
F) Stödstag för bordsbreddning
G) Mutterhållare
H) Gummifötter
I) Stödstag
J) Påskjutare
K) Nycklar
L) Skruv & Mutter
M) Låsbricka till sågklinga
N) Flänsbricka till sågklinga
O) Låsskruv till sågklingas låsbricka
P) Sågklinga
Q) Låsskruv till klyvknivens låsbricka
R) Klyvknivens låsbricka
S) Klyvkniv
T) Klingskydd
U) Geringslinjal
V) Klyvanhåll
W) Sugslang

19
SVENSKA
Användning
• Försäkra dig om att sågen är helt oskadad och rätt monterad innan arbetet påbörjas.
• Kontrollera att sågklingan står lodrätt (90°) och inte är högre justerad än att den precis klarar att såga igenom arbetsstycket.
• Kontrollera att alla skruvar och muttrar är åtdragna.
Strömbrytare (start och stopp)
Anslut stickproppen till ett vägguttag.
Start: Tryck på den gröna knappen [l] för att starta sågen.
Stopp: Tryck på den röda knappen [0] för att stänga av.
Nollspänningsutlösare
Sågen är försedd med en nollspänningsutlösare som hindrar sågen från att starta automatiskt när strömmen kommer åter
efter ett strömavbrott. Starta sågen med [l] efter att strömmen kommit åter.
Motorskydd
Om motorn överbelastas på grund av felaktig matning eller om klingan hindras av föroreningar
etc. kan motorskyddet lösa ut.
Om motorskyddet löser ut:
1. Dra ut stickproppen ur vägguttaget och låt sågen vila i minst 10 min.
2. Se till att inga föroreningar hindrar klingans rotation, rengör och dammsug vid behov.
3. Tryck in motorskyddets återställningsknapp (16).
4. Starta sågen med [l].
Klyvanhåll
Placera klyvanhållet på styrskenan
och lås fast det genom att vika ner
låshandtaget.
Klyvanhållet kan monteras på olika sätt, med den höga eller den låga sidan
mot klingan. Den låga sidan gör det lättare att hantera tunna ämnen som
t.ex. plywood.
Du kan även själv välja på vilken sida
om klingan du vill ha anhållet, höger eller
vänster.
Lossa vingmuttrarna och dra loss anhållet
från fästet. Skjut på anhållet igen i önskad
position och dra åt vingmuttrarna.
OBS! Montering: se sidan 54

20
SVENSKA
Sågklingans höjdjustering
Vrid ratten (15) för att ställa in önskad höjd. Ställ aldrig klingan högre än
att den precis klarar att såga igenom arbetsstycket.
Klyvning
Obs! / Viktigt
• Tänk dig för och prova att utföra alla arbetsmoment utan att sågen är igång om du är osäker på hur du ska hålla
händerna för att arbeta på ett säkert sätt.
• Gör alltid ett provskär i en provbit och kontrollmät innan klyvningen av arbetsstycket påbörjas.
• Låt alltid sågen komma upp i fullt varv innan klyvningen påbörjas.
• Var extra försiktig i början av varje skär.
• Håll ena sidan mot klyvanhållet och den plana sidan mot bordet.
• Stå inte rakt bakom arbetsstycket vid klyvning. Arbetsstycket kan kastas tillbaka mot användaren.
• Håll händerna på arbetsstycket och tryck det mot bordet och klyvanhållet. Mata arbetsstycket med en
lugn och jämn rörelse.
Inställning av sågklingans lutning
Viktigt
Kontrollmät alla vinklar innan sågningen påbörjas. Såga gärna i en provbit och kontrollmät innan du sågar
i det aktuella arbetsstycket.
Varning!
Använd alltid påskjutare om någon av händerna kommer närmare klingan än 125 mm under arbetsmomentet.
Använd aldrig en skadad påskjutare, byt ut innan sågningen återupptas. Lämna avkapade bitar på sågbordet och
ta bort dem först när sågklingan stannat efter att sågen har slagits av.
1. Lossa låsvredet (14).
2. Tryck in ratten för höjdjustering/vinkeljustering (15)
och vrid till önskad vinkel.
3. Dra åt låsvredet igen.
This manual suits for next models
3
Table of contents
Languages:
Other Cocraft Saw manuals

Cocraft
Cocraft LXC RS18 18V Lithium Series User manual

Cocraft
Cocraft HMS 210-L Series User manual

Cocraft
Cocraft PRO RT18-PL User manual

Cocraft
Cocraft HT 10 M1H-ZP2-4-250 User manual

Cocraft
Cocraft PRO Series User manual

Cocraft
Cocraft PRO C1600-M User manual

Cocraft
Cocraft HC185-L User manual

Cocraft
Cocraft 40-7895 User manual

Cocraft
Cocraft HB 10-L BS1001 User manual

Cocraft
Cocraft LXC CS18 User manual