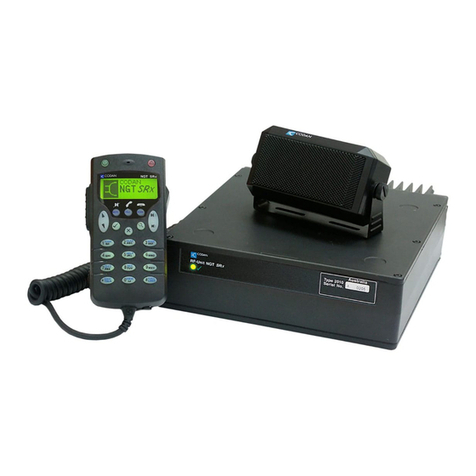
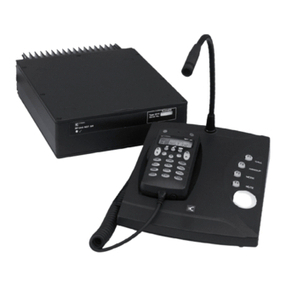
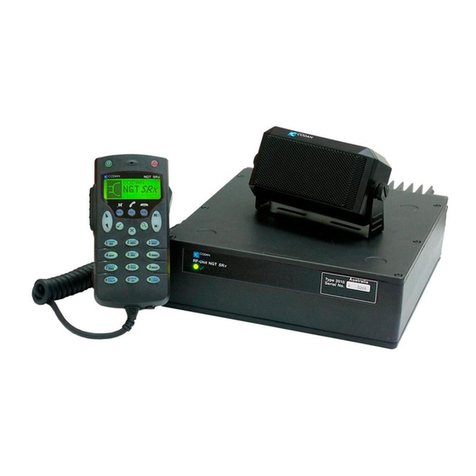
Codan HF SSB User manual

No part of this handbook may be reproduced,
transcribed, translated into any language or transmitted
in any form whatsoever without the prior written
consent of Codan Pty Ltd.
© Copyright 1997 Codan Pty Ltd.
Codan part number 15-04076 Issue 1, 1997
No part of this handbook may be reproduced,
transcribed, translated into any language or transmitted
in any form whatsoever without the prior written
consent of Codan Pty Ltd.
© Copyright 1997 Codan Pty Ltd.
Codan part number 15-04076 Issue 1, 1997


HF SSB transceiver reference manual i
Contents
1 About this manual
2 Installation
Type of station....................................................................2-2
Mounting the transceiver ....................................................2-5
Mounting the control head and loudspeaker........................2-8
Power supply..................................................................... 2-11
Grounding ........................................................................ 2-12
Ancillary equipment ......................................................... 2-13
3 Channel and scan table setup
Channel creation and editing ..............................................3-2
Channel creation in Free-Tune Receiver mode.................. 3-17
Channel deletion...............................................................3-21
Scan table creation............................................................3-22
Scan table deletion............................................................ 3-27
Telephone directory creation............................................. 3-29
4 Using Setup mode procedures
Using Setup mode...............................................................4-2
List of Setup mode procedures.............................................4-3
Advanced users...................................................................4-7
5 Setup procedures—part 1
ALE alphanumeric address setup........................................5-2
ALE option reset.................................................................5-4

Contents
ii HF SSB transceiver reference manual
ALE option settings ............................................................5-6
ALE sounding interval......................................................5-13
Beep loudness................................................................... 5-15
Call preamble length......................................................... 5-17
Call privacy on/off ............................................................ 5-19
Clock calibration............................................................... 5-21
Clock setting..................................................................... 5-23
Clone a transceiver ........................................................... 5-28
6 Setup procedures—part 2
Display brightness............................................................... 6-2
Display contrast..................................................................6-4
Display diagnostics on/off...................................................6-6
Display frequency ...............................................................6-8
Emergency selcall receive setup ........................................ 6-11
Emergency selcall transmit setup ...................................... 6-15
Free-Tune Receiver mode availability on/off ..................... 6-19
GPS display on/off............................................................ 6-21
GPS timeout on/off ........................................................... 6-23
7 Setup procedures—part 3
Page call canned message setup ..........................................7-2
Password entry to enable transceiver options....................... 7-5
Power up message on/off................................................... 7-10
Power up mute setting....................................................... 7-13
Power up address display on/off ........................................ 7-16
PTT release beep on/off..................................................... 7-18
PTT transmit cutout.......................................................... 7-20
Recall channels by frequency on/off .................................. 7-22
RF gain on/off................................................................... 7-24
RS-232 connected equipment............................................ 7-26
RS-232 connection baud rate............................................. 7-29
Contents
ii HF SSB transceiver reference manual
ALE option settings ............................................................5-6
ALE sounding interval......................................................5-13
Beep loudness................................................................... 5-15
Call preamble length......................................................... 5-17
Call privacy on/off ............................................................ 5-19
Clock calibration............................................................... 5-21
Clock setting..................................................................... 5-23
Clone a transceiver ........................................................... 5-28
6 Setup procedures—part 2
Display brightness............................................................... 6-2
Display contrast..................................................................6-4
Display diagnostics on/off................................................... 6-6
Display frequency ...............................................................6-8
Emergency selcall receive setup ........................................ 6-11
Emergency selcall transmit setup ...................................... 6-15
Free-Tune Receiver mode availability on/off ..................... 6-19
GPS display on/off............................................................ 6-21
GPS timeout on/off ........................................................... 6-23
7 Setup procedures—part 3
Page call canned message setup ..........................................7-2
Password entry to enable transceiver options....................... 7-5
Power up message on/off................................................... 7-10
Power up mute setting....................................................... 7-13
Power up address display on/off ........................................ 7-16
PTT release beep on/off..................................................... 7-18
PTT transmit cutout.......................................................... 7-20
Recall channels by frequency on/off .................................. 7-22
RF gain on/off................................................................... 7-24
RS-232 connected equipment............................................ 7-26
RS-232 connection baud rate............................................. 7-29

Contents
HF SSB transceiver reference manual iii
8 Setup procedures—part 4
Scan table automatic scanning start.....................................8-2
Scan table editing on/off .....................................................8-4
Selcall address setup ...........................................................8-6
Selcall address size compatibility...................................... 8-13
Selcall lockout on/off ........................................................ 8-16
Selcall mute availability on/off.......................................... 8-18
Status call availability on/off............................................. 8-20
Telcall availability on/off .................................................. 8-22
Tone call setup.................................................................. 8-24
99-beacon call response on/off .......................................... 8-27
9 Link Setup mode
Link Setup mode enter/exit ................................................. 9-2
Antenna band or channel control ........................................9-5
PIN setup............................................................................9-8
Setup mode availability on/off........................................... 9-11
Transceiver reset to factory settings................................... 9-13
10 Display messages
11 Appendix
Connectors........................................................................ 11-2
Connecting ancillary equipment........................................ 11-8
Using the optional RS-232/I2C Interface ......................... 11-10
Specifications.................................................................. 11-14
Accessories..................................................................... 11-15
Index

Contents
iv HF SSB transceiver reference manual
Figures
Figure 2.1 A typical fixed base station..............................2-2
Figure 2.2 A typical mobile station...................................2-3
Figure 2.3 Rear view of control head without cover..........2-8
Figure 4.1 The Setup mode tree........................................ 4-9
Figure 9.1 Moving the link for Link Setup mode ..............9-2

HF SSB transceiver reference manual 1-1
1 About this manual
This manual describes how you set up your Codan HF SSB
transceiver.
This issue of the manual incorporates operating information
for software versions from:
• transceiver (main) 4.00
• head (control) panel 4.00.
You should refer to this manual when you want to:
• set up the transceiver for the first time
• change how the transceiver operates
• use options or ancillary equipment with the transceiver.

About this manual
1-2 HF SSB transceiver reference manual
The manual contains 11 chapters.
Chapter 1 explains how to use the manual.
Chapter 2 explains how to install your transceiver and
connect the components that make up your station.
Chapter 3 explains how to set up channels, scan tables and
the telephone directory.
Chapter 4 explains how to use Setup mode. You should read
this before following any Setup mode procedure described in
Chapters 5–8.
Chapters 5–8 contain the Setup mode procedures that have
been separated into four parts for ease of reference.
Chapter 9 contains Link Setup mode procedures.
Chapter 10 lists all information and error messages output to
the transceiver display.
Chapter 11 covers technical information such as the
connector pin arrangements, ancillary equipment settings,
transceiver specifications, options and accessories.
We recommend that only Codan approved service agents
perform maintenance on the transceiver.

About this manual
HF SSB transceiver reference manual 1-3
Standards and icons
In this manual, Arial typeface is used for text shown on the
transceiver display. For example:
If no response was displayed, send the call again.
Arial typeface in bold is used for the names of buttons, knobs
and connectors. For example:
Press the On/Off button.
This icon... Means...
the end of a subject.
a warning.
On/Off
the transceiver button or knob that
you need to operate (the On/Off
button in this example). The solid
area in the picture of the control head
on the left shows you where to find
the button or knob.
Call
the microphone button that you need
to operate (the Call button in this
example). The solid area in the
picture of the microphone on the left
shows you where to find the button.

About this manual
1-4 HF SSB transceiver reference manual
Glossary
This term... Means...
µV Microvolt.
BER Bit Error Rate.
A Ampere.
AC Alternating Current.
ALE Automatic Link Establishment.
AM Amplitude Modulation.
Baud Binary transfer rate.
Call memory a list containing details of the last ten
calls you have received.
CICS Computer Interface Command Set.
D Depth.
dB Decibel.
DC Direct Current.
EPROM
EEPROM
BBPROM
SEEPROM
types of Programmable Read-Only
Memory.
GPS Global Positioning System.
H Height.
HF High Frequency.
kg Kilogram.
kHz Kilohertz.
L/S Loudspeaker.
LCD Liquid Crystal Display.
LSB Lower Sideband.
LU Lower/Upper sideband selectable.

About this manual
HF SSB transceiver reference manual 1-5
This term... Means...
MHz Megahertz.
mm Millimetre.
PA Power Amplifier.
PCB Printed Circuit Board.
PIN Personal Identification Number.
PSTN Public Switched Telephone Network.
PTT button Press-To-Talk button.
RAM Random Access Memory.
RDD Radphone Direct Dial.
Receive-only
channel a channel that allows you to receive calls
but not send calls.
Revertive signal an acknowledgment signal automatically
transmitted from a station receiving a
call.
RF Radio Frequency.
RFDS Royal Flying Doctor Service.
Rx Receive.
Scan table a list of channels used when scanning for
incoming calls.
Selcall the simplest type of selective call.
Selective call a call to a specific station using the
station’s address. Selective calls include
beacon calls, selcalls, group calls, telcalls,
GPS calls, page calls, ALE calls and
status calls.
SSB Single Sideband transmission format.
SWR Standing Wave Ratio.

About this manual
1-6 HF SSB transceiver reference manual
This term... Means...
Transceiver ID a factory set 16-character alphanumeric
code that uniquely identifies your
transceiver.
Transmit channel a channel that allows you to receive and
send calls.
Two-frequency
simplex a channel that has different transmit and
receive frequencies but does not allow
simultaneous transmit and receive.
Tx Transmit.
TXE Transmit Enabled—allows you to set up
new transmit frequencies.
USB Upper Sideband.
V Volt.
W Width.
Other documents
For information on how you use the transceiver to send and
receive calls, refer to the HF SSB transceiver user guide
(Codan part number 15-04073).
For information on the features fitted to your transceiver,
refer to the front of your HF SSB transceiver user guide for
the list of factory fitted transceiver options.
For information on ALE calling, refer to the 9300 ALE
controller user guide (Codan part number 15-04046).
For information on Telstra radiophone services within
Australia, refer to the Radphone Direct Dial User Guide and
Radphone User Guide produced by Telstra.

HF SSB transceiver reference manual 2-1
2 Installation
This chapter describes how to install your transceiver and
connect the components that make up your station.
It covers:
• type of station (2-2)
• mounting the transceiver (2-5)
• mounting the control head and loudspeaker (2-8)
• power supply (2-11)
• grounding (2-12)
• ancillary equipment (2-13).
On receiving your transceiver, check the contents against the
packing list. Make sure that nothing is missing before
starting installation.
The procedures for installing your transceiver are not
comprehensive. They are to be used as a guide only. We
recommend that installation be carried out by qualified and
experienced personnel.

Installation
2-2 HF SSB transceiver reference manual
Type of station
There are two versions of the transceiver. The front control
version has the controls on the front panel of the transceiver.
The extended control version has the controls on a separate
control head.
There are two types of station:
• fixed base station
• mobile station.
Fixed base station
A fixed base station typically consists of an AC power supply
connected directly to the mains. DC output from the power
supply is connected to the transceiver, which in turn is
connected to an antenna.
AC power supply
Coaxial cable
Broadband antenna
system
Microphone
Earth point
AC mains
Chan
1
Chan
1
XXXX Power Supply
CODAN
On/Off
Select
Mode
Scan
Emgcy
Call S'Call
Mute Voice
Mute
On/Off Mode
Tune
USB/LSB
F2F1
Volume
93XX SSB Transceiver
CODAN
Front control
transceiver
Figure 2.1 A typical fixed base station

Installation
HF SSB transceiver reference manual 2-3
Mobile station
A mobile station typically consists of a 12V DC power
supply (battery) connected to the transceiver. A coaxial cable
connects the antenna to the transceiver. Automatic tuning
antennas are also connected to the transceiver by a control
cable.
The control head and microphone should be mounted in
such a way as to be easily accessible to the operator.
Coaxial and
control cable
Extended control
transceiver
Microphone Control Head
Speaker
Automatic tuning
whip antenna
On/Off
CODAN
Select
Mode
Scan
Emgcy
Call S'Call
Mute Voice
Mute
On/Off Mode
Tune
USB/LSB
F2F1
Volume
HF SSB Transceiver
12V
Battery
+
Chan
1
Chan
1
SSB Transceiver
CODAN
Figure 2.2 A typical mobile station

Installation
2-4 HF SSB transceiver reference manual
Where cables must pass through bulkheads with sharp edges,
the insulation of the cables should be protected by grommets.
Holes in the bulkhead need only be large enough to allow the
end of the cable with the smaller connector to pass through
(for example, the control cable between the control head and
the transceiver).
If the power and control cables are long and follow a
common path, keep the cables separated by a minimum
of 200mm. The cables can be closer together for short
distances, for example, to pass through the same hole in
the bulkhead.
Failure to observe this warning will cause distortion of
the transmitted audio signals.

Installation
HF SSB transceiver reference manual 2-5
Mounting the transceiver
The transceiver must be mounted in a position that:
•
allows easy access to the controls
•
allows a free flow of air through the rear cooling fins
•
is not exposed to direct sunlight
•
will not cause injury to occupants in the event of a
motor vehicle accident.
There are two types of mounting cradles that can be used
when installing your transceiver:
• code 117 mounting cradle—front entry
• code 118 mounting cradle—top/bottom entry.
Both types of cradle (supplied with six metres of DC power
cable) can be used to mount the transceiver. You must
determine the mounting position to best suit your needs.
Code 117 mounting cradle—front entry
This cradle is suitable for locations where there is enough
space available to slide the transceiver in and out.
To mount the cradle:
1. Secure the mounting cradle in position with the rotating
cam catches to the front. Ensure there is sufficient space
at the rear of the cradle to clear the transceiver heat sink
and connectors.

Installation
2-6 HF SSB transceiver reference manual
2. Align both cam catch slots with the T-section slides.
Cam catch
(Slot in line
with T slide)
Front section
3. Insert the transceiver side rails into the T-section slides
and push the transceiver fully into the cradle.
4. Apply gentle pressure to the front of the transceiver and
lock it into the cradle by using a flat blade screwdriver to
turn the cam catches one quarter of a turn in either
direction.
Code 118 mounting cradle—top/bottom entry
To mount the cradle:
1. Secure the mounting cradle into position with its spring
clips nearest the front. Ensure there is sufficient space at
the rear of the cradle to take the transceiver heat sink
and connectors.
2. Remove the front and rear fixing screws of the
transceiver side rails (the centre screw to be left
untouched).
Note that adaptor plates have to be fitted to the
transceiver side rails to secure the transceiver to the
cradle.
3. Secure the adaptor plates flush to the transceiver side
rails with the new screws provided, and fit one ‘O’ ring
over each projecting stud. The projecting studs on the
adaptor plates fit into the slides in the cradle.

Installation
HF SSB transceiver reference manual 2-7
4. Insert the transceiver adaptor plates into the cradle slides
and push fully into the cradle.
5. Secure the transceiver into the cradle with the spring
clips.
Installation
HF SSB transceiver reference manual 2-7
4. Insert the transceiver adaptor plates into the cradle slides
and push fully into the cradle.
5. Secure the transceiver into the cradle with the spring
clips.

Installation
2-8 HF SSB transceiver reference manual
Mounting the control head and loudspeaker
Make sure that the transceiver is disconnected from the DC
power source before connecting the control head to the
Remote Control
connector on the transceiver.
Select a suitable location to mount the control head and
loudspeaker. Avoid places exposed to direct sunlight such as
the car dashboard close to the windscreen.
L/S loudspeaker socket
10-pin control cable
connector Bottom entry
cable path
Top entry
cable path
Figure 2.3 Rear view of control head without cover
Other manuals for HF SSB
1
Table of contents
Other Codan Transceiver manuals

Codan
Codan 9390 User manual

Codan
Codan 9360 Operating manual

Codan
Codan 6900 Series User manual

Codan
Codan 5705 User manual

Codan
Codan 5700 series User manual

Codan
Codan 2110 series User manual

Codan
Codan Envoy User manual

Codan
Codan NGT AR User manual

Codan
Codan 2110 series User manual

Codan
Codan 8525 Owner's manual

Codan
Codan 8528 Series User manual

Codan
Codan 9480 Service manual

Codan
Codan 9313 Service manual

Codan
Codan 8525B Series Operating manual

Codan
Codan 2110 series User manual

Codan
Codan 2110 series Assembly instructions

Codan
Codan 2110 series User manual

Codan
Codan Envoy User manual

Codan
Codan NGT 2010 RF Operating manual

Codan
Codan HF2000 User manual