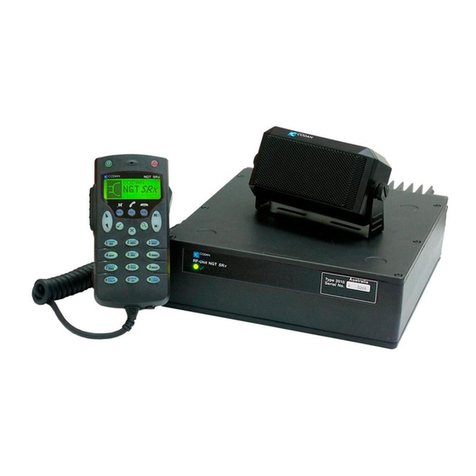
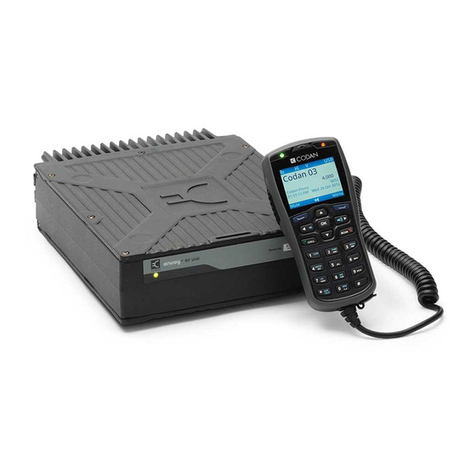
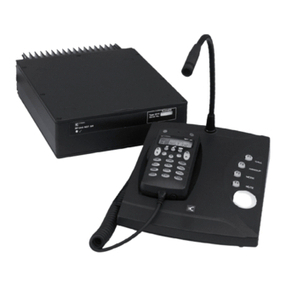
Codan Envoy 2220 User manual

RADIO COMMUNICATIONS
Getting Started Guide
Envoy™ Transceiver

No part of this manual may be reproduced, transcribed, translated
into any language or transmitted in any form whatsoever without
the prior written consent of Codan Limited.
© Copyright 2012 Codan Limited.
Codan part number 15-04177-EN Issue 1, December 2012.
CODAN™, Envoy™, Easitalk™, and CALM™ are trademarks of
Codan Limited. Other brand, product, and company names
mentioned in this document are trademarks or registered
trademarks of their respective holders.
The English version takes precedence over any translated versions.

TABLE OF CONTENTS
ENVOY™ TRANSCEIVER GETTING STARTED GUIDE i
Table of contents
Section 1 Introduction
Overview of this guide . . . . . . . . . . . . . . . . . . . . 2
The 2220 Handset . . . . . . . . . . . . . . . . . . . . . . 3
The 2221 Handset . . . . . . . . . . . . . . . . . . . . . . 5
The 2230 Desk Console . . . . . . . . . . . . . . . . . . . 7
Keypad . . . . . . . . . . . . . . . . . . . . . . . . . . . . 8
Accessing the CD . . . . . . . . . . . . . . . . . . . . . . . 11
Standards and icons . . . . . . . . . . . . . . . . . . . . . . 12
Section 2 Using the wizard
Using the wizard . . . . . . . . . . . . . . . . . . . . . . . 14
Selecting a language . . . . . . . . . . . . . . . . . . . 15
Setting the time and date . . . . . . . . . . . . . . . . . 15
Setting the location of the desk console . . . . . . . . . 16
Adding a channel . . . . . . . . . . . . . . . . . . . . . 17
Entering a self address . . . . . . . . . . . . . . . . . . 19
Adding a contact . . . . . . . . . . . . . . . . . . . . . 20
Selecting an antenna . . . . . . . . . . . . . . . . . . . 23
Selecting a peripheral device . . . . . . . . . . . . . . . 24
Section 3 Navigating the menu structure
The basic menu structure . . . . . . . . . . . . . . . . . . . 26
Navigating the menu structure . . . . . . . . . . . . . . . . 28
Overview of basic and advanced views . . . . . . . . . . . 29
Basic view . . . . . . . . . . . . . . . . . . . . . . . . 29
Advanced view . . . . . . . . . . . . . . . . . . . . . . 29

TABLE OF CONTENTS
ii ENVOY™ TRANSCEIVER GETTING STARTED GUIDE
Switching between basic and advanced views . . . . . . . . 31
Finding a word or value . . . . . . . . . . . . . . . . . . . 32
Selecting an icon . . . . . . . . . . . . . . . . . . . . . . . 35
Selecting a function from the menu bar . . . . . . . . . . . 36
Entering text in a field . . . . . . . . . . . . . . . . . . . . 38
Entering special characters . . . . . . . . . . . . . . . 40
Entering text in the 2221 Handset . . . . . . . . . . . . 41
Selecting a value from a list . . . . . . . . . . . . . . . . . 42
Selecting/deselecting a check box . . . . . . . . . . . . . . 43
Moving a slider . . . . . . . . . . . . . . . . . . . . . . . . 44
Changing the order of items in a list . . . . . . . . . . . . . 45
Saving your changes . . . . . . . . . . . . . . . . . . . . . 46
Section 4 Operating the transceiver
Switching the transceiver on and off . . . . . . . . . . . . . 48
Switching on the transceiver . . . . . . . . . . . . . . . 48
Switching off the transceiver . . . . . . . . . . . . . . . 48
The channel screen . . . . . . . . . . . . . . . . . . . . . 49
Selecting a channel . . . . . . . . . . . . . . . . . . . . 51
Scanning channels . . . . . . . . . . . . . . . . . . . . . . 52
Switching scanning on or off . . . . . . . . . . . . . . . 52
Pausing scanning . . . . . . . . . . . . . . . . . . . . . 53
Muting the transceiver . . . . . . . . . . . . . . . . . . . . 54
Switching mute on or off . . . . . . . . . . . . . . . . . 54
Selecting the mute type . . . . . . . . . . . . . . . . . . 55
Using the microphone . . . . . . . . . . . . . . . . . . . . 56
Setting the date and time . . . . . . . . . . . . . . . . . . . 57
Calling . . . . . . . . . . . . . . . . . . . . . . . . . . . . 59
Making a Selective call . . . . . . . . . . . . . . . . . . 60
Making a Message call . . . . . . . . . . . . . . . . . . 61
Making a call to a contact . . . . . . . . . . . . . . . . 64
Making a call from the Call History . . . . . . . . . . . 65
Making a call from the Emergency key . . . . . . . . . 66
Upgrading the transceiver via a USB stick . . . . . . . . . . 67
Section 5 Contacts
Adding a contact . . . . . . . . . . . . . . . . . . . . . . . 70
Adding a simple call . . . . . . . . . . . . . . . . . . . 71
Adding a Message call . . . . . . . . . . . . . . . . . . 71

TABLE OF CONTENTS
ENVOY™ TRANSCEIVER GETTING STARTED GUIDE iii
Adding a Phone call . . . . . . . . . . . . . . . . . . . . 72
Adding a Get Status call . . . . . . . . . . . . . . . . . 73
Adding an RFDS Emergency call . . . . . . . . . . . . 73
Completing the contact . . . . . . . . . . . . . . . . . . 74
Adding a contact from an entry in the Call Log
or Call History . . . . . . . . . . . . . . . . . . . . . . . . 75
Section 6 Specifications
Appendix A Installing the transceiver
Overview of mobile stations . . . . . . . . . . . . . . . . . 80
Cables in a mobile station . . . . . . . . . . . . . . . . . 82
Mounting a mobile Envoy™ station . . . . . . . . . . . 82
Connecting a mobile Envoy™ station . . . . . . . . . . 84
Overview of fixed stations . . . . . . . . . . . . . . . . . . 86
Cables in a fixed station . . . . . . . . . . . . . . . . . 88
Mounting a fixed Envoy™ station . . . . . . . . . . . . 88
Connecting a fixed Envoy™ station . . . . . . . . . . . 89
Appendix B Compliance
Overview . . . . . . . . . . . . . . . . . . . . . . . . . . . 92
European R&TTE Directive . . . . . . . . . . . . . . . . . 93
Product marking and labelling . . . . . . . . . . . . . . 93
Radiation safety (EU installations only) . . . . . . . . . 93
Declaration of Conformity and Notified Body Letter
of Opinion . . . . . . . . . . . . . . . . . . . . . . . . . 94
Protection of the radio spectrum . . . . . . . . . . . . . 94
EMC and safety notices . . . . . . . . . . . . . . . . . . . 96
Radiation safety (non-EU installations) . . . . . . . . . 96
EMC . . . . . . . . . . . . . . . . . . . . . . . . . . . 97
Electrical safety . . . . . . . . . . . . . . . . . . . . . . 97
Earth symbols . . . . . . . . . . . . . . . . . . . . . . . 98
RCM approval . . . . . . . . . . . . . . . . . . . . . . . . 99
Index

TABLE OF CONTENTS
iv ENVOY™ TRANSCEIVER GETTING STARTED GUIDE
This page has been left blank intentionally.

LIST OF FIGURES
ENVOY™ TRANSCEIVER GETTING STARTED GUIDE v
List of figures
Figure 1: 2220 Handset . . . . . . . . . . . . . . . . . . . . . . . . . . . . . . . . 3
Figure 2: 2221 Handset . . . . . . . . . . . . . . . . . . . . . . . . . . . . . . . . 5
Figure 3: 2230 Desk Console . . . . . . . . . . . . . . . . . . . . . . . . . . . 7
Figure 4: Wizard Startup screen . . . . . . . . . . . . . . . . . . . . . . . . 14
Figure 5: Typical menu screen . . . . . . . . . . . . . . . . . . . . . . . . . 26
Figure 6: Menu structure (user level, basic view) . . . . . . . . . . . 27
Figure 7: Basic view (no advanced view indicator) . . . . . . . . . 29
Figure 8: Advanced view . . . . . . . . . . . . . . . . . . . . . . . . . . . . . 30
Figure 9: Find function . . . . . . . . . . . . . . . . . . . . . . . . . . . . . . . 33
Figure 10: Highlighted icon . . . . . . . . . . . . . . . . . . . . . . . . . . . . 35
Figure 11: Functions on the menu bar . . . . . . . . . . . . . . . . . . . . . 36
Figure 12: Example of an editable text field . . . . . . . . . . . . . . . . 38
Figure 13: List of entries, with and without focus . . . . . . . . . . . 42
Figure 14: Entry with a check box . . . . . . . . . . . . . . . . . . . . . . . 43
Figure 15: A slider value . . . . . . . . . . . . . . . . . . . . . . . . . . . . . . . 44
Figure 16: Screen that has changes to be saved . . . . . . . . . . . . . 46
Figure 17: Channel screen . . . . . . . . . . . . . . . . . . . . . . . . . . . . . . 49
Figure 18: Scanning screen . . . . . . . . . . . . . . . . . . . . . . . . . . . . . 50
Figure 19: Call screen . . . . . . . . . . . . . . . . . . . . . . . . . . . . . . . . . 59
Figure 20: Call Log and Call History . . . . . . . . . . . . . . . . . . . . . 75
Figure 21: Typical mobile station . . . . . . . . . . . . . . . . . . . . . . . . 81
Figure 22: Typical fixed station . . . . . . . . . . . . . . . . . . . . . . . . . 87

LIST OF FIGURES
vi ENVOY™ TRANSCEIVER GETTING STARTED GUIDE
This page has been left blank intentionally.

LIST OF TABLES
ENVOY™ TRANSCEIVER GETTING STARTED GUIDE vii
List of tables
Table 1: Keys and their function . . . . . . . . . . . . . . . . . . . . . . . . 8
Table 2: Character-entry mode . . . . . . . . . . . . . . . . . . . . . . . . 39
Table 3: Specifications . . . . . . . . . . . . . . . . . . . . . . . . . . . . . . . 77
Table 4: Cables for a typical mobile Envoy™ station . . . . . . . 82
Table 5: Cables for a typical fixed Envoy™ station . . . . . . . . 88
Table 6: Earth symbols . . . . . . . . . . . . . . . . . . . . . . . . . . . . . . 98

LIST OF TABLES
viii ENVOY™ TRANSCEIVER GETTING STARTED GUIDE
This page has been left blank intentionally.

ENVOY™ TRANSCEIVER GETTING STARTED GUIDE 1
1Introduction
Congratulations on choosing a Codan Envoy™ Transceiver to
meet your HF communications needs. You can expect many years
of reliable high performance, and if ever assistance is required,
Codan’s world-class after-sales support team is ready to help.
Please read this guide thoroughly and retain it for future reference.
There is an index at the end of this guide to assist you in finding
information.

INTRODUCTION
OVERVIEW OF THIS GUIDE
2ENVOY™ TRANSCEIVER GETTING STARTED GUIDE
Overview of this guide
This guide provides instructions on how to connect up your
Envoy™ Transceiver, and how to perform basic setup and
operating tasks. It assumes that you have limited knowledge of HF
communication and of using an HF transceiver.
Detailed information for setting up a particular system and
extensive reference material are provided on the CD at the back of
this guide.
This guide contains the following sections:
Using the wizard—describes the steps in the wizard that are used
to set up the transceiver
Navigating the menu structure—describes how to navigate the
menu structure and perform basic selection and editing functions
Operating the transceiver—describes how to operate the
transceiver and how to make calls
Adding a contact—describes how to add a contact
Specifications—provides a list of specifications for the transceiver
Installing the transceiver—describes how to mount and connect
the transceiver in mobile and fixed stations
Compliance—provides mandatory compliance information

INTRODUCTION
THE 2220 HANDSET
ENVOY™ TRANSCEIVER GETTING STARTED GUIDE 3
The 2220 Handset
The 2220 Handset is a control point for the Envoy™ Transceiver.
The user interface provides an icon-based menu structure for easy
setup and operation of the transceiver.
Figure 1: 2220 Handset
The 2220 Handset is a hand-held device that has a microphone, a
PTT button, a screen, navigation keys, and numeric keys. The
keypad enables you to control and configure the transceiver system
via the user interface. The handset and an external speaker connect
to the RF unit via a special interface cable.
navigation and
software keys
Power key Emergency key
numeric keys
USB connector
screen
microphone
CALL SCAN
OK
1
TUNE FUNC MODE
FREE Rx
SEC
VS
VIEW
EASI
TAL K
ABC DEF
GHI JKL MNO
PQRS TUV WXYZ
23
456
789
0
PTT

INTRODUCTION
THE 2220 HANDSET
4ENVOY™ TRANSCEIVER GETTING STARTED GUIDE
The 2220 Handset is shipped from the factory with standard hot
keys programmed to the numeric keys. The function that each
standard hot key performs is written on the numeric key in blue
text. You may also add your own macros and assign these to a hot
key.
Related links:
Keypad

INTRODUCTION
THE 2221 HANDSET
ENVOY™ TRANSCEIVER GETTING STARTED GUIDE 5
The 2221 Handset
The 2221 Handset is a control point for the Envoy™ Transceiver.
The user interface provides an icon-based menu structure for easy
operation of the transceiver. It has a condensed set of keys for use
in simpler communication scenarios.
Figure 2: 2221 Handset
CALL SCAN
OK
navigation and
software keys
Power key Emergency key
USB connector
microphone
screen
PTT

INTRODUCTION
THE 2221 HANDSET
6ENVOY™ TRANSCEIVER GETTING STARTED GUIDE
The 2221 Handset is a hand-held device that has a microphone, a
PTT button, a screen, and navigation keys. The navigation keys
enable you to operate the transceiver system via the user interface
using pre-defined profile information. Typically, this profile is
fully configured using the TPS system programmer. The handset
and an external speaker connect to the RF unit via a special
interface cable.
Related links:
Keypad

INTRODUCTION
THE 2230 DESK CONSOLE
ENVOY™ TRANSCEIVER GETTING STARTED GUIDE 7
The 2230 Desk Console
The 2230 Desk Console is a control point for the Envoy™
Transceiver. The user interface provides an icon-based menu
structure for easy setup and operation of the transceiver. The desk
console is an optional accessory for a fixed station.
Figure 3: 2230 Desk Console
The 2230 Desk Console has a boom microphone, a built-in speaker,
a PTT button, a screen, navigation keys, function keys, and
numeric keys. The console also supports the use of headphones and
a foot-switched PTT device. The keypad enables you to control and
configure the transceiver system via the user interface.
The 2230 Desk Console is shipped from the factory with standard
hot keys programmed to the numeric keys. The function that each
standard hot key performs is written on the numeric key in blue
text.
Related links:
Keypad
Desk Console
™
function keys
numeric keys
navigation and
software keys
PTT
speaker
boom microphone
screen
Power key
Emergency key

INTRODUCTION
KEYPAD
8ENVOY™ TRANSCEIVER GETTING STARTED GUIDE
Keypad
Standard macros are programmed in the transceiver in the factory.
You can create a macro and assign it to a hot key.
Table 1: Keys and their function
Key Function
Switches on the transceiver.
Switches off the transceiver (hold for 2 sec).
Performs a hot-key sequence with another key (hold + key):
+ 0 jumps to the Brightness screen
+ 2 toggles advanced view
+ 3 jumps to the Select Language screen
+ SEC performs secure erase
+ performs the built-in test
Starts a chain call of emergency contacts (hold for 2 sec).
PTT Press-to-talk.
Cancels out of editing and calls before they are connected.
Performs the function shown directly above the key in the
menu bar.
Scrolls left in a list of values.
Moves the cursor/highlight to the left.
Reduces the volume when the indicator is shown in the
menu bar.
Scrolls right in a list of values.
Moves the cursor/highlight to the right.
Increases the volume when the indicator is shown in the
menu bar.
Scrolls up in a list of entries.
Moves the highlight up a row.

INTRODUCTION
KEYPAD
ENVOY™ TRANSCEIVER GETTING STARTED GUIDE 9
Scrolls down in a list of entries.
Moves the highlight down a row.
OK Enters the submenu or list of entries represented by the
selected icon.
Toggles the selection of a check box.
CALL Starts the calling process by jumping to the call screen.
Jumps to Contacts/Call History/Emergency Contacts/Last
Heard Log.
SCAN Toggles scanning on and off.
Ends a call.
1TUNE Enters 1 in character-entry mode.
Tunes the antenna.
2FUNC Enters 2, a, b, c, A, B, C in character-entry mode.
Clarifies the currently selected channel.
3MODE Enters 3, d, e, f, D, E, F in character-entry mode.
Selects the next allowed mode for the current channel.
4FREE Rx Enters 4, g, h, i, G, H, I in character-entry mode.
Accesses the free-tune receive function.
5Enters 5, j, k, l, J, K, L in character-entry mode.
Toggles the operating mode of a crosspatch, if connected.
Shows the firmware version of a crosspatch, if connected
(hold for 2 sec).
6Enters 6, m, n, o, M, N, O in character-entry mode.
7V/S Enters 7, p, q, r, s, P, Q, R, S in character-entry mode.
Toggles the type of mute selected.
Table 1: Keys and their function (cont.)
Key Function

INTRODUCTION
KEYPAD
10 ENVOY™ TRANSCEIVER GETTING STARTED GUIDE
8SEC Enters 8, t, u, v, T, U, V in character-entry mode.
Toggles secure mode on and off.
Enables you to enter a PIN for a secure session, or access
secure information (hold for 2 sec).
9Enters 9, w, x, y, W, X, Y in character-entry mode.
0VIEW Enters 0 or a space in character-entry mode.
Toggles between the channel screen and Contacts/Call
History.
EASITALK Enters a special character (repeated press, or hold for 2 sec).
Toggles Easitalk™ on or off.
Toggles character-entry mode.
Table 1: Keys and their function (cont.)
Key Function
This manual suits for next models
2
Table of contents
Other Codan Transceiver manuals

Codan
Codan 9390 User manual

Codan
Codan 2110 series Assembly instructions

Codan
Codan Envoy User manual

Codan
Codan 8525 Owner's manual

Codan
Codan 9480 Service manual

Codan
Codan 8525B Series Operating manual

Codan
Codan 8528 Series User manual

Codan
Codan 5705 User manual

Codan
Codan 2110 series User manual

Codan
Codan 2110 series User manual

Codan
Codan SRx User manual

Codan
Codan 9313 Service manual

Codan
Codan 5700 series User manual

Codan
Codan Cascade User manual

Codan
Codan Envoy User manual

Codan
Codan X-2 User manual

Codan
Codan HF SSB User manual

Codan
Codan HF2000 User manual

Codan
Codan 2110 series User manual

Codan
Codan 2110 series User manual