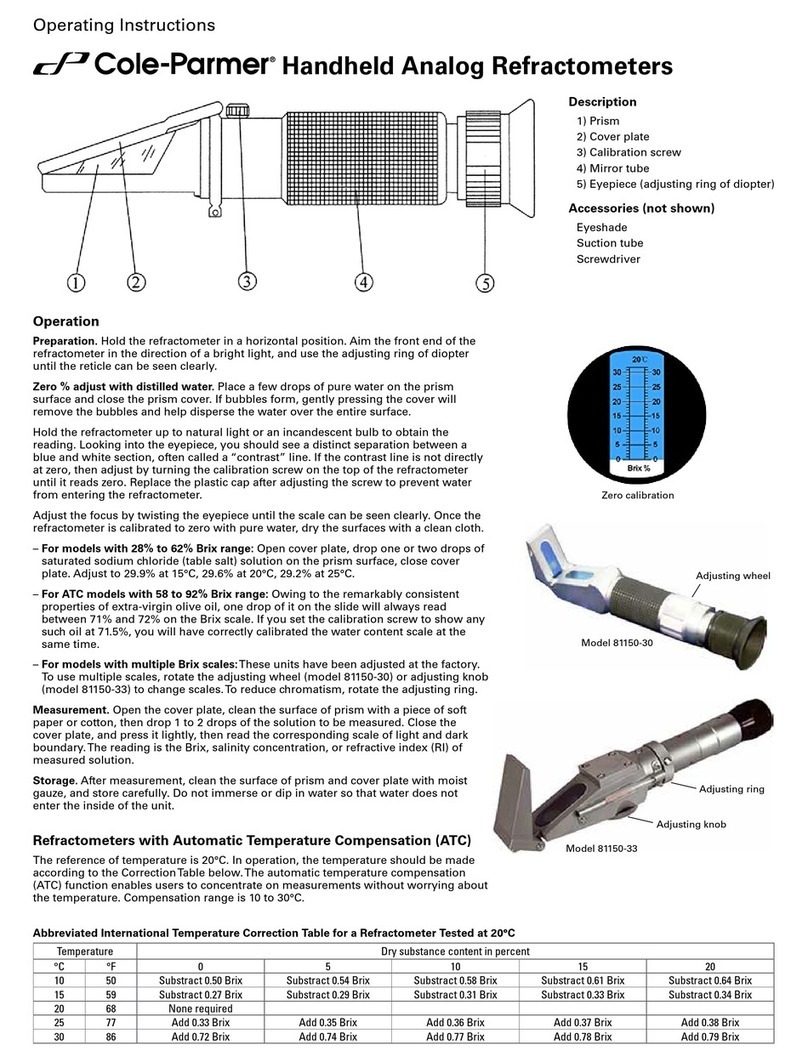
Cole Parmer MB-200-40 User manual

(P.N. 3076611320, Revision B, July 2022)
MB-200-40 Moisture Analyzer
© 2022

© 2022


Page 1 of 60
1.0 CONTENTS
1.0
CONTENTS ........................................................................................................................ 1
2.0
INTRODUCTION................................................................................................................. 3
3.0
SET UP............................................................................................................................... 4
3.1
UNPACKING AND SETTING UP YOUR ANALYZER....................................................................................4
3.2
ASSEMBLING THE ANALYZER.................................................................................................................... 5
3.3
LEVELING THE ANALYZER..........................................................................................................................6
3.4
WARM-UP TIME............................................................................................................................................6
3.5
LOCATING AND PROTECTING YOUR ANALYZER..................................................................................... 7
3.6
SAFETY.........................................................................................................................................................8
4.0
DISPLAY and KEYPAD.................................................................................................... 11
4.1
NUMERIC ENTRY METHOD.......................................................................................................................13
5.0
REAR PANEL INTERFACES............................................................................................ 14
5.1
POWER .......................................................................................................................................................14
5.2
DATA INTERFACE ......................................................................................................................................14
5.3
SECURITY LOCK ........................................................................................................................................14
6.0
BASIC OPERATION......................................................................................................... 15
6.1
SETUP OF METHOD...................................................................................................................................15
6.1.1
MANUALLY SETTING TEST PROCEDURES.................................................................................17
6.1.2
PRINT CURRENT SETTINGS.........................................................................................................20
6.2
STORE TEST SETTINGS...........................................................................................................................20
6.3
RECALL TEST SETTINGS ..........................................................................................................................22
6.4
DELETE TEST SETTINGS ..........................................................................................................................23
6.5
REVIEW TEST SETTINGS.........................................................................................................................23
7.0
RUNNING A TEST............................................................................................................ 24
8.0
PRINT RESULTS.............................................................................................................. 27
8.1
PRINTING FINAL TEST RESULTS .............................................................................................................27
10.0
ANALYZER MENUS......................................................................................................... 28
10.1
SUPERVISOR MENUS................................................................................................................................29
10.1.1
SERIAL INTERFACE PARAMETERS.............................................................................................30
10.1.2
SETUP PARAMETERS ................................................................................................................... 31
10.1.3
CALIBRATION.................................................................................................................................33
10.1.3.1
MASS CALIBRATION......................................................................................................................33
10.1.3.2
TEMPERATURE CALIBRATION.....................................................................................................34
10.1.3.3
CALIBRATION REPORT.................................................................................................................37
10.1.4
PASSCODES ..................................................................................................................................38
10.1.4.1
FORGOTTEN PASSCODES...........................................................................................................38
11.0
SERIAL INTERFACE........................................................................................................ 39
11.1
RS-232 HARDWARE...................................................................................................................................39
11.3
INPUT COMMANDS ....................................................................................................................................39
11.4
PRINTING RESULTS...................................................................................................................................40
11.5
ANALYZER CONFIGURATION THROUGH THE SERIAL INTERFACE .....................................................43
11.5.1
TEST PARAMETERS......................................................................................................................43
11.5.2
BALANCE SETUP PARAMETERS..................................................................................................44
11.5.3
ANALYZER RECALL PARAMETERS .............................................................................................45
11.5.4
REQUEST VALUES OF PARAMETERS........................................................................................45
11.6
CONTINUOUS OUTPUT..............................................................................................................................46
12.0
SPECIFICATIONS & FEATURES..................................................................................... 47
13.0
MENU STRUCTURE......................................................................................................... 49
14.0
SAMPLE PREPARATION................................................................................................. 53
15.0
GUIDANCE NOTES.......................................................................................................... 55
© 2022
Page 2 of 60

Page 3 of 60
2.0 INTRODUCTION
This Instruction Manual will familiarize you with the installation, accessories,
trouble-shooting, after sales service information, general maintenance of the
analyzer, etc. and will guide you through the various applications.
Please read this Manual thoroughly before starting the operation. If you need
any clarifications, feel free to contact your supplier.
PRODUCT OVERVIEW
FEATURES:
•
Large easy to read LCD display with
backlight
•
Bi-directional RS-232 interface
•
Can be configured to print a GLP-
compliant report after each calibration
to include the time, date, analyzer
number and a verification of the
calibration
•
400 watt Halogen Heater
•
Date and time
•
Easy to use, sealed keypad
•
Password protection
•
Security locking point
•
Multiple languages for display and
printing
© 2022

Page 4 of 60
3.0 SET
UP
3.1 UNPACKING
AND
SETTING
UP
YOUR
ANALYZER
Remove the balance from the packing by carefully lifting it out of the box.
Inside the box you will find everything needed to start using the analyzer-
AC power cable
Pan Support
Stainless Steel Lower Chamber Insert
Sample Pan Lifter
Sample Pans (Qty 10)
Spare Fuse 5A, Time Lag, High capacity
This User Manual
IMPORTANT:
Before applying power make sure the balance is configured for the power in
your area. The analyzer will have a label on the rear panel showing the
voltage required: 115VAC (±10%) or 230VAC (±10%). If the label does not
match your power do not attempt to use the analyzer, damage to the balance
could result.
The balance should be positioned to allow easy access to the power
connection on the rear panel. Ensure the power cable is fully engaged to
ensure safe operation.

Page 5 of 60
3.2 ASSEMBLING
THE
ANALYZER
For best performance, let the analyzer warm up for 30 minutes before using.
Locate the balance on a solid
surface, free from vibration with
good ventilation around it.
Place the lower reflector (1) into
the base of the weighing chamber
Gently place the pan support (2)
into the access hole. Rotate to
position.
Place the sample pan lifter (3) into
the weighing chamber, rotate so
the tangs on the lifter do not
interfere with the pan supports
and the handle exits the chamber
using one of the gaps in the
cover.
Place an empty aluminium
weighing tray (4) on the pan
support
Level the balance using the
adjustable feet and spirit level
For some applications it is desirable to run the analyzer in a dummy run to
warm up the weighing chamber and the surrounding area before doing the
actual test. See section 14 for other ideas to help ensure accurate test
results.
© 2022

Page 6 of 60
3.3 LEVELING THE ANALYZER
After placing the balance in a suitable location,
level it by using the spirit level on the rear of the
analyzer. To level the balance turn the two
adjustable feet at the rear of the analyzer until
the bubble in the spirit level is centered.
3.4 WARM-UP TIME
Attach the power supply cable to the connector
on the rear of the analyzer. The master power
switch is on the rear panel, next to the power
cable. Turn the power on.
The display will indicate the serial number and
the software revision number followed by the
capacity. Next the analyzer will run a self-test by
displaying all segments. The display will then
show zero weight accompanied by the 0
symbol.
Before you start weighing, wait for the analyzer to achieve a stable internal
temperature. In addition it may be necessary for some material test to
preheat the weighing chamber so that the delay to reach operating
temperature is minimized.
A stable sign
~
is shown when the balance is in
stable condition. It will turn off if the reading is
not stable.
Exact zero is shown when the “0 “ symbol
is on to the left of the display area.

Page 7 of 60
3.5 LOCATING AND PROTECTING YOUR ANALYZER
In order to keep your analyzer functioning at its best we suggest that you do
the following:
Avoid extremes of temperature. Do not place in
direct sunlight or near air conditioning vents.
Make sure there are no heat sensitive or
flammable materials above the analyzer. The
exhaust from the weighing chamber can be very
hot.
Make sure the analyzer is located on a strong
table and free from vibration.
Avoid unstable power sources. Do not use near
large users of electricity such as welding
equipment or large motors.
Keep free from vibration. Do not place near
heavy or vibrating machinery.
Avoid high humidity that might cause
condensation. Keep away from direct contact
with water. Do not spray or immerse the
analyzers in water.
Do not place near open windows, air-
conditioning vents or fans that may cause a
draft and unstable readings.
Keep the analyzer clean. Clean up spills in the weighing chamber before
they become baked on.
© 2022

Page 8 of 60
3.6 SAFETY
This Moisture Analyzer complies with the European Council Directives and
international standards for electromagnetic compatibility, and safety
requirements.
Improper use or handling can result in damage or injury.
To prevent damage to the equipment, read these operating instructions
thoroughly. Keep these instructions in a safe place.
For safe and dependable operation please follow these instructions.
•The Moisture Analyzer is used for determination of the moisture in
samples. Do not use it for any other purpose. Improper use is dangerous
and can cause injury or damage to other property.
•The Moisture Analyzer must be operated as described in this manual. The
environment must be controlled so that hazardous materials or conditions
are not present.
•The Moisture Analyzer must be operated only by trained personnel who
are familiar with the properties of the samples used and with the operation
of the instrument. Do not leave the analyzer unattended when running a
test.
•Make sure before getting started that the voltage printed on the rear panel
is identical to your local voltage.
•Your Moisture Analyzer is supplied with a 3-pin power cable with a
grounding conductor. Use cables that meet the safety standards for your
location and include the earth ground conductor.
•DO NOT disconnect the earth ground connection.
•The power cable should not touch the enclosure where it can be heated
during the test.
•Remove the power cable if the Moisture Analyzer is serviced.

Page 9 of 60
•Protect the Moisture Analyzer from external liquids. Clean any spills
immediately.
•If there is any visible damage to the Moisture Analyzer or the power cable,
stop using the instrument immediately. Unplug the power and isolate the
analyzer. Do not use until the faults have been repaired.
•All repairs must be done by a trained technician. There are no user
serviceable parts in the enclosure.
HOT SURFACES
•During test the cover of the heating chamber can become very hot,
especially near the top vent. Keep all material away from the vent area. Do
not touch hot surfaces.
•Leave 20 cm (about 8 inches) around the moisture analyzer and 1 m (3
ft.) above.
•Samples will be hot after a test. Do not use bare fingers to pick up any
samples pans or touch the materials. The internal surfaces of the weighing
chamber may be hot for some time after a test.
MATERIALS
•The Moisture Analyzer is not suitable for all materials. During the drying
process samples will be heated to high temperatures. Materials that are
flammable or explosive should not be tested.
© 2022

Page 10 of 60
•Materials that emit toxic, caustic or noxious fumes should only be tested in
suitable fume hoods or with other ventilation.
•Materials that will have a film on the surface during drying may cause high
internal pressures to be present. These materials should not be tested
using this method.
•Materials that emit aggressive or corrosive fumes (such as acids) should
be tested using small quantities of material in an area with good
ventilation.
•See Section 14 for further information on sample preparation.
The user shall be liable and responsible for any damage that arises in
connection with this moisture analyzer.

Page 11 of 60
4.0 DISPLAY
AND
KEYPAD
The LCD has unique symbols to indicate the following:
0
Zero
Stable
Net Net weight
Note: Some symbols shown on the display are not used in the analyzers.
During the moisture test the main display will show the percent moisture. It
can be switched to other values using the [Dspl/
]key, for example, current
mass.
The secondary display will show the elapsed time and temperature during a
test.
Typical Displays that would be used are:
Weighing: Showing no weight on the pan,
stable and at zero point.
During a typical Moisture test: Showing a test in progress for
3:25 minutes, with a current
temperature of 123ºC and
20.05% moisture, the test is still
running.
© 2022

Page 12 of 60
The keypad has dual purpose function keys to allow a selected menu item or
value to be incremented or changed. Right/left shift to change the active digit
and up/down to increment or decrement a value.
The keypad has the following keys to operate the analyzer.
Keys Primary function Secondary function
To turn the analyzer to ON or
Standby
[
0/T
/ Esc] A combined zero and tare function To escape from setup functions
and modes
[Start] To begin the moisture test after all
settings and sample preparation
have been completed. During a
test, used to stop the test.
[Test/
] Selects moisture test parameters
such as temperature, method,
results.
Scrolls through menu options t
o
decrement or change a
displayed value

Page 13 of 60
Keys Primary function Secondary function
[PST/
] Store or Recall pre-stored test
parameters. To advance a flashing digit by
one position to the right.
To go back by one step during
setup functions
[Print/
] Instructs the analyzer to print data To advance a flashing digit by
one position to the left
[Dspl/
]
Changes the display to read other
data during a moisture test.
To increase or change a
displayed value or scroll
through options forward
[Setup/Enter] Enters the Setup parameters
(Supervisor Menus) Enters a function or saves a
value while manually entering
unit weight or check weighing
limits
4.1 NUMERIC ENTRY METHOD
To set a value when required, use the keys as given below:
- [Dspl/
]and [Test/
]keys to increase or decrease the flashing digit
- [Print/
] and [PST/
] keys to advance or move back the digit
- [Setup/Enter] key to accept the value
© 2022

Page 14 of 60
5.0 REAR
PANEL
INTERFACES
The rear panel has connectors for the data interface, fuse holder, security
lock location and power supply input.
5.1
POWER
Make certain your balance is compatible with the power supply in your area.
If the voltage is not the same the analyzer can be damaged. Contact your
supplier if you require assistance.
The power connection uses a standard IEC C13 socket on the cable with a
plug suitable for the location. Do not use adaptors if the plug does not match
your power supply.
The fuse should only be replaced with a time lag type fuse with high breaking
capacity, 5Amp current rating. The fuse is a standard 5 x 20mm size. To
replace the fuse remove all power from the analyzer, unscrew the fuse holder
cover to extract the old fuse, replace with a new fuse. If the fuse should blow
again, the analyzer must be serviced by a qualified service representative.
There are no user serviceable parts inside. Contact your supplier.
5.2 DATA
INTERFACE
The RS-232 interface is a general purpose serial interface for
communications with the analyzer, using a DE-9P type connector. Refer to
section 11.0 for details of the interface.
5.3 SECURITY
LOCK
The center of the rear panel has a location to mount a Kensington type
security lock. Refer to the instructions that come with the lock for details.

Page 15 of 60
6.0 BASIC
OPERATION
When first turned on the balance will act as a basic balance showing grams
weight on the display.
If a passcode has been set to limit access to the weighing functions of the
analyzer the display will show “PASSCODES”. The display will change to
show 7 digits set to zero with the rightmost digit flashing. Use the numeric
entry method (see section 4.1) to enter the code. Make sure to enter the
correct passcode to continue. See the Section 10.1.4 for details.
While in the weighing mode the test conditions for a drying test can be set.
6.1 SETUP
OF
METHOD
•The balance is set to perform a drying test using a method determined
by the user. The drying method can be input by using the keyboard or
entered from a PC using the RS-232 interface.
Regardless of the method used it will be necessary to program the analyzer
with the following:
Type of test:
•% moisture =100 * ((initial mass - dry mass)/initial mass)
•% solid =100 * (dry mass/initial mass)
•% moisture vs. dry weight =100 * ((initial mass - dry mass)/dry mass)
Also called ATRO Moisture
•% solid vs. dry weight = 100 * (Initial mass/dry mass)
Also called ATRO Solid
ATRO Moisture or Solid test are special applications specific to some
industries. %Moisture and %Solid are the more common calculations.
Heat Control
•Single temperature, heat to a set temperature (50-160ºC).
© 2022

Page 16 of 60
Interval
Set the time interval at which the results are computed and printed. Range is
1 to 99 seconds.
End Point Determination (manual stop active in all tests)
The analyzer ends a test when the results are stable within a value set by the
user. The test will stop when the weight changes less than a preset amount
in a preset time. The default setting is 0.002g in 15 seconds. The user can
set other values depending upon model.
Start Criteria
•Start Manually when the [Start] key is pressed
•Start Automatically when cover lowered.
Delays 5 seconds after cover is down before beginning.
Print settings
To set if the analyzer should print and store results and when printing if the
compete test results or only the summary is printed and stored in the
analyzer’s internal memory.
Default settings
% Moisture
Single Temperature = 110ºC
Rapid = Off
Interval Time = 5 seconds
End Point Determination = Time and stable result
Time 60 minutes, and
Stable = 0.002g/15 seconds
Start Criteria = manual start
Print Test = on
Print Format = Complete

Page 17 of 60
6.1.1 MANUALLY SETTING TEST PROCEDURES
Press the [Test/
]key to set the test procedure. During the process use the
numeric entry procedure described in section 4.1 to enter or change a
setting.
Pressing [Print/
] at any time during this procedure will print a list of the
current settings. See 6.1.2
Pressing [
0/T
/ Esc] will always escape back to normal weighing without
a change to the parameter being displayed. Any parameter changed before
this time will be accepted.
PROCEDURE
Press [Test/
]to show “rESULt” with the current setting displayed,
Options are “Moisture”, “Solid”, “ATRO Moist”, “ATRO Solid”
Use arrow keys, [Dspl/
]and [Test/
], to change and press [Setup/Enter]
to continue.
“Single” Selected
Show “Single” “123 C” with the left digit flashing. The user can use the
[PST/
] key to select another digit or the [Dspl/
]and [Test/
]to set the
temperature, Range is 050 C to 160 C
Interval Setting
The next setting will be to set the time interval the analyzer uses to determine
results and to print the current result. The analyzer will compute the percent
ATRO MOIST
result
MOISTURE
result
SINGLE
ºC
123
© 2022
Table of contents
Other Cole Parmer Measuring Instrument manuals

Cole Parmer
Cole Parmer Jenway 7415 User manual

Cole Parmer
Cole Parmer Melting Point S MP-800D Series User manual

Cole Parmer
Cole Parmer Jenway 76 Series User manual

Cole Parmer
Cole Parmer 1100 Series User manual

Cole Parmer
Cole Parmer 81150-30 User manual

Cole Parmer
Cole Parmer 1200 Series User manual

Cole Parmer
Cole Parmer SP-300 Series User manual

Cole Parmer
Cole Parmer Techne FSC400D User manual

Cole Parmer
Cole Parmer Stuart SMP11 User manual

Cole Parmer
Cole Parmer 81150-48 User manual