Collomix VIROneo VIBA X.30 User manual

Service Menu VIBA X.30, VIROneo
E: 2019-12-11 / michael schmidt |Ü: 2021-05-05 / 14 / michael schmidt |D: 2021-05-05 / michael schmidt
CSI035_EN_Service menu VIBA X.30, VIROneo.docx
2021-05-05
Seite 1/21
Contents
1. ABOUT THIS DOCUMENT .................................................................................................................................... 2
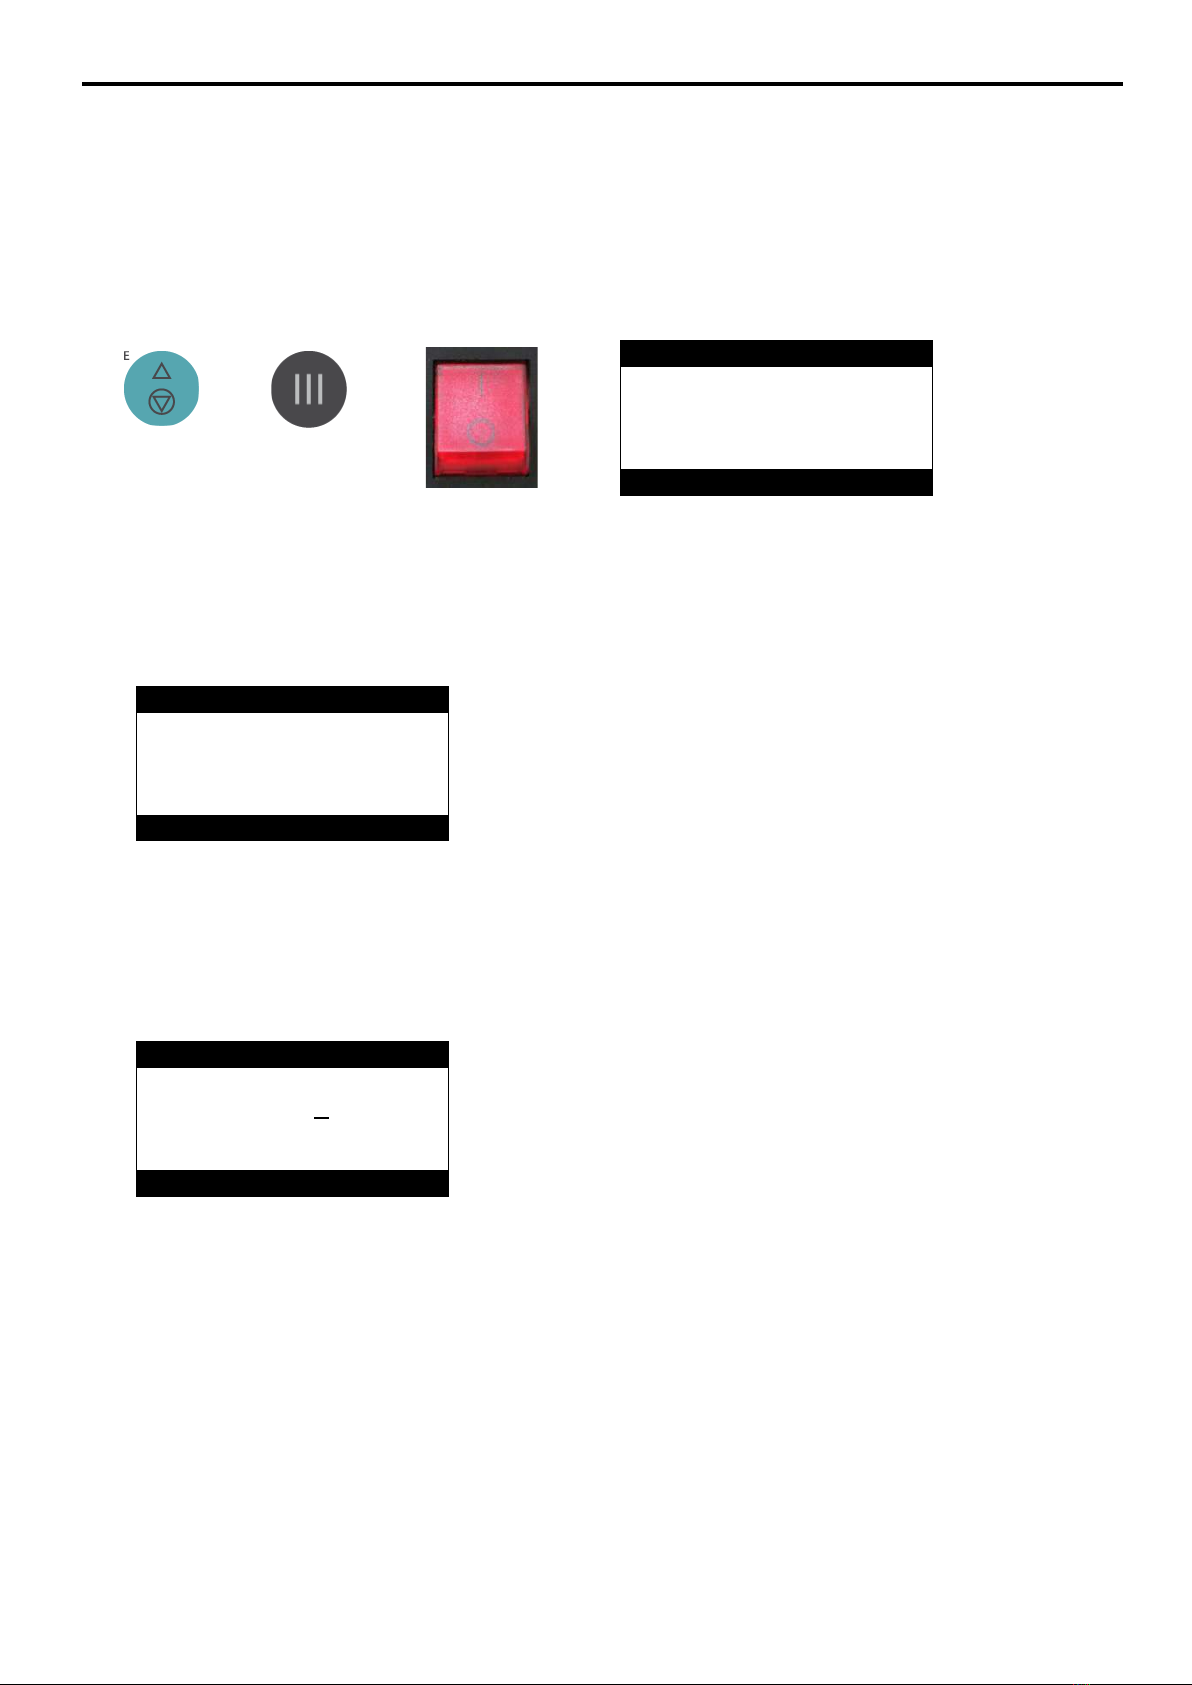
2. ACTIVATE SERVICE MENU ................................................................................................................................... 3
2.1 CALL UP LOGIN ........................................................................................................................................................ 3
2.2 ENTER CODE ........................................................................................................................................................... 3
2.3 CODE ENTRY ERROR.................................................................................................................................................. 3
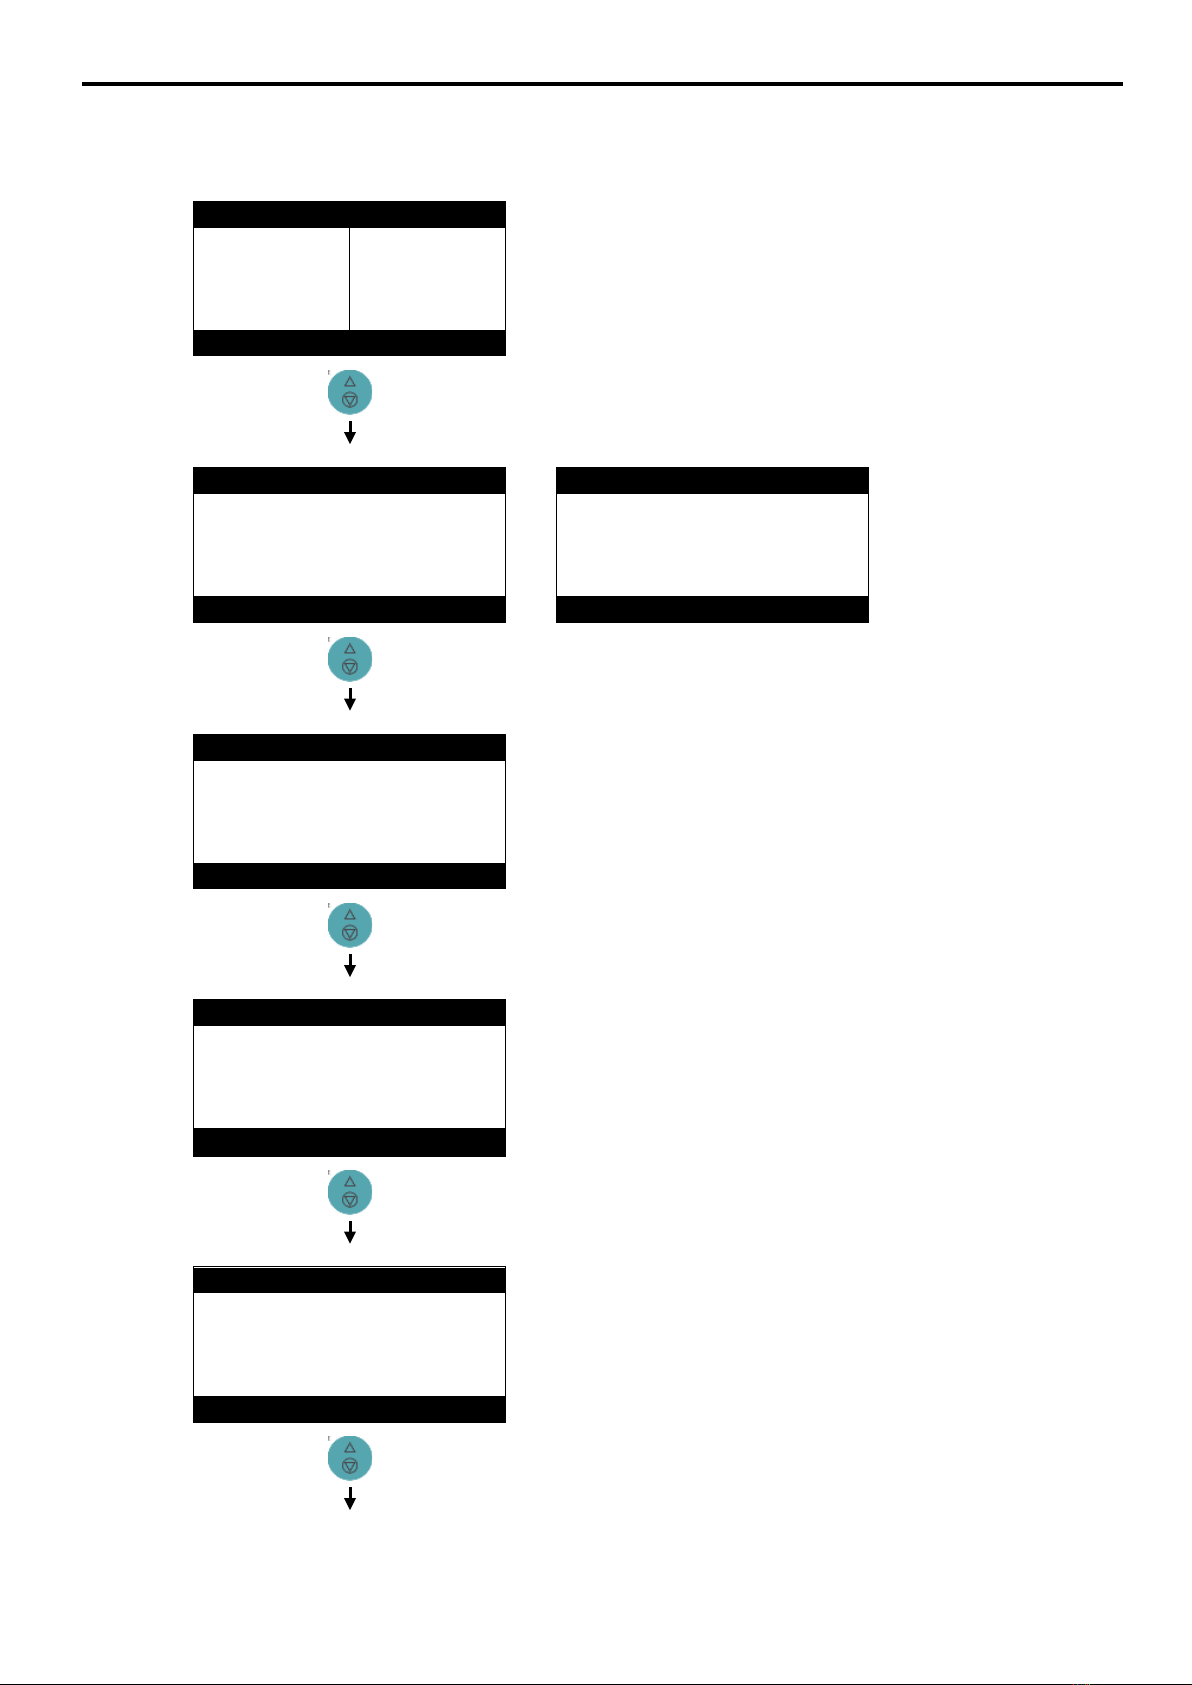
3. NAVIGATION IN SERVICE MENU.......................................................................................................................... 4
3.1 KEYS FUNCTION ....................................................................................................................................................... 4
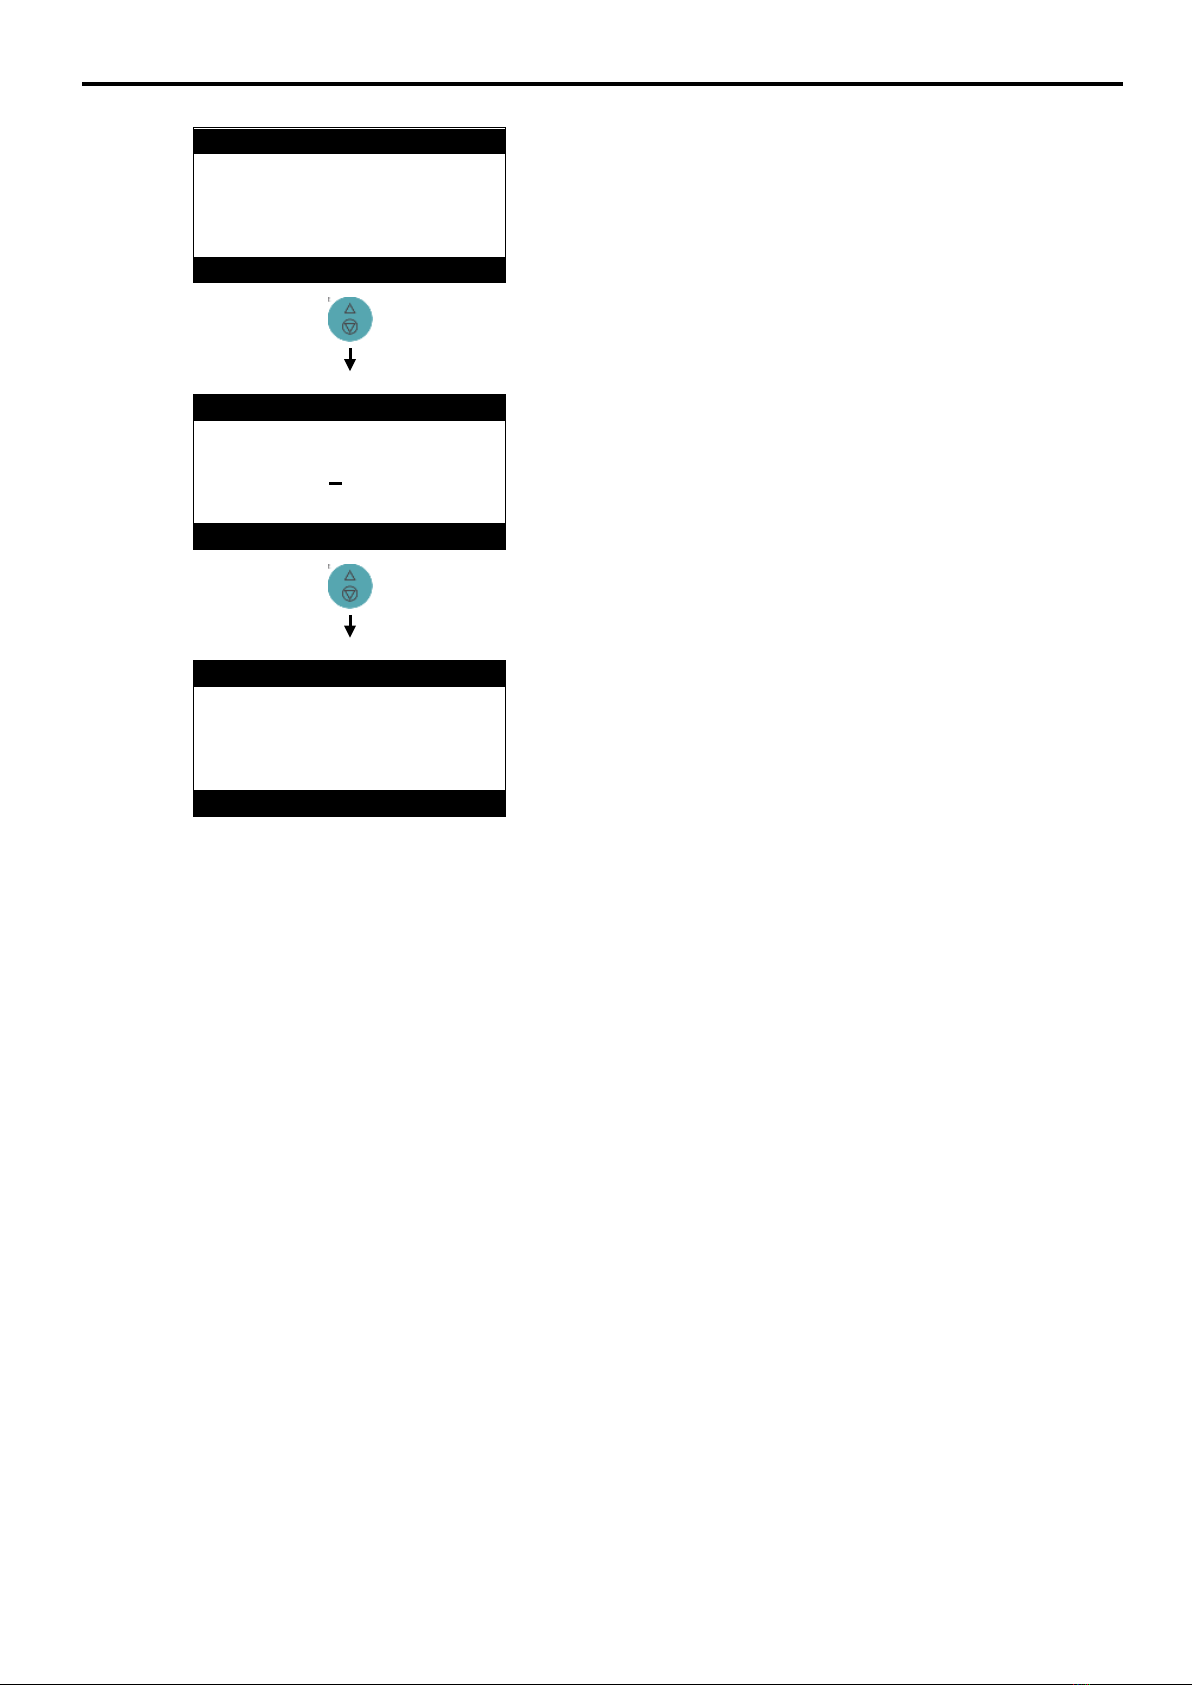
4. MENU STRUCTURE .............................................................................................................................................. 5
5. MENU DESCRIPTION ........................................................................................................................................... 8
5.1 TEST..................................................................................................................................................................... 8
5.2 SET TIME -VIBA X.30, VIRONEO AND VIBA X.30 S.................................................................................................. 9
5.3 EDIT TIMELINE -VIBA X.30 V............................................................................................................................. 10
5.4 SET BUTTONS .................................................................................................................................................... 11
5.5 SET CLAMP FORCE ............................................................................................................................................. 12
5.6 SET CLAMP PAR ................................................................................................................................................. 16
5.7 SET DOOR MENU............................................................................................................................................... 19
5.8 SET LANGUAGE MENU ...................................................................................................................................... 19
5.9 SET TIME &DATE............................................................................................................................................... 19
5.10 OPERATING HOURS........................................................................................................................................... 19
5.11 OPERATING CYCLES........................................................................................................................................... 20
5.12 ENTER S/N ......................................................................................................................................................... 20
5.13 SAVE CHANGES MENU ...................................................................................................................................... 20
6. SCHEMATIC DIAGRAM .......................................................................................................................................21

Service Menu VIBA X.30
2021-05-05 Seite 2/21
1. About this document
These instructions describe the Service menu of the machine in which various functions are tested and
machine specific parameters may be modified.
Please carefully read the operating instructions provided with the machine prior to all work
in the service menu and pay particular attention to the safety and warning indications
contained therein.
These instructions are intended for trained personnel.

Service Menu VIBA X.30
2021-05-05 Seite 3/21
2. Activate service menu
2.1 Call up login
In order to call up the service menu first use the main switch to switch the machine off. Simultaneously press button E
and button III and keep pressed down whilst you switch the machine on via the main switch. After a short period ENTER
CODE will appear on the display.
+
ENTER CODE
CODE : 0000
ENTER WITH E
+
-
>
Button
E Button III
2.2 Enter code
Enter the code 3970 on the keypad to activate the service menu and finish the entry with button E.
ENTER CODE
CODE : 3970
ENTER WITH E
+
-
>
2.3 Code entry error
With incorrect code entry the display will flash; switch the machine off via the main switch and repeat the
entry procedure.
ENTER CODE
CODE : 0000
INVALID CODE
+
-
>

Service Menu VIBA X.30
2021-05-05 Seite 4/21
3. Navigation in service menu
Use keys E, I, II and III to navigate in the service menu. The operating of further menu items is analogous to
the example provided below:
Menu Menu +1
Main menu
TEST
D-LOCK
DOOR
*
-
FUSE
E STOP
*
*
F-RUN
MOTOR
EDIT TIME
T1
T2
T3
Submenu
TEST FREERUN
min
0
405mm
actual
0000
10000
max
0
CLOSE
OPEN
Functions
CLOSE OPEN
3.1 Keys function
Key for DOOR •Opening of the door
Key E
•Calling up next menu item
•Back to main menu
•
Confirm entries
Key I
•Calls up left submenu
•Activates left function
Key II
•Calls up middle submenu
•
Activates middle function
Key III
•Calls up right submenu
•Activates right function
M
M

Service Menu VIBA X.30
2021-05-05 Seite 5/21
4. Menu structure
TEST
D-LOCK
DOOR
-
-
FUSE
E STOP
-
*
F-RUN
MOTOR
VIBA X.30
VIBA X.30 S
VIBA X.30 V
SET TIME
0:30 1:00 2:00
T1
T2
T3
EDIT TIMELINE
PGM1
PGM2
PGM3
SET BUTTONS
T1 T2 T3
I
II
III
SELECT HEIGHT
100mm 220mm
LOW
HIGH
SET CLAMP FORCE
600 800 1200
LOW
MED
HIGH

Service Menu VIBA X.30
2021-05-05 Seite 6/21
SET CLAMP PAR
900
F-RUN
ENDPOS
ICC
SET DOOR
YES NO YES
DOOR
START
UCLMP
SET LANGUAGE
ENGLISH
Press E to quit
SELECT
STE TIME&DATE
10:15:28
01.05.2019
+
-
>
OPERATING HOURS
HOURS: 01600:32
+
-
NEXT

Service Menu VIBA X.30
2021-05-05 Seite 7/21
OPERATING CYCLES
CYCLES:00064021
+
-
NEXT
ENTER S/N
S/N: 00980059
+
-
NEXT
SAVE CHANGES
SAVE
UNDO
RESET

Service Menu VIBA X.30
2021-05-05 Seite 8/21
5. Menu description
5.1 TEST
TEST
D-LOCK
DOOR
*
*
FUSE
E STOP
*
*
F-RUN
MOTOR
The function of important components can be tested in the main
menu under TEST.
D-Lock = Door locking system
DOOR = Safety switch
FUSE = DC Safety
E STOP = EMERGENCY OFF switch
The door can be opened using the DOOR key in order to test the
safety switch and door locking system function.
* = Funktion ON / - = Funktion OFF
F-RUN = TEST FREERUN
MOTOR = MOTOR TEST
5.1.1 TEST FREERUN
TEST FREERUN
min
0
410mm
actual
0000
10000
max
0
CLOSE
OPEN
The function of the clamping motor is tested in the TEST FREERUN
submenu.
CLOSE = Close mixing unit
OPEN = Open mixing unit
The mixing unit moves in the selected direction as long as the
button is pressed. The minimum, actual and maximum
performance of the mixing unit is shown in the display info area.
This is a good indicator of the degree of soiling of the spindles.
The opening hight of the mixing unit, displayed in mm, together
with the actual value of the rotary encoder are provided as
additional information.

Service Menu VIBA X.30
2021-05-05 Seite 9/21
5.1.2 MOTOR TEST
MOTOR TEST
ATTENTION
Motor starts!
START
The function of the main motor is tested in the MOTOR TEST
submenu.
START = Mixing process is started
STOP = Mixing process is stopped
A suitable mixing can must be set for the Motor test.
The mixing
unit is clamped and the main motor begins to run after successful
clamping routine.
5.2 SET TIME - VIBA X.30, VIROneo and VIBA X.30 S
SET TIME
T1
T2
T3
EDIT TIME 1
00:30 min
+
-
The mixing times 1-3 are preset in SET TIME main menu.
T1 = Set mix time 1
T2 = Set mix time 2
T3 = Set mix time 3
Keys I to III can be associated with 3 different mixing times.
The
work setting can be modified in 10s steps (m:ss) where necessary.
IMPORTANT:
An over long mixing time results the mixture being heated too
strongly.
Both the mixing can as well as the mixture can be
damaged.
Always, therefore, select the shortest mixing time
possible!

Service Menu VIBA X.30
2021-05-05 Seite 10/21
5.3 EDIT TIMELINE - VIBA X.30 V
EDIT TIMELINE
PGM1
PGM2
PGM3
The parameters of the Mixing programme I-III are set in the EDIT
TIMELINE main menu.
PGM1 = Mixing programme I
PGM2 = Mixing programme II
PGM3 = Mixing programme III
3 mix programmes (PGM1-3) with 6 intervals (0-
5) can be
programmed.
A time and mixing speed can be assigned to each interval.
In order to avoid colour sliding into the lid edge, the mixing
programme should be started slowly.
The overall duration of
the mixing is determined by the type and
quantity of the mixing materials.
5.3.1 EDIT PGM
EDIT PGM-1
Total
:
0:40
Time (0)
:
0:10
Speed (0)
:
40%
TIME
SPEED
>
The mix programme is defined in the EDIT PGM submenu.
Total = PGM1 total time display
Time (0) = Time display for programme step
Speed (0) =
Speed display in % of maximum value for
programme step
TIME = Setting the time
SPEED = Setting the mixing speed
> = Call up next programmed step
5.3.2 EDIT TIME PGM
EDIT PGM-1
Total
:
0:40
Time (0)
:
0:10
Speed (0)
:
40%
+
-
Setting of time for each programme step.
+ = Increase time for programme step
- = Reduce time for programme step 0
Key E = Quit submenu
IMPORTANT:
An over-
long mixing time results the mixture being heated too
strongly.
Both the mixing can as well as the mixture can be
damaged.
Always, therefore, select the shortest mixing time possible!

Service Menu VIBA X.30
2021-05-05 Seite 11/21
5.3.3 EDIT SPEED PGM
EDIT PGM-1
Total
:
0:40
Time (0)
:
0:10
Speed (0)
:
40%
+
-
Setting of time for each programme step.
+ = Increase speed for programme step 0
- = Reduce speed for programme step 0
Key E = Quit submenu
The speed can be set at 40 to 100% of the maximum
rotation speed.
The area from 1 to 39% must not be used as this, depending on the
mixing can, can lead to resonance phenomena.
If 0% is selected the mixing unit will not move.
A pause can be
programmed in this way.
IMPORTANT:
A mixing speed which is
too high can cause damage to the mixing
can.
Check the suitability of the mixing can through a mix test after
each speed modification.
5.4 SET BUTTONS
SET BUTTONS
T1 T2 T3
I
II
III
The assignment of mixing times T1 -T3 (preset under 5.2 SET TIME
SET TIME) to keys I-III can be set in the SET BUTTONS menu.
T1 -T3 = The mixing time can be selected directly
AUTO = The mixing time is selected based on the con-
tainer height
BLANK = The key is not assigned to a function
The desired assignment can be changed by pressing the keys I-III.
IMPORTANT:
With AUTO, the mixing time is automatically selected depending
on the container height.

Service Menu VIBA X.30
2021-05-05 Seite 12/21
5.4.1 SELECT HEIGHT
SELECT HEIGHT
100mm 220mm
LOW
HIGH
EDIT HEIGHT 1
From MEDIUM to
LOW clamp
100mm
+
-
Selecting change over points from which the clamping force is
changed form small (CLAMP LOW) to medium (CLAMP MED) to
high
(CLAMP HIGH).
+ = Increase value
- = Decrease value
Key E = Quit submenu
The setting value corresponds to the opening of the mixing unit
in millimetres measured from the mixing table upwards.
5.5 SET CLAMP FORCE
SET CLAMP FORCE
500 800 1200
LOW
MED
HIGH
Three
clamping pressures can be set in the SET CLAMP FORCE
menu. With this small, medium and
cans will always be maintained
with an adapted clamp force during mixing.
LOW = Clamping force for small cans
MED = Clamping force for medium cans
HIGH = Clamping force for large cans
IMPORTANT:
With a too low clamping force the can can become loose during the
mixing process.
With a clamping pressure set too high the can can
burst when clamped.
After the clamping force has been set a test run must always be
carried out with original material in original container.
CLAMP MED
HEIGHT LOW
HIGHT HIGH
CLAMP LOW
CLAMP HIGH

Service Menu VIBA X.30
2021-05-05 Seite 13/21
5.5.1 TEST CLAMP LOW
TEST CLAMP LOW
500
+
-
CLAMP
TEST CLAMP LOW
Clamping
405mm 10000
500
FULL-OPEN
OPEN
TEST CLAMP LOW
Clamping
69mm 18928
500
clamped 5000
FULL-OPEN
OPEN
Setting of the small clamp force (CLAMP LOW)
+ = Increase value
- = Decrease value
CLAMP = Can is clamped
The CLAMP LOW is used when the can hight is smaller
than the
HEIGHT LOW value set.
To test the clamping force place a suitable can or a measuring
device in the centre of the clamping plate.
The measuring device
must be smaller than the HEIGHT LOW value set.
The clamping routine is started via the CLAMP function.
The current
opening of the mixing unit can be read in display together with the
current value of the rotary encoder.
After the end o
f the clamping procedure "pot clamped XX" is shown
on the display.
XX stands for the clamping parameter used during
clamping and should not significantly deviate from the parameter
set.
The mixing unit can subsequently be reopened via FULL-
OPEN or
OPEN.
FULL- OPEN = Mixing unit opens completely
OPEN = Mixing unit opens
IMPORTANT:
The CLAMP LOW parameter does not correspond to the clamping
force.
The clamping force resulting from the parameter must be de-
termined with a suitable measuring device.

Service Menu VIBA X.30
2021-05-05 Seite 14/21
5.5.2 TEST CLAMP MED
TEST CLAMP MED
800
+
-
CLAMP
TEST CLAMP MED
Clamping
405mm 10000
800
FULL- OPEN
OPEN
TEST CLAMP MED
Clamping
177mm 16120
800
clamped 800
FULL- OPEN
OPEN
Setting of large clamping force (CLAMP HIGH)
+ = Increase value
- = Decrease value
CLAMP = Can is clamped
The CLAMP MED is used when the canhight is in between
HEIGHT
LOW and HEIGHT HIGH value set.
To test the clamping force place a suitable can or a measuring
device in the centre of the clamping plate.
The measuring device must be larger than the HEIGHT LOW
and
lower than the HEIGHT HIGH value set.
The clamping routine is started via the CLAMP function.
The current
opening of the mixing unit can be read in display together with the
current value of the rotary encoder.
After the end of the clamping procedure "pot clamped XX" is shown
on the display. XX stands fo
r the clamping parameter used during
clamping and should not significantly deviate from the parameter
set.
The mixing unit can subsequently be reopened via FULL-
OPEN or
OPEN.
FULL- OPEN = Mixing unit opens completely
OPEN = Mixing unit opens
IMPORTANT:
The CLAMP MED
parameter does not correspond to the clamping
force.
The clamping force resulting from the parameter must be de-
termined with a suitable measuring device.

Service Menu VIBA X.30
2021-05-05 Seite 15/21
5.5.3 TEST CLAMP HIGH
TEST CLAMP HIGH
1200
+
-
CLAMP
TEST CLAMP HIGH
Clamping
405mm 10000
1200
FULL- OPEN
OPEN
TEST CLAMP HIGH
Clamping
177mm 16120
1200
clamped 1200
FULL- OPEN
OPEN
Setting of large clamping force (CLAMP HIGH)
+ = Increase value
- = Decrease value
CLAMP = Can is clamped
The CLAMP HIGH is used when the can is larger
than the HEIGHT
HIGH value set.
To test the clamping force place a suitable can or a measuring
device in the centre of the clamping plate.
The measuring device must be larger than the HEIGHT HIGH
value
set.
The clamping routine is started via the CLAMP function.
The current
opening of the mixing unit can be read in display together with the
current value of the rotary encoder.
After the end of the clamping procedure "pot clamped XX" is shown
on the display.
XX stands for the clamping parameter used during
clamping and should not significantly deviate from the parameter
set.
The mixing unit can subsequently be reopened via FULL-
OPEN or
OPEN.
FULL- OPEN = Mixing unit opens completely
OPEN = Mixing unit opens
IMPORTANT:
The CLAMP HIGH
parameter does not correspond to the clamping
force.
The clamping force resulting from the parameter must be de-
termined with a suitable measuring device.

Service Menu VIBA X.30
2021-05-05 Seite 16/21
5.6 SET CLAMP PAR
SET CLAMP PAR
900
F-RUN
ENDPOS
ICC
Setting of parameter for the clamping mechanism.
F-RUN = TEST FREERUN
ENDPOS = Mixing unit end stop
ICC = Clamp Control
5.6.1 TEST FREERUN
TEST FREERUN
min
0
410mm
actual
0000
10000
max
0
CLOSE
OPEN
The function of the clamping motor is tested in the TEST FREERUN
submenu
CLOSE = Close mixing unit
OPEN = Open mixing unit
The clamping motor runs for the amount of time the key is held
down.
The minimum, current and maximum performance of the
mixing unit is shown in the display info area.
This is a good indicator
of the degree of soiling of the spindles.
The current opening of the mixing unit, displayed in mm, together
with the actual value of the rotary encoder are provided as
additional information.

Service Menu VIBA X.30
2021-05-05 Seite 17/21
5.6.2 TEST ENDPOS
TEST ENDPOS
900
OPEN
CLAMP
EDIT
EDIT ENDPOS
900
+
-
Set mixing unit end stop.
OPEN = Test upper end stop
CLAMP = Test lower end stop
EDIT = Modify ENDPOS parameter
The mixing unit is opened and closed via a DC motor the power
consumption of which is monitored.
When the end stop is reached the power drawn by the motor
exceeds the set value of the current threshold (ENDPOS) and the
clamping motor is shut off.
The factory set parameter for the end stop has been selected so
that the mixing unit arrives di
rectly at the end position without a
prior switching off.
Before modifying the parameter check whether the threaded
spindles are dirty or damaged. If necessary, clean and apply grease
to the spindles as described in the operating instructions.
A larger value for the DC-
MOT ENDPOS means a higher current
intake and thereby a larger force of the clamping motor.
The value must not be set too high, otherwise the threaded spindle
could jam.
IMPORTANT:
The ENDPOS parameter does not influence the clamping force;
the clamping force is set in the menu item 5.5 SET CLAMP FORCE

Service Menu VIBA X.30
2021-05-05 Seite 18/21
5.6.3 ICC
CLAMP CONTROL
C-LEVEL : 2.0mm
C-CONTROL : ON
LEVEL
On/Off
CLAMP CONTROL
I-MAX : 280
I-STEP : 20
Imax
I-Step
MU SETUP
P-DCT : 50mm
P-MAX : 400mm
MU-SET :
410mm
PDCT
PMAX
MU
HOLDING CURRENT
190 200 240
LOW
MED
HIGH
SET G-SENSOR
T: +26,5 x: +55
B: 7.8HZ Y: -
2792
Z: -2874
2G 0300
Range
Trigger
Intelligent current monitoring ICC
On/Off = Deactivates ICC
ICC
monitors the can during the mixing process and recognises
critical conditions such as detachment or deformation.
The mixing
procedure will break off before a critical condition can lead to an
accident.
The parameter of the intelligent current monitoring wa
s
determined in an intensive series of tests
and are optimally suited
for most of the commonly used cans available on the market.
Any
modification is not recommended.
If there should be problems with special cans the ICC can be
deactivated via On/Off.
C-Level = Allowed upward or downward movement of
the clamping plate
C-Control = Activates / Deactivates ICC
I-Max = Maximum holding current
I-Step = Increment of the holding current increase
P-DCT = Smallest allowed mixable can
P-MAX = Highest allowed mixable can
MU-SET = Actual opening width of the mixing unit
LOW = Holding current for small cans
MED = Holding current for medium cans
HIGH = Holding current for large cans
Range = Rage of the G-Sensors
Trigger = Triggering threshold of the G sensor

Service Menu VIBA X.30
2021-05-05 Seite 19/21
5.7 SET DOOR MENU
SET DOOR
YES NO YES
DOOR
START
UCLMP
Setting of door options.
DOOR = Door opens automatically after the mixing.
START =
Mixing procedure can be started by closing
the door.
UCLMP =
Manual release of mixing unit is permitted
when the door is open.
5.8 SET LANGUAGE MENU
SET LANGUAGE
ENGLISH
Press E to quit
SELECT
Language setting for the main menu
SELECT = Language selection
The service menu language cannot be modified.
5.9 SET TIME & DATE
SET TIME&DATE
10:15:28
01.05.2019
+
-
>
Setting the date and time
+= Increase value
-= Decrease value
>= Next digit
The internal clock is stopped during the time setting.
5.10 OPERATING HOURS
OPERATING HOURS
TIME: 01600:32
+
-
>
Enter the operating hours of the machine.
+= Increase value
-= Decrease value
>= Next digit
When the control panel is replaced, the operating hours of the ma-
chines can be set here.

Service Menu VIBA X.30
2021-05-05 Seite 20/21
5.11 OPERATING CYCLES
OPERATING CYCLES
CYCLES:00064021
+
-
>
Enter the mixing cycles of the machine.
+= Increase value
-= Decrease value
>= Next digit
When the control panel is replaced, the mixing cycles of the ma-
chines can be set here.
5.12 ENTER S/N
ENTER S/N
S/N:00980666
+
-
>
Enter the serial number of the VIBA
+= Increase value
-= Decrease value
>= Next digit
The serial number of VIBA is indicated on the nameplate.
If the
smartCONNECT
functionality is available, the VIBA identifies itself
based on the serial number.
5.13 SAVE CHANGES MENU
SAVE CHANGES
SAVE
RESTORE
EXIT
Language setting for the main menu
SAVE = Saving of modifications
RESTORE = Restoration of previous parameter
EXIT = Concludes service menu
To adopt the modifications in the service menu the SAVE function
must be used.
Table of contents
Other Collomix Laboratory Equipment manuals
Popular Laboratory Equipment manuals by other brands

Ivoclar Vivadent
Ivoclar Vivadent Programat CS4 operating instructions

COOK Medical
COOK Medical Flexipet Instructions for use

Hanil
Hanil Fleta 5 quick guide

Metrohm
Metrohm OMNIS 6.03004.210 Product information

CertoClav
CertoClav Vacuum Pro 8-22L operating instructions

Velp Scientifica
Velp Scientifica AREX DIGITAL PRO F20500410 instruction manual