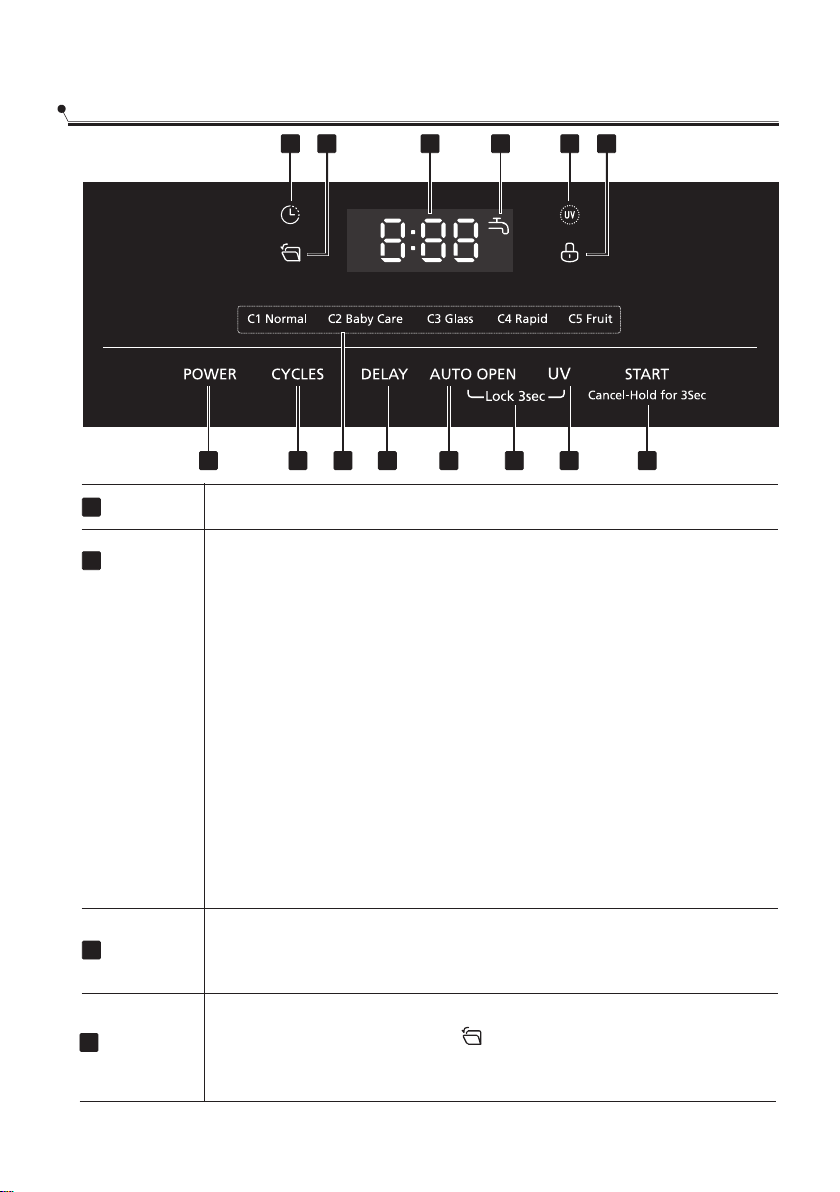
UV
5Press this button. the uv light will be on during the drying phase.
When this function is on, the light will be lit.
Child lock
6
This option allows you to lock the buttons on the control panel, so
children cannot accidently start the dishwasher by pressing the
buttons on the panel. Only the Power button remains active.
To lock or unlock the buttons on the control panel, press and hold
the Auto open button+ UV button for 3 seconds simultaneously.
When this function is on, the light will be lit.
Start
7
Start
Press to start the dishwasher, the drain pump will start the cycle.
Pause
If you need to pause a cycle in process, open the door slightly and
wait a few seconds until the wash action stops. To restart the
Cancel
Press and hold START for 3 seconds to cancel a cycle when the
dishwasher is running. The display will show
Screen
8
When the icon is on, it means that the interal water tank does
The LED screen displays program cycle code (C1, C2,), minutes
remaining in a running cycle, hours of delay before the unit is set
to start, error codes, etc.
If the machine is in operation, the remaining time (mins) of the
selected cycle will be shown in the display window.
If the Delay option is selected, the number of hours of delay
(1h-24h) will be shown in the display window. After the machine
starts, the remaining time of the selected cycle will be shown in
minutes on the display window.
NOTE: The remaining time could suddenly increase or drop several
minutes. This means the Smart Sensor has checked the soil level
and adjusted the number of fill cycles.
If an error occurs which is critical to the machines function and
safe operation, the control shall shut down and indicate an
error code in the display window. (See Error Codes)
If Error codes are displayed, contact the dealer or qualified
service center. They will available to provide assistance in
trouble shooting the problem and/or locate and authorized
service technician if needed.
-10-
(It can only be used with Normal, Baby care and Glass)
/Cancel "-- : --"
9
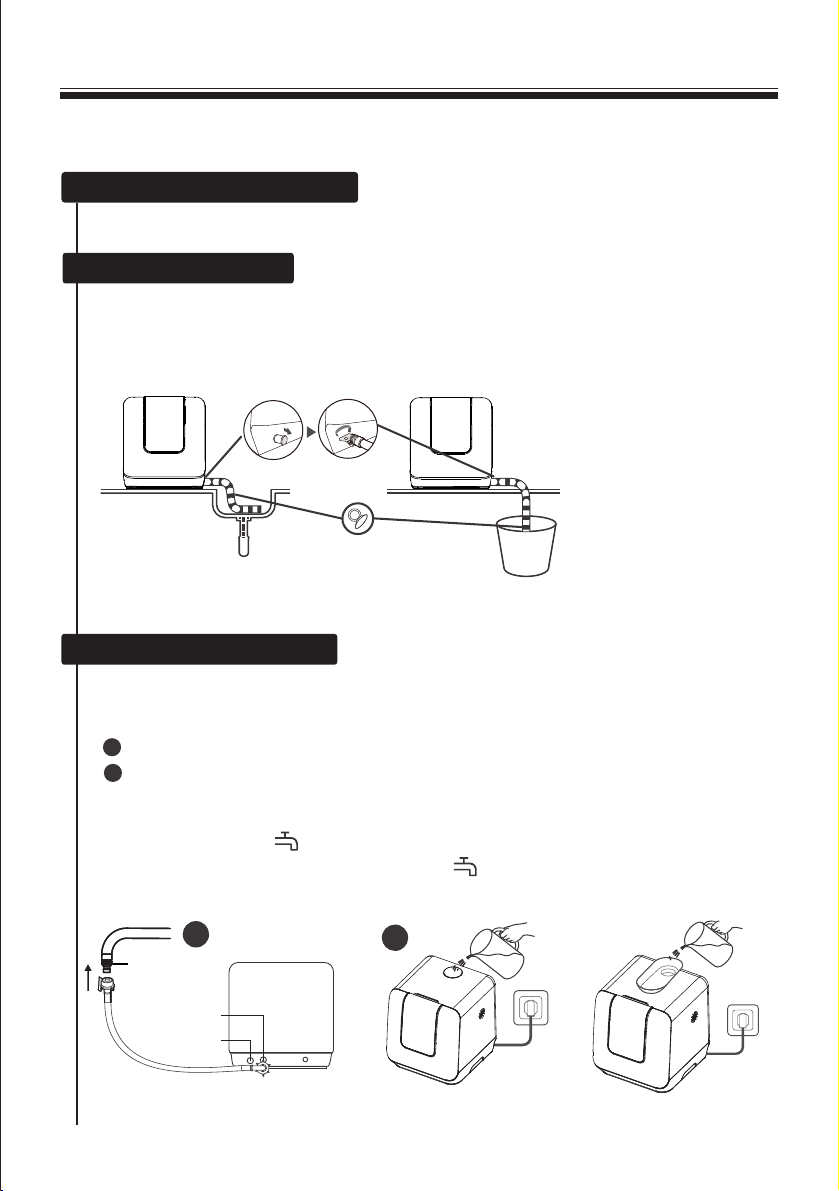
Water Faucet
not have enough water. Add water or check the inlet hose connections
, indicating
cycle has been canceled.
dishwasher press the start button with the door closed.
to make sure the water supply is turned on until this icon is off,
which means the tank is full of water.