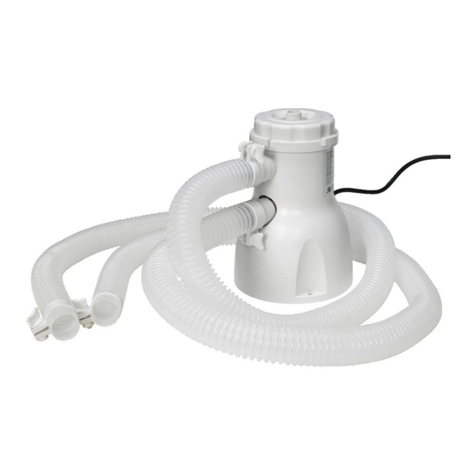
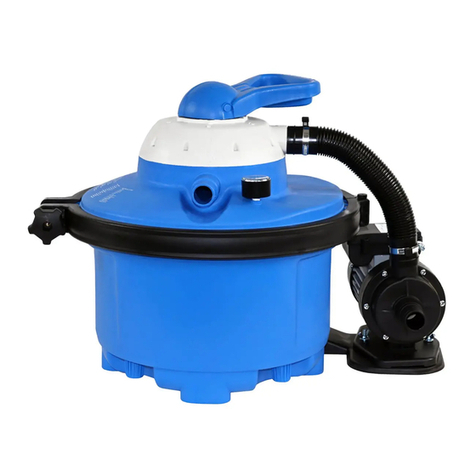
COMFORTPOOL FUZZYCLEAN User manual

FUZZYCLEAN
Cartridgefilterpomp
Cartridge Filter Pump

| NL
2
Inhoud
Veiligheidsvoorschriften__________________________________________________________________3
1. Onderdelen _________________________________________________________________________4
1.1. Onderdelen diagram _______________________________________________________________4
1.2. Onderdelen lijst ___________________________________________________________________5
2. Installatie __________________________________________________________________________6
2.1. Installatie illustratie ________________________________________________________________6
2.2. Installatie instructies _______________________________________________________________6
3. Gebruiksinstructies __________________________________________________________________7
4. Onderhoud _________________________________________________________________________7
4.1. Reinigen en vervangen van de filter ___________________________________________________7
4.2. Algemeen onderhoud ______________________________________________________________8
5. Winterklaar maken en opbergen________________________________________________________8
6. Problemen en oplossingen ____________________________________________________________9
6.1. Problemen met de filterpomp ________________________________________________________9
6.2. Veel voorkomende waterproblemen __________________________________________________10
7. Garantie___________________________________________________________________________11

| NL
3
Veiligheidsvoorschriften
LEES AL DEZE INSTRUCTIES ZORGVULDIG DOOR EN VOLG ZE OP. HET NIET OPVOLGEN VAN
DEZE WAARSCHUWINGEN KAN SCHADE AAN EIGENDOMMEN, ELEKTRISCHE SCHOKKEN,
PERSOONLIJK LETSEL OF ZELFS DE DOOD TOT GEVOLG HEBBEN.
WAARSCHUWINGEN
▪Dit apparaat is geen speelgoed, het apparaat en het snoer buiten bereik van kinderen houden.
▪Dit apparaat kan worden gebruikt door kinderen van 8 jaar en ouder en personen met verminderde fysieke,
sensorische of mentale vermogens, of een gebrek aan ervaring en kennis, mits dit gebeurt onder toezicht
of mits zij instructies hebben gekregen over het veilig gebruik en de risico’s van het product.
▪Het opzetten en afbreken van dit product, en de reiniging en het gebruiksonderhoud dient alleen te worden
gedaan door een volwassene.
▪Pas op voor een elektrische schok. Gebruik geen verlengsnoeren, timers, contactdozen, dubbelstekkers, et
cetera. Sluit de stroomadapter alleen aan op een stopcontact met aardlekschakelaar. Bij twijfel of het
stopcontact geaard is, neem contact op met een erkend elektricien om dit te verifiëren. Laat de
aardlekschakelaar (maximumcapaciteit 30mA) altijd door een erkend elektricien installeren.
▪Plaats stroomadapter nooit in de buurt van het zwembad. De stekker en stopcontact moeten meer dan 3,5
meter van het zwembad verwijderd zijn.
▪Graaf het netsnoer niet in de grond in. Leg het zo neer dat het niet kan worden beschadigd door
grasmaaiers, heggenscharen of andere machines.
▪Het netsnoer kan niet worden vervangen. Wanneer dit snoer beschadigd is dient het product te worden
vernietigd.
▪Om een mogelijke elektrische schok te voorkomen, mag u de stekker niet in het stopcontact steken of uit
het stopcontact halen wanneer u natte handen heeft of met uw voeten in het water staat.
▪Houd de stekker binnen handbereik nadat het product is geïnstalleerd.
▪Alvorens u de filterpomp of het zwembad gaat reinigen of verplaatsen dient u altijd de stekker van de
filterpomp uit het stopcontact te halen.
▪Plaats het product op ruime afstand van het zwembad, om te voorkomen dat kinderen het gebruiken om in
het zwembad te klimmen.
▪Plaats of gebruik de filterpomp niet in de nabijheid van giftige stoffen, ontvlambare of brandbare vloeistoffen
zoals benzine, of explosieve of ontvlambare dampen.
▪Zorg voor elk gebruik dat de pomp is vastgezet met de schroeven.
▪Zorg voor elk gebruik van de pomp dat alle klemmen zijn vastgedraaid en dat alle slangen correct zijn
aangesloten.
▪De filterpomp mag niet worden gebruikt als er mensen in het water zijn.
▪Gebruik deze filterpomp niet om het zwembad te stofzuigen.
▪Dit product is uitsluitend geschikt voor opbouwzwembaden, gebruik het product niet voor
inbouwzwembaden.
▪De maximale opvoerhoogte van de pomp is 3,7 meter. De maximale watertemperatuur waarbij de pomp
gebruikt mag worden is 35°C.
▪Gebruik het product enkel waarvoor dit bedoeld is.
▪Het product mag uitsluitend gebruikt worden volgens de instructies zoals beschreven in deze handleiding.
▪Als er zich abnormale omstandigheden voordoen (zoal geluid, geur of rook) schakel dan onmiddellijk de
stroom uit en neem contact op met de verkoper. Probeer niet zelf de filterpomp te demonteren of te
repareren, hierdoor vervalt de garantie.
Bovenstaande veiligheidsinstructies vormen geen exhaustieve lijst van alle mogelijke risico’s en gevaren
van het gebruik van dit product. Eigenaars en gebruikers van de filterpomp dienen dit apparaat met
voorzichtigheid en gezond verstand te gebruiken.
| NL
4
1. Onderdelen
1.1. Onderdelen diagram
Nr.
Onderdeel
P1
Luchtventielknop
P2
O-ring luchtventiel
P3
Filterkamerdeksel
P4
Deksel filterbehuizing
P5
Rubberen afsluitring
P6
Filter
P7
Behuizing
P8
Afdichtingsring
P9
Netsnoer

| NL
5
1.2. Onderdelen lijst
Nr.
Onderdeel
Afmeting
Aantal
P1
56 mm
1
P2
Ø 23 mm
1
P3
Ø 145 mm
1
P4
Ø 116 mm
1
P5
Ø 116 mm
1
P6
Ø 50 mm
20
P7
313 mm
1
P8
Ø 32 mm
2
P9
2000 mm
1
P10
1000 mm
2
P11
50 mm
4

| NL
6
2. Installatie
2.1. Installatie illustratie
* Bovenstaande tekening is alleen ter demonstratie, de lay-out van de leidingen dient enkel ter referentie. De
tekening is illustratief en niet op schaal, afmetingen kunnen afwijken het van bijgesloten product.
2.2. Installatie instructies
1. Zet het zwembad op. Volg hierbij nauwkeurig de instructies. Vul het zwembad volledig met water.
2. Plaats de filterpomp tenminste 20 cm onder het waterniveau in het zwembad.
3. De filterpomp moet op een vlakke, stabiele ondergrond worden geplaatst. Het gebruik van een trede of een
verhoogd platform is niet toegestaan.
4. Plaats de filterpomp op een afstand van ca. 1,5 m van de slangaansluiting op het zwembad, op tenminste
60 cm van de zwembadwand.
5. Plaats de stroomadapter op meer dan 3,5 m afstand van het zwembad.
6. Zorg ervoor dat u de pomp zo plaatst dat deze altijd toegankelijk is voor onderhoud.
7. Plaats de FuzzyClean cartridge of filterbollen in de filterkamer van de filterpomp.
8. Zorg dat de rubberen ring van de filterkamer in de afdichtingsgroef boven op de filterpomp zit.
9. Draai het deksel van de filterkamer op de filterpomp vast.
10. Sluit de slangen aan zoals afgebeeld op de installatie-illustratie. Zet de slangen vast met de slangklemmen,
en draai deze vervolgens aan met een schroevendraaier.
11. Open beide plugdoppen aan de binnenkant van het zwembad en sluit op elk een zeef aan.
12. Geef de filterkamer de tijd om zich met water te vullen. Laat de pomp nooit droog draaien.
13. Ga bij de lokale autoriteiten na watde reguleringen en vereisten zijn betreffende de installatievan elektrische
producten op zwembaden.

| NL
7
3. Gebruiksinstructies
▪De filterpomp vult zichzelf met water zolang deze minimaal 20 cm onder het hoogste waterpeil is geplaatst.
▪Boven op de pomp bevindt zich het ontluchtingsventiel. Draai de ventielknop tegen de klok in om de lucht
uit de filterkamer te laten ontsnappen. Zodra er een klein beetje water uit de ventielknop komt, moet u de
ventielknop onmiddellijk sluiten door deze met de klok mee dicht te draaien. De filterpomp is nu volledig
gevuld met water.
▪Laat de pomp nooit draaien zonder dat er water in zit. Het droog laten draaien van de pomp kan de
afdichtingen beschadigen, wat kan resulteren in een lekkage of overstroming van de filterpomp.
▪Controleer voor elk gebruik of alle slangen en slangklemmen goed vastzitten.
▪Controleer voor elke gebruik dat beide plugdoppen aan de binnenkant van het zwembad open zijn en de
zeef correct is geïnstalleerd.
▪Om een mogelijke elektrische schok te voorkomen, mag u de stekker niet in het stopcontact steken of uit
het stopcontact halen wanneer u natte handen heeft of met uw voeten in het water staat.
▪De filterpomp moet rechtopstaand gebruikt worden.
▪Zodra u dit allemaal heeft bevestigd, zet u de pomp aan door het netsnoer in een correct geïnstalleerd,
geaard stopcontact te steken.
▪Om de volledige levensduur van de pompte behouden en het zwembadwater goed gefilterd te houden moet
de filterpomp 4 tot 6 uur per dag draaien.
▪Laat de pomp draaien totdat de gewenste helderheid van het water is verkregen.
▪BELANGRIJK: Plaats nooit zwembadchemicaliën of reinigingsmiddelen rechtstreeks in de filterpomp. De
filterpomp kan hierdoor beschadigen en hierdoor vervalt de garantie.
▪Overmatig gebruik kan oververhitting en/of het doorbranden van de motor veroorzaken. Houdt dit in de
gaten wanneer de filterpomp gedurende een langere periode draait en let goed op bij extreme (warme)
weersomstandigheden.
4. Onderhoud
Zorg ervoor, vóór dat u met de installatie van het zwembad en de filterpomp begint, dat u in het bezit bent van
de benodigde zwembadchemicaliën. Wacht niet met toevoeging van chemicaliën totdat het water vuil wordt,
maar voeg deze meteen toe in de juiste hoeveelheden (vraag dit na bij uw zwembadspecialist). Dit verlengt de
levensduur van de filterpomp en de filter.
4.1. Reinigen en vervangen van de filter
1. De FuzzyClean cartridge of filterbollen moeten minstens één keer per seizoen worden vervangen. Bij
intensief gebruik van het zwembad is het aan te raden de filtercartridge of filterbollen elke week te
controleren en zo nodig te reinigen.
2. Het regelmatig reinigen van de filtercartridge of filterbollen vergroot de effectiviteit van de filterpomp en
verlengt de levensduur van de filtercatridge of filterbollen voordat u deze dient te vervangen.
3. Koppel het apparaat los van de stroom wanneer u de filterpomp gaat reinigen of de filtercatridge of
filterbollen gaat reinigen of vervangen.
4. Om te voorkomen dat water uit het zwembad stroomt verwijdert u de zeef en sluit u met de afsluitdoppen
de zwembadinlaat en zwembaduitlaat aan de binnenkant van de zwembadwand af.
5. Draai de luchtventielknop boven op de pomp open om het luchtvacuüm binnenin de filterkamer te verbreken.

| NL
8
6. Verwijder het filterkamerdeksel en de rubberen afsluitring van de filterkamer. Verwijder vervolgens de
filtercartridge of de filterbollen.
7. Na het controleren of vervangen van de filtercartridge of filterbollen opent u het luchtventiel en verwijdert u
de afsluitdoppen van de zwembadinlaat en zwembaduitlaat aan de binnenkant van de zwembadwand en
plaatst u de zeef weer terug.
8. Laat alle ingesloten lucht uit de filterkamer ontsnappen en draai het luchtventiel weer dicht. De filterpomp is
nu gevuld met water en u kunt deze weer aanzetten.
4.2. Algemeen onderhoud
▪Om gevaarlijke of dodelijke elektrische schokken te voorkomen dient u altijd de stroom naar het apparaat
uit te schakelen alvorens de filterpomp te reinigen.
▪Mechanisch onderhoud aan de pompunit is niet nodig. Probeer nooit om de motorunit van de filterpomp te
demonteren.
▪Reinig indien nodig de buitenkant van de filterpomp met water en mild schoonmaakmiddel, of door deze
voorzichtig af te spoelen met een tuinslang.
▪Het gebruik van smeermiddelen op de filterpomp is niet nodig.
▪Gebruik geen oplosmiddelen om de filterpomp, de filtercartridge of filterbollen te reinigen, dit kan de
kunststof onderdelen in de pomp beschadigen.
▪Controleer regelmatig de inlaat en uitlaat van de filterpomp op verstoppingen.
5. Winterklaar maken en opbergen
1. Haal de stekker van de filterpomp uit het stopcontact.
2. Laat het zwembad leeglopen. Alvorens het bad leeg te laten lopen, verzeker uzelf ervan dat het water weg
kan lopen via een correcte afvoer. Controleer de lokale verordeningen op het gebied van afvoer van
zwembadwater.
3. Zodra het bad leeg is maakt u alle slangen van de filterpomp en het zwembad los door de installatie
instructies in omgekeerde volgorde uit te voeren.
4. Verwijder de filtercartridge of filterbollen uit de filterpomp.
5. Schroef de slangklemmen losser alvorens beide zeven van de zwembadaansluiting te verwijderen.
6. Maak de slangklemmen aan de pomp los en haal de slangen eraf. Laat al het water uit de pomp lopen door
ze ondersteboven te houden. Laat de pomp aan de lucht drogen.
7. Droog alle onderdelen van de filterpomp en slangen, en zorg dat ook de binnenkant compleet droog is. Het
opbergen van de filterpomp of onderdelen hiervan wanneer deze nog vochtig zijn kan schimmel en schade
aan het apparaat of de onderdelen ervan veroorzaken. Wanneer dit het geval is vervalt de garantie.
8. Smeer de rubberen afsluitring en o-ring in met zuurvrije vaseline om deze tijdens het opbergen soepel te
houden.
9. Gebruik de originele doos om het product op te bergen.
10. Zorg dat u de filterpomp en toebehoren opbergt op een droge plaats. Zorg dat de temperatuur tijdens de
opslag niet onder het vriespunt of boven de 40°C kan komen.

| NL
9
6. Problemen en oplossingen
6.1. Problemen met de filterpomp
Probleem
Mogelijke oorzaak
Oplossing
De motor van de filterpomp
draait niet.
▪De stekker zit niet in het stopcontact.
▪Defecte aardlekschakelaar.
▪De motor is oververhit en de
oververhittingszekering blokkeert.
▪De filterpomp moet aangesloten zijn op een geaard
stopcontact met een aardlekschakelaar.
▪Vervang de zekering of reset de aardlekschakelaar.
Als de zekeringen blijven doorslaan is er mogelijk een
defect in uw elektra. Neem contact op met een
elektricien.
▪Laat de motor afkoelen.
De filterpomp zuivert het
water niet.
▪Onjuiste pH-waarde of chloorgehalte.
▪Vuile of beschadigde filter.
▪Erg vervuild water.
▪Algengroei in het water.
▪Zeef in de zwembadwand is verstopt.
▪Corrigeer de pH-waarde en het chloorgehalte.
▪Maak de filtercartridge of filterbollen schoon of vervang
deze.
▪Laat de filterpomp langer draaien.
▪Reinig de zeef in de zwembadwand.
De filterpomp pompt weinig
tot geen water rond.
▪Verstopte inlaat of uitlaat.
▪De pomp zuigt lucht i.p.v. water aan.
▪Algengroei of aanslag op de filter.
▪Erg vervuild water.
▪Verkeerd aangesloten zeef of
zwembadaansluitingen.
▪Controleer in- en uitlaatslang op verstoppingen.
▪Controleer de slangklemmen en draai deze zo nodig
vast. Controleer de slangen op beschadigingen en
controleer het waterniveau.
▪Vervang de filter (vaker).
▪Vervang het water.
▪Controleer de zwembadaansluitingen.
De filterpomp doet het niet.
▪Te laag waterniveau.
▪Verstopte zeef.
▪De pomp zuigt lucht aan i.p.v. water.
▪Luchtbel in de filterkamer.
▪Defecte motor of schoepenrad zit
klem.
▪Vul het zwembad tot het juiste waterniveau.
▪Maak de zeef schoon.
▪Draai de slangklemmen vast en controleer slangen op
beschadigingen.
▪Draai het ontluchtingsventiel helemaal open.
▪Verwijder eventuele bladeren of vuil uit de inlaatslang.
▪Raadpleeg de verkoper.
Uit de bovenkant van de
pomp lekt water.
▪Ontbrekende afsluitring.
▪Het deksel of het ontluchtingsventiel
is niet goed vastgedraaid.
▪Verwijder het deksel en plaats de afsluitring.
▪Draai het deksel of de ventielknop met de hand aan.
Lekke slang.
▪De slangklemmen zitten niet goed
vast.
▪De o-ring is verplaatst tijdens het
aansluiten van de slang.
▪De slang is beschadigd.
▪Slangklemmen vastdraaien of vervangen.
▪Plaats de o-ring terug in de afdichtingsgroef.
▪Vervang de slang.
Slechte doorstroom van
water.
▪Luchtbel in de filterkamer of slang.
▪Draai het ontluchtingsventiel open, houd de slang even
omhoog totdat het water weer stroomt en uit het ventiel
komt. Sluit het ventiel.

| NL
10
6.2. Veel voorkomende waterproblemen
Probleem
Omschrijving
Mogelijke oorzaak
Oplossing
Algen
▪Groen water.
▪Groene of zwarte
plekken op
zwembadwand.
▪Glibberige bodem.
▪Vieze geur.
▪De pH-waarde en chloorgehalte
zijn niet in balans.
▪Zorg voor een juiste pH-waarde en
voer een extra chloorbehandeling uit.
Raadpleeg uw zwembadspecialist.
▪Stofzuig de zwembadbodem.
▪Houdt het chloorgehalte constant en
op de aanbevolen waarde.
Gekleurd water
▪Na eerste
chloorbehandeling
wordt water blauw,
bruin of zwart.
▪Er bevindt zich koper, ijzer of
mangaan in het water. Dit bindt
zich aan het chloor.
▪Zorg voor een juiste pH-waarde.
▪Laat de filterpomp draaien totdat het
water weer helder is.
▪Maak de filter regelmatig schoon en
vervang deze regelmatig.
Witte waas in het water
▪Melkachtig water of
wolkachtig water.
▪Te lage pH-waarde wat leidt tot
hard water.
▪Te laag chloorgehalte.
▪Zorg voor een juiste pH-waarde.
▪Zorg voor een juist chloorgehalte.
▪Reinig of vervang de filter.
Dalend waterniveau
▪Waterniveau is lager
dan de vorige dag.
▪Een lek, gat of scheur in de
zwembadwand, bodem of
slang.
▪De aansluitingen of
afvoerdoppen zitten los.
▪Repareer het lek met een
reparatiekit.
▪Draai alle aansluitingen en
afvoerdoppen goed vast.
Vuile zwembadbodem
▪Vuil of zand op de
zwembadbodem.
▪Veelvuldig in- en uit het
zwembad stappen.
▪Geen zwembadafdekking.
▪Stofzuig de bodem met een
zwembadstofzuiger.
▪Dek het zwembad af met een
afdekzeil wanneer het niet gebruikt
wordt.
Vies wateroppervlak
▪Drijvende takjes,
bladeren, insecten of
ander vuil.
▪Zwembad staat de dicht bij
bomen of struiken
▪Vuil uit de lucht valt in het water
▪Gebruik een schepnet om het water
schoon te maken.
▪Gebruik een skimmer.
▪Dek het zwembad af met een
afdekzeil wanneer het niet gebruikt
wordt.

| NL
11
7. Garantie
Dit product is gefabriceerd met gebruikmaking van de beste kwaliteitsmaterialen en vakmanschap. Wij garanderen dat alle
onderdelen van de filterpomp vrij zijn van fabricagefouten in materiaal en afwerking voor een periode van 1 jaar vanaf de
aankoopdatum, voor de slangen en aansluitingen geldt dit voor een periode van 180 dagen. Deze beperkte garantie wordt
verstrekt als aanvulling op en zonder afbreuk te doen aan uw consumentenrechten. Als deze garantie niet overeenkomt
met uw wettelijke rechten, zullen de wettelijke rechten gelden.
Deze garantie beperkt zich tot de eerste koper en is niet overdraagbaar. Bewaar uw origineel aankoopbewijs, daar het
aankoopbewijs dient te worden overlegd ingeval van een klacht. Zonder aankoopbewijs is deze beperkte garantie niet
geldig.
Als er zich een productiefout binnen bovenstaande periode voordoet kunt u contact opnemen met de verkoper. Als er sprake
is van garantie zal het product kosteloos gerepareerd worden of vervangen worden door hetzelfde of een, door Comfortpool
bepaald, gelijkwaardig product. De aansprakelijkheid van Comfortpool zal nooit de reparatie of vervanging van defecte
onderdelen te boven gaan, en zal geen kosten omvatten voor arbeid om een defect onderdeel te verwijderen en opnieuw
te installeren, noch het transport van en naar de fabriek of leverancier, noch enig ander materiaal dat nodig is voor het
uitvoeren van een eventuele reparatie. Kosten van water, zwembadchemicaliën of waterschade worden niet door deze
garantie gedekt. Ook is de garantie niet van toepassing bij schade aan eigendommen of personen.
Deze beperkte garantie is niet van toepassing in onderstaande gevallen:
▪Indien de filterpomp is onderworpen aan nalatigheid, abnormaal gebruik of toepassing, een ongeluk, onjuist gebruik,
verkeerde stroomtoevoer, ander gebruik dan in de handleiding beschreven staat en onjuist onderhoud of opslag;
▪Indien de filterpomp onderhevig is aan schade veroorzaakt door omstandigheden buiten de macht van Comfortpool,
inclusief maar niet beperkt tot, normale slijtage en beschadiging veroorzaakt door blootstelling aan vuur,
overstroming, vrieskou, regen en andere natuurkrachten;
▪Indien er aanpassingen, reparaties of demontage van de filterpomp zijn uitgevoerd door iemand anders dan de
leverancier;
▪Op artikelen die niet van het merk Comfortpool zijn, of op artikelen van het merk Comfortpool die in combinatie met
artikelen of onderdelen van een ander merk worden gebruikt.
Dit is de enige garantie die uitgegeven is door Comfortpool. Comfortpool verleent geen andere garantie of voorwaarden,
hetzij schriftelijk of mondeling, en wijst uitdrukkelijk alle garanties en voorwaarden af die niet in deze garantieverklaring zijn
opgenomen. Andere garanties dan deze en de wettelijk bepaalde rechten in uw land zijn niet van toepassing. Comfortpool
is onder geen enkele voorwaarde aansprakelijk richting de koper of enige andere partij voor indirecte of vervolgschade
veroorzaakt door dit product, van welke aard dan ook.
www.comfortpool.com
Milieuprogramma’s, Europese AEEA-richtlijn
Gelieve de regelgeving van de Europese Unie na te leven en zo het milieu te beschermen. Voer afgedankte
elektrische apparatuur af naar een speciaal gemeentelijk inzamelpunt dat elektrische en elektronische apparatuur
correct recyclet. Werp het niet weg bij ongesorteerd afval. Haal eventuele verwijderbare batterijen uit de
afgedankte apparatuur.
© 2021 Comfortpool. Alle rechten voorbehouden. Niets van dit document mag worden vermenigvuldigd of
doorgegeven in welke vorm of op welke wijze dan ook, zij het elektronisch, mechanisch, op fotokopie,
opgenomen of op enige andere wijze, zonder de voorafgaande schriftelijke toestemming van Comfortpool.

| EN
12
Table of contents
Safety and precautions__________________________________________________________________13
1. Parts______________________________________________________________________________14
1.1. Parts diagram ___________________________________________________________________14
1.2. Parts list________________________________________________________________________15
2. Installation ________________________________________________________________________16
2.1. Installation illustration _____________________________________________________________16
2.2. Installation instructions ____________________________________________________________16
3. Operating instructions_______________________________________________________________17
4. Maintenance _______________________________________________________________________17
4.1. Cleaning and replacing the filter _____________________________________________________17
4.2. General maintenance _____________________________________________________________18
5. Winterizing and storage______________________________________________________________18
6. Troubleshooting guide_______________________________________________________________19
6.1. Filter pump problems______________________________________________________________19
6.2. Common water problems __________________________________________________________20
7. Warranty __________________________________________________________________________21

| EN
13
READ AND FOLLOW ALL THESE INSTRUCTIONS CAREFULLY. FAILURE TO FOLLOW THESE
WARNINGS COULD RESULT IN PROPERTY DAMAGE, ELECTRIC SHOCK, PERSONAL INJURY OR EVEN
DEATH.
Safety and precautions
READ AND FOLLOW ALL THESE INSTRUCTIONS CAREFULLY. FAILURE TO FOLLOW THESE
WARNINGS AND INSTRUCTIONS COULD RESULT IN PROPERTY DAMAGE, ELECTRIC SHOCK,
PERSONAL INJURY OR EVEN DEATH.
WARNINGS
▪This appliance is not a toy, keep the appliance and its cord out of the reach of children.
▪This appliance can be used by children aged 8 years and over and persons with reduced physical, sensory,
or mental capabilities, or lack of experience and knowledge, provided it is done under supervision or
provided they have been instructed on the safe use and risks of the product.
▪Assembling, installing, disassembling, cleaning, and doingmaintenance on this product should onlybe done
by an adult.
▪Beware of electric shock. Do not use extension cords, timers, plug adaptors or converter plugs, etc. Only
connect the power adapter to a socket with a residual current-operated circuit breaker. If in doubt as to
whether the outlet is grounded, contact a licensed electrician to verify. Always have the residual current
device (maximum capacity 30mA) installed by a qualified electrician.
▪Never place the power adapter near the pool. The plug and socket must be more than 3.5 meters from the
pool.
▪Do not bury the power cord in the ground. Place it so that it cannot be damaged by lawn mowers, hedge
trimmers or other machines.
▪The power cord cannot be replaced. If this cord is damaged, the product must be destroyed.
▪To avoid possible electric shock, do not plug in or unplug the power cord when your hands are wet or when
you are standing in water.
▪Keep the plug within reach after the product is installed.
▪Before cleaning or moving the filter pump or pool, always unplug the filter pump from the electrical outlet.
▪Place the product well away from the pool to prevent children from using it to climb into the pool.
▪Do not place or use the filter pump in the vicinity of toxic substances, flammable or combustible liquids such
as petrol, or explosive or flammable gasses.
▪Before each use, make sure that the pump is secured with the screws.
▪Before each use of the pump, make sure that all clamps are tightened and that all hoses are properly
connected.
▪The filter pump must not be used when people are in the water.
▪Do not use this filter pump to vacuum the pool.
▪This product is only suitable for above ground swimming pools, do not use the product for built-in swimming
pools.
▪The maximum head of the pump is 3.7 meters. The maximum water temperature at which the pump may be
used is 35 °C.
▪Use this product only for its intended purpose.
▪The product may only be used in accordance with the instructions as described in this manual.
▪If any abnormal conditions (such as noise, odor, or smoke) occur, turn off the power immediately and contact
the seller. Do not attempt to disassemble or repair the filter pump yourself, as this will void the warranty.
The above-mentioned safety instructions and cautions do not constitute an exhaustive list of all possible
risks and dangers associated with the use of this product. Owners and users of the filter pump should
exercise caution and common sense when using this product.

| EN
14
1. Parts
1.1. Parts diagram
Nr.
Part
P1
Air valve knob
P2
Air valve O ring
P3
Upper cover
P4
Filter chamber cover
P5
Filter cover rubber gasket
P6
Filter
P7
Body
P8
Sealing O ring
P9
Power cable

| EN
15
1.2. Parts list
Nr.
Parts
Size
Qty
P1
56 mm
1
P2
Ø 23 mm
1
P3
Ø 145 mm
1
P4
Ø 116 mm
1
P5
Ø 116 mm
1
P6
Ø 50 mm
20
P7
313 mm
1
P8
Ø 32 mm
2
P9
2000 mm
1
P10
1000 mm
2
P11
50 mm
4

| EN
16
2. Installation
2.1. Installation illustration
* The above drawing is for demonstration purposes only, the layout of the pump and hoses is for reference
only. The drawing is illustrative and not to scale, dimensions may deviate from the enclosed product.
2.2. Installation instructions
1. Set up the pool. Follow the instructions carefully. Fill the pool completely with water.
2. Position the filter pump at least 20 cm below the water level in the pool.
3. The filter pump must be placed on a flat, stable surface. The use of a step or a raised platform is not allowed.
4. Place the filter pump at a distance of approximately 1.5 m from the hose connection to the pool, at least 60
cm from the pool wall.
5. Place the transformer at least 3.5 m away from the pool.
6. Be sure to position the pump in a way that it is always accessible for maintenance.
7. Place the FuzzyClean cartridge or filter balls in the filter chamber of the filter pump.
8. Make sure the rubber gasket of the filter chamber is placed in the sealing groove on top of the filter pump.
9. Tighten the filter chamber cover on the filter pump manually.
10. Connect the hoses as shown in the installation illustration. Secure the hoses with the hose clamps, then
tighten them with a screwdriver.
11. Open both wall plug caps on the inside of the pool and connect a strainer to each.
12. Allow time for the filter chamber to fill completely with water. Never run the pump dry.
13. Check local authorities to determine the regulations and requirements regarding the installation of electrical
products regarding swimming pools.

| EN
17
3. Operating instructions
▪The filter pump will prime itself as long as it is positioned at least 20 cm below the highest water level.
▪The air valve is located on top of the pump. Turn the valve knob counterclockwise to release the air from
the filter chamber. As soon as a small amount of water comes out of the valve, immediately close the valve
knob by turning it clockwise. The pump is now completely primed.
▪Never run the filter pump without any water in it. Running the pump dry can damage the seals, which may
result in leakage or overflow of the filter pump.
▪Before each use, check that all hoses and hose clamps are tightened.
▪Before each use, check to ensure both wall plug caps on the inside of the pool are open and the strainer is
properly installed.
▪To avoid a possible electric shock, do not plug in or unplug the power cord when your hands are wet or
when you are standing in water.
▪The filter pump must operate in an upright position.
▪Once you have confirmed all this, turn on the pump by plugging the power cord into a properly installed
grounded electrical outlet.
▪To preserve the full life of the pump and to keep the pool properly filtered, your pump should run for 4 to 6
hours a day.
▪Run the filter pump until the desired water clarity is obtained.
▪IMPORTANT: Never put pool chemicals or cleaning supplies directly into the filter pump. This can damage
the filter pump and void the warranty.
▪Overuse can cause overheating and / or burn out of the engine. Keep an eye on this when the filter pump is
running for a longer period of time and pay close attention to running the pump in extreme (warm) weather
conditions.
4. Maintenance
Before starting the installation of the pool and filter pump installation, make sure you have the necessary pool
chemicals. Do not wait until the water becomes dirty before adding chemicals but add them immediately in the
correct quantities (check with your swimming pool specialist). This will prolong the life of the filter pump and filter.
4.1. Cleaning and replacing the filter
1. The FuzzyClean cartridge or filter balls should be replaced at least once per season. When the pool is used
intensively, it is advisable to check the filter cartridge or filter balls once a week and clean or replace them if
necessary.
2. Regular cleaning of the filter cartridge or balls will increase the effectiveness of the filter pump and extend
the life of the filter cartridge or filter balls before replacing them.
3. Disconnect the power when cleaning the filter pump or cleaning or replacing the filter cartridge or filter balls.
4. To prevent water from flowing out of the pool, remove the strainer and close the pool inlet and pool outlet
on the inside of the pool wall with the sealing caps.
5. Turn the air valve knob on top of the pump to break the air vacuum inside the filter chamber.
6. Remove the filter chamber cover and the rubber sealing ring from the filter chamber. Then remove the filter
cartridge or the filter balls.

| EN
18
7. After checking or replacing the filter cartridge or filter balls, open the air valve and remove the sealing caps
from the pool inlet and pool outlet on the inside of the pool wall and reinstall the strainer.
8. Release any trapped air from the filter chamber and close the air valve. The filter pump is now primed and
ready to switch on again.
4.2. General maintenance
▪To avoid a dangerous or fatal electric shock, always disconnect the power to the filter pump before cleaning
it.
▪There is no need for the mechanical maintenance of the pump unit. Never attempt to disassemble the motor
unit of the filter pump.
▪If necessary, clean the outside of the filter pump with water and mild detergent, or by rinsing it gently with a
garden hose.
▪The use of lubricants on the filter pump is not necessary.
▪Do not use solvents to clean the filter pump, filter cartridge, or filter balls, as this can damage the plastic
components inside the pump.
▪Regularly check the inlet and outlet of the filter pump for blockages.
5. Winterizing and storage
1. Unplug the filter pump from the electrical outlet.
2. Drain the pool. Make sure the water is directed towards an acceptable drain water receptacle. Check local
regulations for specific directions regarding pool water disposal.
3. Once the pool is completely drained, drain all hoses fromthe filter pump and pool by following the installation
instructions in reverse order.
4. Remove the filter cartridge or filter bulbs from the filter pump.
5. Remove the hose clamps before removing both strainers from the pool connections.
6. Loosen the hose clamps on the pump and remove the hoses. Drain all the water from the pump by turning
it upside down. Let the filter pump air dry.
7. Dry all parts of the filter pump and hoses, and make sure that the interior is completely dry as well. Storing
the filter pump or parts of it while still damp can cause mold and damage to the unit or parts. This will void
the warranty.
8. Lubricate the rubber sealing gasket and O ring with non-acidic petroleum jelly to keep it flexible during
storage.
9. Use the original packaging to store the product.
10. Make sure to store the filter pump and its accessories in a dry place. Make sure that the temperature cannot
fall below 0 °C or rise above 40 °C during storage.

| EN
19
6. Troubleshooting guide
6.1. Filter pump problems
Problem
Possible cause
Solution
The motor is not running.
▪The filter pump is not plugged in.
▪Defective RCD.
▪The motor is overheated, and the
overload protection shut the motor off.
▪The filter pump must be connected to a grounded
socket with an RCD.
▪Replace the fuse or reset the RCD. If the circuit
breaker continues to blow there may be a
malfunction on your electrics. Contact an electrician
to resolve the problem.
▪Let the motor cool down.
The filter pump does not
clean the water.
▪Incorrect pH and chlorine levels.
▪Dirty or damaged filter.
▪Excessively dirty pool.
▪Algae growth in the water.
▪Strainer in the pool wall is clogged.
▪Correct the pH and chlorine levels.
▪Clean the filter cartridge or filter balls or replace
them.
▪Operate the filter pump for longer periods of time.
▪Clean the strainer in the pool wall.
The filter pump does not
pump the water, or the
water flow is low.
▪Clogged inlet or outlet.
▪The pump sucks in air instead of water.
▪Algae growth or build up on the filter.
▪Excessively dirty pool.
▪Incorrectly installed strainer or pool
connections.
▪Check the inlet and outlet hose for blockages.
▪Check the hose clamps and tighten them. Check the
hoses for damages and check the water level.
▪Replace the filter (more frequently).
▪Replace the water.
▪Check all pool connections.
The filter pump does not
work.
▪Water level is too low.
▪Clogged strainer.
▪The pump sucks in air instead of water.
▪Air bubble in the filter chamber.
▪Defective motor or the impeller is
jammed.
▪Fill the pool to the correct water level.
▪Clean the strainer.
▪Tighten the hose clamps and check the hoses for
damages.
▪Open the air release valve completely.
▪Remove any leaves or debris from the inlet hose.
▪Consult the seller.
Water is leaking from the
top of the pump.
▪Missing O ring
▪The cover or air valve knob is not
properly tightened.
▪Remove the cover and check or place the O ring.
▪Tighten the cover and air valve knob manually.
Hose is leaking.
▪The hose clamps are not properly
tightened.
▪The O ring dislodged when connecting
the hose.
▪The hose is damaged.
▪Tighten or replace the hose clamps.
▪Position the O ring in the sealing groove.
▪Replace the hose.
Air lock or poor water flow.
▪Air is trapped inside the filter chamber.
▪Open the air release valve, lift and lower the inlet
hose until water starts to flow out of the air release
valve and close the air release valve.

| EN
20
6.2. Common water problems
Problem
Description
Possible cause
Solutions
Algae
▪Green water.
▪Green or black spots
on the pool liner.
▪Pool liner is slippery.
▪Bad odor.
▪PH or chlorine level needs
adjustment.
▪Correct the pH level. Chlorinate with
a shock treatment. Consult your pool
specialist.
▪Vacuum the pool floor.
▪Maintain the chlorine level at a
constant and recommended value.
Colored water
▪Water turns blue,
brown, or black after
first chlorine treatment.
▪Copper, iron, or manganese in
the water is oxidized by the
chlorine.
▪Maintain a correct pH level.
▪Run the filter pump until the water is
clear.
▪Regularly clean and replace the filter.
Suspended matter in
the water
▪Milky or cloudy water.
▪PH level is too low, this leads
to hard water.
▪Chlorine level is too low.
▪Correct the pH level.
▪Correct the chlorine level.
▪Clean or replace the filter.
Decreasing water level.
▪Water level is lower
than previous day.
▪A leak, hole or tear in the pool
liner or hose.
▪Drain valve or hose
connections are not closed.
▪Repair the leak with a repair kit.
▪Tighten all caps, valves and
connections.
Debris on pool floor.
▪Dirt or sand on pool
floor.
▪Heavy use, frequent stepping
in and out of the pool.
▪No pool cover.
▪Vacuum the pool floor.
▪Cover the pool with a pool cover
when not in use.
Surface debris
▪Floating branches,
leaves, insects, or
other debris.
▪Pool is too close to trees or
bushes.
▪Debris in the air falls into the
water.
▪Use a scoop net to clean the water
surface.
▪Use a skimmer.
▪Cover the pool with a pool cover
when not in use.
Table of contents
Languages:
Other COMFORTPOOL Swimming Pool Pump manuals
Popular Swimming Pool Pump manuals by other brands

DAB
DAB DTRON3 Instruction for installation and maintenance

Davey
Davey POWER ACE CR 100 Installation and operating instructions

STA-RITE
STA-RITE DURA-GLAS PE Series owner's manual

AQUA FORTE
AQUA FORTE GFVS19N Installation & operation manual

Blue Wave
Blue Wave SKIMMERPLUS SFX600 owner's manual

Intex
Intex ECO15220-1 owner's manual

Bestway
Bestway FlowClear 58122 owner's manual

Aquagem
Aquagem XFIow INVERSilence GFVS09N Installation & operation manual

Hidrotermal
Hidrotermal HIDRO-SP Series Installation and maintenance manual

CIPU
CIPU CSPPS702 owner's manual

STAR Water Systems
STAR Water Systems 148014 manual

Pentair
Pentair WhisperFlo Installation and user guide