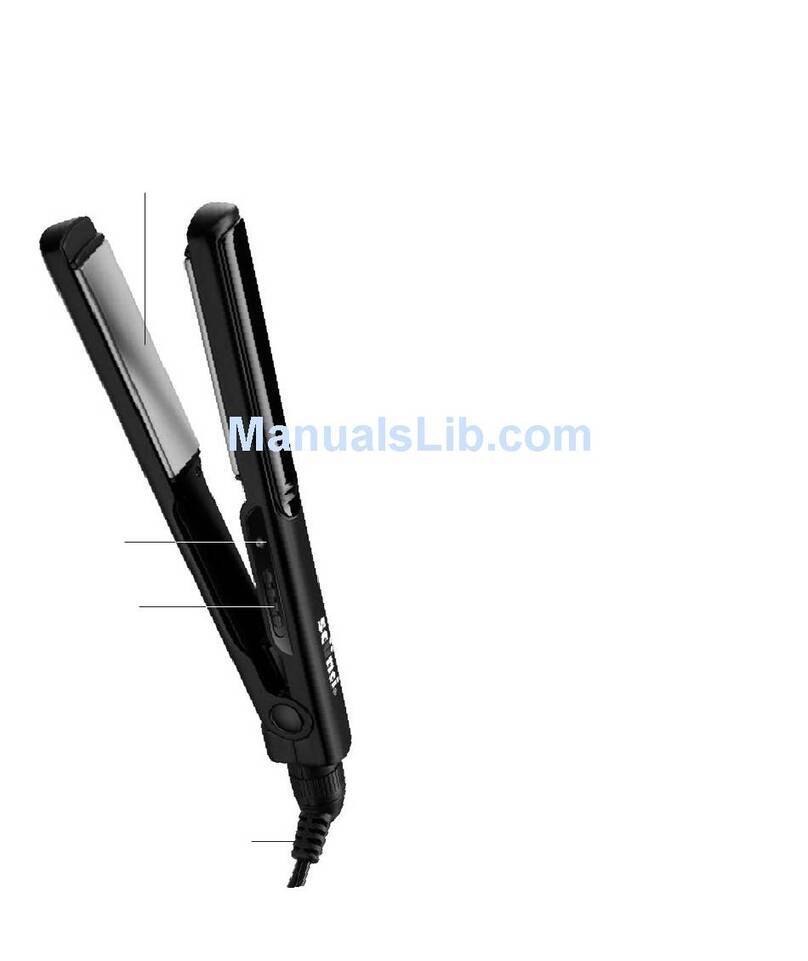
Conair CL3270C COLOURLIGHTS User manual

have been removed, the sectioning
disc, clip and protective tissue should
be removed.
• Repeat as required.
• Wash and dry the hair.
CLEANING & MAINTENANCE OF
APPLIANCE
The plates may require cleaning due to a
build up of wax adhesive residue.
To clean:
• Ensure the appliance is unplugged and
cool.
• Moisten a cloth with a small quantity of
removal lotion and wipe the plates.
Ensure the plates have dried thoroughly
before using the appliance.
IMPORTANT! Do not immerse the
appliance in water or other liquids.
SAFETY CAUTIONS
• WARNING! Polythene bags over the
product or packaging may be dangerous.
To avoid danger of suffocation, keep
away from babies and children.
• This appliance must not be used in the
bathroom.
• Do not use this product without seeking
prior medical advice if you have any of
the following:
- Skin conditions such as acne, eczema
or psoriasis.
- Sensitive skin.
• WARNING! Do not use this appliance
near water contained in basins, bathtubs
or other vessels.
• Do not immerse the appliance in water
or other liquids.
• This appliance should only be used as
described within this instruction book.
Please retain for reference.
• Always inspect the appliance before
use for noticeable signs of damage. Do
not use if damaged, or if the appliance
has been dropped. In the event of dam-
age, contact Conair Customer Service.
• Do not use the appliance if the cord
is damaged. In the event of damage,
discontinue use immediately and
contact Conair Customer Service.
• Do not leave the appliance unattended
when plugged in.
• Do not place the appliance on any heat
sensitive surface while in operation.
• Take care to avoid hot surfaces of the
appliance coming into direct contact
with the skin, in particular the ears,
eyes, face and neck.
• Careful adult supervision is required
when the appliance is used on disabled
persons.
• This appliance is not for use on or by
children. Keep out of the reach of children.
• Allow appliance to cool fully before storing
away.
• After use, do not coil the cord around the
appliance as this may cause damage to
the cord. Instead, coil the cord loosely
by the side of the appliance.
Removal Lotion
• FLAMMABLE. Keep away from naked
flame. No smoking.
• Keep out of the reach of children.
• Not to be taken internally. If ingested,
obtain medical attention and show the
container or label.
• Avoid contact with eyes. If product gets
in the eye, rinse well with clean water
and obtain medical attention if effects
persist.
• Keep container tightly closed and away
from direct sunlight.
• Avoid contact with polished or painted
surfaces and with synthetic materials.
• Use in a well-ventilated place. Use only
as directed.
REPLACEMENTS
Please contact Conair Customer Service
1-800-472-7606 regarding: Colourlights
replacement pack containing Hair
Additions & Removal Lotion. Quoting
CL7320C.
Replacement packs are also available at
leading retailers.
LIMITED ONE YEAR WARRANTY
Conair will repair or replace (at our option) your unit free
of charge for 12 months from the date of purchase if the
appliance is defective in workmanship or materials.
To obtain service under this warranty, return the defective
product to the service centre listed below that is nearest
you, together with your purchase receipt and $5.50 for
postage and handling. In the absence of a purchase
receipt, the warranty period shall be 12 months from the
date of manufacture.
ANY IMPLIED WARRANTIES, OBLIGATIONS, OR
LIABILITIES, INCLUDING BUT NOT LIMITED TO THE
IMPLIED WARRANTY OF MERCHANTABILITY AND
FITNESS FOR A PARTICULAR PURPOSE, SHALL BE
LIMITED IN DURATION TO THE 12 MONTH DURATION
OF THIS WRITTEN, LIMITED WARRANTY.
IN NO EVENT SHALL CONAIR BE LIABLE FOR ANY SPE-
CIAL, INCIDENTAL, OR CONSEQUENTIAL DAMAGES FOR
BREACH OF THIS OR ANY OTHER WARRANTY, EXPRESS
OR IMPLIED, WHATSOEVER.
This warranty gives you specific legal rights, and you may
also have other rights, which vary from province to
province.
CL3270C
www.conaircanada.ca
SERVICE CENTRE:
CONAIR CONSUMER PRODUCTS INC.
156 Parkshore Drive,
Brampton, Ontario
L6T 5M1
1-800-472-7606
©2004 Conair Consumer Products Inc.
04CN1233 IB-5392

CONAIR®COLOURLIGHTS
Features:
• Heated Fixing Iron
• On Indicator Light
• 40 Hair Additions, with wax adhesive tips:
- 3 x Bright (Total 6)
- 4 x Natural (Total 10)
- 3 x Blondesl (Total 9)
- 3 x Jewels (Total 6)
- 3 x Pastels (Total 9)
• 4 Mini Sectioning Clips
• 4 Sectioning Discs
• Scissors
• Removal Lotion
• Storage Pouch
BONUS
Features:
• 28 Hair Additions with Waxy Adhesive Tips.
- 1 Bright (2 in total).
- 4 Natural (8 in total).
- 3 Blondes (6 in total).
- 3 Jewels (6 in total).
- 3 Pastels (6 in total).
• 4 x Sectioning Discs. • Removal Lotion.
INSTRUCTIONS FOR USE
The appliance should not be used by an
individual to fix hair additions to their own
hair. It is intended to be used by one person
to fix hair additions to another person’s hair.
The product is designed as a hair high-
lighting tool and no more than 8 additions
should be used in one person’s hair at
one time.
IMPORTANT! Do not use hair additions
during or immediately after pregnancy in
case of hair loss.
For best results:
• Wash hair thoroughly, preferably using
a pH neutral shampoo.
• Dry hair and comb through until tangle
free.
Fixing Hair Additions
• Plug in the appliance. The On Indicator Light
will illuminate.
• Allow the appliance to heat up for 5 minutes.
IMPORTANT! The plates will become very
hot when the appliance is plugged in. Take
care to avoid hot surfaces of the appli-
ance coming into direct contact with the
skin, in particular the ears, eyes, face
and neck.
• In order for the waxy adhesive tip to not
be visible once the hair addition is fixed
into the hair, it is important not to fix the
addition to the top layer of hair. Instead,
take a thin layer of hair and fold it back
against the natural direction of growth.
The hair addition should then be positioned
under this layer (refer to fig 1).
• Separate a small section of hair approx-
imately half the thickness of the hair
addition.
• Place a sectioning disc around the section
of hair at the root and secure with one or
two mini sectioning clips. The section of
hair should hang loosely in its natural
direction of growth (refer to fig 2).
• Hold the section of hair between the
thumb and forefinger, and place the hair
addition under the hair, approximately
1cm from the scalp, taking care to ensure
that the hair addition is lying in the natural
direction of hair growth. The waxy adhesive
tip should curl upwards around the hair
section (refer to fig 3).
• Using the thumb and forefinger, gently
press the sides of the adhesive tip togeth-
er; around the hair section (refer to fig
4).
• Holding the hair addition and hair section
slightly below the adhesive tip, position
the appliance with the grooved heated
plate beneath the adhesive tip of the
hair addition (refer to fig 5).
• Close the plates around the adhesive tip
and hold in position for just 1 or 2 sec-
onds. Do not move the appliance while
melting the adhesive.
• Release the hair section and put the
appliance down on a heat resistant surface.
• After waiting a few seconds to ensure
that the adhesive tip has cooled slightly,
use the thumb and forefinger, to carefully
roll the melted adhesive around the hair
section. NOTE Rolling the adhesive tip
around the hair section is essential to
ensure the correct fixing of the hair addition
into the hair section (refer to fig 6).
• Carefully remove the sectioning clip(s)
and disc.
• If required, trim the hair addition to the
desired length using the scissors provided.
• Fold the layer of hair (from fig 1) back
over the hair addition.
• Repeat as required, up to a maximum of
8 hair additions per head of hair at any
time.
• After use, unplug the appliance. Allow
to cool fully before storing away.
Care of Hair Additions
• Hair additions may be left in the hair for
up to four weeks. However, over time
there may be loosening of the wax
adhesive securing the hair addition to
the hair section.
• To ensure that your additions are kept in
the best possible condition, take care
when shampooing the hair. Particular
care should be taken with longer hair to
ensure that the additions do not
become tangled or matted when sham-
pooing the hair.
• After washing the hair, the hair additions
should be allowed to dry naturally, or
may be dried carefully using a dryer on
a low heat setting.
• Do not use heated appliances, such as
hair straighteners, directly on the hair
additions. If using a heated appliance
on the hair, carefully clip the hair addi-
tions out of the way.
• Tie hair up at night.
• Do not sleep on wet hair.
Removing Hair Additions
Refer to Safety Cautions: Removal Lotion
for further information and advice regarding
this formulation.
• Place a sectioning disc around the hair
section above the wax tip of the hair
addition and secure with a sectioning
clip.
• Position a folded tissue beneath the
sectioning disc to minimize the risk of
the removal lotion coming into direct
contact with the scalp.
• Carefully moisten a cotton wool pad
with a small quantity of removal lotion.
Do not squeeze the bottle.
IMPORTANT! Do not overload the cotton
wool pad with removal lotion as this may
cause removal lotion to drip onto the
eyes, face or scalp.
• Apply the moistened pad around the
wax adhesive and gently rub until the
wax adhesive starts to break down.
This process may take a minute or two
and it may be necessary to re-moisten
the pad with removal lotion.
• Once the wax adhesive is sufficiently
broken down, holding the wax adhesive
with one hand and the section of hair
above the addition with the other, gently
slide the hair addition out.
• Any remaining wax adhesive may be
carefully removed using a comb.
• Once the wax adhesive and hair addition
fig.1
fig.3
fig.5
fig.4
fig.6
fig.2
have been removed, the sectioning
disc, clip and protective tissue should
be removed.
• Repeat as required.
• Wash and dry the hair.
CLEANING & MAINTENANCE OF
APPLIANCE
The plates may require cleaning due to a
build up of wax adhesive residue.
To clean:
• Ensure the appliance is unplugged and
cool.
• Moisten a cloth with a small quantity of
removal lotion and wipe the plates.
Ensure the plates have dried thoroughly
before using the appliance.
IMPORTANT! Do not immerse the
appliance in water or other liquids.
SAFETY CAUTIONS
• WARNING! Polythene bags over the
product or packaging may be dangerous.
To avoid danger of suffocation, keep
away from babies and children.
• This appliance must not be used in the
bathroom.
• Do not use this product without seeking
prior medical advice if you have any of
the following:
- Skin conditions such as acne, eczema
or psoriasis.
- Sensitive skin.
• WARNING! Do not use this appliance
near water contained in basins, bathtubs
or other vessels.
• Do not immerse the appliance in water
or other liquids.
• This appliance should only be used as
described within this instruction book.
Please retain for reference.
• Always inspect the appliance before
use for noticeable signs of damage. Do
not use if damaged, or if the appliance
has been dropped. In the event of dam-
age, contact Conair Customer Service.
• Do not use the appliance if the cord
is damaged. In the event of damage,
discontinue use immediately and
contact Conair Customer Service.
• Do not leave the appliance unattended
when plugged in.
• Do not place the appliance on any heat
sensitive surface while in operation.
• Take care to avoid hot surfaces of the
appliance coming into direct contact
with the skin, in particular the ears,
eyes, face and neck.
• Careful adult supervision is required
when the appliance is used on disabled
persons.
• This appliance is not for use on or by
children. Keep out of the reach of children.
• Allow appliance to cool fully before storing
away.
• After use, do not coil the cord around the
appliance as this may cause damage to
the cord. Instead, coil the cord loosely
by the side of the appliance.
Removal Lotion
• FLAMMABLE. Keep away from naked
flame. No smoking.
• Keep out of the reach of children.
• Not to be taken internally. If ingested,
obtain medical attention and show the
container or label.
• Avoid contact with eyes. If product gets
in the eye, rinse well with clean water
and obtain medical attention if effects
persist.
• Keep container tightly closed and away
from direct sunlight.
• Avoid contact with polished or painted
surfaces and with synthetic materials.
• Use in a well-ventilated place. Use only
as directed.
REPLACEMENTS
Please contact Conair Customer Service
1-800-472-7606 regarding: Colourlights
replacement pack containing Hair
Additions & Removal Lotion. Quoting
CL7320C.
Replacement packs are also available at
leading retailers.
LIMITED ONE YEAR WARRANTY
Conair will repair or replace (at our option) your unit free
of charge for 12 months from the date of purchase if the
appliance is defective in workmanship or materials.
To obtain service under this warranty, return the defective
product to the service centre listed below that is nearest
you, together with your purchase receipt and $5.50 for
postage and handling. In the absence of a purchase
receipt, the warranty period shall be 12 months from the
date of manufacture.
ANY IMPLIED WARRANTIES, OBLIGATIONS, OR
LIABILITIES, INCLUDING BUT NOT LIMITED TO THE
IMPLIED WARRANTY OF MERCHANTABILITY AND
FITNESS FOR A PARTICULAR PURPOSE, SHALL BE
LIMITED IN DURATION TO THE 12 MONTH DURATION
OF THIS WRITTEN, LIMITED WARRANTY.
IN NO EVENT SHALL CONAIR BE LIABLE FOR ANY SPE-
CIAL, INCIDENTAL, OR CONSEQUENTIAL DAMAGES FOR
BREACH OF THIS OR ANY OTHER WARRANTY, EXPRESS
OR IMPLIED, WHATSOEVER.
This warranty gives you specific legal rights, and you may
also have other rights, which vary from province to
province.
CL3270C
www.conaircanada.ca
SERVICE CENTRE:
CONAIR CONSUMER PRODUCTS INC.
156 Parkshore Drive,
Brampton, Ontario
L6T 5M1
1-800-472-7606
©2004 Conair Consumer Products Inc.
04CN1233 IB-5392
Other Conair Hair Styler manuals

Conair
Conair VSCD150HA User manual

Conair
Conair Unbound CR300 User manual

Conair
Conair 121CTC User manual

Conair
Conair 248C User manual

Conair
Conair CD64XRC User guide

Conair
Conair CS50BC User guide

Conair
Conair fashioncurl CD213 User manual

Conair
Conair CD967CS User guide

Conair
Conair CD122X User guide

Conair
Conair CD123XC User manual

Conair
Conair 199RC User manual

Conair
Conair Tourmaline ceramic 245BCR User guide

Conair
Conair CS19JCSC User manual

Conair
Conair infiniti PRO CD203 User guide

Conair
Conair BAB2095MU User manual

Conair
Conair TT228C User manual

Conair
Conair Infiniti i Series CS67P User guide

Conair
Conair BC84WCS User guide

Conair
Conair CD228 User guide

Conair
Conair BC37HCBC User manual