Conair CPG81C User guide

IB-11756
SERVICE CENTRE:
Conair Consumer Products Inc.
100 Conair Parkway,
Woodbridge, Ontario, L4H 0L2.
1-800-472-7606
©2012 Conair Consumer Products Inc.
www.conaircanada.ca
Consumer Call Centre E-mail :
Consumer_Canada@Conair.com
12CN135646
HAVE A QUESTION?
Please do not return this product to the retailer.
CALL US FIRST!
Our customer service and product experts are ready to
answer ALL your questions. Please call our TOLL-FREE
customer service number at :
1-800-472-7606
Or visit us online at
www.conaircanada.ca
Instruction & Styling Guide
For your safety and continued enjoyment
of this product, always read the instruction book
carefully before using.
Model CPG81C
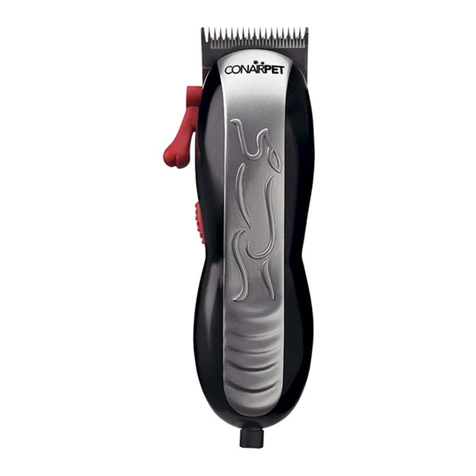
PET CLIPPER &
TRIMMER KIT
LIMITED FIVE YEAR WARRANTY
Conair will repair or replace, at our option, your
appliance free of charge for 60 months from the date of
purchase if the appliance is defective in workmanship
or materials.
To obtain service under this warranty, return the
defective product to the service center nearest
you, together with your sales slip and $7.50 for
postage and handling. In the absence of a receipt, the
warranty period shall be 60 months from the date of
manufacture.
ANY IMPLIED WARRANTIES, OBLIGATIONS, OR
LIABILITIES, INCLUDING BUT NOT LIMITED TO THE
IMPLIED WARRANTY OF MERCHANTABILITY AND
FITNESS FOR A PARTICULAR PURPOSE, SHALL BE
LIMITED IN DURATION TO THE 60 MONTH DURATION
OF THIS WARRANTY.
IN NO EVENT SHALL CONAIR BE LIABLE FOR
ANY SPECIAL, INCIDENTAL, OR CONSEQUENTIAL
DAMAGES FOR BREACH OF THIS OR ANY OTHER
WARRANTY, EXPRESS OR IMPLIED, WHATSOEVER.
This warranty gives you specific legal rights, and you
may also have other rights which vary from province
to province.

3. After recharging, store in a dry place, away from
small children.
4. Do not wrap cord around the clipper.
5. Preserving the batteries: in order to maintain the
optimum capacity of the rechargeable batteries,
the clipper should be recharged for 16 hours
approximately every 3 months.
FOR DIRECT PLUG-IN OPERATION
1. Connect the charging jack into the receptacle at the
end of the clipper.
2. Plug the adapter unit into the electric outlet.
3. Turn the switch to “0-OFF” position; let the clipper
charge for a few minutes first.
4. Turn the switch to “I-ON” position.
5. Unplug the adapter unit after use.
6. After use, store in a dry place away from small
children.
7. Do not wrap cord around the clipper.
8. This power unit is intended to be correctly
oriented in a vertical or floor mount position.
NOTE: THE PRODUCT YOU HAVE PURCHASED CONTAINS
RECHARGEABLE BATTERIES. THE BATTERIES ARE
RECYCLABLE. AT THE END OF THEIR USEFUL LIFE,
UNDER VARIOUS STATE AND LOCAL LAWS, IT MAY BE
ILLEGAL TO DISPOSE OF THESE BATTERIES INTO THE
MUNICIPAL WASTE STREAM.
CHECK WITH YOUR LOCAL
SOLID WASTE OFFICIALS FOR
DETAILS IN YOUR AREA FOR
RECYCLING OPTION OR PROPER
DISPOSAL.
*Be sure that the extreme right-hand big tooth of the
cutter touches the extreme right-hand tooth of the
cutting comb.
Any other servicing should be performed by an
authorized service representative. This product is for
household use. Do not pull, twist, or wrap line cord
around appliance.
FOR RECHARGEABLE APPLICATION
Your new Conair Pet Clipper & Trimmer Kit has
everything you need to achieve professional cuts at
home. Its powerful DC motor clipper with high stainless
steel blades for long lasting cutting precision features
a new 5-position adjustamatic taper control, plus turbo
button for more cutting power. Whatever hair length
you set the lever for, the clipper will automatically cut
all hair in that section at the same desired length.
Also included are 8 comb attachments for different hair
lengths, scissors, a metal comb and a case for easy
storage. The kit comes with lubricating oil, a cleaning
brush and a blade guard for easy maintenance of the
clipper blades.
This appliance is intended for household use.Comes
with an adapter used on 100–240V AC 50/60 HZ.
1. Before using the clipper for the first time, charge
continuously for 16 hours. Maximum battery
capacity will only be reached after 3 charging
and discharging cycles.
2. After use, turn the switch to “0-OFF” position.
Recharge batteries by connecting the charging jack
into the receptacle at the end of the clipper and
plugging the adapter unit into the electrical outlet.
The charging indicator lamp will light up to indicate
that charging has begun.
Cutting Comb (large blade)
Cutter
(small blade)
1/32" to 1/16"

position. To increase cutting length, slowly push the
lever down.To cut closer, push the lever up. Because a
different cutting edge is used in each setting, using the
taper lever lengthens the life of your blades.
Packed-in hair can slow down any clipper. To remove
hair without removing the blades, keep the clipper
on and quickly push the taper lever up and down
several times. If
you do this every
time, especially
after heavy
hair cutting, the
blades should
remain free of cut
hair.
USER MAINTENANCE
INSTRUCTIONS
CARE OF YOUR UNIT
DETACHABLE BLADE SET
Your appliance is equipped
with a detachable blade set
for routine maintenance,
cleaning and replacement.
To remove the blades: the
front of the clipper should be
facing you; push up under
the blades with your thumb
and the blades will pop out.
(See Fig 1)
To replace the blades: Make
sure the taper control is set
to the longest position and,
with the back of the clipper
facing you, insert the bottom side (with screws) of the
blades into the clipper and push down until it snaps
into place. (See Fig 2)
Fig 1
Fig 2
MAINTENANCE OF THE BLADES
Always apply oil to the blades before and after use. This
will ensure maximum cutting performance. Hold clipper
away from your body in a downward position and apply
oil on the front and sides of the cutter blades. Wipe
excess oil off with a soft, dry cloth.
*The top edge of the cutting comb should be 1/32” to
1/16” (.79 mm. to 1.59 mm.) higher than the top edge
of the cutter. This is important so that the clipper does
not cut too close or come in contact with the skin.
*The extreme left-hand tooth of the cutting comb must
cover or be to the extreme left hand of the first small
tooth of the cutter.

18. During use, do not place or leave appliance where
it may be (1) damaged by an animal or (2) exposed
to weather.
SAVE THESE
INSTRUCTIONS
Before you use your ConairPETTM pet clipper for the
first time, familiarize yourself with the entire clipper
kit. Your kit includes the clipper unit with an adjustable
blade assembly, comb attachments to use over the
blades, scissors, a metal comb, cleaning brush and
lubricating oil.
A proper work surface, such as a grooming table or
a kitchen counter or picnic table, is essential to the
safety of your pet during the grooming session. Place a
nonslip rubber bath mat or rubber-backed bath rug on
the raised surface where grooming will take place. Be
sure to keep your hands in continual contact with your
pet, so he doesn’t jump or fall off and get hurt. If you
are doing the grooming alone, you can use a collar and
a short lead to keep him stable.
Your pet must be thoroughly brushed, bathed and
dried before you can clip him accurately. All mats and
tangles must be combed out of the coat before the
clipper is applied to it, or the clipper will be unable to
cut properly. After bathing your pet, towel him until he
is damp, then finish drying with a pet-friendly dryer.
Brush coat while you are drying to straighten coat and
to remove any mats or tangles you may have missed
before the bath. When finished drying, make sure you
can run a comb easily through the coat.
Make sure your pet is not apprehensive about his first
experience with the clipper. Turn on the clipper and
hold it close to your pet until he accepts the sound of
the clipper. Next, hold the clipper up against him until
he seems comfortable. Do this several times while
constantly reassuring him, before you begin the first
grooming session.
OPERATING
INSTRUCTIONS
Remove the plastic head guard protecting the blades.
Apply oil across the blades; wipe off any excess with
a dry cloth. Plug the clipper into electrical outlet;
operate on voltage specified for clipper. Push the
on/off switch to the “I-ON” position.When finished
cutting hair, switch clipper to the “0-OFF” position,
remove clippings from the blades, using the cleaning
brush. Wipe the housing clean with a dry cloth. Before
replacing head guard, apply a few drops of lubricating
oil to the blades to prevent any rust from occurring.
HOW TO USE COMB ATTACHMENTS
Comb attachments serve as clipping guides. The
combs are designed to fit securely over the blades.
To fasten comb onto the blades, turn clipper to the
“0-OFF” position, slide the comb onto the front of the
clipper blades, and snap over the back of the blades.
To remove, push up the comb attachments at the back
of the blades and remove the comb.
Eight comb attachments are included:
1/8" (3mm) 1/4" (6mm) 3/8" (9.5mm)
1/2" (13mm) 5/8" (16mm) 3/4" (19mm)
7/8" (22mm) 1" (25mm)
Depending upon the breed and the length of hair,
choose the most appropriate guide. Increasing
blade tension to force blades to cut can cause the
clipper to overheat and reduce motor life. When the
cutting blades no longer cut smoothly, sharpening or
replacement is required.
ADJUSTABLE TAPER LEVER
The taper lever is positioned at your thumb. You can
hold the clipper in your hand and adjust the lever at the
same time, while you are clipping.
The taper lever adjusts the closeness of the cut from
a close cut with the taper lever in the up position, to
a longer length cut with the taper lever in the down

IMPORTANT SAFETY
INSTRUCTIONS
When using electrical appliances, especially when
children are present, take basic safety precautions,
including the following:
READ ALL INSTRUCTIONS
BEFORE USING.
KEEP AWAY FROM WATER.
DANGER – Any appliance is electrically live, even
when the switch is off. To reduce the risk of death or
injury by electric shock:
1. Unplug this appliance before cleaning.
2. Do not place or store appliance where it can fall or
be pulled into a tub or sink.
3. Do not use while bathing or in a shower.
4. Do not place in, or drop into water or other liquid.
5. Do not reach for an appliance that has fallen into
water. Unplug immediately. Use in a dry location
only. Do not expose to liquid, vapor or rain.
6. Except when charging, always unplug this appliance
from electrical outlet immediately after using.
7. Always verify rating before plugging adapter in.
WARNING – To reduce the risk of burns, electric
shock, fire, or injury to persons:
1. This appliance should never be left unattended
when plugged in. Do not pull, twist, or wrap line
cord around appliance.
2. This appliance should not be used by, on, or near
children or individuals with certain disabilities.
3. Use this appliance only for its intended purpose as
described in this manual. Do not use attachments
not recommended by the manufacturer. Do not use
an extension cord to operate this appliance.
4. Never operate this appliance if it has a damaged
cord or plug, or if it is not working properly, if it
has been dropped or damaged, or dropped into
water. Return the appliance to a service center
for examination and repair.
5. Keep the cord away from heated surfaces.
6. Never drop or insert any object into any opening
on this unit.
7. Do not place appliance on any surface while it is
operating.
8. Do not use this appliance with a damaged or
broken comb or with teeth missing from the
blades as injury may occur. Before use, make
certain blades are aligned properly. (See “Care of
your unit”).
9. Do not use outdoors or operate where aerosol
(spray) products are being used or where oxygen
is being administered.
10. Never block the air openings of the appliance or
place it on a soft surface, such as a bed or couch,
where the air openings may be blocked.
11. Always attach plug to appliance first, then to outlet.
To disconnect, turn all controls to “OFF” then
remove plug from outlet.
12. Avoid skin contact with moving blades.
13. When using the appliance with its cord, be mindful
of tangles or kinks in the cord. If the cord does
become tangled during use, turn the unit off and
straighten cord before operating again.
14. Always connect adapter to appliance first, then
to outlet.
15. This power unit is intended to be correctly oriented
in vertical floor mount position.
16. Be sure voltage selector is in correct position
before operating.
17. For connection to a supply not in the U.S.A/Canada,
use an attachment plug adapter of the proper
configuration for the power outlet.

Never attempt to recharge primary batteries as this
may cause leakage, fire, or explosion.
Please be sure that the attachments are firmly in place
before turning the trimmer on.
BLADE REPLACEMENT
This trimmer comes with a detachable blade set,
which makes maintenance and replacement easy.
TO REMOVE THE BLADE SET:
t.BLF TVSF UIF USJNNFS JT JO UIF
“0-OFF” position.
t'BDJOH UIF GSPOU PG USJNNFS QSFTT
the blade on the teeth in the
direction away from you until they
pop out of the housing.
TO REPLACE THE BLADE SET:
t-PPLJOH BU UIF USJNNFS GSPN BCPWF ZPV XJMM TFF B
notch at the back of the trimmer.
t5IFSF JT B UBC PO UIF CMBEF TFU PO UIF CPUUPN
opposite the blades. Position that tab so that it fits
into the notch inside the trimmer head. Push the
blade set down onto the trimmer head until it snaps
into place.
Oiling blades:
For best results, put a drop of lubricating oil on the
blade approximately once a month. Motor bearings are
permanently lubricated – do not attempt to oil.
Notice – do not over oil:
This trimmer requires very little oiling. When it is
necessary to oil, turn trimmer on, hold the unit with
blades facing DOWN, and squeeze one drop of oil onto
blades. Wipe off excess with soft cloth.
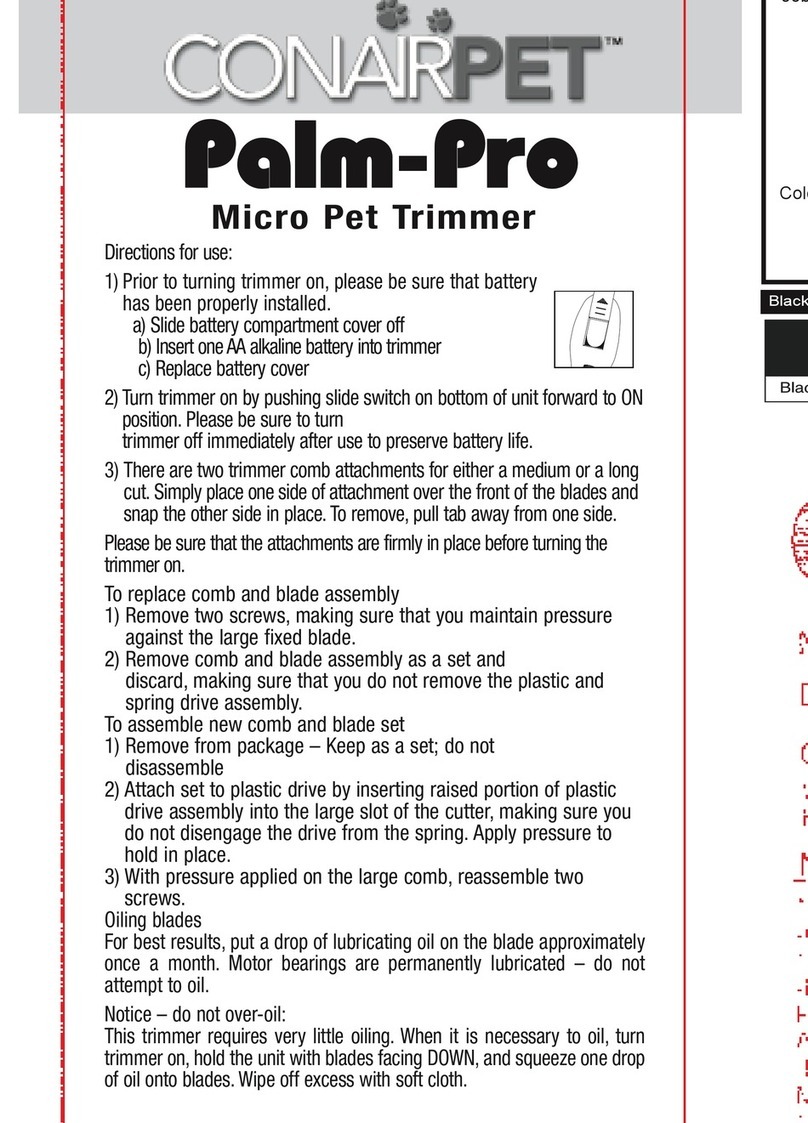
Directions for use:
1. Prior to turning trimmer on,
please be sure that battery has
been properly installed.
a) Slide battery compartment
cover to open.
b) Insert one AA alkaline battery into trimmer.
c) Replace battery cover.
2. Turn trimmer on by pushing rocker switch on
bottom of unit forward to “I-ON” position. Please
be sure to turn trimmer off immediately after use
to preserve battery life.
3. There are two trimmer attachments for either a
medium or a long cut. Simply place one side of
attachment over the front of the blades and snap
the other side in place. To remove, pull tab away
from one side.
4. Always purchase the correct size and grade of
battery most suitable for the intended use.
5. Replace all batteries of a set at the same time.
6. Clean the battery contacts and also those of the
device prior to battery installation.
7. Ensure the battery is installed correctly with regard
to polarity (+ and -).
8. Remove battery from equipment which is not to be
used for an extended period of time.
9. Remove used batteries promptly.
10. Store unused batteries in their original packaging,
away from metal objects that could short-circuit
them. Never short-circuit batteries.
11. Never dispose of batteries in fire, except under
conditions of controlled incineration. (Failure to
observe this precaution may result in an explosion).
PALM-PRO MICRO
PET TRIMMER

BATTERY REMOVAL INSTRUCTIONS
1. Using a small screwdriver, remove the screw on the
bottom housing at back of the clipper.
2. Remove the top housing by hand.
3. Now the battery is exposed so you can separate the
wire connectors. Carefully hold the wires on each
side of the connector and gently cut the wires. The
connector will separate and the batteries can be
removed from the inner housing. Bring the battery to
the nearest collection center for disposal or call the
toll-free RBRC information line at 1-800-8-BATTERY.
RBRC is a trademark of The Rechargeable Battery
Recycling Corporation. DO NOT throw the batteries
into the normal municipal waste system.
Never use cord to pull clipper. Never twist or otherwise
obstruct cord. To store, coil cord loosely and secure
with a twist tie.
SPECIAL OIL
To maintain the blades of your ConairPETTM clipper, be
sure to lubricate them regularly with oil. Gently place 2
or 3 drops of oil on the teeth of the blades before each
use. Turn clipper on for a minute, then turn off. This will
help maintain blade sharpness and prevent damage
from overheating. Oil is included in your clipper set.
This light, natural oil was formulated specifically for the
ConairPETTM clipper. Because it is the right oil to use,
it will not slow down the blades. Never use any other
product. There is no substitute for ConairPETTM oil. KEEP
OIL AWAY FROM CHILDREN.

TENIR LOIN DE L’EAU
STORAGE
When not in use, your clipper should be disconnected
and stored in a safe, dry location, out of reach of
children.
BATTERY
3 SCREWS
CAREFULL
CUT HERE
WITH WIRE
CUTTERS TO
REMOVE THE
BATTERY
Everyone knows that electricity and water are a
dangerous combination. But did you know that an
electric appliance is still electrically alive even if the
switch is off? If the plug is in, the power is on. So
when you are not using your appliances, keep them
unplugged.
ALWAYS UNPLUG
SMALL APPLIANCES
WARNING:
IF YOU THINK
THE POWER IS OFF
WHEN THE SWITCH
IS OFF,
YOU'RE WRONG.
Table of contents
Other Conair Pet Care Product manuals
Popular Pet Care Product manuals by other brands

Aqua One
Aqua One EuroStyle Cube 55 instruction manual

Num'axes
Num'axes Pet Fountain user guide

EYENIMAL
EYENIMAL DELUXE SPRAY NOBARK COLLAR user guide

Petsafe
Petsafe Classic In-Ground Fence PIG00-17441 Get started

NITEforce
NITEforce LIVE MAP DOG GPS user manual

Pet Stop
Pet Stop Comfort Contact PCC-200 owner's guide

Petlibro
Petlibro PLAF001 user manual

Dogtra
Dogtra 1900S Series user manual

Assisi Animal Health
Assisi Animal Health Assisi Loop 150 Instructions for use

AmazonBasics
AmazonBasics B07KMMJ5XH Welcome guide

Pet Gear
Pet Gear PG8800 instruction manual

Petsafe
Petsafe Pet Containment System Operating and training guide