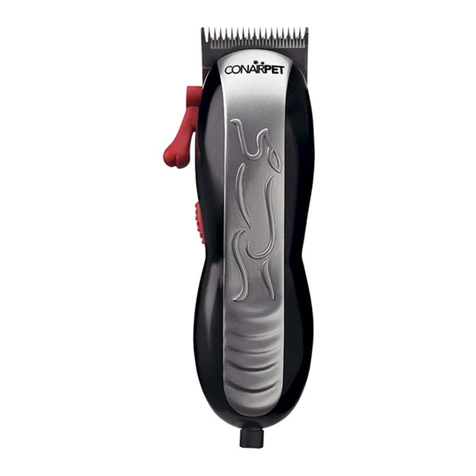
Directions for use:
1)
Prior to turning trimmer on, please be sure that battery
has been properly installed.
a) Slide battery compartment cover off
b) Insert one AA alkaline battery into trimmer
c) Replace battery cover
2)
Turn trimmer on by pushing slide switch on bottom of unit forward to ON
position. Please be sure to turn
trimmer off immediately after use to preserve battery life.
3)
There are two trimmer comb attachments for either a medium or a long
cut. Simply place one side of attachment over the front of the blades and
snap the other side in place. To remove, pull tab away from one side.
Please be sure that the attachments are firmly in place before turning the
trimmer on.
To replace comb and blade assembly
1) Remove two screws, making sure that you maintain pressure
against the large fixed blade.
2) Remove comb and blade assembly as a set and
discard, making sure that you do not remove the plastic and
spring drive assembly.
To assemble new comb and blade set
1) Remove from package – Keep as a set; do not
disassemble
2) Attach set to plastic drive by inserting raised portion of plastic
drive assembly into the large slot of the cutter, making sure you
do not disengage the drive from the spring. Apply pressure to
hold in place.
3) With pressure applied on the large comb, reassemble two
screws.
Oiling blades
For best results, put a drop of lubricating oil on the blade approximately
once a month. Motor bearings are permanently lubricated – do not
attempt to oil.
Notice – do not over-oil:
This trimmer requires very little oiling. When it is necessary to oil, turn
trimmer on, hold the unit with blades facing DOWN, and squeeze one drop
of oil onto blades. Wipe off excess with soft cloth.
Micro Pet Trimmer
Palm-Pro
Model PGR44C
Mode d'emploi :
1. Assurez-vous que la pile est bien installée avant de mettre la tondeuse en
marche.
a) Ouvrez le couvercle du logement de la pile.
b) Insérez une pile alcaline AA dans le logement.
c) Remettez le couvercle du logement.
2. Mettez la tondeuse en marche en poussant l'interrupteur, au bas du manche,
à la position ON. Assurez-vous d'éteindre la tondeuse immédiatement après
l'usage afin de ne pas épuiser la pile inutilement.
3. La tondeuse vient avec deux peignes : un pour la tonte moyenne, l'autre
pour une tonte plus longue. Placez un côté du peigne sur l'avant des lames
et enclenchez l'autre côté en place. Pour l'enlever, tirez la patte d'un côté.
Assurez-vous que l'accessoire est bien enclenché avant de mettre la ton-
deuse en marche.
Retrait de l'ensemble peigne-lame :
1) Enlevez les deux vis, vous assurant de maintenir une pression sur la grosse
lame fixe.
2) Enlevez le peigne et la lame ensemble et jetez-les; assurez-vous de ne pas
jeter l'engrenage et la bague en plastique.
Pose du nouvel ensemble peigne-lame :
1) Sortez l'ensemble de l'emballage et tenez-le assemblé; ne séparez pas les
pièces.
2) Fixez l'ensemble sur l'engrenage en plastique en insérant la partie soulevée
de l'engrenage dans la grosse fente du couteau, vous assurant de ne pas
séparer l'engrenage du ressort. Appliquez une pression pour tenir le tout en
place.
3) Gardant une pression sur l'ensemble, remettez les deux vis de fixation.
Huilage des lames :
Afin d'obtenir de meilleurs résultats, placez une goutte d'huile de lubrification sur
la lame une fois par mois environ. Les roulements du moteur sont lubrifiés en
permanence – ne les lubrifiez pas.
Remarque – Ne huilez pas trop :
La tondeuse ne requiert pratiquement aucun huilage. Lorsqu'un huilage est
requis, mettez la tondeuse en marche, les lames pointant vers le BAS et laissez
tomber une goutte d'huile sur les lames. Essuyez l'excédent avec un linge doux.
Micro-tondeuse pour animaux de compagnie
Palm-Pro
Modèle PGR44C
Job Number
Model #:
:
Box Size:
Material:
Coating:
Color (Front):
(Back):
Date: Aug. 14 2009 Artist :Mariecon N.
UV
4 C- (CMYK)
0 C
Die-Cut
PGR44C Clamshell
09PGC00001
106mm (w) x 425mm (h)
350GSM Whiteback Cardboard
Job Number
Model #:
:
Box Size:
Material:
Coating:
Color (Front):
(Back):
Date: Aug. 14 2009 Artist :Mariecon N.
UV
1 C- (black)
0 C
Die-Cut
Black
PGR44C Clamshell
09PGC00001
106mm (w) x 425mm (h)
350GSM Whiteback Cardboard
Job Number
Model #:
:
Box Size:
Material:
Coating:
Color (Front):
(Back):
Date: Aug. 14 2009 Artist :Mariecon N.
1 C- (black)
0 C
Die-Cut
Black
PGR44C Clamshell Insert
09PGC00001
99mm (w) x 152mm (h)


