Concept Pro AIR45 IP4M Series User manual

Weatherproof Colour/Mono IP Camera
USER MANUAL
AIR45 IP4M Range

CAUTION
1.
2.
3.
4.
5.
6.
7.
8.
9.
10.
11.
12.
13.
14.
15.
Installation should be made by a qualified service person and should adhere to all local
codes.
In order to prevent electric shock and avoid damage to waterproof seals, do not loosen
any screws on the camera body.
Adjust the sunshield to avoid exposing the lens to direct sunlight.
Do not touch the front glass. If necessary, use a soft cloth to wipe off dust or debris.
Do not install on a surface subjected to frequent vibration or shocks.
Do not operate the camera beyond its temperature range or power ratings.
Should any damage or suspected damage occur, shutdown and disconnect the power and
contact your service provider.
Do not install the camera under unstable lighting conditions. Severe lighting change or
flicker can cause the camera to work improperly.
Never use the camera close to a gas or oil leak.
Do not disassemble the camera.
Do not drop the camera or subject the unit to physical shocks
Do not point the camera directly at strong light, this can damage the sensor.
Ensure all removable covers are replaced to protect the inner components.
Do not install near devices which emit a strong electro-magnetic field.
Use a dry or damp cloth only for cleaning.
Note: Changes or modifications not expressly approved by the manufacturer can
cause the camera to be damaged and become inoperable. This may invalidate the
user warranty.
PLEASE FOLLOW THE ABOVE PRECAUTIONS – FAILURE TO DO SO MAY
INVALIDATE THE WARRANTY OR CAUSE SERIOUS INJURY.
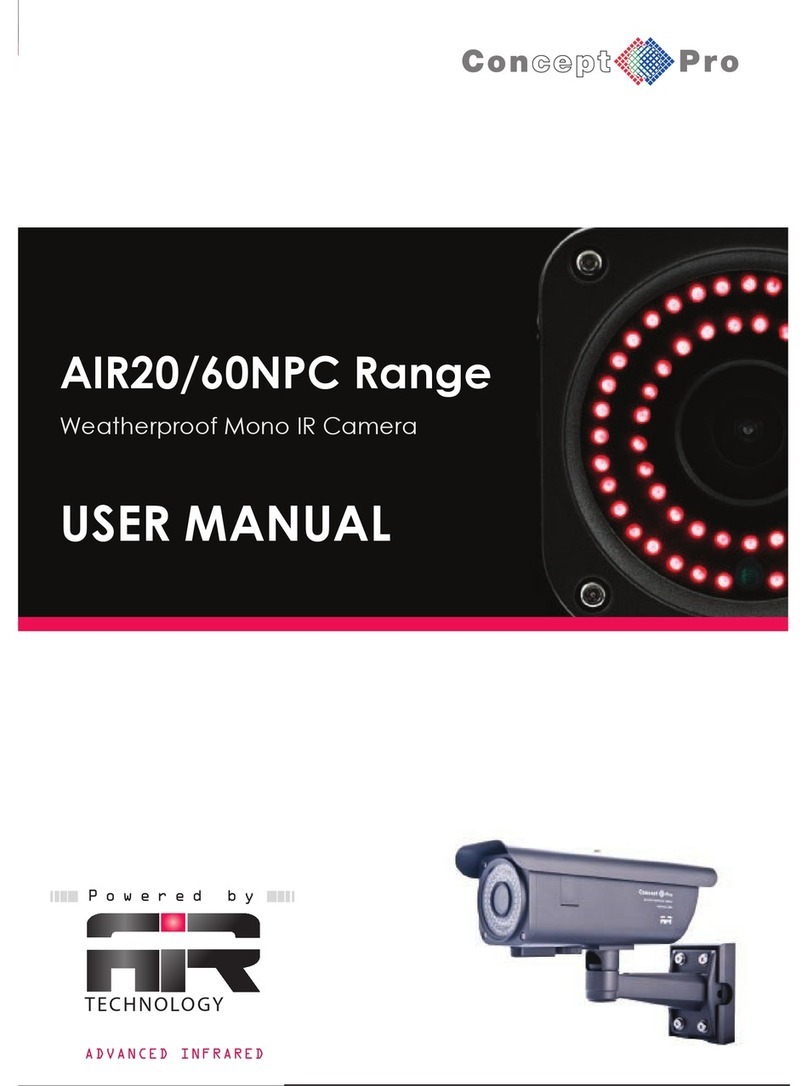
The Concept Pro AIR45 is a weatherproof IR camera, suitable for
monitoring areas in hostile conditions and in low light.
PACKING CONTENTS
1Fixing Bolt for Sunvisor
2Photo Sensor
7Audio Input
4Sunvisor
3IR LED
5Mounting Bracket
4 5
9
8
7
6
10
2
3
111
12
6Tri- Axis Points
Audio Output
8
Power Connector
9
Network RJ45 Connector
10
External Lens Adjustment
Micro SD Slot
11
12
Alarm Cable
13
13
SOCKET WEATHER SEAL
X1
ALLEN KEY
X3
X1
LENS ADJUSTMENT TOOL
X1
MOUNTING DRAWING PAPER
X1
ROUND FIXING PLATE
X1
MOUNTING SEAL
USER MANUAL
X1
USER MANUAL
WALL SCREW
X4 X5
HEX BOLTS
PLASTIC-WALL PLUG
X4

INSTALLATION
MOUNTING TEMPLATE
Use the supplied mounting template
to mark the spacing for drilling.
Following drilling, securely attach the
bracket and camera to the wall.
FIXING TO A WALL
Important: Ensure all precautions are observed during installation.
It is recommended the camera is tested during the most demanding environmental conditions
such as low light or bright sunlight to ensure continuity of effective CCTV monitoring. You may
find the use of an ND filter helpful.
Remove the camera unit carefully from the box,and keep the
accessories in a safe place.
CONNECTION
Power Connector
Network RJ45 Connector
Audio Output
Audio Input
Alarm Cable
Troubleshooting
Ensure all power and cable connections are correct with the Camera, NVR and Test monitor
or Telemetry devices if used.
Power Voltage Check - Remove the OSD cover to see if the green correct power LED is lit. If
there red LED is lit the power voltage is too high. If the yellow LED is lit the power voltage is
not high enough. If there are no LEDs lit there is no power getting to the camera
If all power and cable connections are correct and the camera picture can not be produced or
configured then contact your supplier for technical support.

POSITIONING
Point the Camera towardsthe area to be monitored.
1
2
3
3
2
1

CONNECTION
PC/Laptop
Power Connector
Audio Output
Audio Input
Network Cable (RJ45)
SWITCH
MODEM
PSU
Check the power supply is the correct level and connect your power supply into the power port on the camera.
Connect the RJ45 connector to your network switch. If you are using PoE Switch (Power over Ethernet)
Please Remove the power supply to the camera, as this is not required.
View the image on your monitoring device to check the power and video connection is working properly.
A quick method would be to connect a BNC test Monitor to the SVO. The camera IP address will also be displayed.
Alarm Cable

Use the steps below to find the camera’s IP address and connect to the camera over the
local area network (LAN) using UPnP on Windows®7 or Bonjour in Mac OS®
FINDING THE CAMERA’S IP ADDRESS
2. Finding the camera’s IP address using Bonjour® in Mac OS®
NOTE: To use this method, the camera computer must be on the same network. Bonjour® is
enabled by default, and can be enabled/disabled using NVMS (check the NVMS manual for details)
1. Open Safari® browser and click the Bookmarks button
2. Click Bonjour. The camera’s IP address appears in the Monjour Devices list.
3.Double-click the camera to open it in Safari.
1. Click Start>Computer>Network. The camera’s IP address appears under Network
Infrastructure.
1. Finding the Camera’s IP Address using UPnP in Windows® 7.
NOTE: To use this method, your router must support UPnP and the camera and computer must
be on the same network. UPnP is enabled in the camera by default, and can be enabled/disabled
using NVMS (Check the NVMS manual for details).
-Double click to open
the camera
2. Double-click the camera to open it in
your default browser.
3. Under User Name and Password,
enter the camera’s User Name
(default: admin) and Password
(default: admin) and click Login.
Enter Camera Password (default: admin)
Enter Camera User name (default: admin)
Click To Login
FINDING THE CAMERA’S IP ADDRESS

Bookmarks
button
Bonjour
Double-click the camera’s IP address
4. Under User Name and Password, enter the camera’s User Name (default: admin)
and Password (default: admin) and click Login.
Enter Camera Password (default: admin)
Enter Camera User name (default: admin)
Click To Login

EXTERNAL LENS ADJUSTMENT
NOTES
2
1
3
B A
A
B
1
2
3
Open the lens adjuster cover and
adjust focus and zoom. Loose the
screw on the lens adjuster cover.
Lens Adjustment Tool
Focus and Zoom Adjustments
A
B
Zoom
Turn clockwise to zoom wide
anti-clockwise to zoom narrow
Focus
Turn clockwise to focus far
Anti-clockwise to focus near

NOTES

334mm
DIMENSIONS

Can’t find the camera IP address:
Make sure Ethernet and/or DC power cables are correctly connected to the camera.
Make sure the PoE switch or DC power source meets the camera’s power requirements.
If using PoE,make sure the PoE switch is powered on.
Make sure the PC is on the same network as the camera. Ping the camera’s IP address.
On your PC, go to Start>Programs>Accessories >Command Prompt. Type ping then the
camera’s local IP address and press Enter. If you get the message “Request timed out,” PC and
camera are not on the same network or camera is not connected. Camera is connected if you
receive replies.
Connect the BNC test cable to the camera and the other end to a test monitor. The monitor
display shows the camera’s IP address. A default IP address of 192.168.0.120 may mean that
the camera cannot obtain an IP address from the router. Check the Ethernet/power
connections and router configuration.
Camera set for static IP mode using an incorrect IP address. By default, the camera is set for
DHCP mode,which means it will automatically obtain an IP address from your router. Reset
the camera to factory default settings by removing the camera cover and pressing the reset
button for 5 seconds or more.
Can’t connect to the camera on a web browser using local IP address:
See steps above.
Verify the camera’s local IP address using one of the methods listed in “Finding the Camera’s IP
Address”
Can’t connect to camera on a web browser using a DDNS address:
Port forwarding not set up. Make sure the HTTP port (default: 80) and Control port (default:
30001)are forwarded on your router to the camera’s local IP address.
Multiple cameras using same port number to connect. Configure each camera to use different
ports and port forward the new ports
Can’t connect to camera video on a web browser:
If using IE, make sure to install ActiveX plug-in or Adobe Flash Player. For more information,
see “8.3 Internet Explorer® Setup”
If using a browser other thanIE (e.g.Google Chrome,Apple Safari,Mozilla Firefox),make sure
latest version of Adobe Flash Player is installed.
Video performs poorly on browser:
Insufficient bandwidth available for high-quality stream1. Select stream 2 under Stream.
Stream 2 provides a lower-resolution to conserve bandwidth and improve performance on
low-bandwidth connections.
If using IE, click the message above the video area to use ActiveX plug-in instead of Flash
Player. ActiveX may provide smoother video performance.
User account is locked:
User accounts are locked when the password has been incorrectly entered 3 times. To unlock
the account, login to the camera web interface as admin. Click Privilege Manager>User.
Under User, select the locked user account and click Unlock to unlock the account.
TROUBLESHOOTING

NUMBER PLATE CAPTURE
The AIR4528-IP4M & AIR4528-IP4M-Z, are ideal for Number Plate Capture installations. Simply
follow the instructions below to tweak the settings and the Number Plate Capture camera will be
ready to go.
1. Please connect the Concept Pro IP camera to a POE switch and PC.
Navigate to the IP cameras web interface.
2. From the live video stream, right click the video and select ‘Sensor’.

3. To alter the Sensor Setting, select Debug mode.
4. Select Exposure Tab and apply these settings;
• Mode > Manual
• Meter Area > Whole
• Fix shutter > 1/20000
• Fixed Gain > 50*
• Iris > Auto*
• Iris Speed > 50*
*This setting may need adjusting depending on the environment, please test and adjust for
optimal performance.

5. Select DayNight Tab and apply these settings;
• D/N Setting > Night Mode
• IR > fixed @ 50%*
*This setting may need adjusting depending on the environment, please test and adjust for
optimal performance.
6. Select Enhanced Image Tab and apply these settings;
• HLC > ON @ 100
•Anti-shake > ON
7. Click Save, then yes. Close the pop up and it will remind you to switch out of debug mode
to standard mode, select yes and this will be done.

Table of contents
Other Concept Pro IP Camera manuals

Concept Pro
Concept Pro AIR2024-AHD Series User manual

Concept Pro
Concept Pro CVP9328DNIR-AHD2M User manual

Concept Pro
Concept Pro AIR701/IRH User manual

Concept Pro
Concept Pro AIR20NPC series User manual

Concept Pro
Concept Pro AIR3026-HD User manual

Concept Pro
Concept Pro CVP9314DNIR-AHD User manual

Concept Pro
Concept Pro VHSDIR-870EXT-IP User manual

Concept Pro
Concept Pro CBP6325EL-AHD2M User manual

Concept Pro
Concept Pro AIR3526-AHD User manual

Concept Pro
Concept Pro AIR701/IRH User manual