Im Interesse Ihrer eigenen Sicherheit und um ordnungsgemäße Benutzung zu gewährleisten, lesen
Sie bitte diese Hinweise sorgfältig vor Gebrauch Ihres neuen Produkts. Wir empfehlen, diesen
Hinweiszettel sorgfältig aufzubewahren, so daß Sie auch in Zukunft nachschlagen können.
Pour une utilisation sécurisée et adéquate de ce produit, veuillez lire attentivement les instructions
suivantes et les garder pour y revenir si besoin.
Allgemeine Information
1. Dieses Produkt gehört zu unserem 240V erweiterbaren Lichtsystem und sollte daher ausschließlich nur mit
unseren Netzteilen verwendet werden. 2. Alle Produkte dieses Systems sind mit wetterfesten, 2-poligen
Steckverbinder ausgestattet, mit der alle Produkte dieses 240V Lichtsystems nahtlos miteinander verbunden
werden können. 3. Die maximale Anzahl an LEDs und andere Leistungdaten sind auf dem Typenschild des
Netzteils ausgewiesen. Überschreiten Sie niemals die maximale Anzahl an LEDs. 4. Produkte des 240V
Lichtsystems sind gemüß der IP65 Schutzklasse hergestellt und, nachdem alle Produkte miteinander
verbunden sind, für Innen- und saisonalen Außenbetrieb geeignet. 5. Für gewerblichen Gebrauch geeignet:
Dieses hochwertigere, erweiterbare Lichtsystem ist mit stapazierfähiger Gummiverkabelung und innovativer
Technologie zur Birnenabdichtung ausgestattet, d.h. dieses Lichtsystem ist für Einsatz selbst bei ständig
wechselnder Wetterlage und verlängertem Außengebrauch konzipiert.
Vor Inbetriebnahme
1. Prüfen Sie das Produkt auf eventuelle Beschädigungen oder Mängel, bevor Sie es an eine Stromversorgung
anschließen. Testen Sie, daß alle Produkte richtig funktionieren. (Festive Lights Ltd kann keinerlei Kosten für
Installation oder Aus- und Wiedereinbau übernehmen). 2. Das Produkt darf unter keinen Umständen
verändert werden. Bei etwaigen Änderungen, insbesondere Kürzen oder Verlängern der Verkabelung oder
Verwendung eines anderen Netzteils erlischt jegliche Garantie und es kann dazu führen, daß das Produkt nicht
mehr sicher betrieben werden kann. 3. Achten Sie darauf, daß das Produkt an eine normale 240V Steckdose
angeschlossen wird; aber erst nachdem sämtliche Steckverbinder fest miteinander verbunden und
eingeschraubt wurden.
Montage & Aufbewahrung
1. Schließen Sie den Transformator entweder im Innenbereich an oder schützen Sie diesen bei Außenanschluß,
in dem Sie den Transformator in einer geeigneten, wetterfesten Behausung unterbringen. 2. Vermeiden Sie
die Verwendung von scharfkantigen Werkzeug oder Befestigungsmaterial (z.B. Metalldraht) wenn Sie Ihr
Lichtsystem befestigen oder aufhängen. 3. Das Produkt darf unter keinen Umständen verändert werden. Bei
etwaigen Änderungen, z.B. Kürzen oder Verlängern der Verkabelung oder Verwendung eines anderen als den
mitgelieferten Transformators, erlischt jegliche Garantie und es kann dazu führen, daß das Product nicht mehr
sicher betrieben werden kann. 4. Die LED Birnen sind für langlebigen Betrieb konstruiert und können daher
nicht ausgetauscht werden. Versuchen Sie unter keinen Umständen, diese zu reparieren oder auszutauschen.
Bitte beachten: Die Lichtsystemverkabelung sollte, insbesondere bei den schwereren
Partylichterkettenversionen, immer mit zusätzlichem Oberleitungskabel installiert werden.
Anleitung für den Timer-Controller (MV091)
1. Drücken Sie einmal, um die Leuchten einzuschalten. 2. Drücken Sie zweimal und die Taste wird grün, was
anzeigt, daß der 6-Stunden-Timer eingeschaltet ist (6 Stunden an und 18 Stunden aus). 3. Drücken Sie dreimal,
und die Taste wird rot und zeigt an, daß der 8-Stunden-Timer eingeschaltet ist (8 Stunden an und 16 Stunden
aus). 4. Drücken Sie die Taste viermal, um die Beleuchtung auszuschalten.
Einbau
1. Vor festen Einbau empfehlen wir, daß Sie sämtliche Lichter testen und prüfen, daß alle Steckverbindungen
sicher miteinander verbunden sind. 2. Vor Stromanschluß prüfen Sie, daß die Verkabelung keine
Beschädigungen aufweist und die Wasserdichtungen (O-förmige Gummiringe) richtig positioniert sind. 3.
Stellen Sie sicher, daß Sie den Stecker erst nachdem alle Steckverbindungen richtig miteinander verbunden
sind, an eine haushaltsübliche 240V Steckdose anschließen. 4. Verlegen Sie die Kabel nicht in der Nähe von
irgendwelchen direkten Wärmequellen und so, daß Stolperfallen vermieden werden.
Informations générales
1. Ce produit appartient à notre système raccordable 240V ne peut être utilisé qu’avec une de nos prises
adaptées. 2. Tous les produits de ce système sont vendus avec un connecteur 2 broches imperméable qui
se connectera facilement à tout le reste de notre gamme 240V. 3. Veuillez consulter l’étiquette de cote
énergétique qui vous indique le nombre de LED maximum pouvant être connecté sur le système ainsi que
la consommation électrique du produit et veuillez ne pas dépasser le nombre de LED autorisé. 4. Les
produits de notre gamme 31V sont dotés de la cote IP65 qui permet une utilisation intérieure et extérieure
du produit. 5. Convient à un usage commercial – ce système raccordable de qualité supérieure est doté de
câbles en caoutchouc et d’une technologie innovante d’étanchéité des ampoules ce qui fait que ces
guirlandes lumineuses résistent aux changements climatiques et sont adaptées à un usage extérieur
prolongé.
Avant de commancer
1. Vérifiez que le produit soit en bon état avant de le brancher à une source électrique. Avant l’installation,
veuillez tester chaque produit pour vous assurer de leur bon fonctionnement. (Festive Lights Ltd ne
couvrira aucun coût lié à l’installation). 2. Ce produit NE DOIT PAS ÊTRE MODIFIÉ. Si des modifications sont
apportées (ex: couper ou rallonger les câbles) cela annulera la garantie et peut rendre le produit dangereux.
3. Veuillez vous assurer de connecter le produit à une prise 240V. Attendez que toutes les connexions soient
faites avant de connecter le produit à la source de courant.
Installation et Rangement
1. Veillez à toujours connecter le produit à l’intérieur ou bien utilisez une boîte étanche pour protéger les
prises et connexions des intempéries en cas d’usage extérieur. 2. Évitez d’utiliser des objets et outils
coupants/pointus pour accrocher ou attacher votre produit. 3. Ce produit NE DOIT PAS ÊTRE MODIFIÉ. Si
des modifications sont apportées (ex: couper ou rallonger les câbles) cela annulera la garantie et peut
rendre le produit dangereux. 4. Les ampoules LED sont conçues pour durer et ne peuvent pas être
remplacées. Veuillez ne pas tenter de les remplacer. Notez s'il vous plaît: Les câbles de guirlande
guinguette doivent toujours être supportés par des câbles caténaires.
Instructions de la minuterie (MV091)
1. Appuyer une fois pour allumer la lampe. 2. Appuyer deux fois et le bouton sera vert, indiquant que le
minuteur 6 heures est en marche (lampe allumée pendant 6 heures et éteinte pendant 18 heures). 3.
Appuyer trois fois et le bouton passera au rouge, indiquant que le minuteur 8 heures est en marche (lampe
allumée pendant 8 heures et éteinte pendant 16 heures). 4. Appuyer quatre fois pour éteindre la lampe.
Réparations
1. Avant de tenter une réparation, nous vous recommendons de tester toutes les lumières ensemble ainsi
que les différentes connexions. 2. Avant de connecter le produit à une source d’éléctricité, veillez à ce que
les câbles ne soient pas endommagés et que les joints imperméables (en forme de ‘O’ en caoutchouc)
soient en place. 3. Veillez à connecter la prise à une prise électrique 240v – ne connectez pas le produit sur
le courant avant de vous être assuré que toutes les connexions soient prêtes. 4. Afin d’éviter tout risque de
chute ou de trébuchement, veuillez placer les câbles dans un endroit sûr et les tenir éloignés de toute
source directe de chaleur.
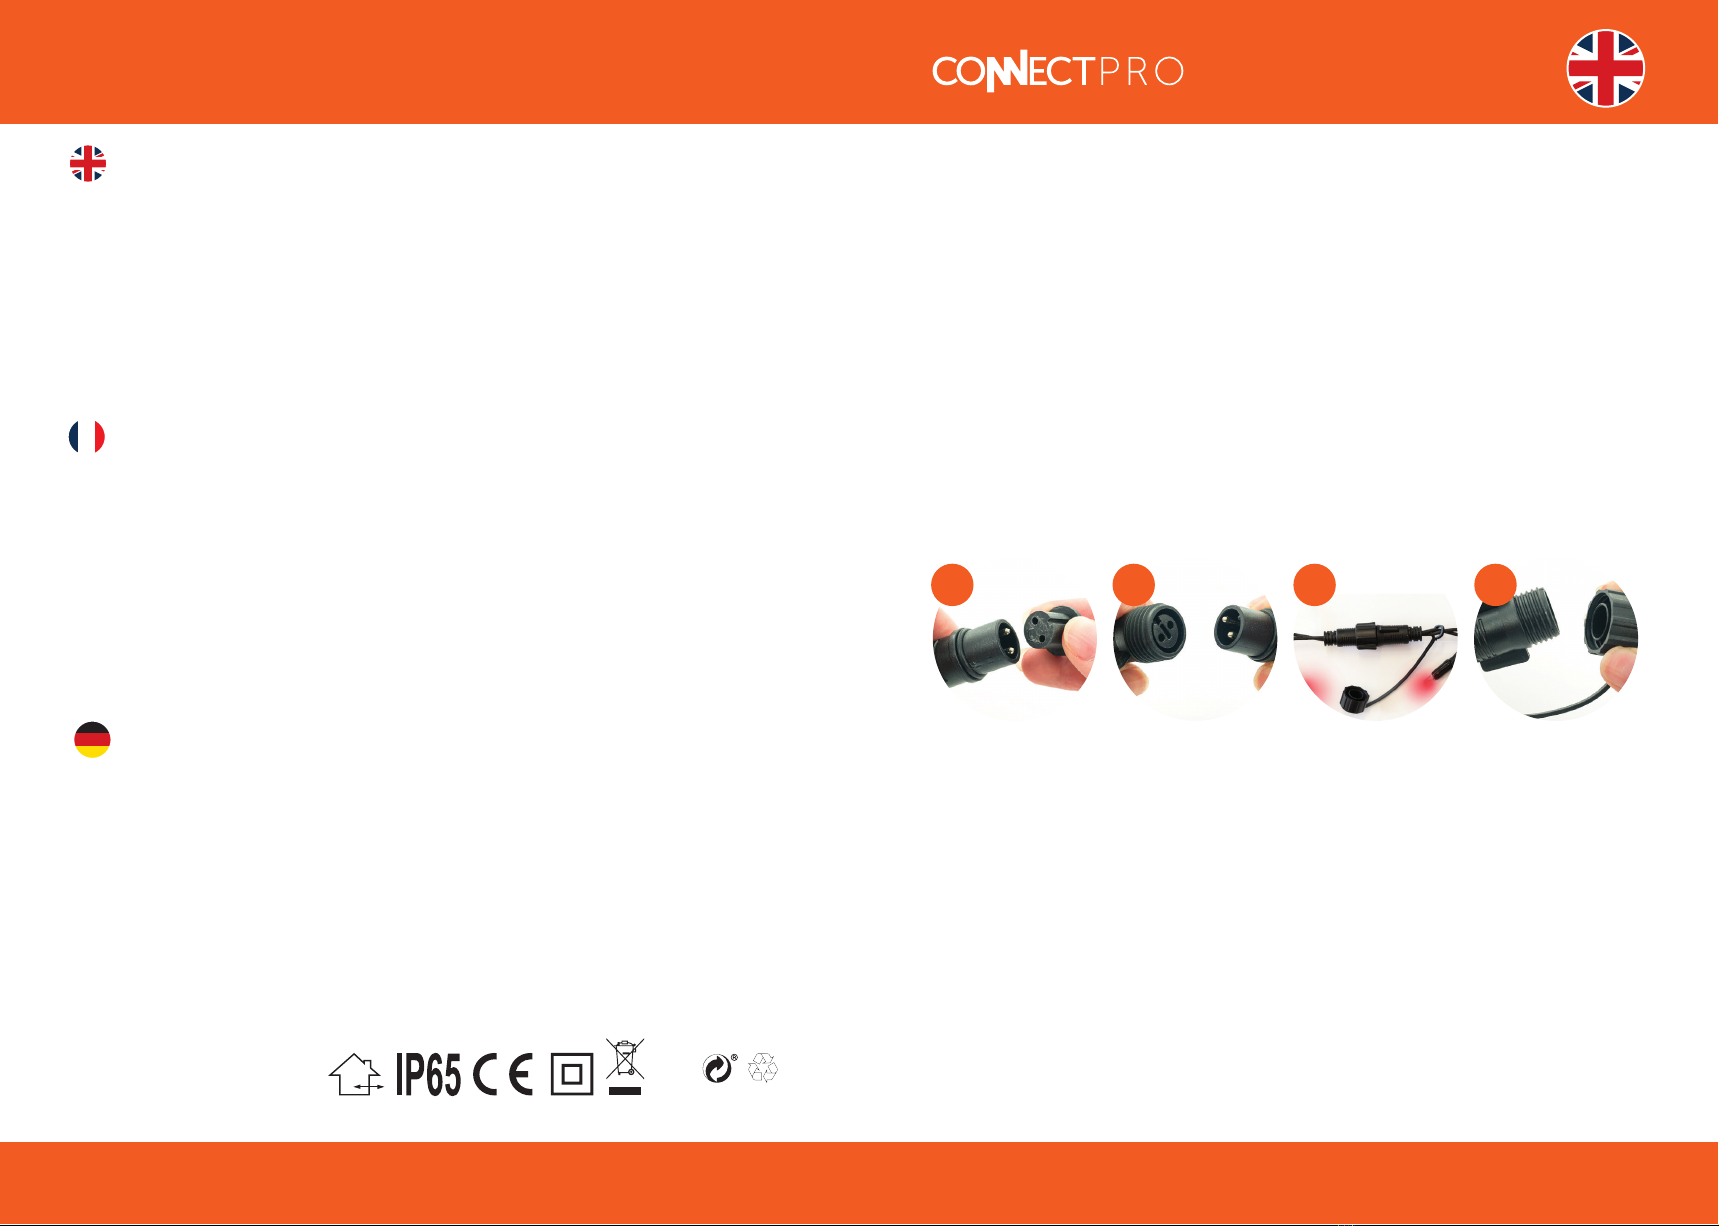
Enlevez les bouchons
de sécurité de vos
produits
Connectez la prise à la
première guirlande
lumineuse / au premier
accessoire
Continuez à connecter
les guirlandes et
accessoires
Placez le bouchon à vis
sur la dernière lumière
pour finir la chaîne
1 2 3 4
Sicherheitskappe entfernen Anschlußkabel and erstes
Produkt/Zubehör
anschließen
Alle weiteren, benötigten
Lichtersets/Zubehör
anschließen
Befestigen Sie die
Endschraubkappe am Ende
der leichten Kette.
1 2 3 4
UK Importeur: Festive Lights Ltd, Preston Road, Charnock Richard, Chorley, Lancashire, PR7 5HH
EU Importeur: Festive Lights BV, Utrechtseweg 341, 3818 EL Amersfoort, Netherlands
UK Importateur: Festive Lights Ltd, Preston Road, Charnock Richard, Chorley, Lancashire, PR7 5HH
EU Importateur: Festive Lights BV, Utrechtseweg 341, 3818 EL Amersfoort, Netherlands