manuals.online logo
Brands
  1. Home
  2. •
  3. Brands
  4. •
  5. Conrad
  6. •
  7. Laptop Accessories
  8. •
  9. Conrad 99 92 00 User manual

Conrad 99 92 00 User manual

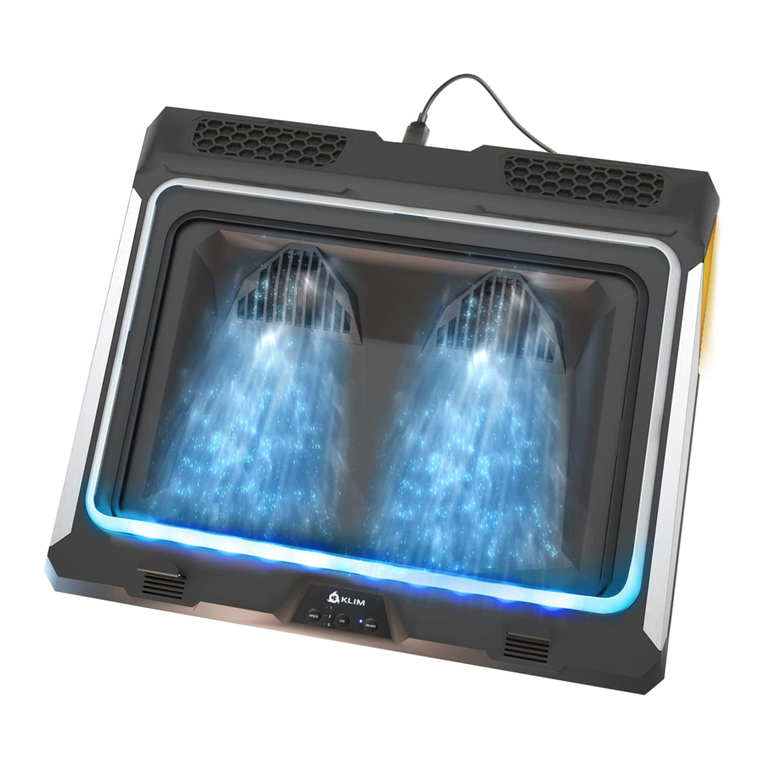
Notebook Cooling Pad Mobility
Item no. 99 92 00
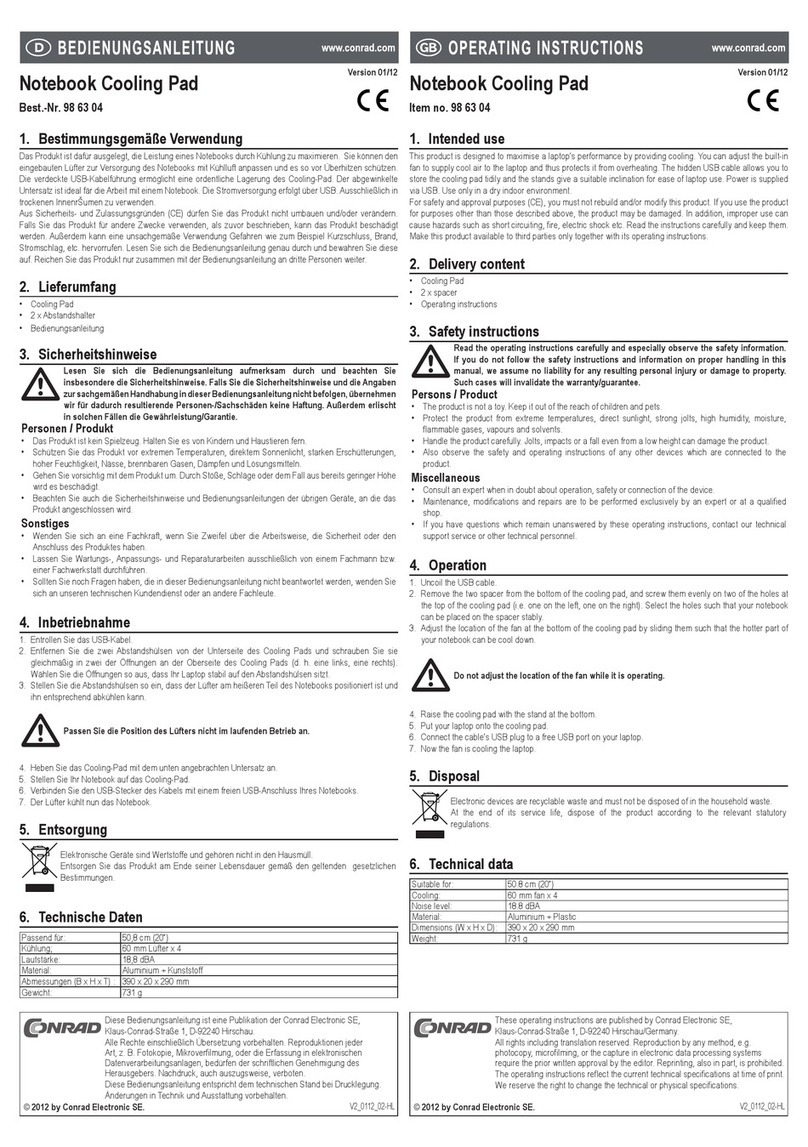
Intended use
This product enhances the cooling efficiency of notebook computers by increasing air ventilation underneath the
computer. For this purpose, it is placed in between the notebook computer’s underside and its support. In addition it
functions as a USB hub with 3 USB ports.
Any usage other than specified in the operating instructions is not permitted. Violation of usage can damage the
device and lead to hazards such as short-circuit, fire, electric shock, etc. No part of the device may be modified or
rebuilt. Please read the operating instructions thoroughly and keep the operating instructions for further reference.
Delivery contents
Cooling pad
USB connecting cable
Rubber feet
Operating instructions
Features
power supply via USB
suitable for 15” notebooks and below
extra quiet
3 ports USB hub
Safety instructions
We do not assume liability for resulting damages to property or personal injury if the device
has been abused in any way or damaged by improper use or failure to observe these operating
instructions. The guarantee will then expire!
An exclamation mark in a triangle indicates important information in the operating instructions.
Carefully read the whole operating instructions before operating the device, otherwise there is
risk of danger.
Unauthorised conversion and/or modification of the product are inadmissible because of safety and approval
reasons (CE).
No object should be inserted into the ventilation openings of the product. If anything has jammed the fan, unplug
the USB plug immediately.
The device should be handled with care. Do not drop it, as it may be damaged by the impact.
The device must not be subjected to heavy mechanical stress.
The device must not be exposed it to extreme temperatures, direct sunlight, intense vibration or dampness.
The device is not a toy and should be kept out of reach of children!
If there is reason to believe that safe operation is no longer possible, the device is to be put out of operation and
secured against unintended operation. Safe operation is no longer possible if the device:
shows visible damages,
no longer works,
was stored under unfavourable conditions for a long period of time or
was subject to considerable transport stress.
Servicing, adjustment or repair works must only be carried out by a specialist/ specialist workshop.
If any questions arise that are not answered in this operating instruction, please contact our Technical Advisory
Service or other experts.
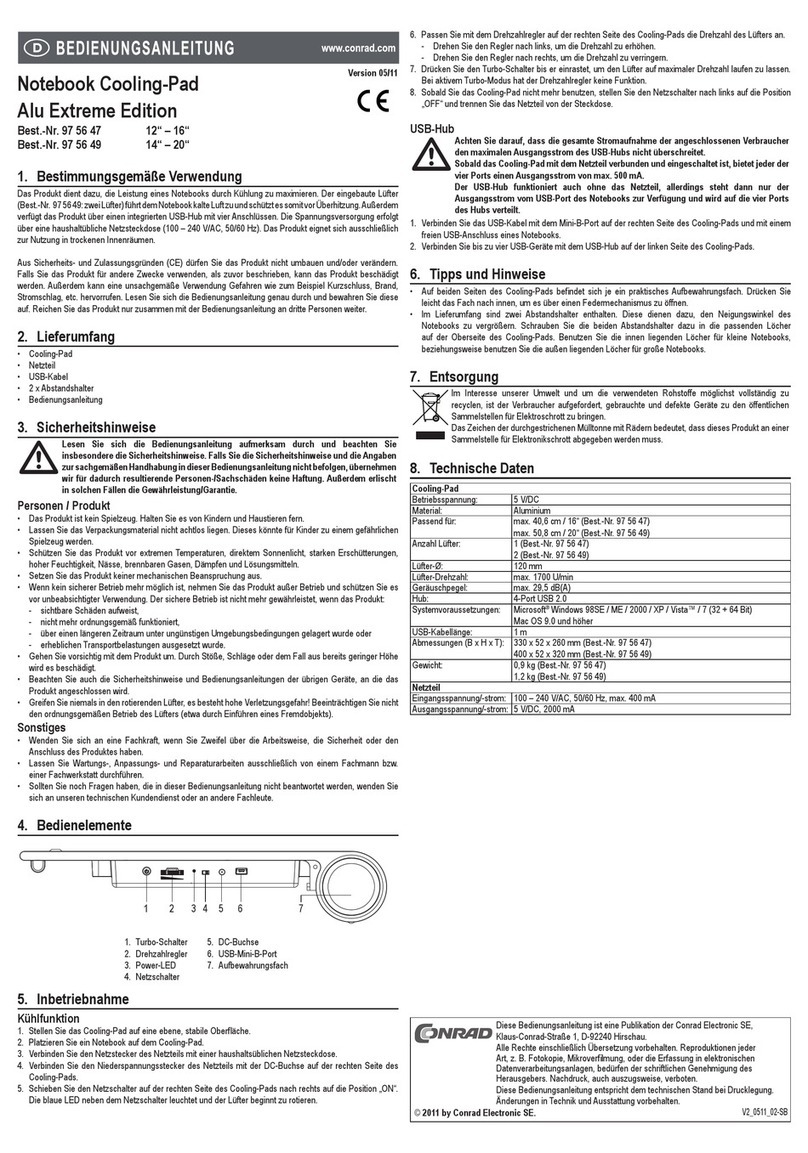
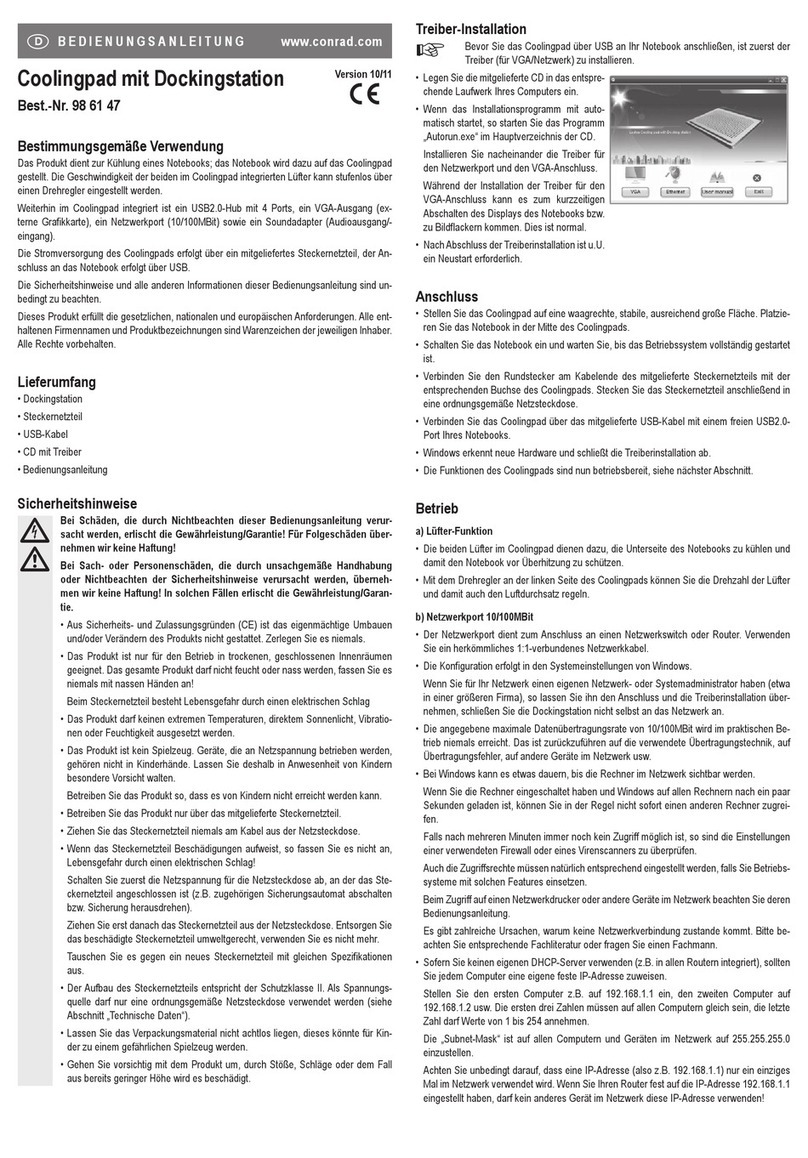
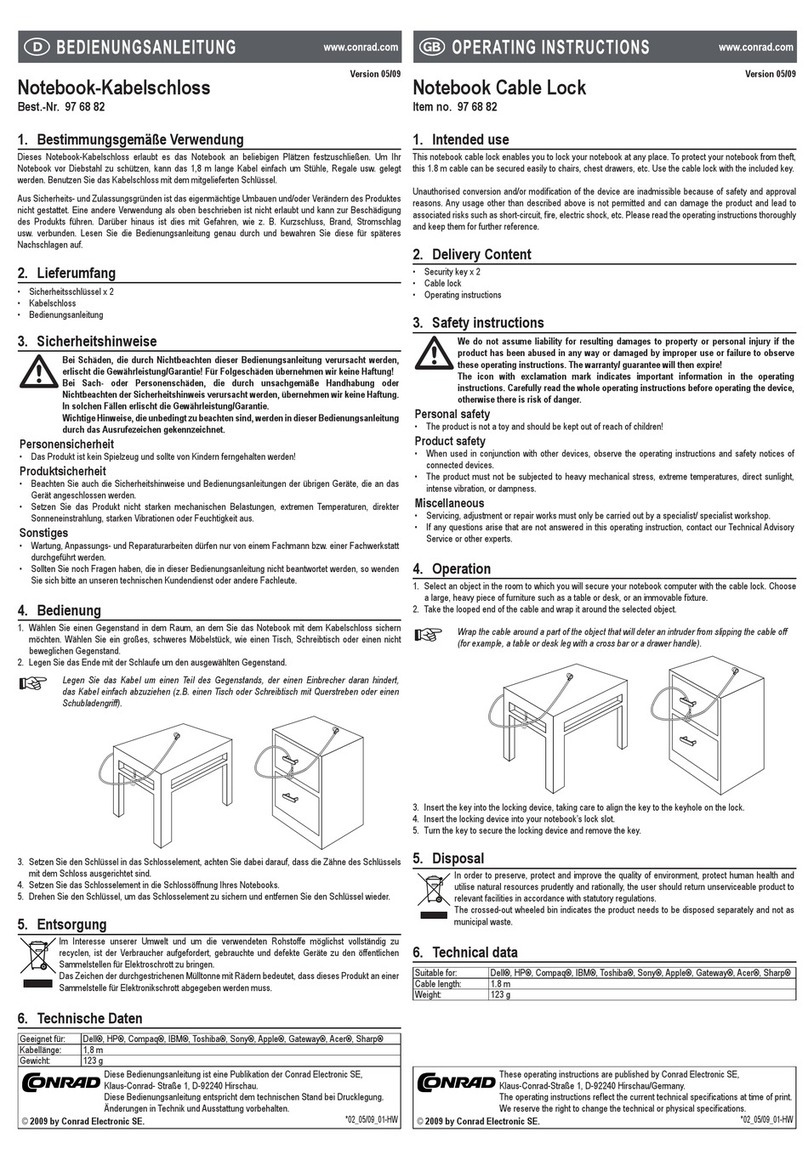
Operation
Slide out the cooling pad and take the USB power cord out of the compartment located at the bottom of the
cooling pad.
Place it underneath the notebook computer.
Connect the USB power cord to mini USB port located at the left side of the cooling pad.
Plug the USB plug of the power cord to a vacant USB slot.
Once the notebook computer is turned on, the blue LED will be lit to indicate that the cooling pad is ready for
operation.
The fans in the cooling pad will start cooling.
You can also switch on/off the cooling pad manually. Slide therefor the button at the left side of the cooling
pad with a pointed item to the position ON or OFF.
Use the USB Hub
When connecting other USB devices to the cooling pad you have to connect a suitable power
adapter (5V=, 2A) to it. The notebooks USB port can only provide up to 500mA so there is a risk
of overheating when more devices are connected to the cooling pad without using a power
adapter.
Connect the the low voltage plug from a power adapter (5V, 2A outer ø 3.5mm, inner ø 1.35mm), not included, to
power receptacle located at the left side of the cooling pad.
Connect the USB power cord to mini USB port located at the left side of the cooling pad with a vacant USB port
in the notebook computer.
Connect other USB devices to the USB ports of the cooling pad, located at the left side.
Disposal
Dispose of waste electrical and electronic equipment
In order to preserve, protect and improve the quality of environment, protect human health and utilise
natural resources prudently and rationally, the user should return unserviceable product to relevant
facilities in accordance with statutory regulations.
The crossed-out wheeled bin indicates the product needs to be disposed separately and not as
municipal waste.
Technical data
Cooling Pad
Operating voltage: 5V=, 400mA
Fan speed: 2500 RPM +/- 10%
Noise level: 23 dBA
Dimensions (L x W x H): 305 x 24 x 180/297 mm (closed/open)
USB Hub
USB standard 2.0
Data transfer rate: up to 480 Mbps
-
-
-
-
-
-
-
-
•
•
•
•
•
•
•
-
-
-
-
•
•
1.
2.
3.
4.
5.
6.
1.
2.
3.
Version 02/07Version 02/07
Notebook Cooling Pad Mobility
Best.-Nr. 99 92 00
Bestimmungsgemäße Verwendung
Diese Produkt verbessert die Kühlungseigenschaften von Notebook-Computern, indem es die Luftzirkulation an der
Unterseite erhöht. Es wird zwischen die Unterseite des Computers und dem Auflagegrund plaziert. Zusätzlich kann es
als USB Hub mit 3 USB-Anschlüssen verwendet werden.
Eine andere als die zuvor beschriebene Verwendung ist verboten. Sie kann das Gerät beschädigen und ist überdies mit
Risiken wie Kurzschluss, Brand, elektrischer Stromschlag, usw. verbunden. Das gesamte Gerät darf nicht verändert
oder umgebaut werden. Die Sicherheitshinweise in dieser Bedienungsanleitung sind unbedingt zu beachten. Bitte
lesen Sie die Bedienungsanleitung aufmerksam durch und bewahren Sie diese für spätere Rückfragen gut auf.
Lieferumfang
Kühlplatte
USB-Anschlusskabel
Gummifüße
Bedienungsanleitung
Merkmale
Stromversorgung über USB
passend für 15” Notebooks und kleiner
besonders leise
3-fach USB-HUB
Sicherheitshinweise
Bei Schäden, die durch Nichtbeachtung dieser Bedienungsanleitung verursacht werden, erlischt
der Garantieanspruch! Für Folgeschäden und bei Sach- und Personenschäden, die durch
unsachgemäße Handhabung oder Nichtbeachten der Sicherheitshinweise verursacht werden,
übernehmen wir keine Haftung!
Wichtige Hinweise, die unbedingt zu beachten sind, werden in dieser Bedienungsanleitung durch
das Ausrufezeichen gekennzeichnet.
Aus Sicherheits- und Zulassungsgründen (CE) ist das eigenmächtige Umbauen und/oder Verändern des Produktes
nicht gestattet.
Stecken Sie niemals Gegenstände in die Kühlöffnungen des Produktes. Wenn der Ventilator einmal blockiert sein
sollte, ziehen Sie sofort den USB-Stecker aus der Buchse.
Das Gerät sollte mit Vorsicht behandelt und nicht fallen gelassen werden, da es durch Stöße oder bei einem Fall aus
geringer Höhe bereits Schaden nehmen kann.
Das Gerät darf keinem starken mechanischen Druck ausgesetzt werden.
Das Gerät darf keinen extremen Temperaturen, direktem Sonnenlicht, starken Vibrationen oder Feuchtigkeit
ausgesetzt sein.
Das Gerät ist kein Spielzeug und sollte von Kindern ferngehalten werden!
Wenn kein sicherer Betrieb mehr möglich ist, nehmen Sie das Gerät außer Betrieb, und schützen Sie es vor
unbeabsichtigter Verwendung. Der sichere Betrieb ist nicht mehr gewährleistet, wenn das Gerät:
sichtbare Schäden aufweist,
nicht mehr ordnungsgemäß funktioniert,
über einen längeren Zeitraum unter ungünstigen Umgebungsbedingungen gelagert wurde oder
erheblichen Transportbelastungen ausgesetzt wurde.
Wartung, Anpassungs- und Reparaturarbeiten dürfen nur von einem Fachmann bzw. einer Fachwerkstatt
durchgeführt werden.
Sollten Sie noch Fragen haben, die in dieser Bedienungsanleitung nicht beantwortet werden, so wenden Sie sich
bitte an unseren technischen Kundendienst oder andere Fachleute.
Bedienung
Ziehen Sie das Cooling Pad auseinander und nehmen Sie das USB-Anschlusskabel aus dem Fach, das sich auf
der Unterseite des Cooling Pads befindet.
Legen Sie das Cooling Pad unter den Notebook-Computer.
Stecken Sie das USB-Kabel in die Buchse auf der linken Seite des Cooling Pads.
Benutzen Sie einen freien USB-Ausgang des Notebook-Computers zur Anschluss des anderen Kabelendes.
Wenn der Notebook-Computer eingeschaltet wird, leuchtet die blaue LED, um die Betriebsbereitschaft des
Cooling Pads anzuzeigen.
Danach beginnen die Ventilatoren zu kühlen.
Sie können das Cooling Pad auch manuell ein-/ausschalten. Schieben Sie dazu die Taste an der linken Seite
des Cooling Pads mit einem spitzen Gegenstand auf ON oder OFF.
Benutzung des USB Hubs
Wenn Sie andere USB-Geräte an das Cooling Pad anschließen wollen, müssen Sie ein geeignetes
Netzteil an das Pad anschließen (5V=, 2A). Der USB-Anschluss des Notebooks kann nur bis zu
500mA bereitstellen, was ein Risiko der Überhitzung zur Folge hat, wenn mehr als ein Gerät an
das Cooling Pad ohne zusätzliche Stromversorgung durch ein Netzteil angeschlossen wird.
Verbinden Sie den Niederspannungsadapter eines Netzteils (5V=, 2A Außen-ø 3,5mm, Innen-ø 1,35mm), nicht
enthalten, mit der Niederspannungsbuchse auf der linken Seite des Cooling Pads.
Verbinden Sie das USB-Anschlusskabel mit der Mini-USB-Buchse auf der linken Seite des Cooling Pads und
benutzen Sie einen freien USB-Ausgang des Notebook-Computers zur Anschluss des anderen Kabelendes.
Verbinden Sie weitere USB-Geräte mit den USB-Anschlussbuchsen auf der linken Seite des Cooling Pads.
Entsorgung
Entsorgung von Elektrik- und Elektronikaltgeräten
Im Interesse unserer Umwelt und um die verwendeten Rohstoffe möglichst vollständig zu recyceln, ist
der Verbraucher aufgefordert, gebrauchte und defekte Geräte zu den öffentlichen Sammelstellen für
Elektroschrott zu bringen.
Das Zeichen der durchgestrichenen Mülltonne mit Rädern bedeutet, dass dieses Produkt an einer
Sammelstelle für Elektronikschrott abgegeben werden muß, um es durch Recycling einer bestmöglichen
Rohstoffwiederverwertung zuzuführen.
Technische Daten
Cooling Pad
Betriebsspannung: 5V DC, 400mA
Lüftergeschwindigkeit: 2500 U/min +/- 10%
Geräuschpegel: 23 dBA
Abmessungen (L x B x H): 305 x 24 x 180/297 mm (geschlossen/offen)
USB Hub
USB Standard 2.0
Datentransferrate: bis zu 480 Mbps
-
-
-
-
-
-
-
-
•
•
•
•
•
•
•
-
-
-
-
•
•
1.
2.
3.
4.
5.
6.
1.
2.
3.
Version 02/07Version 02/07
Diese Bedienungsanleitung ist eine Publikation der Conrad Electronic SE, Klaus-Conrad-
Straße 1, D-92240 Hirschau.
Diese Bedienungsanleitung entspricht dem technischen Stand bei Drucklegung. Änderung
in Technik und Änderungen vorbehalten.
© 2007 by Conrad Electronic SE. 2007/02/MK.
These operating instructions are published by Conrad Electronic SE, Klaus-Conrad-
Straße 1, D-92240 Hirschau/Germany.
The operating instructions reflect the current technical specifications at time of print. We
reserve the right to change the technical or physical specifications.
© 2007 by Conrad Electronic SE. 2007/02/MK.
Système de Refroidissement pour
Ordinateur Portable mobilité
Nº de commande 99 92 00
Utilisation prévue
Cet appareil est destiné à améliorer le refroidissement des ordinateurs portables en augmentant la ventilation sous
l’ordinateur. Pour ce faire, il se place entre l’ordinateur portable et la table sur laquelle il est posé. En plus il fonctionne
comme un moyeu USB avec 3 ports d’USB.
Tout autre usage que celui spécifié dans le mode d’emploi est interdit. Le non respect de cette règle peut entraîner
la détérioration de la lampe et faire courir des risques tels que court-circuits, incendie, décharge électrique, etc.
Aucune partie de cette lampe ne doit être modifiée ou reconstruite. Veuillez lire attentivement le mode d’emploi et
conservez-le pour vous-y référer dans le futur.
Contenu de l’emballage
Plateau ventilé
Câble connexion USB
Pieds de caoutchouc
Mode d’emploi
Caractéristique
Alimentation secteur via USB
Usage pour ordinateur portable 15” et plus petit
Ultra-silencieux
3 ports USB HUB
Consignes de sécurité
Nous déclinons toute responsabilité en cas de dommages matériels ou de blessures dans le cas
où cet appareil aurait été maltraité de quelque façon que ce soit ou endommagé du fait d’une
mauvaise utilisation ou d’un non respect de ce mode d’emploi. La garantie en serait d’ailleurs
annulée!
Le point d’exclamation attire l’attention sur une information importante dont il convient de tenir
compte impérativement.
Les transformations et/ou modifications de cet appareil sont inacceptables pour des raisons de sécurité et de
respect des normes (CE).
N’insérez aucun objet dans la fente de ventilation ni dans aucune autre ouverture. Si un quelconque objet se
coince dans le ventilateur, débranchez immédiatement la fiche USB.
Manipulez ce produit avec soin et ne le laissez pas tomber, l’impact de la chute pourrait l’endommager.
Ne soumettez pas ce produit à de fortes contraintes mécaniques.
Ce produit ne doit pas être exposé à des températures extrêmes, aux rayons directs du soleil ou à d’intenses
vibrations.
Ce produit n’est pas un jouet et doit être tenu hors de portée des enfants!
Il faut considérer que l’appareil ne peut plus fonctionner sans danger lorsqu’il :
présente des dommages visibles,
ne marche plus,
a été entreposé pendant une longue durée dans des conditions non appropriées ou
présente de fortes sollicitations de transport.
L'entretien, les réglages et les réparations doivent être effectuées par un spécialiste ou un atelier spécialisé.
Si vous avez des questions sur des sujets non abordés dans ce mode d’emploi, contactez notre service technique
ou autres experts.
Fonctionnement
Sortir le câble d’alimentation USB du compartiment situé au bas du plateau ventilé.
Retirer le plateau ventilé et le placer sous le portable.
Connecter le câble d’alimentation USB au mini port USB situé sur la gauche du plateau ventilé.
Brancher la prise du câble d’alimentation USB dans une fente libre de l’USB.
Lorsque le portable est allumé, la DEL bleue s’allumera pour indiquer que le plateau ventilé est prêt à l’emploi.
Les ventilateurs du plateau ventilé se mettront en marche.
Vous pouvez également allumer et éteindre le plateau ventilé manuellement. Pour ce faire, mettre le bouton
sur la gauche du plateau ventilé sur la position ON ou OFF.
Utilisation du concentrateur USB
Lorsque vous connectez d’autres appareils USB au plateau ventilé, vous devez y connecter un
adaptateur de courant adéquat (5V = 2A). Le port USB du portable ne peut fournir que jusqu’à
500mA; il y a donc un risque de surchauffe lorsque plus d’appareils sont connectés au plateau
ventilé sans l’aide d’un adaptateur de courant.
Connecter la prise basse tension d’un adaptateur de courant (5V=, 2A ø extérieur 3,5mm, ø intérieur 1,35mm),
non compris, à la prise située sur la gauche du plateau ventilé.
Connecter le câble d’alimentation USB au mini port USB situé sur la gauche du plateau ventilé à un port libre de
l’USB du portable.
Connecter les autres appareils USB aux ports USB du plateau ventilé situé sur la gauche.
Disposition
Mise au rebut d’équipements électriques et électroniques
Afin de préserver, protéger et améliorer la qualité de l’environnement, protéger la santé humaine et
utiliser les ressources naturelles avec prudence et de manière rationnelle, l’utilisateur doit renvoyer tout
produit ne pouvant pas subir d’entretien à l‘établissement pertinent conformément à la réglementation
statutaire.
Le symbole de la poubelle barrée indique que le produit doit être mis au rebut séparément et non en
tant que déchet municipal.
Caractéristiques techniques
Plateau ventilé
Tension de fonctionnement : 5V DC, 400mA
Vitesse du ventilateur : 2500 TPM +/- 10%
Niveau sonore : 23 dBA
Dimensions (L x l x H) : 305 x 24 x 180/297 mm (fermé/ouvert)
Concentrateur USB
Norme USB : 2.0
Débit : jusqu’à 480 Mbps
-
-
-
-
-
-
-
-
•
•
•
•
•
•
•
-
-
-
-
•
•
1.
2.
3.
4.
5.
6.
1.
2.
3.
Version 02/07Version 02/07 Koelplaat voor draagbare PCs mobiliteit
Bestnr. 99 92 00
Bedoeld gebruik
Dit product verbeterd de koelingsefficiëncy van een notebook computer door het verhogen van de luchtventilatie
onder de computer. Het wordt tussen de notebook computer en tafel geplaatst. Daarnaast functioneert het als hub
USB met 3 ports USB.
Elk gebruik dat niet overeenstemt met hetgeen hierboven beschreven werd, is verboden. Inbreuk op het gebruik kan
het product beschadigen en leiden tot ongelukken zoals kortsluiting, brand, elektrische schokken, enz. Geen enkel
onderdeel van het product mag gewijzigd of herbouwd worden. Lees de bedieningsinstructies grondig en bewaar de
bedieningsinstructies voor latere raadpleging.
Leveringsomvang
Koelplaat
USB ansluitkaabel
Rubber voeten
Gebruiksaanwijzing
Gelaatstrek
Voeding via USB
Toepasbaar voor draagbare PCs 15” en kleiner
Bijzonder geluidsarm
Drievoudige USB-HUB
Veiligheidsinstructies
Wij zijn niet verantwoordelijk voor schade aan eigendom of lichamelijke letsels indien het product
verkeerd gebruikt werd op om het even welke manier of beschadigd werd door het niet naleven
van deze bedieningsinstructies. De waarborg vervalt dan!
Het uitroepteken geeft belangrijke informatie aan voor deze bedieningsinstructies waaraan u
zich strikt moet houden.
Niet-toegelaten omschakeling en/of wijziging van het toestel is onaanvaardbaar omwille van veiligheids- en
goedkeuringsredenen (CE).
U moet geen objecten in de ventilatieopeningen steken. Als de ventilator om één of andere reden vastloopt moet
u de USB-kabel zo snel mogelijk verwijderen.
Het product moet behandeld worden dit met zorg en laat het niet vallen, daar het kan beschadigd worden door
de val.
Het product mag niet onderworpen worden aan zware mechanische druk.
Het product mag niet blootgesteld worden aan extreme temperaturen, rechtstreeks zonlicht, intense trillingen
of vocht.
Het apparaat is geen speelgoed en moet buiten het bereik van kinderen worden gehouden!
Wanneer veilig gebruik niet langer mogelijk is, stel het apparaat dan buiten werking en voorkom dat het zomaar
opnieuw kan worden ingeschakeld. Veilig werken is niet meer mogelijk wanneer:
het apparaat zichtbare beschadigingen vertoont,
het apparaat niet meer werkt,
het apparaat gedurende langere tijd onder ongunstige omgevingscondities is opgeslagen,
het apparaat tijdens transport mechanisch is beschadigd.
Onderhoud, aanpassing of herstellingen mogen enkel uitgevoerd worden door een deskundige/bekwaam atelier.
Indien er vragen zijn die niet beantwoord zijn in deze bedieningsinstructies, neem dan contact op met onze
Technische Adviesdienst of andere deskundigen.
Werking
Haal de USB voedingskabel uit het compartiment dat zich aan de onderzijde van de koelplaat bevindt.
Trek de koelplaat uit en plaats hem onder de draagbare PC.
Verbind de USB voedingskabel met de miniatuur USB poort die zich aan de linkerkant van de koelplaat bevindt.
Steek de andere USB connector van de voedingskabel in een vrije USB connector van de PC.
Op het moment dat de draagbare PC wordt ingeschakeld, zal de blauwe LED oplichten om aan te geven dat de
koelplaat klaar is voor gebruik.
De ventilatoren in de koelplaat zullen gaan draaien zodat de draagbare PC wordt gekoeld.
De koelplaat kan ook handmatig worden in- en uitgeschakeld. Verschuif daarvoor het knopje aan de
linkerkant van de koelplaat met een puntig voorwerp in de stand aan (ON) of uit (OFF).
Gebruik van de USB hub
Bij het koppelen van andere USB apparaten op de koelplaat dient er tevens een geschikte
netspanningsadapter (5 V DC, 2 A) te worden aangesloten. De USB poort van de draagbare
PC kan slechts maximaal 500 mA leveren en daardoor bestaat het risico van oververhitting
wanneer er meer apparaten op de koelplaat worden aangesloten zonder het gebruik van een
netspanningsadapter.
Sluit de laagspanningsconnector van een netspanningsadapter (5V=, 2A buiten-ø 3,5mm, binnen-ø 1,35mm), niet
meegeleverd, aan op het voedings-chassisdeel dat zich aan de linkerkant van de koelplaat bevindt.
Verbind de USB voedingskabel met de miniatuur USB poort die zich aan de linkerkant van de koelplaat bevindt en
steek het andere kabeleind in een vrije USB poort van de draagbare PC.
Sluit andere USB apparaten aan op de USB poorten van de koelplaat; deze bevinden zich ook aan de linkerkant.
Verwijdering
Verwijder gebruikte elektrische en elektronische apparatuur
In het belang van het behoud, de bescherming en de verbetering van de kwaliteit van het milieu, de
bescherming van de gezondheid van de mens en een behoedzaam en rationeel gebruik van natuurlijke
hulpbronnen dient de gebruiker een niet te repareren of afgedankt product in te leveren bij de
desbetreffende inzamelpunten overeenkomstig de wettelijke voorschriften.
Het symbool met de doorgekruiste afvalbak geeft aan dat dit product gescheiden van het gewone
huishoudelijke afval moet worden ingeleverd.
Technische gegevens
Koelplaat
Werkspanning: 5V DC, 400mA
Ventilatorsnelheid: 2500 omw/min., ±10%
Geluidsniveau: 23 dBA
Afmetingen (L x B x H): 305 x 24 x 180/297 mm (gesloten/geopend)
USB hub
USB standaard: 2.0
Overdrachtsnelheid: maximaal 480 Mbps
-
-
-
-
-
-
-
-
•
•
•
•
•
•
•
-
-
-
-
•
•
1.
2.
3.
4.
5.
6.
1.
2.
3.
Versie 02/07Versie 02/07
Deze gebruiksaanwijzing is een publicatie van Conrad Electronic SE, Klaus-Conrad-
Straße 1, D-92240 Hirschau/Duitsland.
Deze werkende instruties voldoet aan de technische eisen bij het ter perse gaan.
Wijzigingen in techniek en uitrusting voorbehouden.
© 2007 by Conrad Electronic Benelux B.V. 2007/02/MK.
Cette notice est une publication de la société Conrad Electronic SE, Klaus-Conrad-
Straße 1, D-92240 Hirschau/Allemagne.
Cette notice est conforme à la règlementation en vigueur lors de l´impression. Données
techniques et conditionnement soumis à modifications sans aucun préalable.
© 2007 par Conrad Electronic SE. 2007/02/MK.
Other Conrad Laptop Accessories manuals

Conrad 975369 User manual

Conrad

Conrad 975369 User manual

Conrad 87 46 85 User manual

Conrad

Conrad 87 46 85 User manual

Conrad 97 68 82 User manual

Conrad

Conrad 97 68 82 User manual

Conrad 986147 User manual

Conrad

Conrad 986147 User manual

Conrad 97 56 47 User manual

Conrad

Conrad 97 56 47 User manual

Conrad 97 38 09 User manual

Conrad

Conrad 97 38 09 User manual

Conrad 87 46 84 User manual

Conrad

Conrad 87 46 84 User manual

Conrad 99 03 80 User manual

Conrad

Conrad 99 03 80 User manual

Conrad 97 53 57 User manual

Conrad

Conrad 97 53 57 User manual

Conrad 98 63 04 User manual

Conrad

Conrad 98 63 04 User manual

Popular Laptop Accessories manuals by other brands

Hi-Capacity 90-Watt Universal Laptop Adapters Compatibility guide

Hi-Capacity

Hi-Capacity 90-Watt Universal Laptop Adapters Compatibility guide

Xbrand XB-1002F user guide

Xbrand

Xbrand XB-1002F user guide

HQ P.SUP.NBT120-A manual

HQ

HQ P.SUP.NBT120-A manual

Panasonic CF-VAB371 operating instructions

Panasonic

Panasonic CF-VAB371 operating instructions

Compaq N400c - Evo Notebook - PIII 700 MHz reference guide

Compaq

Compaq N400c - Evo Notebook - PIII 700 MHz reference guide

Digitus DA-10192 manual

Digitus

Digitus DA-10192 manual

DreamLED SCL-100 user manual

DreamLED

DreamLED SCL-100 user manual

Reloop Laptop Stand Operation manual

Reloop

Reloop Laptop Stand Operation manual

DigiPower EBP-NB60 instruction manual

DigiPower

DigiPower EBP-NB60 instruction manual

Berserker Gaming VAFTHRUDNIR installation guide

Berserker Gaming

Berserker Gaming VAFTHRUDNIR installation guide

HP OmniBook 2100 user guide

HP

HP OmniBook 2100 user guide

Kensington MicroSave Instruction guide

Kensington

Kensington MicroSave Instruction guide

Sony VAIO PCGA-PRGX1 operating instructions

Sony

Sony VAIO PCGA-PRGX1 operating instructions

HP 2530p - EliteBook - Core 2 Duo 2.13 GHz user guide

HP

HP 2530p - EliteBook - Core 2 Duo 2.13 GHz user guide

Accessory Power ProSeries user manual

Accessory Power

Accessory Power ProSeries user manual

Targus NOTEBOOK SECURITY DEFCON SCL user guide

Targus

Targus NOTEBOOK SECURITY DEFCON SCL user guide

Dell Latitude 11 quick start guide

Dell

Dell Latitude 11 quick start guide

BenQ LaptopBar NB21 user guide

BenQ

BenQ LaptopBar NB21 user guide

manuals.online logo
manuals.online logoBrands
  • About & Mission
  • Contact us
  • Privacy Policy
  • Terms and Conditions

Copyright 2025 Manuals.Online. All Rights Reserved.