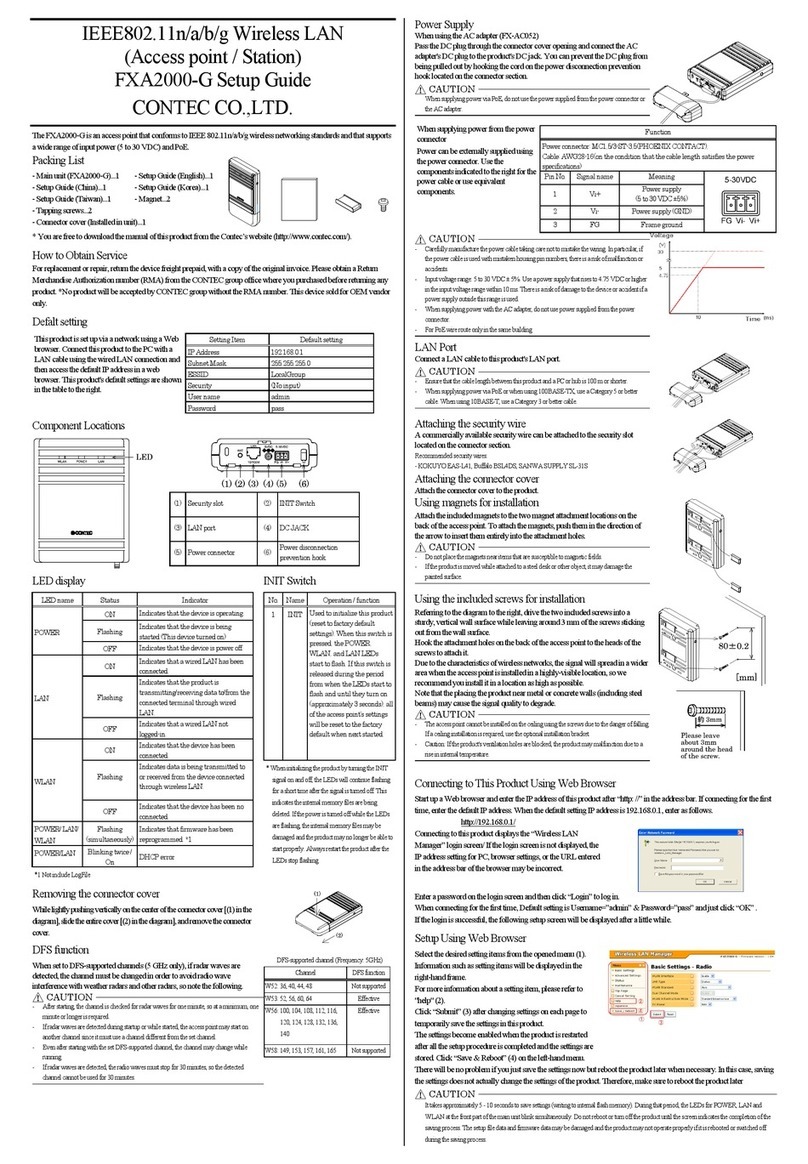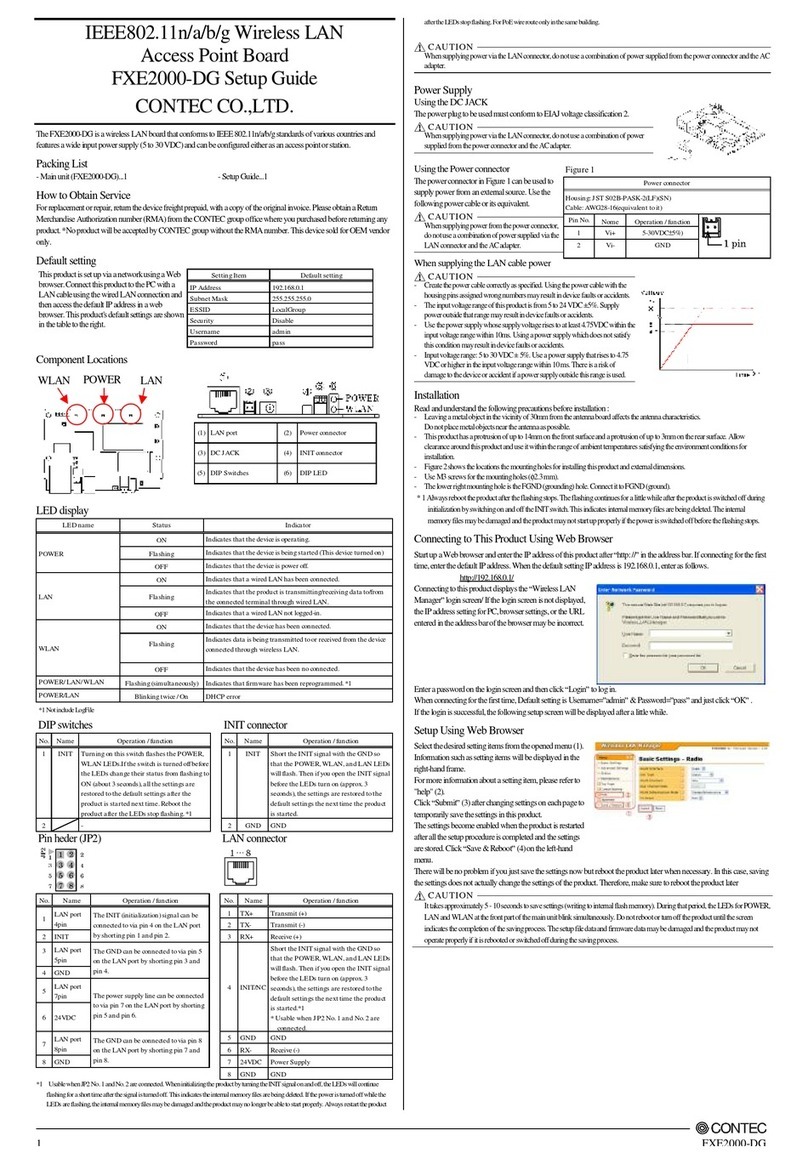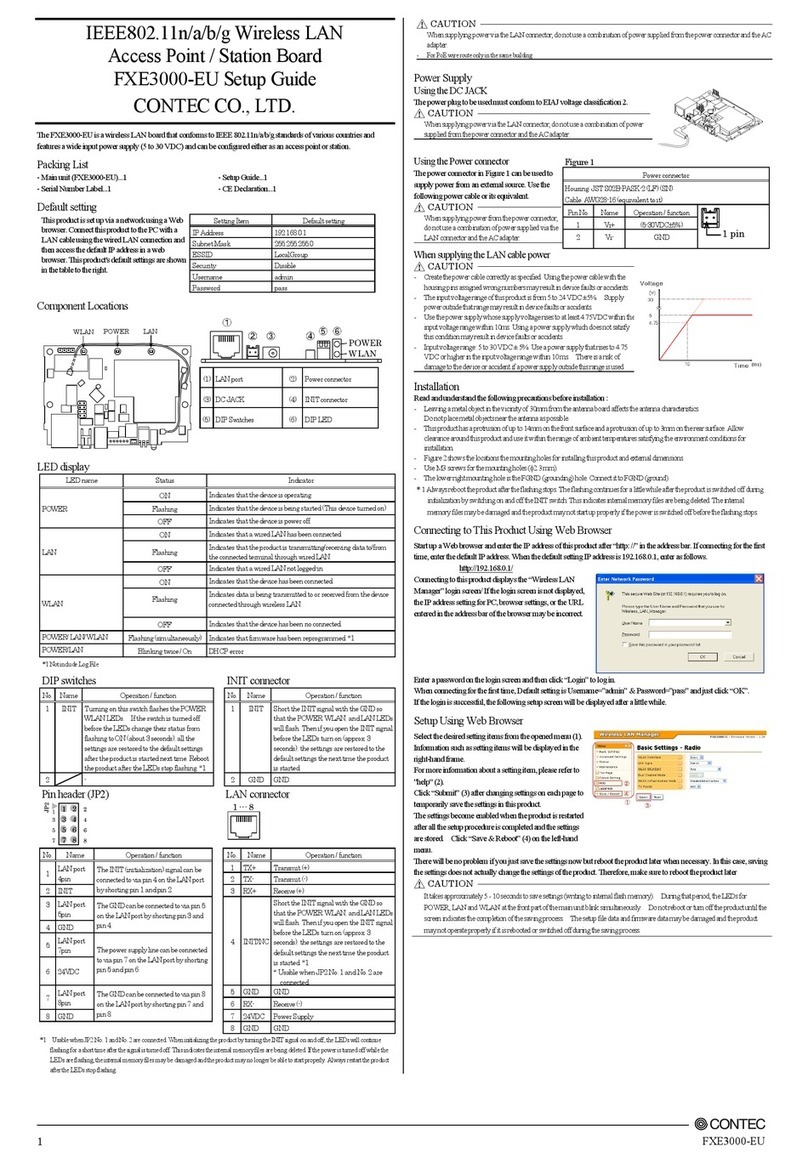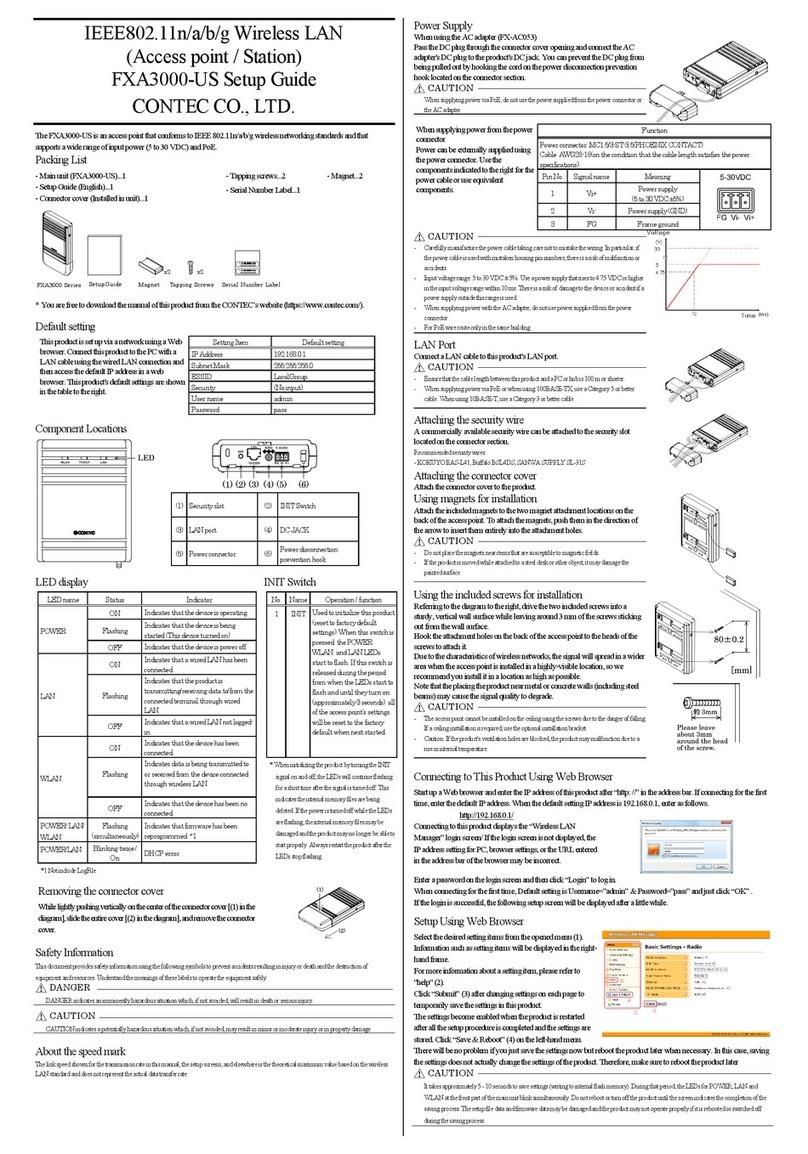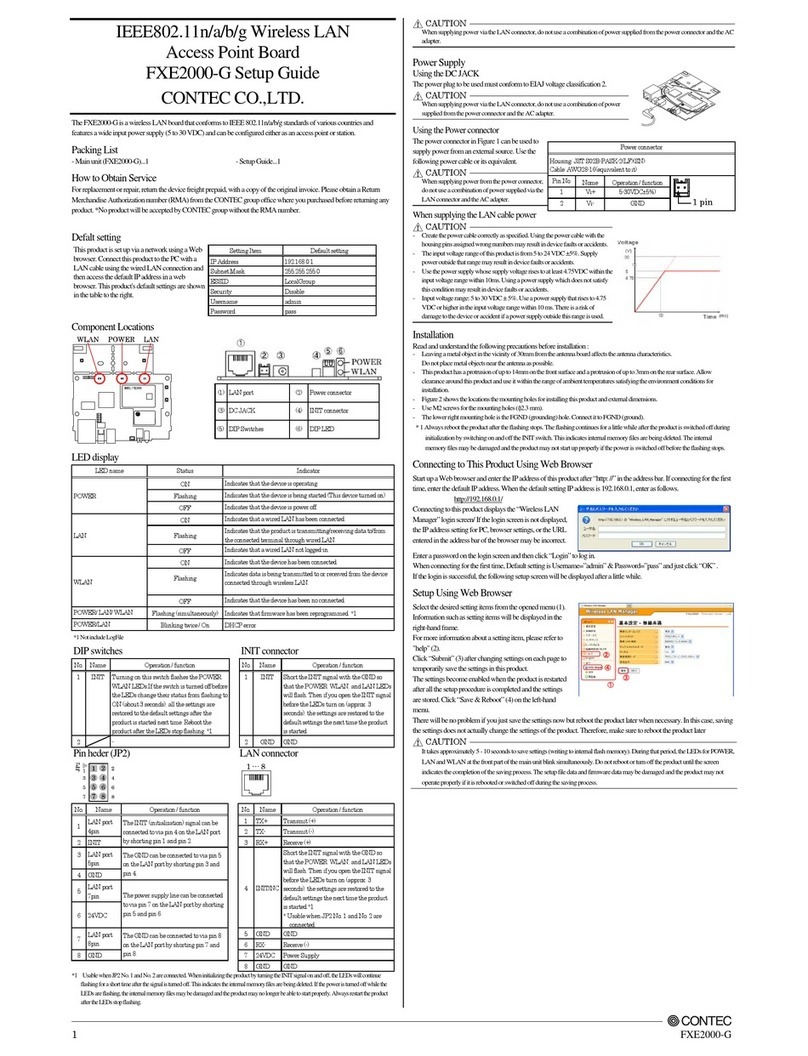
FXE3000-US Setup Guide
Specifications
IEEE802.3 (10BASE-T), IEEE802.3u (100BASE-TX)
Port Speed / Communication type /
10/100Mbps/Half Duplex, Full Duplex/ 1
Wireless Networking Standard
IEEE802.11n, IEEE802.11a, IEEE802.11b, IEEE802.11g
IEEE802.11n
IEEE802.11a
5GHz: 9ch(36, 40, 44, 48ch [W52]
149, 153, 157, 161, 165ch [W58] )
Station
5GHz: 21ch(36, 40, 44, 48ch [W52], 52, 56, 60, 64ch [W53],
100, 104, 108, 112, 116, 132, 136, 140ch [W56]
149, 153, 157, 161, 165ch [W58] ):]
IEEE802.11n IEEE802.11g
IEEE802.11b
2.4GHz: 11ch (1 -11)
Data transmission speed *2
300 - 6.5Mbps [MCS0 - 15, Short/Long GI] (Fixed/Auto)
Data transmission speed *2
54, 48, 36, 24, 18, 12, 9, 6Mbps (Fixed/Auto)
Data transmission speed *2
11, 5.5, 2, 1Mbps (Fixed/Auto)
Data transmission speed *2
54, 48, 36, 24, 18, 12, 9, 6Mbps (Fixed/Auto)
IEEE802.11n WPA(AES), WPA2(AES), WPA-PSK(AES), WPA2-PSK(AES),
WSL(combination mentioned above are possible)
IEEE802.11a/b/g
WEP(open/ Shared Key /Auto), WPA(AES, TKIP), WPA-PSK(AES,TKIP),
WPA2(AES, TKIP), WPA2-PSK(AES,TKIP), IEEE802.1X(EAP-TLS, PEAP),
WSL(combination mentioned above are possible)
60.0(W) x 89.2(D) x 17.5(H)
*1 Varies depending on the country in which the product is used
*2 These are theoretical values based on their respective wireless LAN standards; theydo not indicate actual data transfer rates.
Environmental Specifications
5VDC±5% (DC Jack), 5 - 30VDC±5% (power connector), 24VDC±10% (PoE)
0.83A (5VDC input), 0.15A (30VDC input) (Max.), 0.18A (PoE input 24V)
Operating ambient temperature
Operating ambient humidity
10 - 90%RH (No condensation)
FCC, IC, WPC, IMDA, UL/cUL, RoHS Compliant
External Dimensions
Precaution on use
It is prohibited to modify the inside of this product. The product cannot be used in any country other than those authorized for use.
Security Precautions
Wireless LAN uses radio waves instead of LAN cables to send and receive data between a computer and a wireless access point,
making it possible to freely establish a LAN connection within a range of the radio waves. However, radio waves can be received
through obstacles, such as walls, when within the range. Therefore, if security settings are not made, the following problems may occur.
Unauthorized viewing of data
An unauthorized third party can intercept the radio waves and view e-mail messages and personal information, such as user ID and
password or your credit card information.
Unauthorized access
An unauthorized third party can access a personal or corporate network and cause the following damage:
-Intercepting personal information and confidential information (information leak)
-Using a false identity to communicate and disclose information illegally (identity theft)
-Changing and transmitting intercepted data (tampering)
-Damaging data and systems by spreading a computer virus (destruction)
The wireless LAN card and wireless access point have security features to counter these problems. Using the security settings of the
wireless LAN equipment can help prevent these problems fromoccurring. The security settings of thewireless LAN equipment are not
configured at thetime of purchase.
To reduce security problems, configure all security settings of the wireless LAN equipment according to the manual before using the
wireless LAN card and wireless access point. Please be aware that the security settings do not providecompletesecurityprotection due
to wireless LAN specifications. If you are unableto configure the security settings yourself, please contact your local authorized dealer.
The customer is responsible for configuring the security settings and understanding therisks inherent in usingtheproduct without the
security settings configured.
Notes on Radio Interface
The 2.4 GHz band used by this product covers the operating frequencies of mobile-identification local radio stations (requiring the
license), specific low-power radio stations (requiring no license) and amateur wireless stations (requiring the license) as well as
industrial, scientific, and medical equipment such as microwave ovens.
1. Before using this product, make sure that there is no mobile-identification local radio station, specific low-power radio station and
amateur wireless station operating near theproduct.
2. If the product should cause radio interface with any mobile-identification local radio station or specific low-power radio station,
immediately change the operating frequency to avoid the radio interface.
3. Placing wireless terminalsnear each other may slows downtheir data ratebecause oftheir mutual interference. You shouldallow a
minimum clearanceof about 1m between stations, 3m between access point and station, and 3m between access points.
4. Contact your local retailer or CONTEC if the product has trouble such as recurrent radio interface with mobile-identification local
radio stations or specific low-power radio stations
About the speed mark
The link speed shown for the transmission rate in this manual, the setup screens, and elsewhere is the theoretical maximum value based
on the wireless LAN standard and does not represent the actual data transfer rate.
Handling Precautions
Do not use the product where it is exposed to flammable or corrosive gas. Doing so may result in an explosion, fire, electric shock,
or failure.
- This product contains precision electronic elements and must not be used in locations subject to physical shock or strong vibration.
Otherwise, the board may malfunction, overheat, or cause afailure.
- Do not touch this product directly with your hands. Doing so may cause the board to malfunction, overheat, cause a failure, or be
damaged. To prevent damage caused by static electricity, implement measures to prevent static electric discharges when handling
theproduct.
- Do not use or store this device in high temperature or low temperature surroundings, or do not expose it to extreme temperature
changes. Otherwise, theboard may malfunction, overheat, or cause a failure.
- Do not use or store this device where it is exposed todirect sunlight or near stoves or other sources of heat. Otherwise, the board
may malfunction, overheat, or cause a failure.
- Do not use or store this device near strong magnetic fieldsor devices emitting electromagnetic radiation. Otherwise, theboard may
malfunction, overheat, or causea failure.
- If an unusual smell or overheat is noticed, unplug thepower cable immediately In the event of an abnormal condition or
malfunction, pleasecontact your retailer.
- The specifications of this product are subject tochange without noticefor enhancement andquality improvement. Even when using
the product continuously, be sure to read the manual and understand the contents.
- Do not attempt tomodify this device. The manufacturer willbear no responsibility whatsoever for the device ifit has been modified.
- The product must always be associated with the instruction manual.
- Regardless of the foregoing statements, CONTEC is not liable for any damages whatsoever (including damages for loss of business
profits) arising out of the use or inability to use this CONTEC product or the information contained herein.
Federal Communications Commission
FCC Caution: Changes or modifications not expresslyapprovedby theparty responsible for compliancecould voidtheuser's authority
to operate this equipment.
Note: This equipment has been tested and found to comply with the limits for a Class A digital device, pursuant to part 15 of the FCC
Rules. These limits are designed to provide reasonable protection against harmful interference when the equipment is operated in a
commercial environment. This equipment generates, uses, and can radiate radio frequency energy and, if not installed and used in
accordance with the instruction manual, may cause harmful interference to radio communications. Operation of this equipment in a
residential area is likely to cause harmful interference in which case the user will be required to correct the interference at his own
expense. Data transmission is always initiated by software, which is the passed down through the MAC, through the digital and analog
baseband, and finally to the RF chip. Several special packets are initiated by the MAC. These are the only ways the digital baseband
portion will turn on the RF transmitter, which it then turns off at the end of the packet. Therefore, the transmitter will beon only while
one of the aforementioned packets is being transmitted. In other words, this device automatically discontinue transmission in case of
either absence of information to transmit or operational failure. Frequency Tolerance: 20ppmThis transmitter must not beco-located or
operated in conjunction with any other antenna or transmitter.
This equipment complies with FCC/IC radiation exposure limits set forth for an uncontrolled environment and meets the FCC radio
frequency (RF) Exposure Guidelines and RSS-102 of the IC radio frequency (RF) Exposure rules. This equipment should be installed
and operated keeping the radiator at least 20cm or more away from person’s body.
End Product Labeling this transmitter module is authorized only for use in device where the antenna may be installed such that 20 cm
may be maintained between the antenna and users.
Thefinal endproduct must belabeled in a visible area with the following: “ContainsFCC ID:PQRFXE3000-US”.
The grantee's FCC ID can be used only when all FCC compliance requirements are met.
Users in Canada
Contains Transmitter Module IC: 4564A-FXE3000.
This device complies with RSS-247 of the Industry Canada Rules. Operation is subject tothefollowing twoconditions:
(1) This device may not cause interference,and
(2) This device must accept any interference, including interference that may cause undesired operation of the device.
Cet appareil radio est conforme au CNR-247 d’Industrie Canada. L’utilisation de ce dispositif est autoriséeseulement aux deux
conditions suivantes :
1) il ne doit pas produire de brouillage, et
2) l’utilisateur du dispositif doit être prêt à accepter tout brouillage radioélectrique reçu, même si ce brouillage est susceptible de
compromettre le fonctionnement du dispositif.
This equipment complies with IC radiation exposure limits set forth for an uncontrolled environment. This equipment should be
installed and operated with minimum distance 20cm between the radiator and your body.
Cet èquipement est conforme aux limites d’exposition auxrayonnements IC ètablies pour unenvirionnement non contrôlè. Cet
èquipement doit être installè etutilisè avec un minimum de 20cmde distance entrela source derayonnement et votre corps.
This radio transmitter (4564A-FXE3000)has been approved by Industry Canada to operate with the antenna types listedbelow with
the maximum permissible gain indicated. Antenna types not included in this list, having a gain greater than the maximum gain indicated
for that type, are strictly prohibited for use with this device.
Le présent émetteur radio (IC Number 4564A-FXE3000) aété approuvé par Industrie Canada pour fonctionner avec les types d'antenne
énumérés ci-dessous et ayant un gain admissible maximal et I’impèdance requise pour chaque type d’antenne. Les types d'antenne non
inclus dans cette liste, ou dont legain est supérieur au gainmaximal indiqué, sont strictement interdits pour l'exploitation de l'émetteur.
Antenna Name Antenna Type Peak Gain(dBi)2.4GHz Peak Gain(dBi)5GHz
FX-ANT-A8 CHIP 3 3.3
FXE3000-ANT CHIP 3 3.3
MR-1700-W Vehicle 4 -
MPR-6000 Vehicle - 4
5150-5250 MHz band is restricted to indoor operation only.
High-power radars are allocated as primaryusers (i.e. priority users) of the bands 5250-5350MHzand5650-5850 MHz andthat these
radars could cause interference and/or damage to LE-LAN devices.
La bande 5150-5250 MHz est restreinte à une utilisation à l’intérieur seulement.
Les radarsde haute puissance sont désignés utilisateurs principaux (c.-à-d., qu'ils ont la priorité)pour les bandes 5250-5350 MHzet
5650-5850 MHz, et ces radars pourraient causer du brouillage et/ou des dommages aux dispositifs LAN-EL.
Compliance with IC requirement RSS-210A9.4.4
Data transmission is always initiated by software, which is the passed down through the MAC, through the digital and analog baseband,
and finally to the RF chip. Several special packets are initiated by the MAC. These are the only ways the digital baseband portion will
turn on the RF transmitter, which it then turns off at the end of the packet. Therefore, the transmitter will be on only while one of the
aforementioned packets is being transmitted. In other words, this device automatically discontinue transmission incase of either absence
of information to transmit or operational failure.
Conformité à la norme CNR-210 A9.4.4
La transmission des données est toujours initiée par le logiciel, puis les données sont transmises par l'intermédiaire du MAC, par la
bande debase numérique et analogique et, enfin, à la puce RF.Plusieurs paquets spéciaux sont initiés par leMAC. Ce sont les seuls
moyens pour qu'une partie de la bande de base numérique activel'émetteur RF, puis désactive celui-ci à la fin du paquet. En
conséquence, l'émetteur reste uniquement activé lors de la transmissiond'un des paquets susmentionnés. En d'autres termes, cedispositif
interrompt automatiquement toutetransmission en cas d'absence d'information à transmettre ou de défaillance.
TEC CO., LTD.
-9-31, Himesato, Nishiyodogawa-ku,Osaka555-0025, Japan
Japanese http://www.contec.co.jp/ English http://www.contec.com/
Chinese
http://www.contec.com.cn/
No part of this document may be copied or reproduced in any form by any means without prior written consent of CONTEC CO., LTD.
4-φ3.5
82
89.2
3.6
60
32.2
24.2
