Continental Refrigerator CP-CE009 User manual

Espresso
Maker
:
User Manual
Model: CP-CE009

*IMPORTANT SAFEGUARDS:
1. Before using machine always carefully read and comply with all these instructions.
We cannot accept any responsibility for the consequences of improper use.
2. Check voltage to be sure that the voltage indicated on the name plate agrees with your
voltage.
3. Close supervision is necessary when the appliance is used by people. Place the machine
out of the reach of children and persons with limited capabilities.
4. Do not place on or near a hot gas or electric burner or in a heated oven.
5. Unplug from outlet when notin use and before cleaning. Allow to cool before putting or
taking off parts, and before cleaning the appliance.
6. Do not operate any appliance with a damaged cord or plug or after the appliance
malfunctions, or has been damaged in any manner. Return appliance to the nearest
authorized service facility for examination, repair or adjustment.
7. The use of accessory attachment not recommended by the appliance manufacturer
may result in fire, electric shock, or injury to persons.
8. Be careful to ensure that the power cable does not become trapped and does not rub
against sharp edges.
9. Do not let the cord hang over the edge of a table or counter, or touch hot surfaces.
10. Do not touch any hot parts. Use the handle of the funnel.
11. This appliance has been incorporated with a grounded plug. Please ensure the wall
outlet in your house is well earthed.
12. To protect against fire, electric shock and injury to persons, do not immerse cord,
plugs, or body of machine in water or other liquid.
13. Do not use outdoors.
14. For household use only.
SAVE THESE INSTRUCTIONS
*CLEANING MINERAL DEPOSITS
1. The machine builds up limescale deposits over time, and you need descale the machine
2-3 months.
2. Fill the tank with clean water and descaler( the scale of water and descaler is 4:1, the
detail refers to the instruction of descaler. Please use “household descaler”, or you can
use the citric acid (obtainable from chemist’s or drug stores) instead of the descaler (the
one hundred parts of water and three parts of citric acid).
3. According to the program of make espresso coffee, put the pressurized funnel (no
coffee powder in it) and carafe (jug) in place. Brewing water per “B. MAKE ESPRESSO
COFFEE”.
4. Turn the knob to position, the indicator will be illuminated, and make two cups
coffee (about 120ml). Then turn the knob to position and wait for 5s.
5. Turn the knob to position and make steam for 2min, then turn the knob
to position to stop the unit immediately, make the descalers deposit in the unit
vat least 15 minutes.
6. Restart the machine, repeated the steps of 4-5 for three times
7. Then turn the knob to position to brew until no descaler is left.
8. Then brewing coffee (no coffee powder) with water in the MAX level, repeat the steps
of 4-5 for 3 times (not need to wait for 15 minutes in step of 5), then brewing until no water
is left in the tank.
-
9. Repeat the step of 8 at least 3 times to make sure the piping is cleanly.

A. FOR THE FIRST USE
Remove the coffee maker from the package, and check the accessories according to
the list.
2.
3.
4.
1.
Clean all the detachable components according to the following section of
“CLEANING AND MAINTENANCE”. Then assemble them completely.
Ensure the filter place in position. Place the carafe on drip tray.
Operation the appliance according to the section of “B” and “C” (no coffee powder in
filter). Repeat 2-3 times.
B. MAKE ESPRESSO COFFEE
1. Remove the cover by turning it in anti-clockwise. Pour appropriate water in water tank with
the carafe. Do not exceed the maximum capacity.
Note: 1). the carafe has the cup marks, the maximum tank capacity is equal to 4 cups marks
water quantity. The minimum tank capacity is equal to 2 cups marks water quantity.
2). Before pouring the water into the water tank, be sure the power cord is unplug
from the power outlet and the knob is in position.
2. Replace the cover in place by turning the cover in clockwise until it locks in position.
3. Put the filter into pressurized funnel, pour coffee powder into the filter with coffee spoon
(240ml water with 4 cups of coffee powder, 120ml water with 2 cups of coffee Then Press
the coffee powder tightly powder,the filter has 2 cups and 4 cups marks.)with the circular
flat side of the coffee spoon.
4. Make sure the tubers on the funnel align with the grooves in the appliance, then insert the
funnel into from the “INSERT” position, and you can fix the funnel into coffee maker
firmly through turn it anti-clockwise until it is locked in the “LOCK” position
(see Fig. 1).
5. Place the carafe on the drip tray.
6. Plug the power cord into the outlet.
Turn the knob to position, and the indicator
is illuminated, about 2 minutes, the coffee will
flow out.
7. After desired coffee has obtained, you should
turn knob to position, the indicator go out and
the coffee maker stops working, your coffee is ready now.
Then remove the carafe and turn the knob to position release the residual
steam in the tank.
WARNING: Do not leave the coffee maker unattended during making coffee, as
you need operate manually sometimes!
8.
9.
Before removing pressurized funnel or opening the cover, make sure the pressure in the
tank shall be released. The method is to turn the knob to the position firstly,
the steam in the tank will eject from the frothing device. After pressure has released,
and wait for the pressurized funnel cooling down, you can remove the pressurized
funnel or open the cover.
After finishing making the coffee, you can take the pressurized funnel out through
turn clockwise, and then pour the coffee residue out with the filter pressed by funnel
hook. Let them cool down completely, then rinse under running water. (When
assemble the filter again, you shall turn over the funnel hook to the original position).
C. FROTHING MILK/ MAKE CAPPUCCINO
-

5. When the required purpose is reached, you can turn the knob to position stop
frothing. Then remove the jug and turn the knob to position release the
residual steam in the tank.
Note: Clean steam outlet with wet sponge immediately after steam stops
generating, but care not to hurt!
6. Pour the frothed milk into the espresso prepared, now the cappuccino is ready.
Sweeten to taste and if desired, sprinkle the froth with a little cocoa powder.
Note: We recommend you allow the appliance to cool down before making
coffee again. Otherwise burnt odor may occur in your espresso coffee.
*CLEAN AND MAINTENANCE
1. Cut off power source and let the coffee maker cool down completely before cleaning.
2. Clean housing of coffee maker with moisture-proof sponge often.
Note: Do not clean with alcohol or solvent cleanser. Never immerse the housing in
water for cleaning.
3. Detach the pressurized funnel through turn it clockwise, get rid of coffee residue
inside, then you can clean it with cleanser, but at last you must rinse with clear water.
4. Clean all the detachable attachments in the water and dry thoroughly.
Accessories
1. Prepare espresso first with container big enough according to the part “B.
MAKE ESPRESSO COFFEE”.
2. Fill a jug with desired amount of milk for each cappuccino to be prepared,
Please use whole milk at refrigerator temperature (not hot!).
Note: In choosing the size of jug, it is recommend the diameter is not less
than 70±5mm, and bear in mind that the milk increases in volume, make
sure the height of jug is enough.
3. Turn the knob to the position, the indicator will light up.
4. Insert the frothing device into the milk about two centimeters, after about 2
minutes, the steam will come out from the frothing device. Froth milk in the way
moving vessel round from up to down.
*DISPOSAL
Please dispose of old machines in an environmentally neutral way.
Old machines contain valuable materials which should be salvaged for recycling.
Please therefore dispose of old machines via your regional collection system.
HOUSEHOLD USE ONLY

*TROULBE SHOOTING
Problem Cause/Result Action
Carafe leakage water
or water leaks out
from lid of carafe
The carafe is not located
properly
Let centreline of carafe
aligns with leakage opening
of brew basket well.
The level of water in the
tank exceed
of MAX.
The water level in the tank
should be within the scale of
MIN and MAX.
The metal parts in the
tank have rust.
The descaler is not
recommended type. It
may corrode the metal
parts in the tank.
Use the descaler which
recommended by
manufacturer.
Water leaks from the
bottom of coffee
maker.
There is much water in
the drip tray.
Please clean the drip tray.
The coffee maker is
malfunction.
Please contact with the
authorized service facility
for repairing.
Water leaks out of
outer side of filter
There is some coffee
powder on filter edge.
Get rid of them.
Acid (vinegar) taste
exists in Espresso
coffee.
No clean correctly after
cleaning mineral
deposits.
Clean coffee maker per the
content in “before the first
use” for several times
The coffee powder is
stored in a hot, wet place
for a long time.
And it turns bad.
Use the fresh coffee powder
and it should berstored in a
cool, dry place
The coffee maker
cannot work anymore.
The power outlet is not
plugged well.
Only after the steam ready
indicator (green indicator) is
illuminated, the steam can be
used to froth
The steam cannot
froth.
The container is too big
or the shape is not fit.
Only after the steam ready
indicator (green indicator) is
illuminated, the steam can be
used to froth.
The container is too big
or the shape is not fit
Use high and narrow cup.
You have used skimmed
milk
Use whole milk or
half-skimmed milk
*If you have not been able to solve the problem, contact customer support in your country
Capacity 4cups/240mL
Pressure 5Bar
Voltage 120V,60Hz
Power 800W

Cafetera
Espresso
:
Manual de Usuario
Modelo: CP-CE009

*SALVAGUARDIAS IMPORTANTES:
1. Antes de usar la máquina, siempre lea cuidadosamente y cumpla con todas estas
instrucciones. No podemos aceptar ninguna responsabilidad por las consecuencias del
uso incorrecto.
2. Verifique la tensión para asegurarse de que el voltaje indicado en la placa de identifi-
cación concuerde con su voltaje.
3. La supervisión cercana es necesaria cuando el aparato es utilizado por personas.
Coloque la máquina fuera del alcance de niños y personas con capacidades limitadas.
4. No coloque sobre o cerca de un quemador de gas o eléctrico caliente o en un horno
caliente.
5. Desenchufe del tomacorriente cuando no esté en uso y antes de limpiarlo. Deje que
se enfríe antes de poner o quitar las piezas, y antes de limpiar el aparato.
6. No opere ningún artefacto con un cable o enchufe dañado o después de un mal
funcionamiento del artefacto, o si se ha dañado de alguna manera. Devuelva el
artefacto al centro de servicio autorizado más cercano para su examen, reparación o
ajuste.
7. El uso de accesorios no recomendados por el fabricante del aparato puede
provocar incendios, descargas eléctricas o lesiones personales.
8. Tenga cuidado de asegurarse de que el cable de alimentación no quede atrapado y no
roce contra bordes filosos.
9. No permita que el cable cuelgue del borde de una mesa o mostrador, ni toque
superficies calientes.
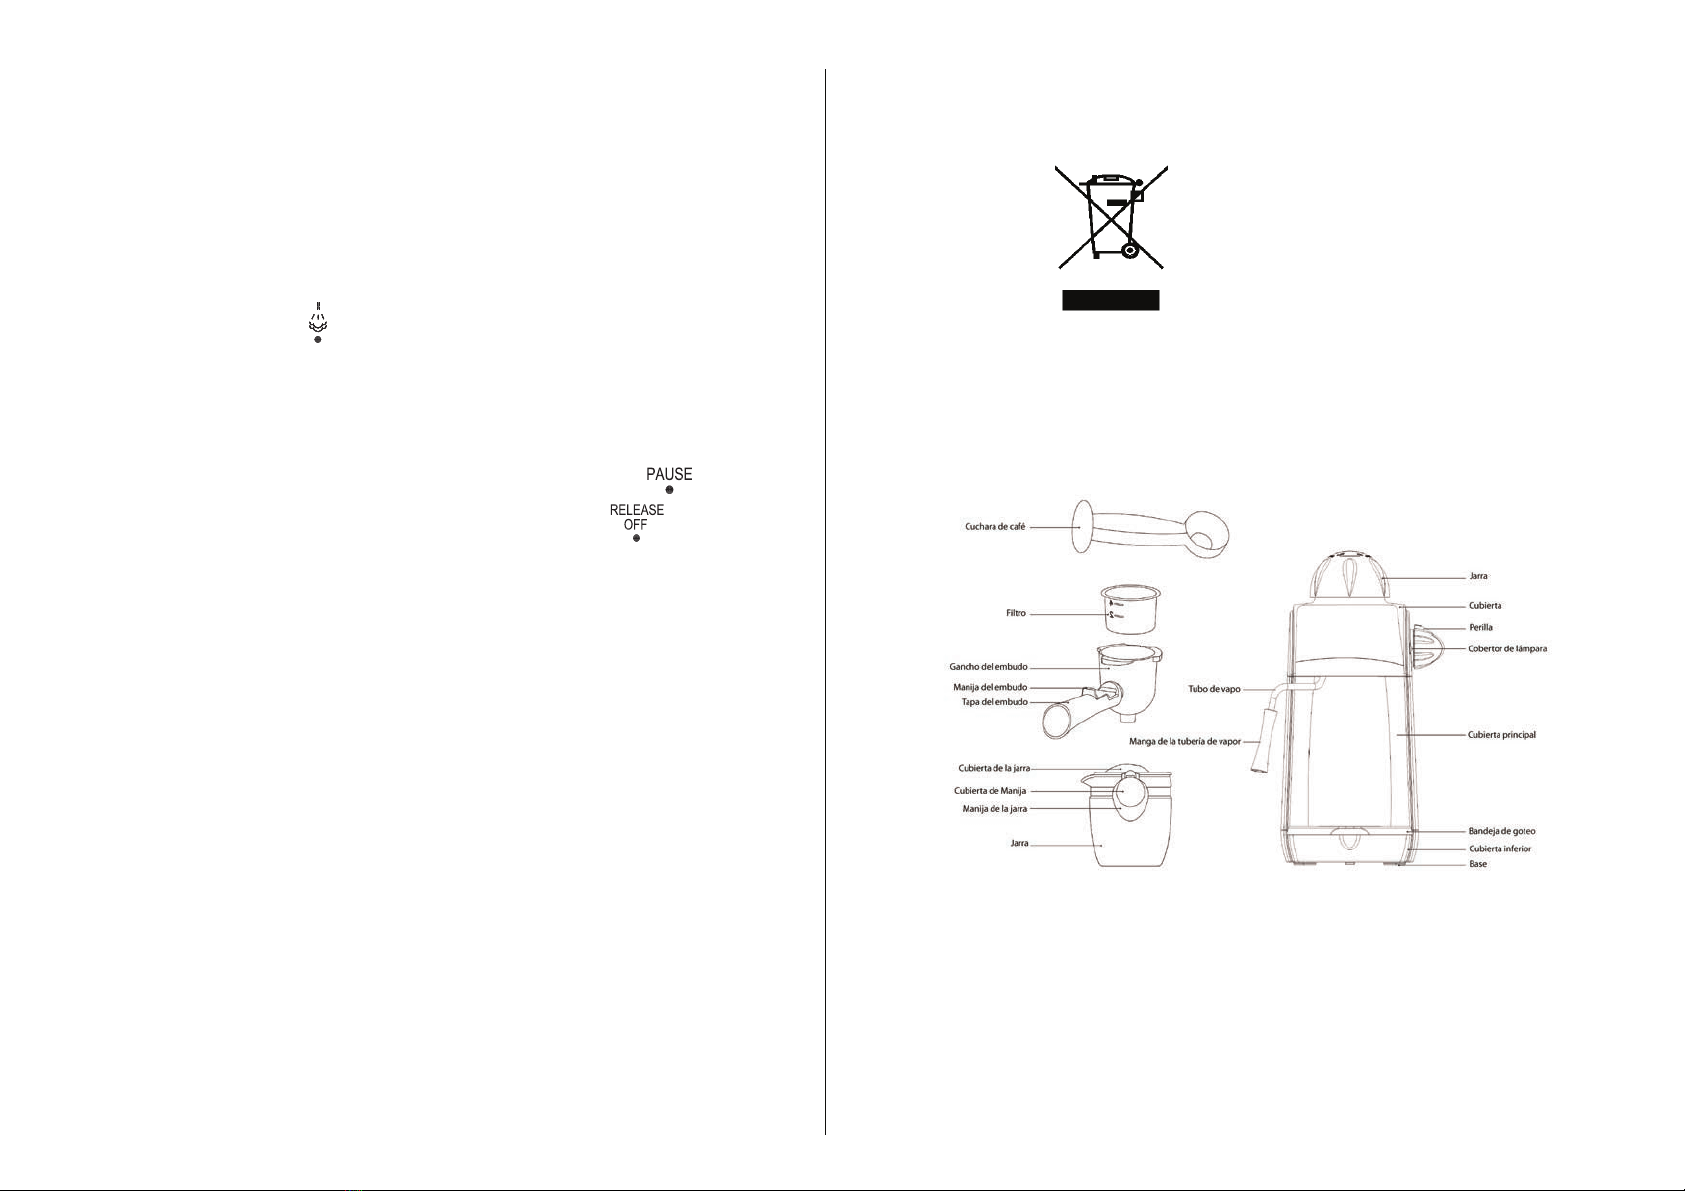
10. No toque ninguna parte caliente. Usa el mango del embudo
11. Este electrodoméstico se ha incorporado con un enchufe con conexión a tierra.
Asegúrese de que la toma de corriente de su casa esté bien conectada a tierra.
12. Para protegerse contra incendios, descargas eléctricas y lesiones personales, no
sumerja el cable, los enchufes o el cuerpo de la máquina en agua u otro líquido.
13. No lo use al aire libre.
14. Para uso doméstico solamente.
GUARDA ESTAS INSTRUCCIONES
*LIMPIEZA DE DEPÓSITOS MINERALES
1. La máquina acumula depósitos de cal a lo largo del tiempo y necesita desincrustar la
máquina 2-3 meses.
2. Llene el tanque con agua limpia y descalcificador (la escala de agua y descalcificador es
4: 1, el detalle se refiere a las instrucciones del descalcificador. Utilice el "descalcificador
del hogar", o puede usar el ácido cítrico (que puede obtenerse de un químico o farmacias)
en lugar del descalcificador (las cien partes de agua y tres partes de ácido cítrico).
3. De acuerdo con el programa de preparación del café expreso, coloque el embudo presuriza-
do (sin café en polvo) y la jarra (jarra) en su lugar. Elaboración de agua por "B. HAGA EL
CAFÉ ESPRESSO ".
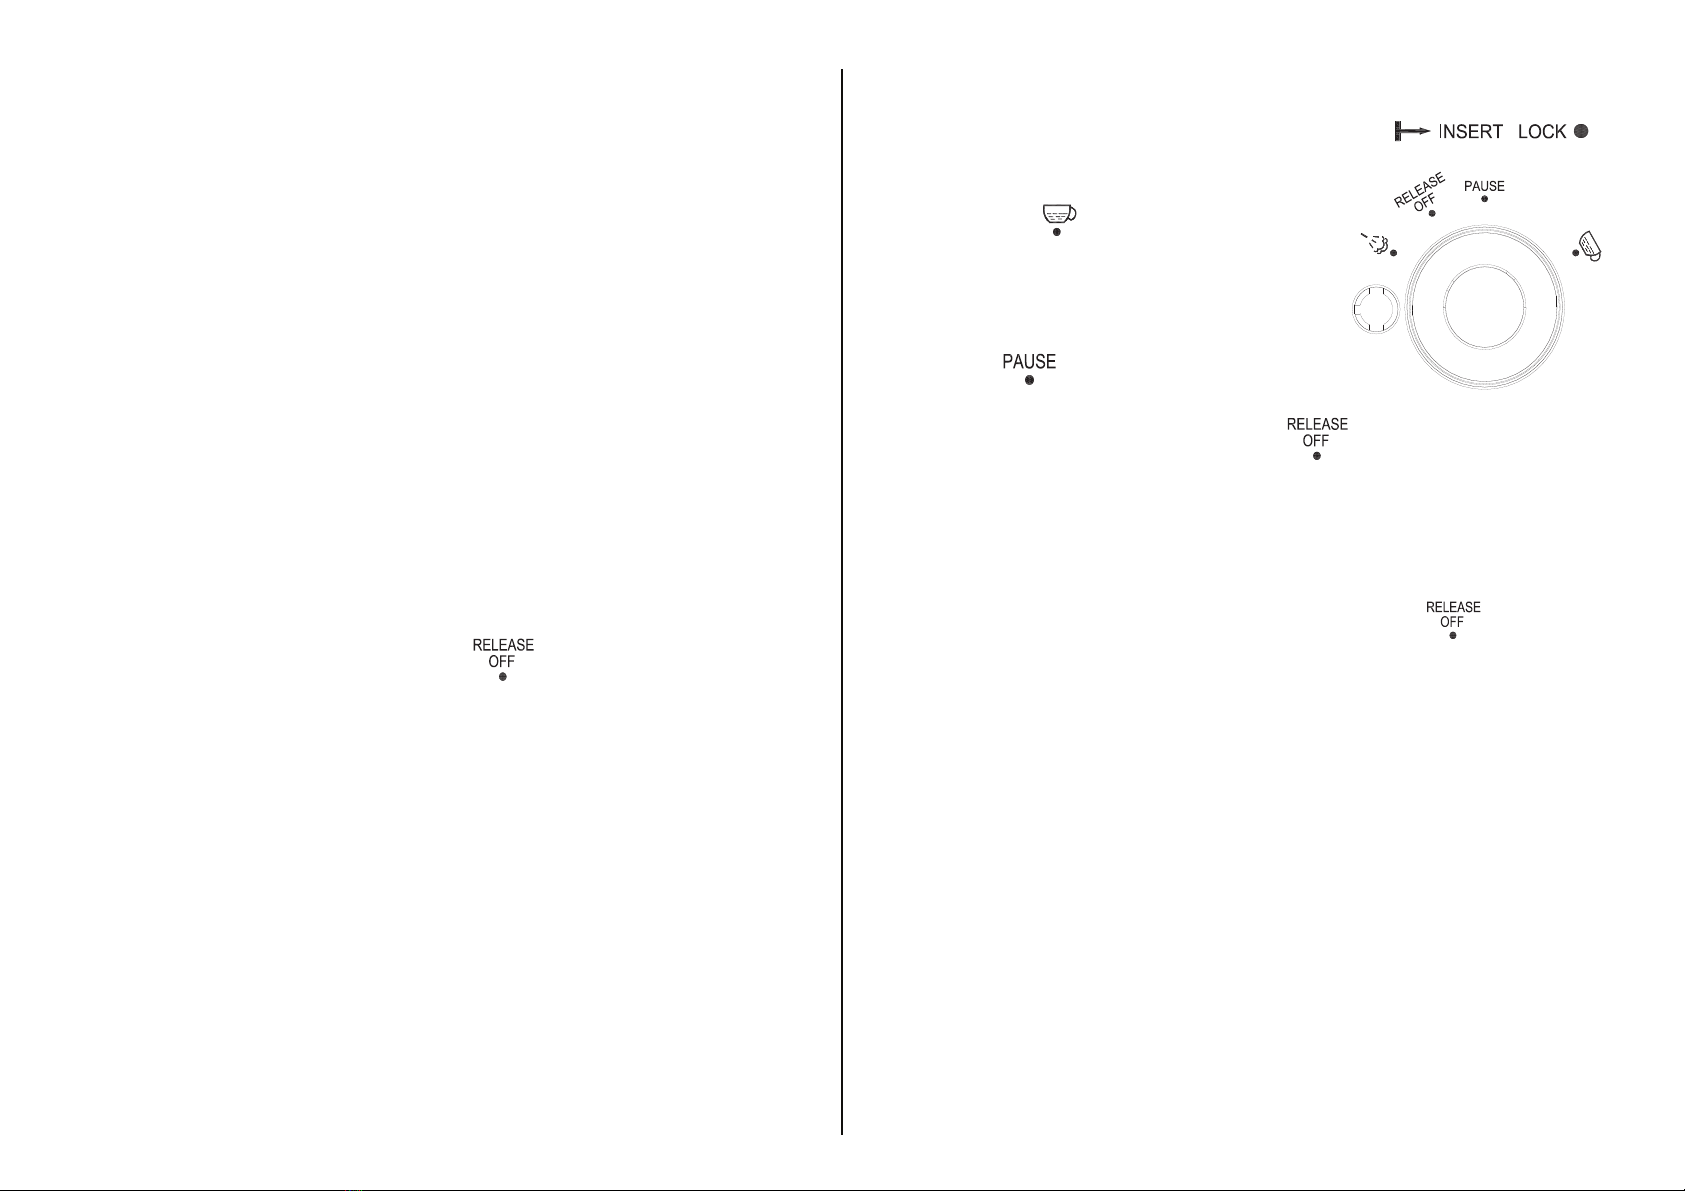
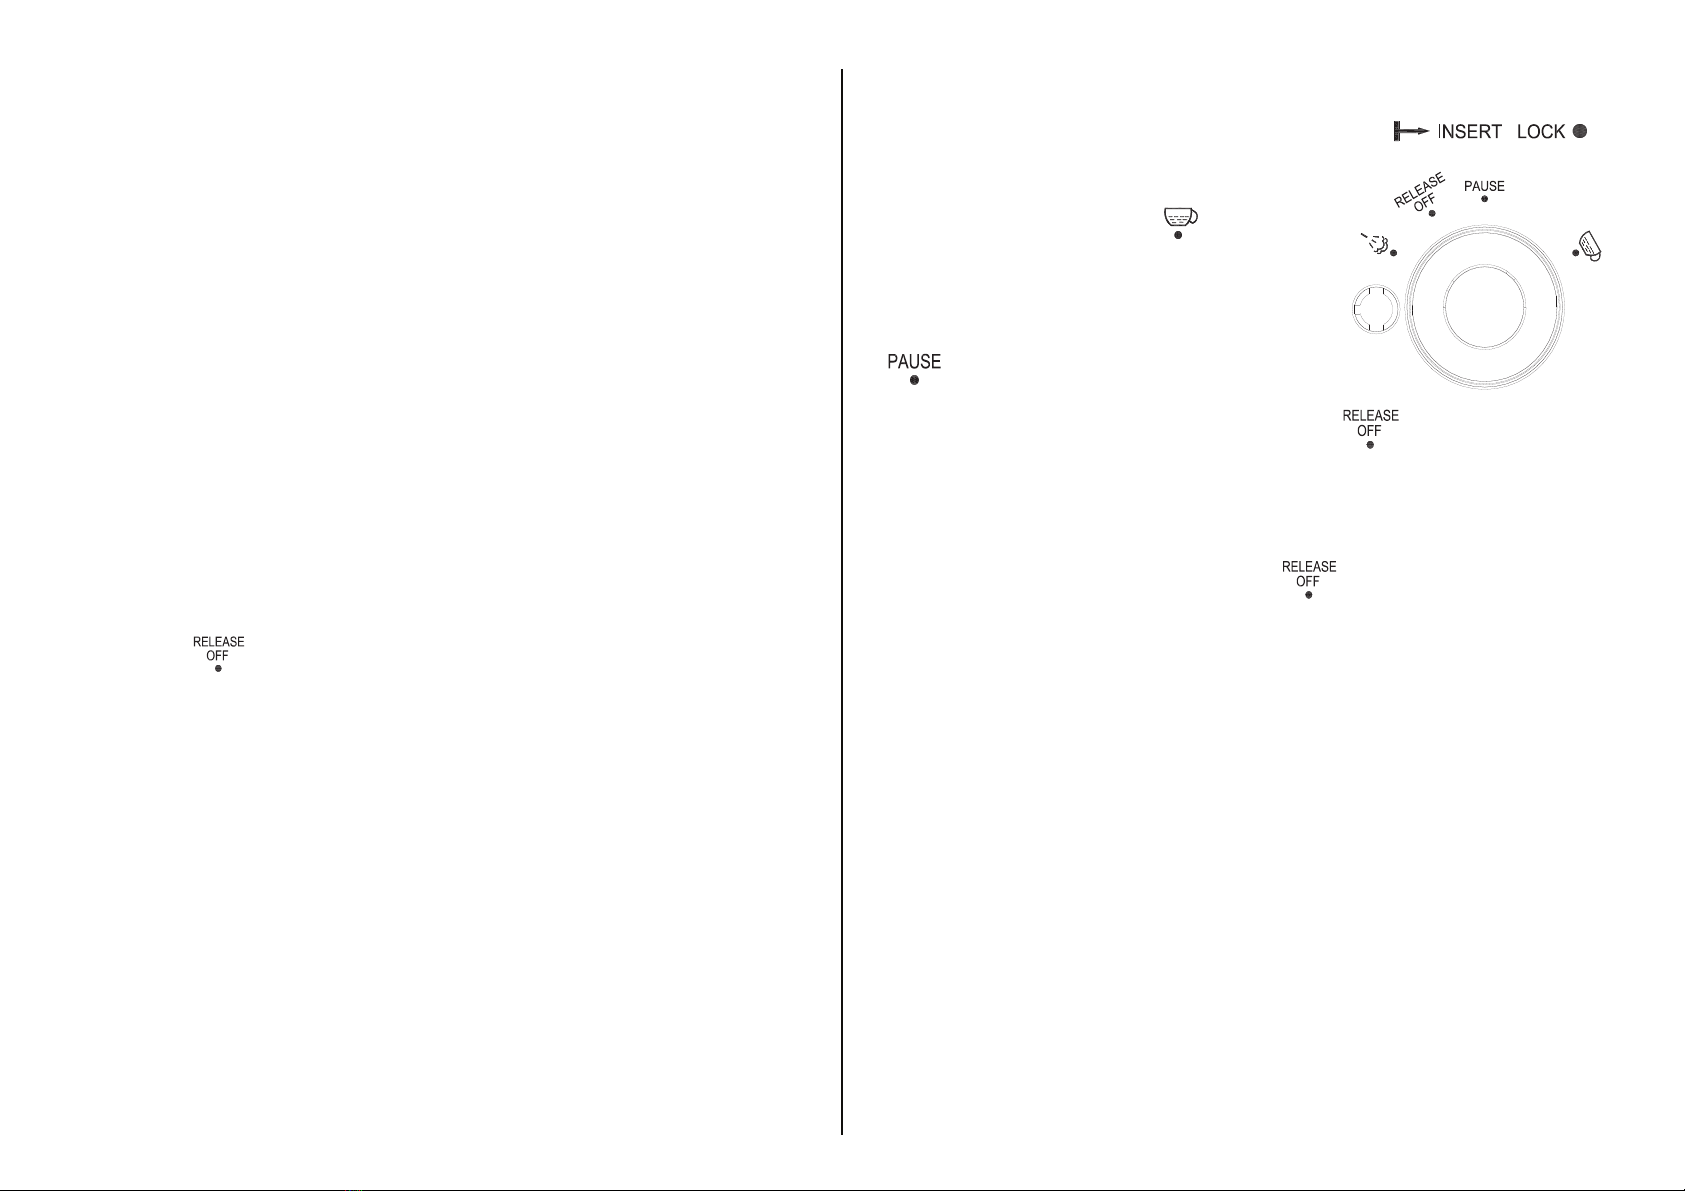
4. Gire la perilla hacia posición, el indicador será eliminado, y hacer dos tazas de
café (alrededor de 120 ml). Luego gire la perilla hacia posición y espera 5s.
5. Gire la perilla hacia posición y vapor durante 2 minutos, luego gire la perilla a
posición para detener la unidad de inmediato, haga que los desincrustadores
depositen en la unidad al menos 15 minutos.
6. Reinicie la máquina, repita los pasos de 4-5 por tres veces;
7. Luego gire la perilla hacia posición para preparar hasta que no quede ningún
descalcificador.
8. Luego, prepare café (sin café en polvo) con agua en el nivel MÁX. Repita los pasos de
4 a 5 veces (no es necesario esperar 15 minutos en el paso de 5) y luego cuele hasta que
no quede agua en el tanque.
9. Repita el paso de 8 al menos 3 veces para asegurarse de que la tubería esté limpia.

A. PARA EL PRIMER USO
Retire la cafetera del paquete y verifique los accesorios de acuerdo con la lista.
2.
3.
4.
1.
Limpie todos los componentes desmontables de acuerdo con la siguiente sección de
"LIMPIEZA Y MANTENIMIENTO". Luego ensamblarlos por completo.
Asegúrese de que el filtro se coloque en su lugar. Coloque la jarra en la bandeja de
goteo.
Operación del aparato de acuerdo con la sección de "B" y "C" (sin polvo de café en el
filtro). Repita 2-3 veces
B. HACER CAFÉ ESPRESSO
1. Retire la tapa girándola en sentido contrario a las agujas del reloj. Vierta el agua adecuada
en el tanque de agua con la jarra. No exceda la capacidad máxima.
Note: 1). La jarra tiene las marcas de taza, la capacidad máxima del tanque es igual a 4
tazas de cantidad de agua. La capacidad mínima del tanque es igual a 2 tazas de
cantidad de agua.
2). Antes de verter el agua en el tanque de agua, asegúrese de que el cable de
alimentación esté desenchufado de la toma de corriente y la perilla esté en su
posición.
2. Vuelva a colocar la cubierta en su lugar girando la tapa en el sentido de las agujas del reloj
hasta que se bloquee en su posición.
3. Coloque el filtro en un embudo a presión, vierta café molido en el filtro con una cuchara-
da de café (240 ml de agua con 4 tazas de café en polvo, 120 ml de agua con 2 tazas de
café en polvo, el filtro con 2 tazas y 4 tazas de café). el café en polvo herméticamente con
el lado plano circular de la cuchara de café.
4. Asegúrese de que los tubérculos del embudo se alineen con las ranuras del electro-
doméstico, luego inserte el embudo en la posición "INSERTAR", y puede fijar el
embudo en la cafetera firmemente girándolo en sentido contrario a las agujas del reloj
hasta que está bloqueado en la posición "LOCK" (ver Fig. 1).
5. Coloque la jarra en la bandeja de goteo.
6. Enchufe el cable de alimentación a la toma de
corriente. Gire la perilla hacia posición, y
el indicador es iluminado, aproximadamente 2
minutos, el café fluir fuera.
7. Después de obtener el café deseado, debe girar
perilla para posicionar, el indicador se apaga y el
la cafetera deja de funcionar, su café está listo ahora.
A continuación, retire la jarra y gire la perilla hacia
WARNING: ¡No deje desatendida la cafetera durante la preparación del café, ya
que es necesario que lo haga de forma manual a veces!
8.
9.
Antes de retirar el embudo a presión o abrir la tapa, asegúrese de liberar la presión
en el tanque. El método es girar la perilla al posición en primer lugar, el
vapor en el tanque se expulsará del dispositivo de espuma. Una vez que se haya
liberado la presión y espere a que se enfríe el embudo a presión, puede retirar el
embudo a presión o abrir la tapa.
Después de terminar de preparar el café, puede sacar el embudo presurizado en
sentido horario, y luego verter el residuo de café con el filtro presionado por el
embudo. Deje que se enfríen completamente, luego enjuague con agua corriente.
(Cuando vuelva a ensamblar el filtro, deberá girar el gancho del embudo a la posición
original)
C. ESPUMENADO LECHE Y HACIENDO CAPUCHINO

5. Cuando se alcanza el objetivo requerido, puede girar el mando a posición
dejar de espumar. Luego retire la jarra y gire la perilla hacia posición
libera el vapor residual en el tanque.
Nota: Limpie la salida de vapor con una esponja húmeda inmediatamente
después de que el vapor deje de generarse, ¡pero tenga cuidado de no lastimar!
6. Vierta la leche espumosa en el expreso preparado, ahora el capuchino está listo.
Endulce al gusto y, si lo desea, espolvoree la espuma con un poco de cacao en
polvo.
Nota: Recomendamos que permita que el aparato se enfríe antes de volver a hacer
café. De lo contrario, podría producirse un olor a quemado en el café exprés.
*LIMPIEZA Y MANTENIMIENTO
1. Corte la fuente de alimentación y deje que la cafetera se enfríe por completo antes de
limpiarla.
2. Limpie la carcasa de la cafetera con una esponja a prueba de humedad con frecuencia.
Nota: No lo limpie con alcohol o limpiador solvente. Nunca sumerja la carcasa en
agua para limpiarla.
3. Separe el embudo presurizado girándolo en el sentido de las agujas del reloj,
elimine los residuos de café en el interior, luego puede limpiarlo con limpiador, pero
finalmente debe enjuagar con agua limpia.
4. Limpie todos los accesorios desmontables en el agua y seque completamente.
Accesorios
1. Prepare el espresso primero con un recipiente lo suficientemente grande de
acuerdo con la parte "B. HAGA EL CAFÉ ESPRESSO ".
2. Llene una jarra con la cantidad deseada de leche para preparar cada capuchino.
Utilice leche entera a la temperatura del refrigerador (¡no caliente!).
Nota: Al elegir el tamaño de la jarra, se recomienda que el diámetro no sea
inferior a 70 ± 5 mm, y tenga en cuenta que la lech.
3. Gire la perilla a la posición el indicador se encenderá.
4. Inserte el dispositivo de espuma en la leche unos dos centímetros, después de
unos 2 minutos, el vapor saldrá del dispositivo de espuma. Leche de espuma en
el camino moviendo recipiente redondo de arriba a abajo.
*DISPOSICIÓN
deseche las máquinas viejas de una manera ambientalmente neutral.
Las máquinas antiguas contienen materiales valiosos que deben ser rescatados para su
reciclaje. Por lo tanto, deseche las máquinas antiguas a través de su sistema de recolección
regional.
HOUSEHOLD USE ONLY

*TROULBE SHOOTING
Problema Causa / resultado Acción
El agua o agua de fuga
de la garrafa se escapa
de la tapa de la jarra
La jarra no está ubicada
correctamente
Deje que la línea central de
cuidado se alinee bien con la
abertura de fuga de la canasta
de preparación.
El nivel de agua en el
tanque excede la escala
de MAX.
El nivel de agua en el tanque
debe estar dentro de la escala
de MIN y MAX.
Las partes metálicas
en el tanque tienen
óxido.
El descalcificador no es un
tipo recomendado. Puede
corroer las partes metálicas
en el tanque.
Use el desincrustante
recomendado por el
fabricante.
El agua se filtra desde
el fondo de la cafetera.
Hay mucha agua en la
bandeja de goteo.
Por favor, limpie la bandeja
de goteo.
La cafetera no funciona
bien
Por favor, póngase en contacto
con el centro de servicio
autorizado para la reparación.
El agua se filtra por el
lado exterior del filtro
Hay un poco de café en
polvo en el borde del filtro.
Deshazte de ellos.
El sabor ácido
(vinagre) existe en el
café expreso.
No limpiar correctamente
después de limpiar los
depósitos minerales.
Limpie la cafetera por el
contenido en "antes del primer
uso" varias veces
El café en polvo se
almacena en un lugar
caliente y húmedo durante
mucho tiempo. Y se vuelve
malo.
Use the fresh coffee powder
and it should berstored in a
cool, dry place
La cafetera ya no
puede funcionar.
La toma de corriente no
está bien conectada.
Solo después de que se
ilumina el indicador de vapor
listo (indicador verde), el
vapor se puede usar para espumar
El vapor no puede
espumar.
El contenedor es
demasiado grande o la
forma no es adecuada.
Solo después de que se
ilumina el indicador de vapor
listo (indicador verde), el
vapor se puede usar para espumar.
El contenedor es demasiado
grande o la forma no es
adecuada
Use una copa alta y estrecha.
Usted ha usado leche
desnatada
Use leche entera o leche
semidesnatada
*Si no ha podido resolver el problema, póngase en contacto con atención al cliente en
su país
Capacidad 4cups/240mL
Presión 5Bar
Voltaje 120V,60Hz
Poder 800W
Table of contents
Languages:
Other Continental Refrigerator Coffee Maker manuals

Continental Refrigerator
Continental Refrigerator CE-CM219 User manual

Continental Refrigerator
Continental Refrigerator CE-CM389 User manual

Continental Refrigerator
Continental Refrigerator CE-CM241 User manual

Continental Refrigerator
Continental Refrigerator Elite CELT-CE005 User manual

Continental Refrigerator
Continental Refrigerator CP43929 User manual

Continental Refrigerator
Continental Refrigerator CE-CM249 User manual

Continental Refrigerator
Continental Refrigerator CM43905 User manual

Continental Refrigerator
Continental Refrigerator CP-CP019 User manual

Continental Refrigerator
Continental Refrigerator CM43655 User manual