manuals.online logo
Brands
  1. Home
  2. •
  3. Brands
  4. •
  5. CORFLEX
  6. •
  7. Medical Equipment
  8. •
  9. CORFLEX Ranger II GS User guide

CORFLEX Ranger II GS User guide

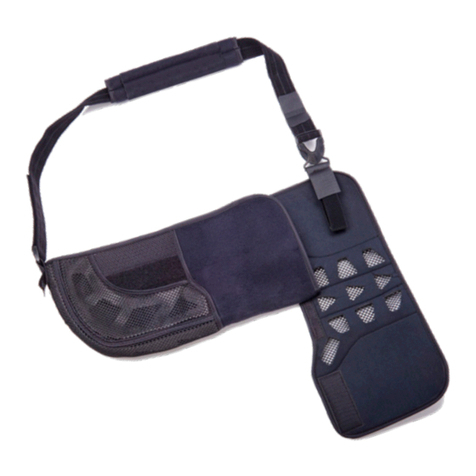
Sizing and Applying the Sling
Shoulder sling features a universal
design that accommodates a wide
variety of patients, tting a forearm
length from 9”-20”. Length is
measured from wrist to elbow. Sling
comes shipped as a typical medium
right arm sling.
1. Sizing Sling Length and Thumb Loop
°°
CORFLEX.COM | 800 426 7353
RangerTM II GS
Shoulder Brace
Application Instructions
A. With both the sling and waistband properly t, remove plastic sleeve
from waistband and discard. Attach the sling by securing hook and
loop portions together.
B. Secure the waistband to the sling by reapplying the 2” x 9” mesh
strap across the top of the sling. Locate close to the elbow to help
prevent the arm from sliding forward in the sling.
2. Securing Sling and Waistband
A. Ensure that any open wounds and/or surgical sites are properly
covered before applying the sling.
B. Sling is congured for use on the right arm/shoulder. For left arm
application: properly orient sling, unbuckle strap at wrist end of sling
and rotate before reinserting. Check that strap is not twisted and that
front shoulder strap hook adjustment is accessible from front of strap.
C. Release top hook closure at shoulder strap buckle allowing front
panel of sling to open fully. While supporting affected arm at 90°,
gently place arm into sling with elbow positioned as far back as
possible in sling pocket.
D. Sling length t: Edge of sling should extend to rst knuckle (PIP
joint) on the pinkie nger. Adjust sling length, if needed, by removing
the forearm section and reapplying in the desired position.
E. Release thumb loop strap and align bottom fold of strap with
third metacarpal. Thumb should rest comfortably inside loop when
properly t and maintain the wrist and hand in a neutral position.
F. Trim excess strap and reapply top hook closure to secure the front
panel for use.
G. Hand should rest fully along the bottom of the sling and never be
suspended by the thumb loop.
Comfort Harness Application
1. Adjusting Strap Lengths
A. Unbuckle Comfort Harness Strap and guide strap around the back,
sliding opposite arm through the sling loop.
B. Secure front buckle at sling, leaving the strap loose at this time.
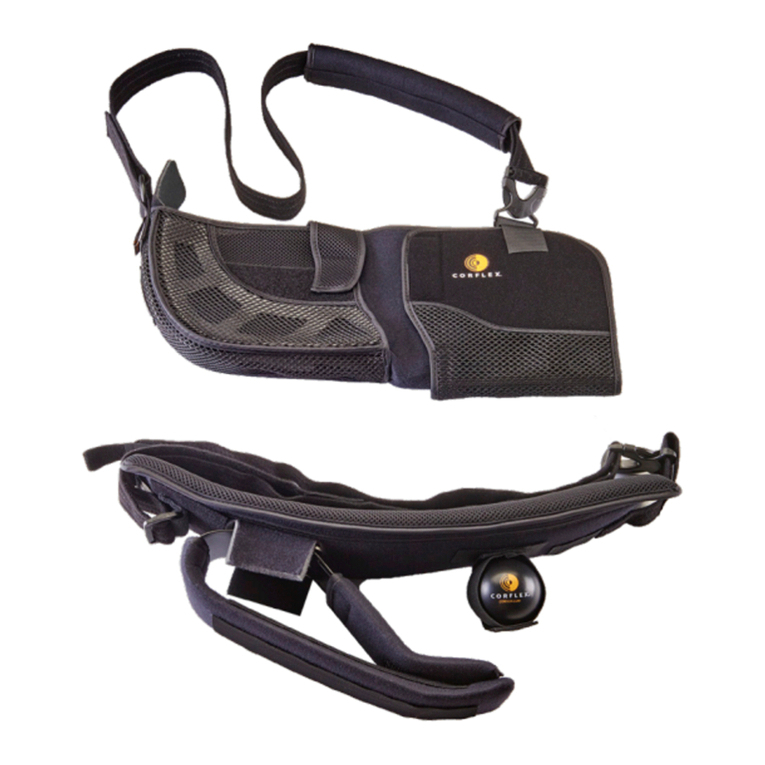
A. the sling from the waistband and
set aside.
B. Orient waistband so the long at
section is toward body and exercise
ball is in front. For use on left arm
remove elastic ball holder and
rotate 180°, reattach to front end of
waistband/strap.
C. Curve waistband to match patient's
waistline, this will provide a stable
platform for the arm and reduce migration.
D. Shape outer frame section for desired abduction/rotation.
Waistband can be adjusted to provide shoulder abduction from 10°
to 45° and from full internal rotation to 70° of external rotation as
specied by the physician or other qualied healthcare provider.
E. Apply at patient's waist on their affected side. Wrap strap around
the patient’s waist and secure buckle at the front of waistband.
F. If the waistband can be easily pushed down, tighten waist strap.
Strap should be snug but not cause discomfort.
1. Fitting the Metal Waistband
Waistband Application
UNIV
Ranger II GS Shoulder Brace 23-2560
A. Locate webbing loop on
the back end of the sling.
B. Thread hook end of strap
through webbing loop and
secure back onto strap.
1336/12-19GM-1192-000
Care instructions
Sling should be hand washed only using warm water and
detergent for delicate fabrics, repeatedly rinsed and line dried
only. Do not use bleach or place in a dryer. Waistband can be
surface washed using warm water and a detergent for delicate
fabrics or wiped clean with a mild disinfectant. Do not immerse
waistband in liquids.
Caution
This product has been designed and tested based on single
patient use only. It should never be used by multiple patients. If
additional pain, swelling or symptoms occur while using the
device, seek medical attention. Product should be applied by a
licensed or certied healthcare practitioner and as prescribed by
a physician or other qualied medical authority.
Indications
Indicated for non-surgical or post-op shoulder conditions where
specic shoulder positioning is recommended, including rotator
cuff repairs, SLAP or Bankart lesions, dislocations/subluxations,
capsule repairs, joint reconstruction and shoulder arthroscopy.
Warranty
Products manufactured by Corex are warranted to the original
purchaser against defects in workmanship and material for the
life of the product. The foregoing warranty shall not apply to
normal wear and tear; or if the product has been subjected to
misuse or misapplication the warranty will be voided at the
discretion of Corex.
APPLICATION INSTRUCTIONS (continued)
CORFLEX | 669 EAST INDUSTRIAL PARK DRIVE | MANCHESTER, NH 03109
CORFLEX.COM
|
TOLL FREE: 800 426 7353
|
FAX: 603 623 4111
To Reorder
Sizing: Fits waist circumference of 24”-48”. Sling ts forearm length from
9”-20”, length is measured from wrist to elbow.
Product Number
A. Wrap strap around the
patient’s waist and secure
the hook fastener to the
front sling panel.
B. Adjust waist strap length
as needed for a secure t.
Strap should be snug but
not cause discomfort.
2. Attaching Strap to Sling
3. Final Waist Strap Fit
Converting to Shoulder Immobilizer
This product can also be stepped-down to a shoulder immobilizer. Use
as a shoulder immobilizer should only be at the direction of the patient’s
physician or other qualied healthcare provider.
NOTE:
The three-point adjustable strapping system makes it easy to apply when
intravenous (IV) lines are present. Simply release the lower front tab (F),
adjust the position of the IV lines and reattach the hook tab.
2. Sizing the Comfort Harness
A. To ensure a proper t,
always adjust back strap rst.
B. Locate the plastic triangle
along the inside border of
the scapula aligning the
point with the spine of the
scapula or roughly the level
of the T3 vertebrae.
C. With the waistband
properly positioned, adjust
the strap length that
connects the plastic triangle
to the sling. Remove alligator
tab and trim if needed.
D. Next adjust the location
of the C-shaped pad that will
sit on the front of the patient.
The top edge of the pad
should be located at the tip
of the shoulder or AC joint.
E. For the initial tting
reposition the hook tabs that
contact the elastic portion of
the strap, not the ends that
fall on the C-shaped pad.
F. A more precise t can be
controlled by moving the
location of the front tabs that
fasten to the C-shaped pad.
D
A
ADJUST BACK
STRAP FIRST
HOOK TAB
(ADDITIONAL TAB
LOCATED UNDER
ARM AREA)
C
F
PLACE
PLASTIC
TRIANGLE
IN PROPER
POSITION
POSITION FRONT TABS
FOR A MORE PRECISE FIT
ADJUST STRAP
LENGTH FOR
BEST FIT
B
E
C-SHAPE PAD
A. Remove waist strap from
waistband by releasing the
hook fastener attached to
the front end of waistband.
B. At the opposite end of
the waist strap, release the
hook fastener and thread
the strap out through the
plastic buckle.
C. Remove waistband from sling by detaching the hook and loop
fasteners. 2” x 9” mesh strap should now be secured to the front and
back sling panels close to the upper arm.
1. Strap Removal

Other CORFLEX Medical Equipment manuals

CORFLEX Ranger AP User manual

CORFLEX

CORFLEX Ranger AP User manual

CORFLEX Ranger ER User guide

CORFLEX

CORFLEX Ranger ER User guide

CORFLEX Ranger II ER Shoulder Pillow w/Sling User guide

CORFLEX

CORFLEX Ranger II ER Shoulder Pillow w/Sling User guide

Popular Medical Equipment manuals by other brands

Respironics SleepEasy user manual

Respironics

Respironics SleepEasy user manual

MGE UPS Systems SA 2 Operating and maintenance manual

MGE UPS Systems

MGE UPS Systems SA 2 Operating and maintenance manual

brewer ASSIST 7000 Installation & operation manual

brewer

brewer ASSIST 7000 Installation & operation manual

Eko Devices CORE quick start guide

Eko Devices

Eko Devices CORE quick start guide

DORC 1100 Service manual

DORC

DORC 1100 Service manual

NeuroTek EyeScan Deluxe instructions

NeuroTek

NeuroTek EyeScan Deluxe instructions

Civco ASTRA Error Codes

Civco

Civco ASTRA Error Codes

Comen CM300 user manual

Comen

Comen CM300 user manual

SYMBYX DuoCare 904 instruction manual

SYMBYX

SYMBYX DuoCare 904 instruction manual

Beurer PO 60 quick start guide

Beurer

Beurer PO 60 quick start guide

OncoTherm EHY-2000plus user manual

OncoTherm

OncoTherm EHY-2000plus user manual

Dräger D-Vapor Instructions for use

Dräger

Dräger D-Vapor Instructions for use

Waeco Refresh-o-mat operating manual

Waeco

Waeco Refresh-o-mat operating manual

Virtuox Vpod Vital Pro user manual

Virtuox

Virtuox Vpod Vital Pro user manual

Mirion Technologies BIODEX ECONO 058-726 Operation manual

Mirion Technologies

Mirion Technologies BIODEX ECONO 058-726 Operation manual

Conair WJ2C Instructions for use

Conair

Conair WJ2C Instructions for use

Sound Oasis SP-150 instruction manual

Sound Oasis

Sound Oasis SP-150 instruction manual

Regenesis Reprieve 60 instruction manual

Regenesis

Regenesis Reprieve 60 instruction manual

manuals.online logo
manuals.online logoBrands
  • About & Mission
  • Contact us
  • Privacy Policy
  • Terms and Conditions

Copyright 2025 Manuals.Online. All Rights Reserved.