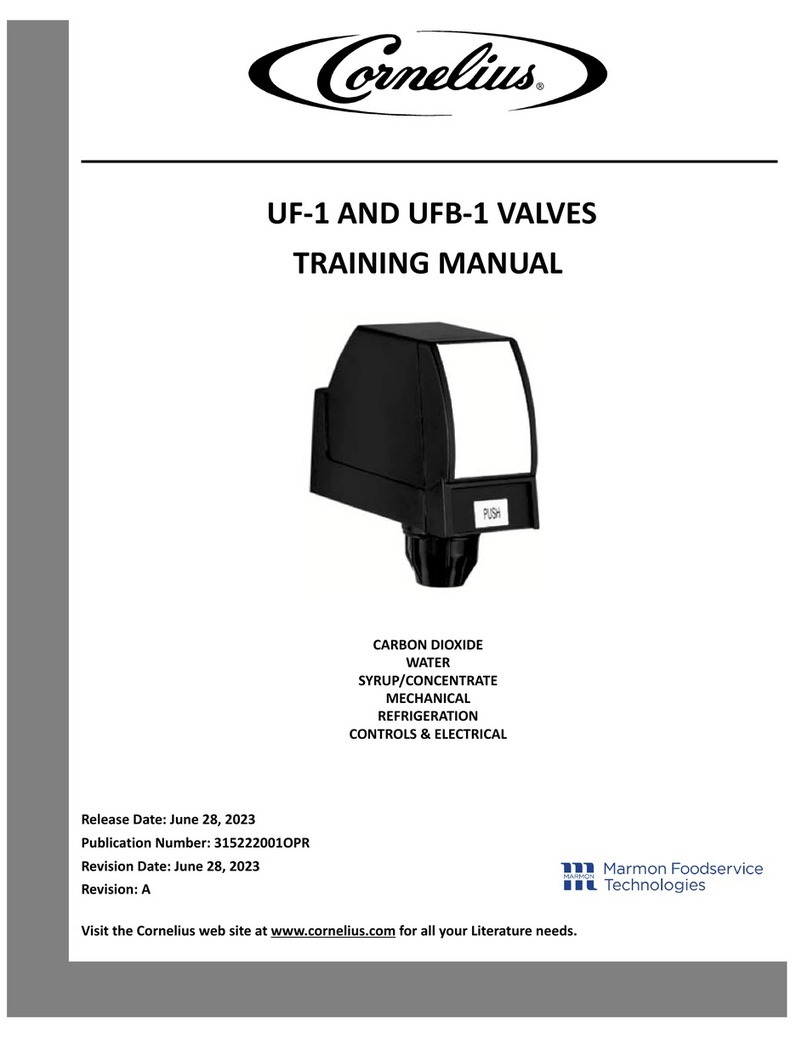
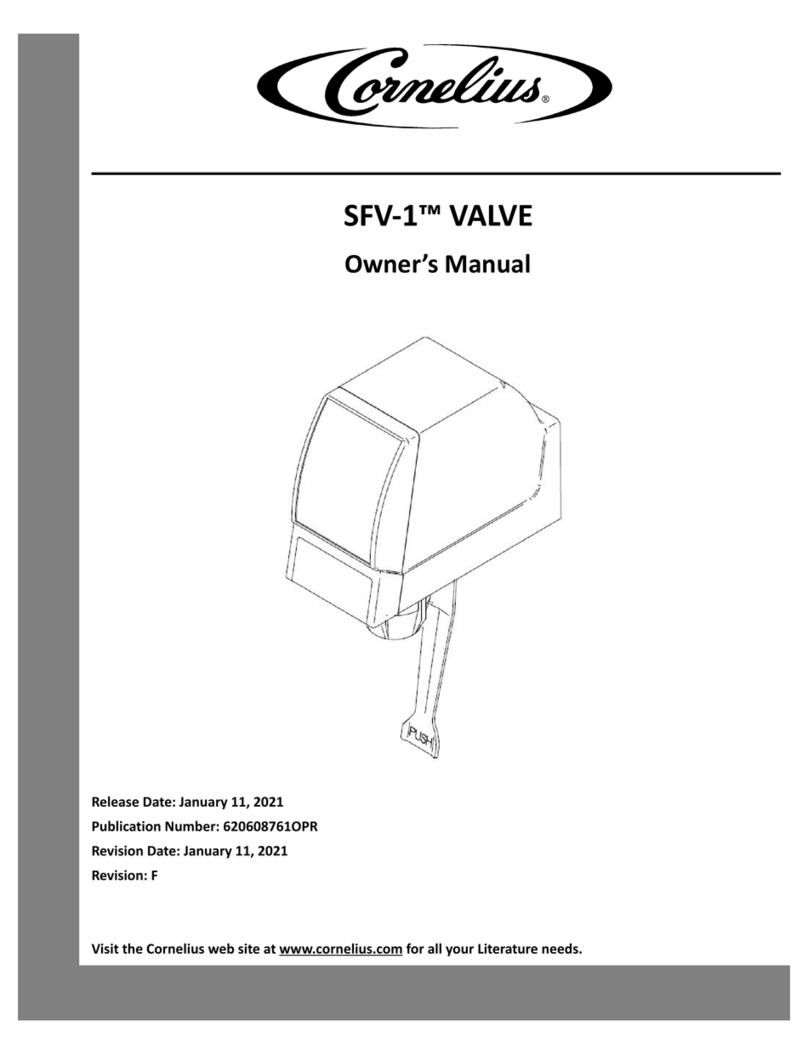
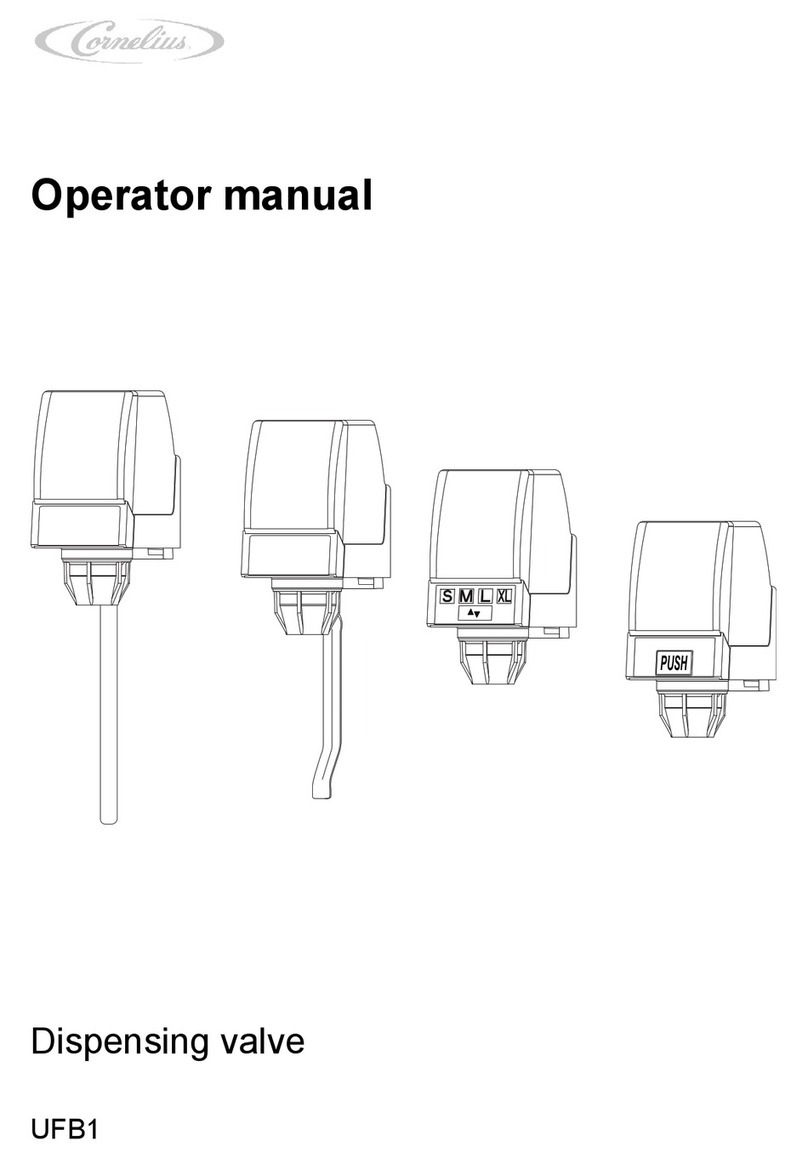
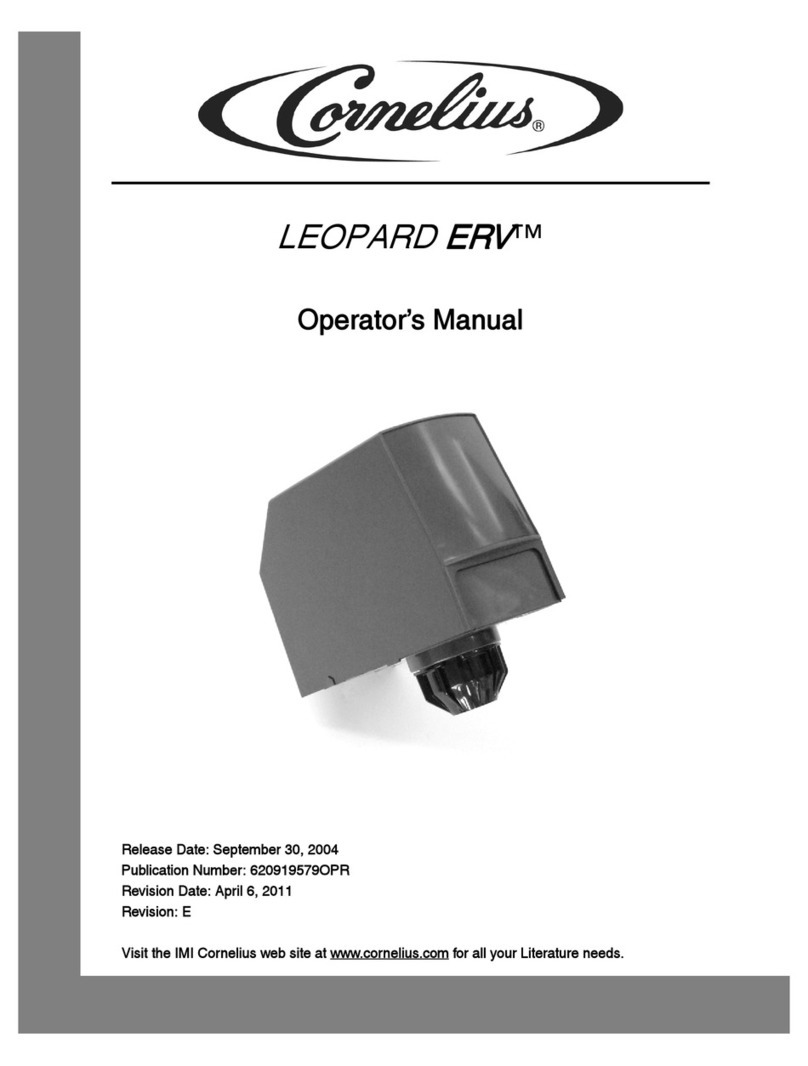
Cornelius UF-1 User manual

UF-1 POST-MIX VALVE
Operator’s Manual
Release Date: January 11, 2021
Publication Number: 315222002OPR
Revision Date: January 11, 2021
Revision: D
Visit the Cornelius web site at www.cornelius.com for all your Literature needs.

Notice
The products, technical information, and instructions contained in this manual are subject to change without notice. These
instructions are not intended to cover all details or variations of the equipment, nor to provide for every possible contingency
in the installation, operation or maintenance of this equipment. This manual assumes that the person(s) working on the equip‐
ment have been trained and are skilled in working with electrical, plumbing, pneumatic, and mechanical equipment. It is
assumed that appropriate safety precautions are taken and that all local safety and construction requirements are being met,
in addition to the information contained in this manual.
This Product is warranted only as provided in Cornelius’ Commercial Warranty applicable to this Product and is subject to all of
the restrictions and limitations contained in the Commercial Warranty.
Cornelius will not be responsible for any repair, replacement or other service required by or loss or damage resulting from any
of the following occurrences, including but not limited to, (1) other than normal and proper use and normal service conditions
with respect to the Product, (2) improper voltage, (3) inadequate wiring, (4) abuse, (5) accident, (6) alteration, (7) misuse, (8)
neglect, (9) unauthorized repair or the failure to utilize suitably qualified and trained persons to perform service and/or repair
of the Product, (10) improper cleaning, (11) failure to follow installation, operating, cleaning or maintenance instructions, (12)
use of “non‐authorized” parts (i.e., parts that are not 100% compatible with the Product) which use voids the entire warranty,
(13) Product parts in contact with water or the product dispensed which are adversely impacted by changes in liquid scale or
chemical composition.
Correct Disposal of this Product
RECYCLE
This marking indicates that this product should not be disposed with other household wastes throughout the EU. To prevent
possible harm to the environment or human health from uncontrolled waste disposal, recycle it responsibly to promote the
sustainable reuse of material resources. To return your used device, please use the return and collection systems or contact
the retailer where the product was purchased. They can take this product for environmental safe recycling.
Trademarks and Copyrights
This document contains proprietary information and it may not be reproduced in any way without permission from Corne‐
lius. This document contains the original instructions for the unit described.
Marmon Foodservice Technologies, Inc.
101 Regency Drive
Glendale Heights, IL
Tel: + 1 800‐238‐3600
Printed in U.S.
Contact Information
To inquire about current revisions of any documentation or assistance with any Cornelius product, contact:
www.cornelius.com
800-238-3600

TABLE OF CONTENTS
Safety Instructions . . . . . . . . . . . . . . . . . . . . . . . . . . . . . . . . . . . . . . . . . . . . . . . . . . . . . . . . . . . . . . 1
Read And Follow All Safety Instructions . . . . . . . . . . . . . . . . . . . . . . . . . . . . . . . . . . . . . . . . . . . . 1
Safety Alert symbol . . . . . . . . . . . . . . . . . . . . . . . . . . . . . . . . . . . . . . . . . . . . . . . . . . . . . . . . . 1
Types of Alerts . . . . . . . . . . . . . . . . . . . . . . . . . . . . . . . . . . . . . . . . . . . . . . . . . . . . . . . . . . . . . 1
Safety Tips . . . . . . . . . . . . . . . . . . . . . . . . . . . . . . . . . . . . . . . . . . . . . . . . . . . . . . . . . . . . . . . . 1
Qualified Service Personnel . . . . . . . . . . . . . . . . . . . . . . . . . . . . . . . . . . . . . . . . . . . . . . . . . .1
Safety Precautions . . . . . . . . . . . . . . . . . . . . . . . . . . . . . . . . . . . . . . . . . . . . . . . . . . . . . . . . . . . . . 2
Shipping And Storage . . . . . . . . . . . . . . . . . . . . . . . . . . . . . . . . . . . . . . . . . . . . . . . . . . . . . . . 2
CO2 (Carbon Dioxide) Warning . . . . . . . . . . . . . . . . . . . . . . . . . . . . . . . . . . . . . . . . . . . . . . . 2
Mounting in or on a Counter . . . . . . . . . . . . . . . . . . . . . . . . . . . . . . . . . . . . . . . . . . . . . . . . . 2
Unit Location . . . . . . . . . . . . . . . . . . . . . . . . . . . . . . . . . . . . . . . . . . . . . . . . . . . . . . . . . . . . . . 2
Machine Usage . . . . . . . . . . . . . . . . . . . . . . . . . . . . . . . . . . . . . . . . . . . . . . . . . . . . . . . . . . . . 2
Introduction . . . . . . . . . . . . . . . . . . . . . . . . . . . . . . . . . . . . . . . . . . . . . . . . . . . . . . . . . . . . . . . . . . . 3
UF-1 Valves Models . . . . . . . . . . . . . . . . . . . . . . . . . . . . . . . . . . . . . . . . . . . . . . . . . . . . . . . . . . . . 3
Cup Actuated Valve . . . . . . . . . . . . . . . . . . . . . . . . . . . . . . . . . . . . . . . . . . . . . . . . . . . . . . . . . 3
Self–serve . . . . . . . . . . . . . . . . . . . . . . . . . . . . . . . . . . . . . . . . . . . . . . . . . . . . . . . . . . . . . . . . . 3
Portion Control . . . . . . . . . . . . . . . . . . . . . . . . . . . . . . . . . . . . . . . . . . . . . . . . . . . . . . . . . . . . 3
Optifill™ dispensing Control . . . . . . . . . . . . . . . . . . . . . . . . . . . . . . . . . . . . . . . . . . . . . . . . . .4
Flow Rates . . . . . . . . . . . . . . . . . . . . . . . . . . . . . . . . . . . . . . . . . . . . . . . . . . . . . . . . . . . . . . . . 4
Mounting Block . . . . . . . . . . . . . . . . . . . . . . . . . . . . . . . . . . . . . . . . . . . . . . . . . . . . . . . . . . . . 4
Environmental Requirements . . . . . . . . . . . . . . . . . . . . . . . . . . . . . . . . . . . . . . . . . . . . . . . . . 4
Alternate Dispensing Modules . . . . . . . . . . . . . . . . . . . . . . . . . . . . . . . . . . . . . . . . . . . . . . . . . . . 5
UF-1 Manual Dispense (Push Button) . . . . . . . . . . . . . . . . . . . . . . . . . . . . . . . . . . . . . . . . . . 5
UF-1 Portion Control . . . . . . . . . . . . . . . . . . . . . . . . . . . . . . . . . . . . . . . . . . . . . . . . . . . . . . . . 5
UF-1 Optifill™ Dispensing Control . . . . . . . . . . . . . . . . . . . . . . . . . . . . . . . . . . . . . . . . . . . . . 5
Operation Instructions . . . . . . . . . . . . . . . . . . . . . . . . . . . . . . . . . . . . . . . . . . . . . . . . . . . . . . . . . . . 6
UF-1 Dispensing Valve . . . . . . . . . . . . . . . . . . . . . . . . . . . . . . . . . . . . . . . . . . . . . . . . . . . . . . . . . . 6
UF-1 Electric Dispensing Control . . . . . . . . . . . . . . . . . . . . . . . . . . . . . . . . . . . . . . . . . . . . . . 6
Optional Water Lever . . . . . . . . . . . . . . . . . . . . . . . . . . . . . . . . . . . . . . . . . . . . . . . . . . . . . . . 6
UF-1 Dispensing Valve With Self Serve Dispense Switch. . . . . . . . . . . . . . . . . . . . . . . . . . . 6
UF-1 Dispensing Valve With Portion Control. . . . . . . . . . . . . . . . . . . . . . . . . . . . . . . . . . . . . 6
Optifill Dispensing Valve Control . . . . . . . . . . . . . . . . . . . . . . . . . . . . . . . . . . . . . . . . . . . . . . . . . . 7
UF–1 Dispensing Valve With Optifill™ Dispensing . . . . . . . . . . . . . . . . . . . . . . . . . . . . . . . . 7
Portion Control Operation . . . . . . . . . . . . . . . . . . . . . . . . . . . . . . . . . . . . . . . . . . . . . . . . . . . . . . . 8
Adjustments . . . . . . . . . . . . . . . . . . . . . . . . . . . . . . . . . . . . . . . . . . . . . . . . . . . . . . . . . . . . . . . . . . . 9
Adjusting The Portion Control . . . . . . . . . . . . . . . . . . . . . . . . . . . . . . . . . . . . . . . . . . . . . . . . . . . . 9
Changing Size Of Drink Dispensed. . . . . . . . . . . . . . . . . . . . . . . . . . . . . . . . . . . . . . . . . . . . . . 9
Adjusting The Portion Control . . . . . . . . . . . . . . . . . . . . . . . . . . . . . . . . . . . . . . . . . . . . . . . . . . . . 9
Optifill™ Dispensing Valve Control . . . . . . . . . . . . . . . . . . . . . . . . . . . . . . . . . . . . . . . . . . . . . . .10
Programming Top-off Delay Time . . . . . . . . . . . . . . . . . . . . . . . . . . . . . . . . . . . . . . . . . . . . 10
Water Flow Rate . . . . . . . . . . . . . . . . . . . . . . . . . . . . . . . . . . . . . . . . . . . . . . . . . . . . . . . . . . 11
Dispensing Valve With Adjustable Water Flow Regulator . . . . . . . . . . . . . . . . . . . . . . . . . 11
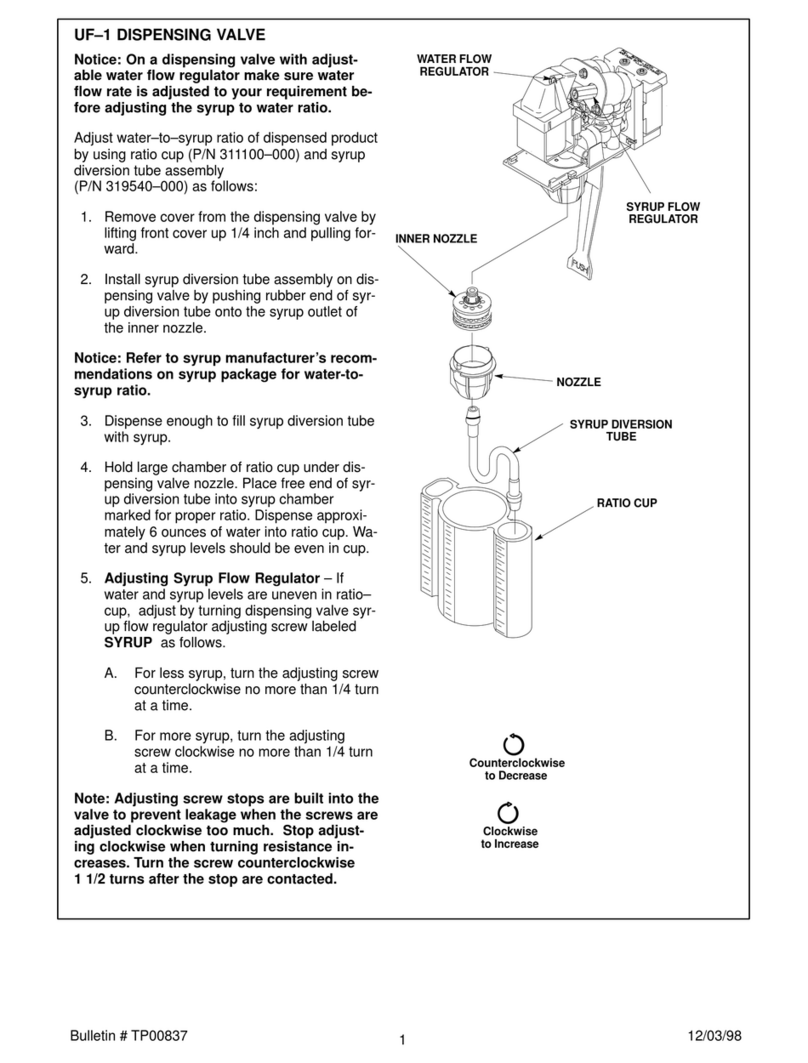
Adjust Water-to-syrup Ratio . . . . . . . . . . . . . . . . . . . . . . . . . . . . . . . . . . . . . . . . . . . . . . . . . . . . 12
UF-1 Dispensing Valve . . . . . . . . . . . . . . . . . . . . . . . . . . . . . . . . . . . . . . . . . . . . . . . . . . . . . .12
Service And Maintenance . . . . . . . . . . . . . . . . . . . . . . . . . . . . . . . . . . . . . . . . . . . . . . . . . . . . . . . 13
Cleaning Dispensing Valve . . . . . . . . . . . . . . . . . . . . . . . . . . . . . . . . . . . . . . . . . . . . . . . . . . . . . . 13
Removal And Replacement Procedures Of UF-1 Valve . . . . . . . . . . . . . . . . . . . . . . . . . . . . . . . 13
Remove And Replace Solenoid Coil . . . . . . . . . . . . . . . . . . . . . . . . . . . . . . . . . . . . . . . . . . . 13
Remove And Replace Switch . . . . . . . . . . . . . . . . . . . . . . . . . . . . . . . . . . . . . . . . . . . . . . . . 14
Remove And Replace Syrup Or Water Flow Regulator . . . . . . . . . . . . . . . . . . . . . . . . . . . . 14
Remove And Replace Water Flowasher Assembly . . . . . . . . . . . . . . . . . . . . . . . . . . . . . . . 15
Remove And Replace Inlet Banjo Valve . . . . . . . . . . . . . . . . . . . . . . . . . . . . . . . . . . . . . . . . 16
Remove And Replace Control Modules . . . . . . . . . . . . . . . . . . . . . . . . . . . . . . . . . . . . . . . . 17
Troubleshooting . . . . . . . . . . . . . . . . . . . . . . . . . . . . . . . . . . . . . . . . . . . . . . . . . . . . . . . . . . . . . . . 18
Reference Material . . . . . . . . . . . . . . . . . . . . . . . . . . . . . . . . . . . . . . . . . . . . . . . . . . . . . . . . . . . . . 20
Wiring Diagram For UF-1 Dispensing Valve . . . . . . . . . . . . . . . . . . . . . . . . . . . . . . . . . . . . . . . . 20
Wiring Diagram For UF-1 Self Serve Dispensing Valve . . . . . . . . . . . . . . . . . . . . . . . . . . . . . . . 20
Wiring Diagram For UF-1 Dispensing Valve With Portion Control . . . . . . . . . . . . . . . . . . . . . . 21
Wiring Diagram For UF-1 Optifill Dispensing Valve . . . . . . . . . . . . . . . . . . . . . . . . . . . . . . . . . . 21

UF-1 Post- Mix Valve Operation Manual
© 2017-2021, Marmon Foodservice Technologies, Inc. - 1 - Publication Number: 315222002OPR
SAFETY INSTRUCTIONS
READ AND FOLLOW ALL SAFETY INSTRUCTIONS
•Read and follow ALL SAFETY INSTRUCTIONS in this manual and any warning/caution labels on the unit (decals, labels or laminated
cards).
•Read and understand ALL applicable OSHA (Occupational Safety and Health Administration) safety regulations before operating
this unit.
SAFETY ALERT SYMBOL
!
This is the safety alert symbol. When you see this in the manual or on the unit, be alert to the
potential of personal injury or damage to the unit.
TYPES OF ALERTS
Indicates an immediate hazardous situation which if not avoided WILL result in serious injury, death or equipment
damage.
Indicates a potentially hazardous situation which, if not avoided, COULD result in serious injury, death, or
equipment damage.
Indicates a potentially hazardous situation which, if not avoided, MAY result in minor or moderate injury or
equipment damage.
SAFETY TIPS
•Carefully read and follow all safety messages in this manual and safety signs on the unit. - from Rod’s doc
•Keep safety signs in good condition and replace missing or damaged items.
•Learn how to operate the unit and how to use the controls.
•Donotlet anyone operate the unit without proper training. This appliance is not intended for use by very young children or infirm
persons without supervision. Young children should be supervised to ensure that they do not play with the appliance.
•Keep your unit in proper working condition and do not allow unauthorized modifications to the unit.
QUALIFIED SERVICE PERSONNEL
Only trained and certified electrical, plumbing and refrigeration technicians should service this unit.
All wiring and plumbing must conform to National and Local Codes. Failure to comply could result in seri‐
ous injury, death or equipment damage.
DANGER
!
WARNING
!
CAUTION
!
WARNING
!

UF-1 Post-Mix Valve Operation Manual
Publication Number: 315222002OPR - 2 - © 2017-2021, Marmon Foodservice Technologies, Inc.
SAFETY PRECAUTIONS
This unit has been specifically designed to provide protection against personal injury. To ensure continued protection observe
the following:
Disconnect power to the unit before servicing, following all lock out/tag out procedures established by the
user. Verify all the power is off to the unit before any work is performed. Failure to disconnect the power
could result in serious injury, death or equipment damage.
Always be sure to keep area around the unit clean and free of clutter. Failure to keep this area clean may
result in injury or equipment damage.
SHIPPING AND STORAGE
Before shipping, storing, or relocating the unit, the unit must be sanitized and all sanitizing solution must be
drained from the system. A freezing ambient environment will cause residual sanitizing solution or water
remaining inside the unit to freeze resulting in damage to internal components.
CO2(CARBON DIOXIDE) WARNING
CO2displaces oxygen. Strict attention MUST be observed in the prevention of CO2gas leaks in the entire CO2
and soft drink system. If a CO2gas leak is suspected, particularly in a small area, IMMEDIATELY ventilate the
contaminated area before attempting to repair the leak. Personnel exposed to high concentrations of CO2
gas experience tremors which are followed rapidly by loss of consciousness and DEATH.
MOUNTING IN OR ON ACOUNTER
While installing the unit in or on a counter top, the counter must be able to support a weight in excess of
340 lbs. to insure adequate support for the unit.
Failure to comply could result in serious injury, death or equipment damage.
Note: Many units incorporate the use of additional equipment such as ice makers. When additional
equipment is used you must check with the equipment manufacturer to determine the additional weight
the counter will need to support to ensure a safe installation.
UNIT LOCATION
•This unit is not designed for use in outdoor locations.
•The appliance must be placed in a horizontal position.
•The appliance is not suitable for installation in an area where a water jet would be used.
MACHINE USAGE
•This appliance is not intended for use by persons (including children) with reduced physical, sensory or mental
capabilities, or lack of experience and knowledge, unless they have been given supervision or instruction
concerning use of the appliance by a person responsible for their safety.
•Children should be supervised to ensure that they do not play with the appliance.
WARNING
!
CAUTION
!
CAUTION
!
DANGER
!
WARNING
!
CAUTION
!
CAUTION
!

UF-1 Post- Mix Valve Operation Manual
© 2017-2021, Marmon Foodservice Technologies, Inc. - 3 - Publication Number: 315222002OPR
INTRODUCTION
The UF-1 (interchangeable with UFB–1) valve provides the fast flow capabilities required in today’s business world; simplicity to
provide dependability and ease of repair when needed and easy conversion to any of the available pouring formats.
Read this manual carefully to learn how to operate and maintain this valve. Failure to do so can result in loss of valve perfor-
mance.
Consider this manual a permanent part of your equipment file.
UF‐1 VALVES MODELS
IMPORTANT: All UF‐1 valve models are capable of flow rates of 1‐1/2 to 3 ounces per second (High Flow) or 2 to 4
oz./sec. (UFB–1). Certain components of the valve must be changed to convert from High Flow to 2 to
4 oz./sec. or from 2 to 4 oz./sec. to High Flow. Qualified service persons should be contacted to make
this conversion. The dispensing/cooling equipment that supplies syrup and water to the valves must
be capable of providing enough 40F water and syrup to permit the higher flow rates. Be certain the
dispenser is capable of the higher flow rates before attempting to convert the valves.
CUP ACTUATED VALVE
LEVER
Operate the cup actuated valve by pressing the cup against the lever
until the cup is full; then release the lever
SELF–SERVE
PRESS
HERE
Operate the Self–Serve by pressing the “SYMBOL” switch and holding
until the desired amount of product has been dispensed, then release
the “SYMBOL” switch
PORTION CONTROL
SWITCHES
PRESS HERE
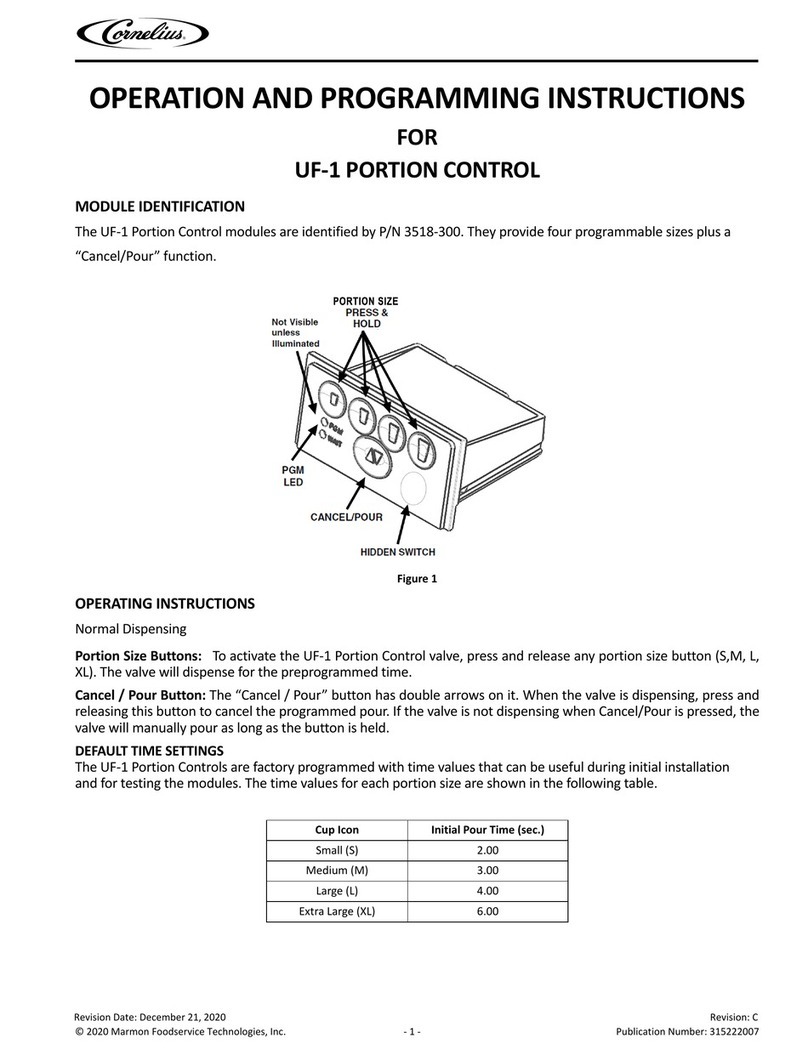
The portion control valve will dispense four different size drinks by
pressing the desired switch. The valve also has a manual dispense func-
tion. The Portion Control valve can be programmed to dispense four dif-
ferent drink sizes.

UF-1 Post-Mix Valve Operation Manual
Publication Number: 315222002OPR - 4 - © 2017-2021, Marmon Foodservice Technologies, Inc.
OPTIFILL™ DISPENSING CONTROL
LEVER
Operate the OptiFill™ model by pressing a cup against the lever and
allowing it to remain there. The valve will automatically shut off when
the liquid from the cup touches the lever. There is also an automatic
top-off delay that can be disabled if desired.
FLOW RATES
Water and Syrup pistons are marked for Low Flow (WL SL) or UFB–1 (W
S). They may be supplied individually or as a Low or UFB–1 Control
Module Assembly.
SI.No Description P/N
1. Module Assy High Flow 1954
2. Module Assy UFB–1 560006408
3. High Flow Pistons: (WL SL)
A. Water 31-0754-011
B. Syrup 31-0480-011
4. UFB–1 Pistons: (W S)
A. Water 56-000-6006
B. Syrup 56-000-6005
MOUNTING BLOCK
BOTTOM
DOVETAIL
All UF-1 valves use the same mounting block. You can easily remove the
valve from the mounting block by releasing the latch and depressing
the top Dovetail. The water and syrup are now shut off and the valve is
free to be removed. Pull the valve away from the block to remove.
When installing the valve, place it on the mounting block and press the
bottom dovetail upwards until the latch engages.
ENVIRONMENTAL REQUIREMENTS
SI.No Description Range
1. Operational temperature 0° C (32° F) to 60° C (140° F)
2. Operational relative humidity 20% to 100%
UF‐1 OPTIFILL DISPENSING VALVE REQUIRES:
1. 24 VAC power supply connected to the dispenser chassis (see Installation Instruction P/N 3776 for details)
2. Water quality (electrical conductivity) must be 50 micro Siemens or greater.
INSPECT THE VALVE REGULARLY AND PERFORM ALL MAINTENANCE PROCEDURES
1. Check syrup supply regularly. Replace when necessary.
2. Check CO2supply and water filters frequently. Replace when necessary.
3. Clean the valve as outlined in the maintenance section.
4. Sanitize the dispensing system as required for that model.
5. DO NOT abuse the valve

UF-1 Post- Mix Valve Operation Manual
© 2017-2021, Marmon Foodservice Technologies, Inc. - 5 - Publication Number: 315222002OPR
ALTERNATE DISPENSING MODULES
UF‐1 MANUAL DISPENSE (PUSH BUTTON)
•Integrated styling with other control modules.
•Manual dispense “PUSH” for self–serve applications
UF‐1 PORTION CONTROL
•Four dispense sizes and manual pour.
•Fully programmable from front panel with Hidden Switch.
•Integrated styling with other control modules.
•Fully waterproof design..
UF‐1 OPTIFILL™ DISPENSING CONTROL
•Automatic dispense and top-off delay.
•No sensitivity adjustment necessary for proper operation.
•Top-off delay time programmable.
•Fully waterproof design

UF-1 Post-Mix Valve Operation Manual
Publication Number: 315222002OPR - 6 - © 2017-2021, Marmon Foodservice Technologies, Inc.
OPERATION INSTRUCTIONS
UF‐1 DISPENSING VALVE
UF‐1 ELECTRIC DISPENSING CONTROL
LEVER
1. Press cup or glass against dispensing valve lever and dispense product until
cup or glass is full. Then release lever
OPTIONAL WATER LEVER
1. If water only is desired, place cup under a dispensing valve with the water lever.
Press down on the water lever to dispense. Then release lever to stop dispensing.
NOTE: The water lever is an optional item. The water lever is available
as a kit, refer to illustrated parts list for part number
OPTIONAL ILLUMINATED COVER
1. The downward lighting can be turned off by removing the access bushing on the back
of the light module and changing the position of the selector switch.
NOTE: The illuminated cover is an optional item. Refer to
the illustrated part list for the kit number.
UF‐1 DISPENSING VALVE WITH SELF SERVE DISPENSE SWITCH.
PRESS
HERE
1. Place cup or glass under dispensing valve nozzle.
2. Press and hold the dispense switch until the cup or glass is full. Then
release the switch.
UF‐1 DISPENSING VALVE WITH PORTION CONTROL.
SWITCHES
PRESS
HERE
1. Place cup under dispensing valve nozzle.
2. Momentarily press and release one of the four drink size switches to
dispense the portion size programmed. Dispensing will stop at the
end of the programmed portion cycle. Push the “Cancel/Pour” but-
ton to interrupt the pour cycle or to top off the drink after the cycle
stops.

UF-1 Post- Mix Valve Operation Manual
© 2017-2021, Marmon Foodservice Technologies, Inc. - 7 - Publication Number: 315222002OPR
OPTIFILL DISPENSING VALVE CONTROL
UF–1 DISPENSING VALVE WITH OPTIFILL™ DISPENSING
1. Place cup (with ice if desired) against the operating lever and allow it
to stay there as the cup fills.
2. When the cup is full and liquid from the cup touches the lever the
valve will shut off.
3. Automatic “top-off” (if set) will begin after the preset time if the cup
is allowed to remain in position against the valve.
NOTES

UF-1 Post-Mix Valve Operation Manual
Publication Number: 315222002OPR - 8 - © 2017-2021, Marmon Foodservice Technologies, Inc.
PORTION CONTROL OPERATION
NOTE: You must momentarily depress one of the four drink–size switches,
then release before the drink will dispense. You can use the cancel/
pour switch for the following two separate dispensing functions:
1. You can cancel the portion control drink by depressing and immediately releasing the
cancel/pour switch. Do NOT hold switch in depressed position as drink dispensing
will continue manually.
2. You may also use the cancel/pour switch to dispense a non-portion controlled drink
by merely depressing and holding the cancel/pour switch until desired quantity
has been dispensed, then release switch.
NOTE: Each portion size is programmed at the factory and can be easily
reprogrammed in the field from the front control panel. The
factory settings can be restored if necessary.

UF-1 Post- Mix Valve Operation Manual
© 2017-2021, Marmon Foodservice Technologies, Inc. - 9 - Publication Number: 315222002OPR
ADJUSTMENTS
ADJUSTING THE PORTION CONTROL
CHANGING SIZE OFDRINK DISPENSED.
Use the programming mode to set the portion size to the desired setting.
To enter the programming mode, the following criteria must be met:
1. There is no active dispensing cycle in progress.
ACCESSING PROGRAMMING MODE
1. Press and hold the hidden switch for 3 seconds, without interrup-
tion.
When you have entered into the program mode, the “PGM” LED will be
illuminated. While in the programming cycle for any dispensing size, the
“PGM” LED will flash.
NOTE: On the Portion Control module, the “PGM/OUT”
displays are not visible unless they are illuminated. This
is similar to the dashboard warning lights on
automobiles. They are shown here to identify their
location.
ADJUSTING THE PORTION CONTROL
PROGRAM MODE STEPS
1. Place appropriate size cup (with the desired amount of ice) under dis-
pensing nozzle.
2. Press and hold the desired portion switch until the liquid/foam level
reaches the desired cup level.
While in the programming mode the “PGM” LED will be illumi‐
nated. While pressing a portion switch the “PGM” LED will flash.
3. Release the switch storing the pour time value in memory. The
“PGM” LED will stop flashing and return to steady illumination.
4. Programming steps for this drink size are now complete. Repeat steps
1 through 3 for each drink size to be programmed.
NOTE: Any drink size may be programmed as many times as
desired before exiting the program mode. It is not
necessary to adjust all cup sizes while in the program
mode

UF-1 Post-Mix Valve Operation Manual
Publication Number: 315222002OPR - 10 - © 2017-2021, Marmon Foodservice Technologies, Inc.
EXITING PROGRAMMING MODE
1. Press and hold the hidden switch for 3 seconds. When you have exited
the program mode, the timer values stored in temporary memory
will be written to permanent storage and the “PGM” LED will go off.
RESTORING FACTORY SETTINGS
1. To restore to the factory setting, while in program mode, press and
hold the cancel/pour switch. Then, at the same time, press the
desired dispensing size switch. The factory programmed setting is
now restored.
2. Repeat for each drink size to be restored to the factory programmed
setting
OPTIFILL™ DISPENSING VALVE CONTROL
PROGRAMMING TOP‐OFF DELAY TIME
NOTE: Top‐off delay time has been factory set at 4.0 seconds but may be field adjusted in Programming mode.
You may enter the programming mode only under the following conditions:
1. The dispensing valve is not dispensing.
TOENTER PROGRAMMING MODE
1. Press the PROGRAM SWITCH for 3-seconds until the LED (light) turns on. The
valve is now ready for programming the top-off delay.
PROGRAMMING TOP‐OFF DELAY TIME.
Only the top-off delay is adjustable. Use top off adjustment mainly for drinks
that are foamy, such as diet drinks. To adjust the top-off delay, follow these pro-
gramming steps.
1. Place an appropriate size cup (with the desired amount of ice in the cup)
against the valve lever causing the valve to begin dispensing. When foam or
liquid touches the lever, the valve will automatically stop dispensing. This is
the initial pour. The cup must remain in place with the valve lever pressed.
The LED (light) will flash at this time.
2. If you want to continue programming the top-off delay time, skip step 3
and proceed to step 4.
3. If you do not want top-off delay time, re-move the cup from against the
valve lever. This will enter a zero value for the top-off delay time and will
inhibit a top-off pour. When finished, exit program mode by pressing the
PROGRAM SWITCH for 3-seconds until the LED (light) turns off.
4. When foam in the cup has lowered, press and release the SET SWITCH. The
valve will begin dispensing and will stop when the foam or liquid touches
the lever. This is the top-off pour. The time between the end of the initial
pour and when the pour is restarted is the top-off delay and it is now pro-
grammed into the valve. The LED (light) will be on steady at this time.
5. When the valve stops pouring the second time, the cup may be removed
and you may exit the program mode by pressing the PROGRAM SWITCH
for 3-seconds until the LED (light) turns off. The top-off delay is now pro-
grammed into the valve.
6. When the valve stops pouring the second time, the cup can be removed
and you may exit the programming mode. The top-off delay is now set

UF-1 Post- Mix Valve Operation Manual
© 2017-2021, Marmon Foodservice Technologies, Inc. - 11 - Publication Number: 315222002OPR
EXITING PROGRAM MODE
To leave the programming mode, press and hold the PROGRAM SWITCH for 3
seconds.
WATER FLOW RATE
DISPENSING VALVE WITH WATER
Flowasher
Water flowasher is at a fixed water flow rate and is nonadjustable.
DISPENSING VALVE WITH ADJUSTABLE WATER FLOW
REGULATOR
Turn the water flow regulator adjusting screw counterclockwise to
decrease the water flow rate. Turn the adjusting screw clockwise to in-
crease the water flow rate. Adjustments should be no more than 1/4 turn
at a time.
NOTE: Adjusting screw stops are built into the valve to prevent
leakage when the screws are adjusted clockwise too
much. Stop adjusting clockwise when turning resistance
increases. Turn the screw counterclockwise 1 1/2 turns
after the stop are contacted.

UF-1 Post-Mix Valve Operation Manual
Publication Number: 315222002OPR - 12 - © 2017-2021, Marmon Foodservice Technologies, Inc.
ADJUST WATER‐TO‐SYRUP RATIO
UF‐1 DISPENSING VALVE
NOTE: On a dispensing valve with adjustable water flow regulator make sure water flow rate is adjusted to your
requirement before adjusting the syrup to water ratio.
Adjust water–to–syrup ratio of dispensed product by using ratio cup (P/N 311100–000) and syrup diversion tube assembly (P/N
319540–000) as follows:
1. Remove cover from the dispensing valve by lifting front cover up 1/4
inch and pulling forward.
2. Install syrup diversion tube assembly on dispensing valve by pushing
rubber end of syrup diversion tube onto the syrup outlet of the inner
nozzle.
NOTE: Refer to syrup manufacturer’s recommendations on
syrup package for water‐to‐syrup ratio.
3. Dispense enough to fill syrup diversion tube with syrup.
4. Hold large chamber of ratio cup under dispensing valve nozzle. Place
free end of syrup diversion tube into syrup chamber marked for
proper ratio. Dispense approximately 6 ounces of water into ratio
cup. Water and syrup levels should be even in cup.
5. Adjusting Syrup Flow Regulator – If water and syrup levels are uneven
in ratio–cup, adjust by turning dispensing valve syrup flow regulator
adjusting screw labeled SYRUP as follows.
A. For less syrup, turn the adjusting screw counterclockwise no
more than 1/4 turn at a time.
B. For more syrup, turn the adjusting screw clockwise no more
than 1/4 turn at a time.
NOTE: Adjusting screw stops are built into the valve to prevent
leakage when the screws are adjusted clockwise too
much. Stop adjusting clockwise when turning resistance
increases. Turn the screw counter‐clockwise 1 1/2 turns
after the stop are contacted.
6. Repeat water-to-syrup ratio test and adjust syrup flow regulator as
many times as necessary until proper ratio of dispensed drink is
achieved.
7. Remove syrup diversion tube assembly from dispensing valve.
8. Install dispensing valve front cover.
NOTE: In some dispensing systems, the syrup flow rate may be
the limiting factor for Ultra flow valves. In this case, the
water flow rate should be adjusted down to achieve the
proper ratio.

UF-1 Post- Mix Valve Operation Manual
© 2017-2021, Marmon Foodservice Technologies, Inc. - 13 - Publication Number: 315222002OPR
SERVICE AND MAINTENANCE
CLEANING DISPENSING VALVE
NOTE: The solenoid is not shown to provide a clear view. it
is not necessary to remove the solenoid.
WEEKLY NOZZLE CLEANING PROCEDURE.
This cleaning procedure must be performed each week or more
often if needed to maintain cleanliness of the nozzle and inner noz-
zle.
1. Prepare a washing solution of 3 gallons of warm (120F) and 1-
ounce mild non-scented detergent.
2. Remove nozzle assembly (contains Inner Nozzle) from dispensing
valve. Separate the inner nozzle from the nozzle and wash the
two parts in the cleaning solution. It may be necessary to use a
small stiff Nylon bristle brush to thoroughly clean the nozzles. Do
not use a brush with metal bristles.
3. Rinse the nozzle and the inner nozzle in potable water.
A. Inspect the two nozzle parts to be sure that they are clean.
If any residue remains, return to step 2 and clean the parts
again.
4. Return the inner nozzle to the nozzle and replace the assembly to
the valve.
REMOVAL AND REPLACEMENT PROCEDURES OFUF‐1 VALVE
REMOVE AND REPLACE SOLENOID COIL
REMOVAL
1. Remove dispensing valve cover from valve. Lift the front cover
straight up for 1/4 inch and pull forward. Slide rear cover forward
1/4 inch and lift off.
2. Disconnect wiring from solenoid coil.
3. Remove solenoid cover by lifting up.
4. Remove solenoid coil by releasing snap fit (on both sides) with
thumb, as shown.
INSTALLATION
1. Install new solenoid coil. Snap into the snap fittings.
2. Connect wires and install solenoid cover.
3. Install dispensing valve covers.

UF-1 Post-Mix Valve Operation Manual
Publication Number: 315222002OPR - 14 - © 2017-2021, Marmon Foodservice Technologies, Inc.
REMOVE AND REPLACE SWITCH
REMOVAL
1. Remove dispensing valve cover. Lift front cover straight up for 1/4 inch
and pull forward. Slide rear cover forward 1/4 inch and lift off.
2. Remove valve from dispenser by releasing the latch with your thumb
and pressing the top dovetail. Pull valve forward.
3. Then disconnect wires from switch terminals.
4. Remove nozzle.
5. Remove Bottom Plate by releasing snap fit with thumbs, (on both
sides), and pivot the Bottom Plate down.
6. Remove switch.
INSTALLATION
1. Install new switch by reversing removal procedure. The switch button
must be down and toward the rear of the valve.
2. Install the Bottom Plate by inserting the Bottom Plate rear tabs and
then pivot up to secure the snap fits.
3. Install dispensing valve cover.
REMOVE AND REPLACE SYRUP ORWATER FLOW REGULATOR
Removal
1. Remove dispensing valve cover. Lift front cover straight up for 1/4 inch
and pull forward. Slide rear cover forward 1/4 inch and lift off.
2. Remove the valve by pressing down on the top dovetail on the
mounting block. This shuts off syrup and water flow and releases the
valve. Pull valve away from the block.
3. Remove the bail wire that locks the flow regulator assembly into the
valve body. Remove the flow regulator assembly.
4. Remove three screws securing the plate, then remove the plate.
5. Remove the flow control tops.
6. Pull top flow control spring and piston up out of flow regulator cylin-
der, or tip module over collecting spring, piston, and sleeve in your
hand.
7. The sleeve normally need not be removed from body. If you need to
remove the sleeve, pull sleeve up out of the body, ALWAYS INSTALL
NEW O–RING P/N 317816–000 ON SLEEVE BEFORE INSTALLING
SLEEVE IN BODY.
NOTE: Complete Flow Control module can also be replaced as an assembly. High Flow Regulator Assembly
P/N 1954, 2 to 4 oz./sec. regulator assembly P/N 560006408, 1 1/2 oz. Standard Flow Washer Water Syrup
Regulator Assembly P/N 1957, and 3 oz. Flow Washer Water Syrup Regulator Assembly P/N 1958.
Installation
1. Install top flow control, spring, and piston in sleeve.
2. Secure water flow or syrup flow regulators in the regulator assembly body with plate and tighten the three screws.
3. Install Flow Control module and the bale wire (“U” shaped wire). Route switch wires around rear leg of flow control.
4. Install dispensing valve on the mounting block. Press the bottom of dovetail latch upward until it is tight and is snapped into
place. This will turn on the product flow.
5. Place the harness connector in the holder provided. Then install valve cover.
6. Was Water Flow Regulator Removed?
7. If water flow regulator was removed from dispensing valve, water flow rate must be checked and, if necessary, the regulator
must be adjusted as instructed.
8. Was Syrup Flow Regulator Removed?

UF-1 Post- Mix Valve Operation Manual
© 2017-2021, Marmon Foodservice Technologies, Inc. - 15 - Publication Number: 315222002OPR
9. If syrup flow regulator was removed, check dispensing valve for water-to-syrup ratio of dispensed product and, if necessary,
adjust as instructed.
10. Install dispensing valve cover and secure.
NOTE: New O‐Rings(4) P/N 4073 must be installed on the flow control assembly before its installation in the
dispensing valve body
REMOVE AND REPLACE WATER FLOWASHER ASSEMBLY
Removal
1. Remove dispensing valve cover. Lift front cover straight up for 1/4
inch and pull for-ward. Slide rear cover forward 1/4 inch and lift
off.
2. Release the latch with your thumb. Depress the top valve dove-
tail on the mounting block. This shuts off the product and
water flow, and releases the valve. Pull valve away from the
block.
3. Remove three screws securing plate that secure water
flowasher assembly into the dispensing valve body, then
remove the plate.
4. Pull water flowasher assembly up out of dispensing valve body.
5. Remove water flowasher retainer from bot-tom of housing,
water flowasher then re-move flowasher from housing.
Installation.
1. Install flowasher in bottom of housing, water flowasher and
secure with retainer. Flo-washer must be installed in water
flowasher housing with concave surface of flowasher facing
away from its retainer. Flowasher marking up (visible) when in
pocket.
NOTE: Always install a new O‐ring, P/N 317816‐000 on the
flowasher assembly before installing it into the
flow control housing.
2. Replace flowasher assembly in flow control housing. Replace plate. Tighten the three screws that fastens the plate.
3. Install flow control assembly in dispensing valve body. Install the bale wire. Route switch wires around rear leg of Flow Con-
trol.
NOTE: New O–Rings (4) P/N 4073 must be installed on the flow control assembly be‐fore its installation in the
dispensing valve body.
4. Install dispensing valve on unit by inserting valve on block fittings and pushing in until tight. Then push up on bottom dove-
tail until the latch has snapped into place.
NOTE: Always make sure bale wire holding Flow Control module is in place before installing valve on block.
5. Connect dispensing valve electrical wiring harness connector to unit wiring harness connector, and place connector in
holder.
6. Install dispensing valve cover.
Other manuals for UF-1
3
Table of contents
Other Cornelius Control Unit manuals

Cornelius
Cornelius SFV1 User manual

Cornelius
Cornelius Post-Mix Valves UFB-1 Manual

Cornelius
Cornelius VIPER FMFV User manual

Cornelius
Cornelius MFV Installation and user guide

Cornelius
Cornelius UF-1 Manual

Cornelius
Cornelius UF-1 Portion Control Installation manual

Cornelius
Cornelius LEOPARD ERV User manual

Cornelius
Cornelius LEOPARD ERV User manual

Cornelius
Cornelius UF-1 Installation guide

Cornelius
Cornelius Post-Mix Valves UFB-1 User manual