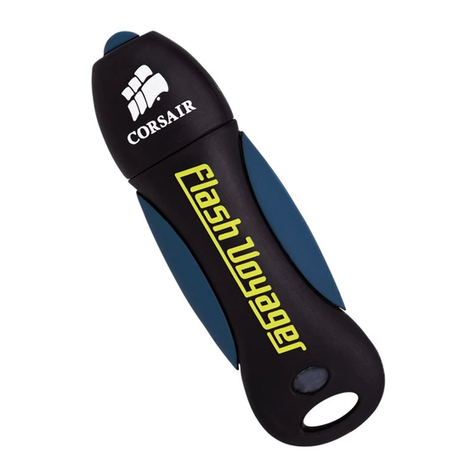
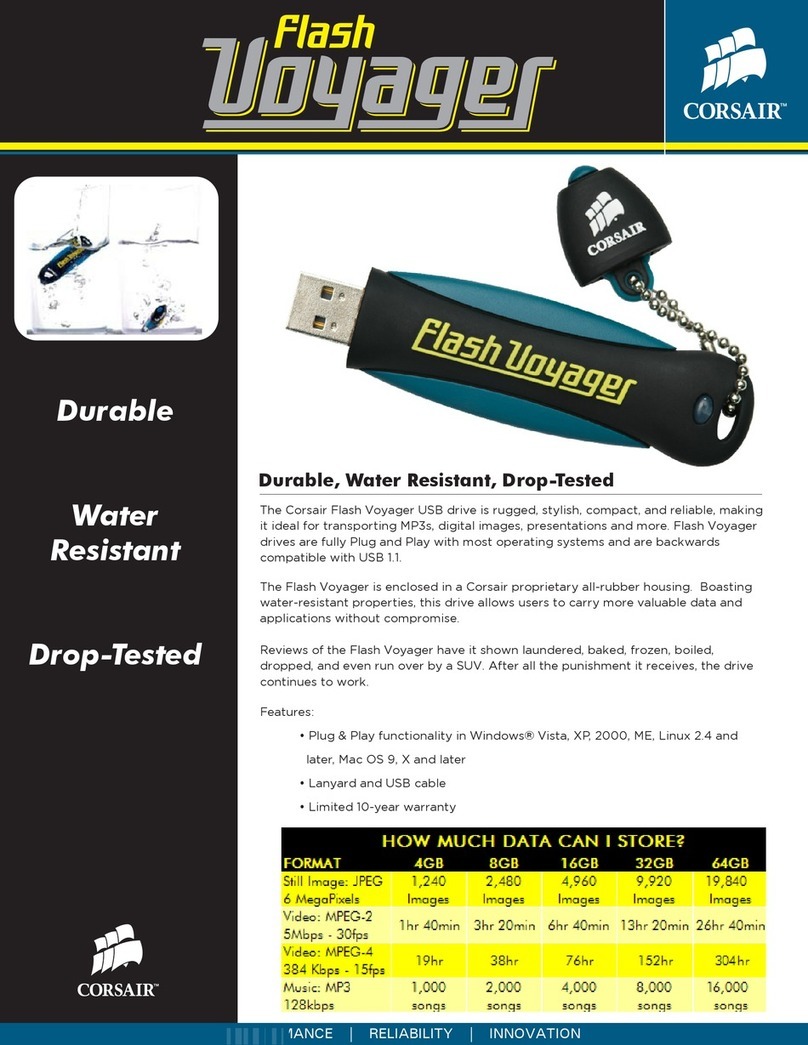
Corsair FlashPadlock3 User manual

ENGLISH
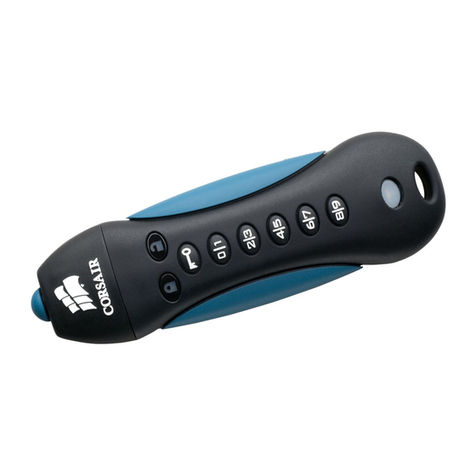
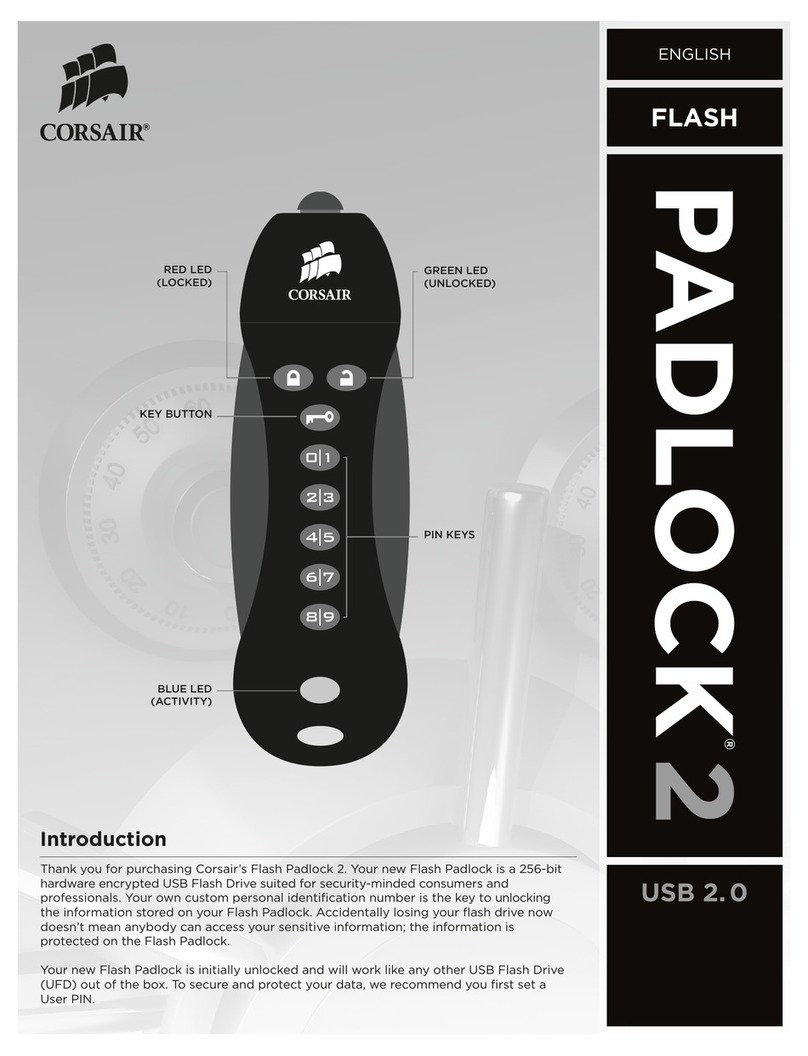
GREEN LED
(UNLOCKED)
PIN KEYS
RED LED
(LOCKED)
KEY BUTTON
BLUE LED
(ACTIVITY)
Introduction
Thank you for purchasing the Corsair Flash Padlock 3. Your new Flash Padlock 3 is
a AES 256-bit hardware encrypted USB Flash Drive suited for security-minded consumers
and professionals. Your own custom personal identification number (PIN) is the key to
unlocking the information stored on your Flash Padlock. Accidentally losing your flash
drive now doesn’t mean anybody can access your sensitive information; the information is
protected on the Flash Padlock.
Your new Flash Padlock 3 is initially unlocked and will work like any other USB Flash
Drive (UFD) out of the box. To secure and protect your data, we recommend you first set
a User PIN.
USB 3.0
FLASH
FLASH
PADLOCK
PADLOCK®
®
User
Manual

2
LED Indicators
Your Flash Padlock 3 comes with three LED indicators on the top side of the unit. Each LED indicator, whether it’s
solid or flashing or appears with another LED indicator, provides feedback to you on the current state of the
Flash Padlock 3. Review the chart below to view the definition of each LED display pattern.
LED LED STATE EXPLANATION
Red - Fade Out Locking down/incorrect PIN entry.
Red blinking Locked and awaiting User defined PIN entry.
Blue blinking Locked and awaiting Admin defined PIN entry.
Green Solid Padlock 3 is unlocked in User mode.
Green blinking When connected to a USB port if Green Led blinks every 2 seconds this
indicates the Padlock 3.0 has been set as ‘Read-Only’.
Green flickering Padlock 3 is unlocked in Admin mode.
Blue solid Connected to a USB port.
Blue blinking Data exchange with host/changing User PIN/when not connected to a USB
port indicates an Admin PIN exists.
Red and Green
blinking alternately Factory reset/deleting files in Admin mode.
Red and Green
flickering together Awaiting Admin PIN entry.
Red and Blue
blinking together
When not connected to a USB port indicates that both User and Admin
PINs have been set on the PadLock 3.
Red and Blue
flickering together Awaiting Admin PIN change.
If the module encounters a problem with a self-test it will light the LEDs in order red, green, blue, red, green, blue
and then it will power down. If this occurs, retry the operation and if the error persists contact technical support.
When the red LED flickers quickly it means that the drive is locked out from failed password attempts. Neither the
user nor the admin password may be used to unlock the drive while it is in state. This is described in more detail in
the section on Hacking Protection.
User Operation
The steps below show how you can set, change, or clear your User PIN, and how to lock and unlock your
Flash Padlock 3.
Setting User PIN
Your Flash Padlock 3 comes out of the box without any set User PIN. Until the User PIN is set, your Flash Padlock 3
is unsecure, allowing any user access to view your files on the Flash Drive. We recommend you set a custom User
PIN immediately.
DIRECTIONS EXPLANATION
PresstheKEYbuttontoawakenthedriveTheredLEDwilllightfirstand
thenthegreenLEDwilllightThedriveisunlocked
PressKEYbuttontwicetobeginenteringanewuserpassword Blue LED will blink.
EnternewuserpasswordItmustbebetweenanddigitslong
Padlock 3 does not permit a PIN with all of
the digits the same
PressKEYbuttontwicetoendentryofthenewpassword Green LED will blink.
Reenterthenewuserpassword
PressKEYbuttontwicetoendconfirmationofthenewpassword
TheredLEDwilllightwhilethepasswordisbeingsaved
WhencompletethegreenLEDwilllight
Green LED willlight
/
&
&
&

3
Unlocking your Flash Padlock 3 a User PIN
Oncea a User PIN is set, all files stored on the Flash Padlock 3 are secure and not viewable. In order to read, or write
to your Flash Padlock 3, you must first unlock the drive with your User PIN.
DIRECTIONS EXPLANATION
PressandreleasetheKEYbutton Red LED will continue to blink during PIN entry.
EnteryouruserPINusingthePINkeys
PressandreleasetheKEYbutton
The red LED will light while the drive checks
the password. When it confirms that the
password is correct, the green LED will light
steadily.
The drive will remain unlocked and ready to be
connected to a USB port for up to 30 seconds.
InsertdriveintoUSBport Green LED will remain solid and blue LED will
be blinking when drive is connected.
Note your Padlock will automatically lock if the device hasn’t been inserted into a computer within 30 seconds.
Locking your Flash Padlock 3
After you use your Flash Padlock 3, we recommend locking your Flash Padlock 3 to protect your stored files on
the flash drive.
DIRECTIONS EXPLANATION
Usetheoperatingsystemfunctiontoejectthedrive
RemoveyourFlashPadlockfromtheUSBport RedLEDwilllightandthenfadeout
Alternatively, you can also lock the Padlock 3 at any time by pressing and holding the KEY button for more than
3 seconds. The Padlock will response by lighting the red LED and then fading it out.
Note your Padlock will automatically lock itself upon removal from the USB port.
Change User PIN
Corsair recommends regularly changing your User PIN in order to prevent unauthorized access to your
Flash Padlock 3.
DIRECTIONS EXPLANATION
Unlockthedrivewiththeuserpassword GreenLEDwilllight
PressKEYbuttontwicetobeginenteringanewuserpassword Blue LED will blink.
EnternewuserpasswordItmustbebetweenanddigitslong
PressKEYbuttontwicetoendentryofthenewpassword Green LED will blink for 10 seconds.
Reenterthenewuserpassword
PressKEYbuttontwicetoendconfirmationofthenewpassword
TheredLEDwilllightwhilethepasswordisbeingsaved
WhencompletethegreenLEDwilllight
GreenLEDwilllight
Admin Operation
Create Admin PIN – first time use only
A second PIN can be created to unlock your Flash Padlock 3, in case you forget the primary User PIN.
Note Admin features can be changed by Admin only once drive is unlocked by Admin. For example, if Admin set a
Read-Only mode, User can not change it.
DIRECTIONS EXPLANATION
UnlockthedrivewiththeuserpasswordGreenLEDwilllight
Pressandholdthe‘’buttonwhilepressingKEYtwice
Releasethe‘’buttonRedandblueLEDswillflickerquickly Red and blue LEDs will flicker.
EnterthenewadminpasswordItmustbebetweenanddigitslong
PressKEYbuttontwicetoendentryoftheadminpassword
ThegreenLEDwillblinkaftercompletingtheentryofthepassword Green LED will blink.
4
Reenterthenewadminpassword
PressKEYbuttontwicetoendconfirmationoftheadminpassword
TheredLEDwillremainlightwhilethepasswordissaved
WhencompletethegreenLEDwilllight
GreenLEDwilllight
Note once Admin PIN is created, it cannot be cleared under normal usage. You can however change it and this is
described in “Change Admin PIN” section.
Change Admin PIN
A second PIN can be created to unlock your Flash Padlock 3, in case you forget the primary User PIN. The same
procedure is used to change the admin password as is used to create it the first time. The only dierence is that
when the admin password is defined, it can only be changed when the drive is unlocked with the admin password.
Unlock the drive with the admin password as described below. Use the procedure for setting the admin password
to change it.
DIRECTIONS EXPLANATION
DrivemustbeunlockedandinadminmodeGoto“Unlockwith
AdminPIN”belowtounlockdrive Green LED will flicker.
Pressandholdthe‘’buttonwhilepressingKEYtwice
Releasethe‘’buttonRedandblueLEDswillflickerquickly Red and blue LEDs will flicker.
EnterthenewadminpasswordItmustbebetweenanddigitslong
PressKEYbuttontwicetoendentryoftheadminpassword
ThegreenLEDwillblinkaftercompletingtheentryofthepassword Green LED will blink.
Reenterthenewadminpassword
PressKEYbuttontwicetoendconfirmationoftheadminpassword
TheredLEDwillremainlightwhilethepasswordissaved
WhencompletethegreenLEDwillflicker
GreenLEDwillflicker
Unlock with Admin PIN
Note unlocking your Flash Padlock 3 with a Admin PIN will erase the user PIN setting and the contents of the drive
will not be deleted.
DIRECTIONS EXPLANATION
PressandholdthebuttonPressandreleasetheKEYbutton
ReleasethebuttonRed and green LEDswillflicker Red and green LEDs will flicker.
Entertheadminpassword
PresstheKEYbuttonTheredLEDwilllightwhilethedriveverifies
thepasswordWhenitunlocksthegreenLEDwillflicker Green LED will flicker.
Theuserpasswordandsettingshavebeenerasedandthedriveisunlocked
Youcanconnectthedrivetoacomputertouseitoryoucansetanewuser
passwordimmediately
Setting User Password after Unlocking Drive with Admin Password.
DIRECTIONS EXPLANATION
Unlockthedrivewiththeadminpassword The green LED will flicker.
UsetheprocedureofChangeUserPINtosetanewuserpassword
Whentheprocedureiscompletethedrivewilllock

5
Setting User Read-only Mode
DIRECTIONS EXPLANATION
Unlockthedriveastheuser Green LED will light.
PressKEYbuttonthreetimes Blue and green LEDs will blink.
Enterthesequence
PressKEYbuttontomakethesetting Green LED will light.
WhenunlockedandconnectedtoacomputerthegreenLEDwillturno
brieflyeverysecondsindicatingthatthedriveisinread-onlymode
Setting User Read-write Mode
DIRECTIONS EXPLANATION
Unlockthedriveastheuser Green LED will light.
PressKEYbuttonthreetimes Blue and green LEDs will blink.
Enterthesequence
PressKEYbuttontomakethesetting Green LED will light.
Setting Admin Read-only Mode
DIRECTIONS EXPLANATION
Unlockthedrivewiththeadminpassword Green LED will flicker.
PressKEYbuttonthreetimes Blue and green LEDs will flicker.
Enterthesequence
PressKEYbuttontomakethesetting Green LED will flicker.
WhenunlockedandconnectedtoacomputerthegreenLEDwillturno
brieflyeverysecondsindicatingthatthedriveisinread-onlymode
Whenthedriveissettoread-onlywiththeadminpassworditwilloverride
anysettingmadebytheuserInotherwordsiftheadminpasswordmakes
thedriveread-onlythenthedriveisread-onlyregardlessofthesetting
madewiththeuserpassword
Setting Admin Read-write Mode
DIRECTIONS EXPLANATION
Unlockthedrivewiththeadminpassword Green LED will flicker.
PressKEYbuttonthreetimes Blue and green LEDs will flicker.
Enterthesequence
PressKEYbuttontomakethesetting Green LED will flicker.
Disablingadminread-onlymodemeansthattheuser’sread-onlysetting
maybechanged
Admin Delete-all
DIRECTIONS EXPLANATION
Unlockthedrivewiththeadminpassword The green LED will flicker.
PressKEYbuttonthreetimes Blue and green LEDs will flicker.
Enterthesequence
PressKEYbuttontostarttheconfirmationforDelete-all Red and green LEDs will blink alternately.
Entertheadminpasswordagain
PresstheKEYbuttonTheredLEDwilllightwhiletheencryptionkeyis
changedwhicherasestheuserdataThentheredandgreenLEDswill
lightsimultaneouslyconfirmingthatthedrivedataiserased
Red LED will light, next both red and green
LEDs will light and then green LED will flicker.

6
Troubleshooting
Below are directions on how to proceed in typical troubleshooting scenarios.
Dead Battery
Flash Padlock 3 has an internal battery. If the internal battery is fully discharged, you may still continue using your
Flash Padlock 3.
DIRECTIONS EXPLANATION
ConnectyourFlashPadlocktoaUSBportonanycomputer
EnterauseroradminPINonyourFlashPadlocktounlock
thedrivewhileyourdriveisconnectedtothecomputer
The internal battery will automatically charge when connected to a USB port on your computer. We recommend
keeping your Flash Padlock 3 connected to your computer for 1 hour to fully charge the internal battery.
Lost your User PIN? (No Admin PIN set or Admin PIN set but forgotten)
If you lose your User PIN, you’ll need to reset the Flash Padlock 3, but all the data on the drive will be completely erased.
If you have a Admin PIN set, then please proceed to section below to recover use of your drive without erasing your
stored data. This procedure is also called a factory reset.
DIRECTIONS EXPLANATION
PressandholdthebuttonPressandreleaseKEYbuttonRelease
TheredandgreenLEDswillblinkalternately Red and green LEDs will blink alternatively.
Enter
PressandholdthebuttonPressandreleasetheKEYbuttonRelease
buttonRedandgreenLEDswilllightandremainsteadyforafewseconds
whilethedriveiserased
Green and red LEDs will light and remain steady
for a few seconds.
The Padlock 3 will unlock without a password. Connect it to a USB port and format the drive before using it to store
your data. Please set a password to secure your data.
Lost your User PIN (Admin PIN Set)
If Your Flash Padlock 3 has a admin PIN, you may recover the use of your drive and gain access to your data.
DIRECTIONS EXPLANATION
Unlockthedrivewiththeadminpassword GreenLEDwillflicker
Yourdrivewillbeunlockedandreadyforuse
We recommend setting a new user PIN to secure the data on your drive.

7
Hacking Detection
After 5 unsuccessful User/Admin PIN entry attempts, your Flash Padlock 3 will be disabled for 2 minutes. The red LED
will start blinking rapidly and continue doing so for 2 minutes to indicate the unit has been locked. User/Admin PIN
entry will not be allowed at this state. Also, keep in mind that clearing your User PIN with admin PIN (if set) in that 2
minute time window is also disabled.
After 2 minutes, you can attempt to unlock your Flash Padlock 3. After another 5 more unsuccessful User/Admin PIN
entries (now 10 total) the drive will be disabled for 12 hours. The red LED will start blinking rapidly for 30 seconds and
then your Flash Padlock 3 will enter sleep state. At that point pressing KEY button will again cause red LED to start
blinking rapidly for 30 seconds followed by entering sleep state to indicate the drive has been locked.
Any subsequent attempt to press KEY button will before 12 hours is elapsed will repeat above sequence.
After 12 hours, you can attempt to unlock your Flash Padlock 3. After another 5 more unsuccessful User/Admin PIN
entries (now 15 total) the drive will be disabled for 2 minutes. The red LED will start blinking rapidly and continue
doing so for 2 minutes to indicate the unit has been locked.
After 2 minutes, you can attempt to unlock your Flash Padlock 3. After another 5 more unsuccessful User/Admin PIN
entries (now 20 total) the User PIN and Admin PIN will be cleared. Your Flash Padlock 3 will now be unlocked and all
data will be permanently lost.
For More Information
Visit corsair.com and click on “support.”
© 2017 Corsair Components, Inc. All rights reserved. Corsair, the sails logo, and Flash Padlock 3 are registered trademarks in the United
States and/or other countries. All other trademarks are the property of their respective owners. Product may vary slightly from
those pictured. 49-001575 revAA
Flash Padlock is developed and produced by Corsair Components, Inc. based on the licensed DataLock® technology (patents pending)
from ClevX, LLC (clevx.com)
Table of contents
Other Corsair Storage manuals

Corsair
Corsair Obsidian 800D Hot Swap Trays User manual

Corsair
Corsair Flash Voyager Mini User manual

Corsair
Corsair FLASH VOYAGER MINI 16GB User manual

Corsair
Corsair VOYAGERAIR 2 User manual

Corsair
Corsair Voyager Air User manual

Corsair
Corsair Flash Voyager CMFUSBHC-64GB User manual

Corsair
Corsair FLASH VOYAGER User manual

Corsair
Corsair Flash Padlock 2 User manual

Corsair
Corsair FLASH VOYAGER User manual

Corsair
Corsair Voyager Air User manual