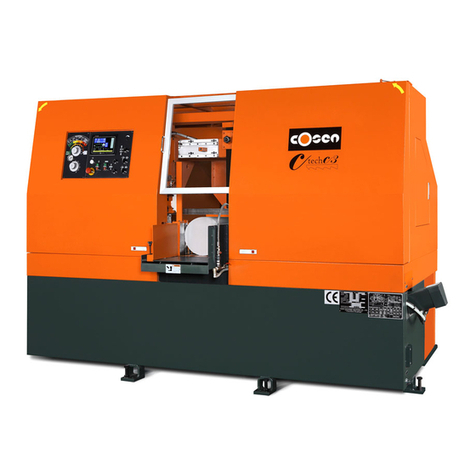
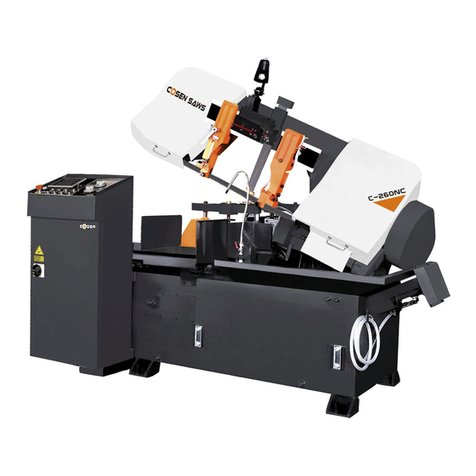
Cosen C2 User manual

COSEN SAWS
C2
NCFullyAutomatic
HorizontalBandsaw
InstructionManual
ThePinnacleofCuttingPerformance
CosenMechatronicsCo.,Ltd.


NOTE:
Read this instruction manual carefully to familiarize yourself with the installation,
operation and maintenance of your COSEN bandsaw machine.
Operate the machine following the procedures described in the manual to prevent
personal injuries or machine damage.
Keep this manual handy and refer to it whenever you are uncertain of how to
perform any of the procedures.
For technical support or parts purchase, please contact your nearest COSEN
representative or our service center:
For Europe:
phone: +31-77-7600280
fax: +31-77-7600288
web: www.cosensaws.eu
For Taiwan and other countries:
phone: +886-3-5332143
fax: +886-3-5348324
web: www.cosen.com.tw
For US, Mexico, and Canada:
phone: +1-704-943-1030
toll free: +1-877-SAWING1
fax: +1-704-943-1031
web: www.cosensaws.com
For China:
email: service@cosensaws.cn
phone: +86-152-50127815
web: www.cosensaws.cn
Instruction Manual: C2
NC Fully Automatic Horizontal Bandsaw
Ver.8 2017/7/24
©2013 by COSEN MECHATRONICS CO., LTD.
No part of this publication may be photocopied or otherwise reproduced without the prior written
permission of COSEN.
Printed in Taiwan
FROM THE MANUFACTURER
Thank you for your purchase of COSEN’s bandsaw machine and your trust in the COSEN
brand.
We are excited to have you as our valued customer and look forward as much as you do to
the accelerated productivity, long-lasting endurance and superb cost-effectiveness this
machine is about to bring to you.
To ensure you are fully utilizing our machine and being advantaged in every possible way,
please do take your time and read through this instruction manual.
Any comment or suggestion in making our service better, please do not hesitate to let us
know. Thank you again!


Safety rules
Make sure your work area is cleared of uninvited people and obstacles
every time before you start operating the machine.
Never step or stand on the roller table. Your foot may slip or trip on the
rollers and you will fall.
Never wear gloves or loose clothing when operating the machine. It may
lead to serious injury if they are caught in the running machine. Wrap or
cover long hair.
Never touch the running saw blade with gloves or not. It is dangerous if
your hands, clothing or gloves are caught by the running blade.
Make sure any use of fire is prohibited in the shop and install a fire
extinguisher or other fire control device near the machine when cutting
titanium, magnesium, or any other material that produces flammable chips.
Never leave the machine unattended when cutting flammable materials.
Use a water-soluble cutting fluid on this machine. Oil-based cutting fluids
may emit smoke or catch fire, depending on how they are used.
Never cut carbon or any other material that may produce and disperse
explosive dust. It is possible that sparks from motors and other machine
parts will ignite and explode the air-borne dust.

Safety rules
Never adjust the wire brush or remove chips while the saw blade is still
running. It is extremely dangerous if hands or clothing are caught by the
running blade.
Stop the saw blade before you clean the machine. It is dangerous if hands or
clothing are caught by the running blade.
Never start the saw blade unless the workpiece has been clamped firmly. If
the workpiece is not securely clamped, it
will be forced out of the vise
during cutting.
Take preventive measures when cutting thin or short pieces from the work
to keep them from falling. It is dangerous if the cut pieces fall.
Use roller tables at the front and rear sides of the machine when cutting
long work. It is dangerous if the work piece falls off the machine.
Turn off the shop circuit breaker switch before performing maintenance on
the machine. Post a sign indicating the machine is under maintenance.

vi
Table of Contents
Section 1 –Safety Information
1-1
Safety Instructions ………………………………………………………………………………………………………
1-1
Safeguard Devices ……………………………………………………………………………………………………….
1-3
Emergency Stop ………………………………………………………………………………………………………….
1-4
Illustration: Emergency Stop ………………………………………………………………………………………
1-5
Safety Labels ……………………………………………………………………………………………………………….
1-6
Illustration: Safety Labels ………………………………………………………………………………………..…
1-9
Hearing Protection ………………………………………………………………………………………………………
1-10
CE Compliance …………………………………………………………………………………………………………….
1-10
Risk Assessment ………………………………………………………………………………………………………….
1-10
Section 2 –General Information
2-1
Specification ……………………………………..………………………………………………………………………..
2-2
Machine Parts Identification ……………………………………………………………………………………….
2-3
Floor Plan …………………………………………………………………………………………………..……………….
2-4
Section 3 –Moving & Installation
3-1
Location & Environment ………………………………..……………………………………………………………
3-1
Unpacking & Inspecting ……..……………………………………………………………………………………….
3-2
Lifting …………………………………………..………………………………………………………………….………….
3-3
Illustration: Lifting Points ……………………………..……………………………….…………………..
3-5
Removing Shipping Bracket …………………………..……………………………………………….……………
3-6
Cleaning …………………………………………..…………………………………………………………….……………
3-6
Installing …………………………...………………………………………………………………………….…………….
3-6
Supplying Hydraulic Oil …………………………………………………………………….…………….
3-6
Supplying Coolant ………..………………………………………………………………….……………..
3-7
Connecting Electric Power ……………………………………………………………….……………..
3-7
Leveling & Anchoring …………………………………………………………………….……………….
3-8
Installing Roller Table (Optional) ………………………………………………….………………….
3-9
Installing Fire Control Device……………………………………………………………………………
3-9
Relocating ………………………...…………………………………………………………………….………………….
3-9
Section 4 –Operating Instructions
4-1
Safety Precautions …………………..…………………..……………………………………….…………………….
4-2
Before Operating …………………………..…………………………………………………………………………….
4-3
Control Panel ……..……………………………………..………………………………………….…………………….
4-4
Control Panel ………………….………………………………………………………………………..…….
4-4
Control Buttons ……………………………………………………………………………………….……..
4-5

vii
Table of Contents
Blade Descend Pressure & Speed ………..…………………………………………………….……
4-7
HMI Touch Screen & Functions …………………………………………………………….…………
4-7
HMI Error Codes ………………………..……………………………………………………….………….
4-20
Standard Accessories ………….………………………..……………………………………………….……………
4-21
Optional Accessories …….…….………………………..…………………………………………….………………
4-24
Unrolling & Installing the Blade …………………………………………………………………….…………….
4-26
Adjusting Wire Brush ………..……………………………………………………………………….……………….
4-28
Adjusting Saw Arm……………..……………………………………………………………………….………………
4-28
Adjusting Blade Speed ………..………..…………………………………………………………………………….
4-29
Breaking-In the Blade ………..………..…………………………………………………………………..………….
4-29
Placing Workpiece onto Workbed ………………………..……..………..…………………………………….
4-29
Positioning Workpiece for Cutting ………..………..………………………………….……………………….
4-30
Without Using Automatic First Cut Function………………………………………………….
4-30
Using Automatic First Cut Function…………………………………………………………………
4-31
Adjusting Coolant Flow ………..………..…………………………………………………………………..……….
4-32
Test -Running the Machine ....………..……………………………………………..…………………………….
4-33
Cutting Operation ………..………..……………………………………………..…………………………………….
4-34
Using Top Clamp for Bundle Cutting…………………………………………………………………………….
4-35
Terminating a Cutting Operation ………..………..…………………………………….……………………….
4-36
Section 5 –Electrical System
5-1
Electrical Circuit Diagrams ……….…………………..……………………………………………………………..
5-1
Section 6 –Hydraulic System
6-1
Hydraulic Diagrams ……….…………………..………………………………………………………………………..
6-1
Section 7 –Bandsaw Cutting: A Practical Guide
7-1
Introduction ……………………….…….…………………..…………………………………………………………….
7-2
Saw Blade Selection ………………….…………………..……………………………………………………………
7-2
VISE LOADING …………….…………………..………………………………………….………………………………
7-3
BladeBreak -In …………………………………………………………………………………….……………………..
7-4
Section 8 –Maintenance & Service
8-1
Introduction ……………………….…….…………………..…………………………………………………………….
8-1
Basic Maintenance ………………….…………………..…………………………………………….……………….
8-1
Maintenance Schedule …………….…………………..…………………………………………………………….
8-1
Before Beginning a Day’s Work ……………………………………………………………………….
8-2
After Ending a Day’s Work …………………………………………………….………………………..
8-2
Every Month ………………………………………………………………………….……………………….
8-2

viii
Table of Contents
Every Three Months ………………..…………………………………………….……………………….
8-2
Every Six Months ……………….………………………………………………….……………………….
8-3
Storage Conditions …………………………....………..……………………………………………………………..
8-3
Terminating the Use of Machine ……..…………..……………………………………………………………..
8-3
Oil Recommendation for Maintenance ……………………………………………………………………….
8-4
Section 9 –Troubleshooting
9-1
Introduction ……………………….…….…………………..…………………………………………………………….
9-1
Precautions ………………….…………………..…………………………………………………………………….....
9-2
General Troubles & Solutions ………………………..…………………………………………………………….
9-2
Minor Troubles & Solutions ………………………..………………………………………………..…………….
9-3
Motor Troubles & Solutions ………………………..…………………………………………………..………….
9-3
Blade Troubles & Solutions ………………………..………………………………………………………………..
9-4
Sawing Problems & Solutions ………………………..……………………………………………………………
9-5
Re-Adjusting the Roller Table ………………………..…………………………………………………………….
9-12
Section 10 –Parts
10-1
Spare Parts Recommendations …………………..……………………………………………………………….
10-1
Part List …………………..………………………………………………………………………………………………….
10-2
Section 11 –Warranty
11-1
Warranty …………………..………………………………………………………………………………………………..
11-1


1‐1
Section1
SAFETY
INFORMATION
SAFETYINSTRUCTIONS
SAFEGUARDDEVICES
EMERGENCYSTOP
SAFETYLABELS
HEARINGPROTECTION
CECOMPLIANCE
RISKASSESSMENT
Safetyisacombinationofawell‐designedmachine,operator’sknowledgeaboutthemachineand
alertnessatalltimes.COSEN’sbandmachinehasincorporatedmanysafetymeasuresduringthe
designprocessandusedprotectivedevicestopreventpersonalinjuriesandpotentialrisks.Warning
labelsalsoserveasaremindertotheoperator.
Throughoutthismanual,youwillalsoseevarioussafety‐relatedsymbolsindicatingimportant
informationthatyoushouldtakenoteofpriortouseofthemachineorpartofitsfunctions.These
importantsafetyinstructionsdonotcoverallpossiblesituationsthatmightoccur.Itisyour
responsibilitytotakecautionandfollowproceduresstatedinthismanualwheninstalling,
maintainingandoperatingyourmachine.Cosenwillnotbeliablefordamagesresultingfrom
improperuse.
SAFETYINSTRUCTIONS
Whattheiconsandsignsinthisusermanualmean:
ThisiconmarksDANGER;hazardsorunsafepracticesthatmayresultinsevere
personalinjuryordeath.
ThisiconmarksWARNING;hazardsorunsafepracticesthatmayresultin
personalinjuryordamagetothemachine.
ThisiconmarksCAUTION;informationthatshouldbereadbeforeusetoprevent
damagetothemachine.
Supplementaryinformationtotheproceduresdescribedinthismanual.
Callyourlocalagentorourservicecenterforhelp.

1‐2
Thismanualhasimportantsafety
information.Readthroughitcarefully
beforeoperatingthismachinetoprevent
personalinjuryormachinedamage.Learn
theoperation,limitationandthespecific
potentialhazardspeculiartothisband
saw.
Donotoperatethismachineunlessitis
completelyassembled.
Makesurethepowerswitchisoffbefore
plugginginpowercord.
Disconnectthepowercordbeforemaking
adjustment,maintenanceorblade
changes.
Keepallguardsandshieldsinplacebefore
installingorstartingupthemachine.
Wearproperapparelduringoperation
andwhenservicingthemachine.
Keepunauthorizedpersonnelaway.
Donotreachoverorstandonanypartof
themachine.
Neverholdthematerialbyhandfor
cutting.Alwaysusetheviseandmake
surethematerialisclampedsecurely
beforecutting.
Itisdangeroustooperatethemachine
whenthefloorisslippery.Keepthefloor
cleananddry.Checkforice,moisture,or
greasebeforeentering.
Donotusethemachinetocutexplosive
materialorhighpressurevesselsasitwill
generategreatamountofheatduringthe
sawingprocessandmayignitean
explosion.
Keeptheworkenvironmentsafe.Donot
usebandsawinadamporwetlocation.
Neveroperatewhileundertheinfluence
ofdrugs,alcoholormedication.
Allusersmustreaditbeforeperformingany
activityonthemachine,suchasreplacing
thesawbandordoingregularmaintenance.
Somepersonalprotectiveequipmentis
requiredforthesafeuseofthemachine,e.g.
protectiongoggles.
Keepbladeprotectioncoverandwheel
coversinplaceandinworkingorder.
Userecommendedaccessories.Improper
accessoriesmaybehazardous.
Keepyourworkareawellilluminatedat
minimum500lumen.
Keepyourworkareaclean.Clutteredand
slipperyfloorsinviteaccidents.
Removeadjustingkeys,wrenchesorany
loosepartsoritemsfromthemachine
beforeturningonpower.
Checkfordamagedparts.Beforecontinuing
usingthemachine,thedamagedpartshould
becheckedandreplaced.
Movingpartsshouldbekeptinproper
alignmentandconnectionwiththemachine.
Checkforbreakage,mountingandanyother
conditionsthatmayaffectitsoperation.Any
damagedpartorguardshouldbeproperly
repairedorreplaced.
Whenaworkpieceistoolongorheavy,
makesureitissupportedwitharollertable
(recommended).
Alwaysremembertoswitchoffthemachine
whentheworkiscompleted.
Useasharpsawbladeandkeepthemachine
initsbestandsafestperformanceby
followingaperiodicalmaintenanceschedule.
Donotforcethebandsawbeyondits
intendeduse.Itissafertooperatewiththe
cuttingrateforwhichitwasdesigned.

1‐3
SAFEGUARDDEVICES
Thesafeguarddevicesincorporatedinthismachineincludethefollowingtwomainparts:
1. Protectioncovers&guards
2. Safety‐relatedswitches
ProtectionCovers&Guards
1. Idlewheelhousingcover
2. Drivewheelhousingcover
3. Gearreducercover
4. Wirebrushbeltcover
5. Bladeguardcover(left&right)
6. Chipconveyorcover(CEmodelonly)
Theprotectiondevicesshouldalwaysbemountedonthemachinewheneverthemachineisrunning.
Donotremoveanyofthesesafeguarddevicesunderanycircumstancesexceptwhenservicingthe
machine.Evenskilledservicetechniciansshouldstilltakecautionswhenperformingrepairsorservice
onthemachinewithanyoftheseprotectorsremoved.Itistheresponsibilityoftheusertomakesureall
theseelementsarenotlostanddamaged.
Takenoteofthefollowingmainmovingpartsonthemachinepriortoandduringmachineoperation:
Sawbowassembly
Driveandidlewheels
Bladeguidearm
Sawbladeguiderollers
Quickapproachdevice
Wirebrush
Chipconveyor(optional)
Workpiececlampingvises
Shuttlevisesandworkbedrollers
Topclamps(optional)
Gearreducer

1‐4
SafetyRelatedSwitches
Toprotecttheoperator,thefollowingsafetyrelatedswitchesonthemachineareactuatedwhenthe
machineisinoperation.
WheelmotiondetectorThisisaproximitysensorusedtodetectthemotion
ofthedrivewheel.Oncethesawbladeisbrokenor
assoonasitstartsslipping,thesensorwilldetect
andstopthedrivewheelandthemachine.
PowerswitchLocatedonthecoverofelectricalcabinet,thepower
switchcontrolsthemainpowerofthemachine.
EmergencystopbuttonLocatedonthecontrolpanel,thebuttonwhen
pressedwillstopthemachinecompletely.
ViseclampswitchThisswitchassuresfirmclampingoftheworkpiece.If
theworkpieceisnotclampedproperly,thesaw
bladeisnotallowedtorun.
Wheelcoverinterlockswitches
(CEmodelonly)
Locatedonthetwowheelhousings,theseswitches
areusedtoassurethatthemachinewillstop
wheneverthewheelcoversareopen.Thisdeviceis
toprotectusersfrombeingcutbytherunningsaw
blades.
Amongallthesesafetyswitches,someofthemareusedtoprotecttheusersandsomeofthemare
usedtopreventdamagetosawblades,theworkpieceandthemachineitself,etc.Wehavetaken
everyprecautiontopreventinjuryordamageandtoprovidesafeandeconomicaloperationofthe
machine.
EMERGENCYSTOP
Designedtobeeasilyaccessible,theemergencystopbuttonislocatedontheleftbottomcorneron
thecontrolpanelandismadeinredcolorandrubbermaterial.ForCEmodels,supplementary
emergencystopbuttonmaybeavailableatotherarea(s)ofthemachinedependingonmachinetype.
PleaserefertoIllustration:EmergencyStop.
Whenyoupressthebutton,themachinewillimmediatelycometoafullstoptoavoidinjuryor
damagewhenanaccidentoccurs.Thebuttonwillbelockedwhenyoupressit.Tounlockit,pullit
upward.
Youshouldpressitimmediatelywithoutanyhesitationwhenobserving:
Anemergencysituationthatwouldcauseanyinjuryordamage
Anabnormalsituationorproblemsuchasfire,smoke,abnormalnoiseandetc.

1‐5
Illustration:EmergencyStop
EmergencyStop

1‐6
SAFETYLABELS
Safety‐relatedlabelsmountedonthemachinearecategorizedintothefollowingfourcategories.
Pleasereadthroughandunderstandthembeforeoperatingthemachine.RefertoIllustration:Safety
Labels.
DANGERLabels
AredandwhiteDANGERlabelsmarksshazardsorunsafepracticesthatwillresultinseverepersonal
injuryordeath.
LabelMeaningLabelMeaning
HazardousVoltage
TURNPOWEROFFbefore
servicing.Failureto
followingthewarningcan
resultinsevereinjury.
DANGER:RunningBlade
Bladerunsthroughthisarea.Keep
yourhandsawayfromarunning
bladetoavoidsevereinjury.The
arrowindicatesdirectionofthe
blade.
WARNINGLabels
AnorangeandblackWARNINGlabelmarkshazardsorunsafepracticesthatcanresultinsevere
personalinjuryordamagetothemachine.
LabelMeaningLabelMeaning
CuttingHazard
KEEPCOVERCLOSEDwhile
thebladeisrunning.Turn
poweroffbeforeopening
cover.Failuretofollowthe
warningcanresultinsevere
injury.
CuttingHazard
KEEPHANDOFFwhilethebladeis
running.Turnpoweroffbefore
openingcover.Failuretofollowthe
warningcanresultinsevereinjury.
Pleaseaddantifreeze
coolantwhentheambient
temperatureisbelow0˚C
(32˚F).
LooseHandHazard
KEEPHANDOFF.Donottouchchip
conveyor.Failuretofollowthe
warningcanresultinsevereinjury.
ImpactHazard
WEARSAFETSHOES.Donot
approachdroppingarea
duringoperation.

1‐7
CAUTIONLabels
YellowandblackCAUTIONlabelsmarkhazardsorunsafepracticesthatcanresultin
considerablepersonalinjury.
LabelMeaning
Keephandsoutofthemachinewhilethebladeisrunning.
Powertomachinemustbeturnedoffwhenchangingbladesor
adjustingwirebrush.
NOTICELabels
BlueandwhiteNOTICElabelsmeanunsafepracticesthatcouldresultindamagetoproductsor
property.
LabelMeaning
Replacethehydraulicoileverysixmonthsorevery1,200hours
ofoperation.
Oilspecification:ShellTELLUS27orMobilDTEOILLIGHT/
HYDRAULIC28
Toextendbladelife,alwaysadjustthelocationofwirebrushso
thatitisproperlytouchingtheblade.Alsoreplaceawornwire
brushwithanewone.

1‐8
SAFETYINSTRUCTIONLabels
GreenandwhiteSAFETYINSTRUCTIONSareimportantremindersthatshouldbereadbefore
operatingthemachine.
LabelMeaning
1. Readandunderstandtheinstructionmanualandwarning
signsbeforeoperatingmachine.Failuretofollowthese
instructionsandwarningscanresultinseriousinjuryor
death.
2. Donotweargloves,neckties,jewelryorlooseclothing
whileoperatingthemachine.
3. Alwaysweareyeprotectiongoggles.
4. Checkbladetensionandadjustbladeguidebeforestarting
tocut.
5. Alwaysclampstockfirmlyinplacebeforecutting.
6. Donotremovejammedorcut‐offpiecesuntilbladehas
stopped.
7. Keepfingersoutofpathofblade.
8. Bladeguardsshouldbeinplaceandusedatalltimes.
9. Disconnectmachinefrompowersourcebeforemarking
repairsoradjustments.
10. Donotoperatewhileundertheinfluenceofdrugs,alcohol
ormedication.

1‐9
Illustration:SafetyLabels

1‐10
HEARINGPROTECTION
Alwaysuseearprotection!
Whenyourmachineisrunning,noisegeneratedbythemachinemaycomefromthefollowing:
Sawbladeduringcuttingormaterialfeedmechanism
Wirebrushunit
Chipconveyorunit
Speedreducer
Hydraulicmotor/pump
Belttransmissionsvariablespeedmotors
Blademotor
Coolantpump
Drivewheel
Partsnotassembledtightlycausingmechanicalvibration
Ourproductspassnoisetestinglessthan78dBA.Noiselevelvaryaccordingtoworkingconditions
andwerecommendearplugsorotherhearingprotectionatalltime.Ifyourmachineproducesan
undesirablenoisewhileitisrunning,youshould:
1. Makesureallmaintenancetaskshavebeenperformedfollowingtheprescribedmaintenance
schedule(RefertoSection8).
2. Ifmaintenancedoesnotseemtosolvetheproblem,followthetroubleshootingprocedures
underSection9.
CECOMPLIANCE
Cosen’sCEmodelisdesignedtosatisfyregulationsoftheCouncilDirectiveontheapproximationof
thelawsoftheMemberStatesrelatingtomachinery(2006/42/EC)‐AnnexIEssentialhealthand
safetyrequirementsrelatingtothedesignandconstructionofmachinery.
RISKASSESSMENT
Riskassessmentgenerallytakesaccountofintendeduseandforeseeablemisuse,includingprocess
controlandmaintenancerequirements.Wemadeeveryefforttoavoidanypersonalinjuryor
equipmentdamageduringthemachinedesignstage.However,theoperator(orotherpeople)still
needstotakeprecautionswhenhandlinganypartofthemachinethatisunfamiliarandanywhereon
themachinethathaspotentialhazards(e.g.theelectricalcontrolbox).
Table of contents
Other Cosen Saw manuals

Cosen
Cosen V2230NC User manual

Cosen
Cosen SH-460M User manual

Cosen
Cosen SH-510LDMM User manual

Cosen
Cosen SVT-6070H User manual

Cosen
Cosen SH-5542 User manual

Cosen
Cosen C-420NC User manual

Cosen
Cosen SH-3026L User manual

Cosen
Cosen MT-105 User manual

Cosen
Cosen SH-700DM User manual

Cosen
Cosen C-620NC User manual

Cosen
Cosen AH-250H User manual

Cosen
Cosen C-325NC User manual

Cosen
Cosen MH-460M User manual

Cosen
Cosen C-650MNC User manual

Cosen
Cosen MH-1016JA User manual

Cosen
Cosen SH-710LDM User manual

Cosen
Cosen SH-250R User manual

Cosen
Cosen SH-330ER User manual

Cosen
Cosen MT-150 User manual

Cosen
Cosen C-320NC User manual