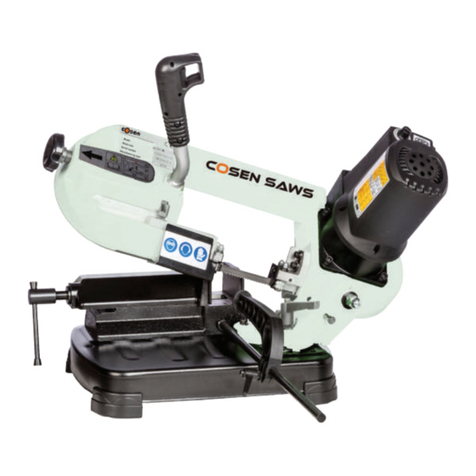
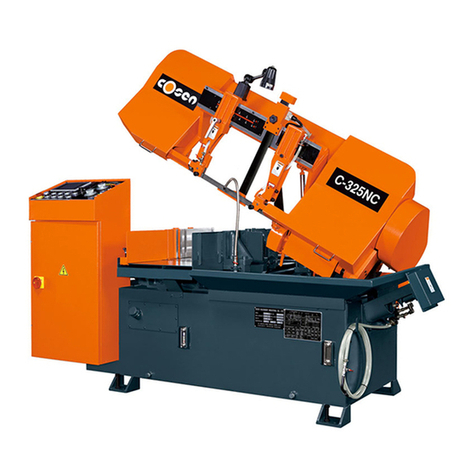
Cosen C3 User manual

COSEN SAWS
C3
NCFullyAutomatic
HorizontalBandsaw
(Non‐CE&CEModels)
InstructionManual
ThePinnacleofCuttingPerformance
CosenMechatronicsCo.,Ltd.

i
NOTE:
Read this instruction manual carefully to familiarize yourself with the installation, operation
and maintenance of your COSEN bandsaw machine.
Operate the machine following the procedures described in the manual to prevent personal
injuries or machine damage.
Keep this manual handy and refer to it whenever you are uncertain of how to perform any of
the procedures.
For technical support or parts purchase, please contact your nearest COSEN representative or
our service center:
For US, Mexico, and Canada:
phone: 1-704-943-1030
toll free: 1-877-SAWING1
fax: 1-704-943-1031
Instruction Manual: C3
NC Fully Automatic Horizontal Bandsaw
Ver. 8 2017/06/13
©2013 by COSEN MECHATRONICS CO., LTD.
No part of this publication may be photocopied or otherwise reproduced without the prior written permission of COSEN.
Printed in Taiwan
FROM THE MANUFACTURER
Thank you for your purchase of COSEN’s bandsaw machine and your trust in the
COSEN brand.
We are excited to have you as our valued customer and look forward as much as
you do to the accelerated productivity, long-lasting endurance and superb
cost-effectiveness this machine is about to bring to you.
To ensure you are fully utilizing our machine and being advantaged in every possible
way, please do take your time and read through this instruction manual.
Any comment or suggestion in making our service better, please do not hesitate to
let us know. Thank you again!

ii
Safety rules
Makesureyourworkareaiscleared
ofuninvitedpeopleandobstacles
everytimebeforeyoustart
operatingthemachine.
Neverwearglovesorlooseclothing
whenoperatingthemachine.Itmay
leadtoseriousinjuryiftheyare
caughtintherunningmachine.Wrap
orcoverlonghair.
Useawater‐solublecuttingfluidon
thismachine.Oil‐basedcuttingfluids
mayemitsmokeorcatchfire,
dependingonhowtheyareused.

iii
Safety rules
Nevercutcarbonoranyother
materialthatmayproduceand
disperseexplosivedust.Itispossible
thatsparksfrommotorsandother
machinepartswilligniteandexplode
theair‐bornedust.
Makesureanyuseoffireis
prohibitedintheshopandinstalla
fireextinguisherorotherfirecontrol
devicenearthemachinewhen
cuttingtitanium,magnesium,orany
othermaterialthatproduces
flammablechips.Neverleavethe
machineunattendedwhencutting
flammablematerials.
Neveradjustthewirebrushor
removechipswhilethesawbladeis
stillrunning.Itisextremely
dangerousifhandsorclothingare
caughtbytherunningblade.
Nevertouchtherunningsawblade
withglovesornot.Itisdangerousif
yourhands,clothingorglovesare
caughtbytherunningblade.

iv
Safety rules
Stopthesawbladebeforeyouclean
themachine.Itisdangerousifhands
orclothingarecaughtbytherunning
blade.
Neverstartthesawbladeunlessthe
workpiecehasbeenclampedfirmly.
Iftheworkpieceisnotsecurely
clamped,itwillbeforcedoutofthe
viseduringcutting.
Takepreventivemeasureswhen
cuttingthinorshortpiecesfromthe
worktokeepthemfromfalling.Itis
dangerousifthecutpiecesfall.

v
Safety rules
Userollertablesatthefrontandrear
sidesofthemachinewhencutting
longwork.Itisdangerousifthework
piecefallsoffthemachine.
Neversteporstandontheroller
table.Yourfootmaysliportripon
therollersandyouwillfall.
Turnofftheshopcircuitbreaker
switchbeforeperforming
maintenanceonthemachine.Posta
signindicatingthemachineisunder
maintenance.

vi
T
able of Contents
Section1–SafetyInformation1‐1
SafetyInstructions…………………………………………………………………………………………………….. 1‐1
SafeguardDevices……………………………………………………………………………………………………… 1‐3
EmergencyStop………………………………………………………………………………………………………… 1‐4
Illustration:EmergencyStop……………………………………………………………………………………… 1‐5
SafetyLabels…………………………………………………………………………………………………………….. 1‐6
Illustration:SafetyLabels………………………………………………………………………………………..… 1‐9
HearingProtection…………………………………………………………………………………………………….. 1‐10
CECompliance………………………………………………………………………………………………………….. 1‐10
RiskAssessment……………………………………………………………………………………………………….. 1‐10
Section2–GeneralInformation2‐1
Specification……………………………………..……………………………………………………………………..2‐2
MachinePartsIdentification……………………………………………………………………………………… 2‐3
FloorPlan…………………………………………………………………………………………………..……………… 2‐4
Section3–Moving&Installation3‐1
Location&Environment………………………………..………………………………………………………….. 3‐1
Unpacking&Inspecting……..……………………………………………………………………………………… 3‐2
Lifting…………………………………………..………………………………………………………………….………… 3‐3
Picture:LiftingPoints…………………………………………………………………….………….3‐5
RemovingShippingBracket…………………………..……………………………………………….………….. 3‐6
Cleaning…………………………………………..…………………………………………………………….………….. 3‐6
Installing…………………………...………………………………………………………………………….…………… 3‐6
SupplyingHydraulicOil…………………………………………………………………….…………… 3‐6
SupplyingCoolant………..………………………………………………………………….…………… 3‐7
ConnectingElectricPower……………………………………………………………….……………. 3‐7
Leveling&Anchoring…………………………………………………………………….………………. 3‐8
InstallingRollerTable(Optional)………………………………………………….………………… 3‐9
InstallingFireControlDevice…………………………………………………………………………… 3‐9
Relocating………………………...…………………………………………………………………….………………… 3‐9
Section4–OperatingInstructions4‐1
SafetyPrecautions…………………..…………………..……………………………………….………………….. 4‐2
BeforeOperating…………………………..…………………………………………………………………………… 4‐3
ControlPanel……..……………………………………..………………………………………….…………………… 4‐4
ControlPanel………………….………………………………………………………………………..…… 4‐4
ControlButtons……………………………………………………………………………………….…… 4‐5

vii
T
able of Contents
BladeDescendPressure&Speed………..…………………………………………………….…. 4‐7
HMITouchScreen&Functions…………………………………………………………….………. 4‐7
HMIErrorCodes………………………..……………………………………………………….………… 4‐20
StandardAccessories………….………………………..……………………………………………….………….. 4‐21
OptionalAccessories…….…….………………………..…………………………………………….…………….. 4‐24
Unrolling&InstallingtheBlade…………………………………………………………………….…………… 4‐26
AdjustingWireBrush………..……………………………………………………………………….……………… 4‐28
AdjustingSawArm……………..……………………………………………………………………….……………… 4‐28
AdjustingBladeSpeed………..………..…………………………………………………………………………… 4‐29
Breaking‐IntheBlade………..………..…………………………………………………………………..………… 4‐29
PlacingWorkpieceontoWorkbed………………………..……..………..…………………………………… 4‐29
PositioningWorkpieceforCutting………..………..………………………………….……………………… 4‐30
WithoutUsingAutomaticFirstCutFunction…………………………………………………. 4‐30
UsingAutomaticFirstCutFunction………………………………………………………………… 4‐31
AdjustingCoolantFlow………..………..…………………………………………………………………..……… 4‐32
Test‐RunningtheMachine....………..……………………………………………..…………………………… 4‐33
CuttingOperation………..………..……………………………………………..…………………………………… 4‐34
UsingTopClampforBundleCutting…………………………………………………………………………… 4‐35
TerminatingaCuttingOperation………..………..…………………………………….……………………… 4‐36
Section5–ElectricalSystem5‐1
ElectricalCircuitDiagrams……….…………………..…………………………………………………………..5‐1
Section6–HydraulicSystem6‐1
HydraulicDiagrams……….…………………..……………………………………………………………………….. 6‐1
Section7–BandsawCutting:APracticalGuide7‐1
Introduction……………………….…….…………………..………………………………………………………….. 7‐1
SawBladeSelection………………….…………………..………………………………………………………….. 7‐1
SomeSawingPractices…………….…………………..………………………………………….……………….. 7‐4
SawPitchSelection……………………………………………………………………….……………… 7‐4
MaterialSizeandSawPitch………………………………………………….….…………………… 7‐4
Section8–Maintenance&Service8‐1
Introduction……………………….…….…………………..………………………………………………………….. 8‐1
BasicMaintenance………………….…………………..…………………………………………….……………..8‐1
MaintenanceSchedule…………….…………………..…………………………………………………………..8‐1
BeforeBeginningaDay’sWork……………………………………………………………………… 8‐2
AfterEndingaDay’sWork…………………………………………………….………………………8‐2
EveryMonth………………………………………………………………………….……………………… 8‐2

viii
T
able of Contents
EveryThreeMonths………………..…………………………………………….……………………… 8‐2
EverySixMonths……………….………………………………………………….……………………… 8‐3
StorageConditions…………………………....………..…………………………………………………………..8‐3
TerminatingtheUseofMachine……..…………..…………………………………………………………..8‐3
OilRecommendationforMaintenance……………………………………………………………………..8‐4
Section9–Troubleshooting9‐1
Introduction……………………….…….…………………..………………………………………………………….. 9‐1
Precautions………………….…………………..…………………………………………………………………….... 9‐2
GeneralTroubles&Solutions………………………..………………………………………………………….. 9‐2
MinorTroubles&Solutions………………………..………………………………………………..…………..9‐3
MotorTroubles&Solutions………………………..…………………………………………………..……….. 9‐3
BladeTroubles&Solutions………………………..……………………………………………………………..9‐4
SawingProblems&Solutions………………………..………………………………………………………….. 9‐5
Re‐AdjustingtheRollerTable………………………..………………………………………………………….. 9‐6
Section10–Parts10‐1
SparePartsRecommendations…………………..…………………………………………………………….. 10‐1
PartList…………………..…………………………………………………………………………………………………. 10‐2
Section11–Warranty11‐1
Warranty…………………..……………………………………………………………………………………………….. 11‐1

1‐1
Section1
SAFETY
INFORMATION
SAFETYINSTRUCTIONS
SAFEGUARDDEVICES
EMERGENCYSTOP
SAFETYLABELS
HEARINGPROTECTION
CECOMPLIANCE
RISKASSESSMENT
Safetyisacombinationofawell‐designedmachine,operator’sknowledgeaboutthemachineand
alertnessatalltimes.COSEN’sbandmachinehasincorporatedmanysafetymeasuresduringthe
designprocessandusedprotectivedevicestopreventpersonalinjuriesandpotentialrisks.Warning
labelsalsoserveasaremindertotheoperator.
Throughoutthismanual,youwillalsoseevarioussafety‐relatedsymbolsindicatingimportant
informationthatyoushouldtakenoteofpriortouseofthemachineorpartofitsfunctions.These
importantsafetyinstructionsdonotcoverallpossiblesituationsthatmightoccur.Itisyour
responsibilitytotakecautionandfollowproceduresstatedinthismanualwheninstalling,
maintainingandoperatingyourmachine.Cosenwillnotbeliablefordamagesresultingfrom
improperuse.
SAFETYINSTRUCTIONS
Whattheiconsandsignsinthisusermanualmean:
ThisiconmarksDANGER;hazardsorunsafepracticesthatmayresultinsevere
personalinjuryordeath.
ThisiconmarksWARNING;hazardsorunsafepracticesthatmayresultin
personalinjuryordamagetothemachine.
ThisiconmarksCAUTION;informationthatshouldbereadbeforeusetoprevent
damagetothemachine.
Supplementaryinformationtotheproceduresdescribedinthismanual.
Callyourlocalagentorourservicecenterforhelp.

1‐2
Thismanualhasimportantsafety
information.Readthroughitcarefully
beforeoperatingthismachinetoprevent
personalinjuryormachinedamage.Learn
theoperation,limitationandthespecific
potentialhazardspeculiartothisband
saw.
Donotoperatethismachineunlessitis
completelyassembled.
Makesurethepowerswitchisoffbefore
plugginginpowercord.
Disconnectthepowercordbeforemaking
adjustment,maintenanceorblade
changes.
Keepallguardsandshieldsinplacebefore
installingorstartingupthemachine.
Wearproperapparelduringoperation
andwhenservicingthemachine.
Keepunauthorizedpersonnelaway.
Donotreachoverorstandonanypartof
themachine.
Neverholdthematerialbyhandfor
cutting.Alwaysusetheviseandmake
surethematerialisclampedsecurely
beforecutting.
Itisdangeroustooperatethemachine
whenthefloorisslippery.Keepthefloor
cleananddry.Checkforice,moisture,or
greasebeforeentering.
Donotusethemachinetocutexplosive
materialorhighpressurevesselsasitwill
generategreatamountofheatduringthe
sawingprocessandmayignitean
explosion.
Keeptheworkenvironmentsafe.Donot
usebandsawinadamporwetlocation.
Neveroperatewhileundertheinfluence
ofdrugs,alcoholormedication.
Allusersmustreaditbeforeperformingany
activityonthemachine,suchasreplacing
thesawbandordoingregularmaintenance.
Somepersonalprotectiveequipmentis
requiredforthesafeuseofthemachine,e.g.
protectiongoggles.
Keepbladeprotectioncoverandwheel
coversinplaceandinworkingorder.
Userecommendedaccessories.Improper
accessoriesmaybehazardous.
Keepyourworkareawellilluminatedat
minimum500lumen.
Keepyourworkareaclean.Clutteredand
slipperyfloorsinviteaccidents.
Removeadjustingkeys,wrenchesorany
loosepartsoritemsfromthemachine
beforeturningonpower.
Checkfordamagedparts.Beforecontinuing
usingthemachine,thedamagedpartshould
becheckedandreplaced.
Movingpartsshouldbekeptinproper
alignmentandconnectionwiththemachine.
Checkforbreakage,mountingandanyother
conditionsthatmayaffectitsoperation.Any
damagedpartorguardshouldbeproperly
repairedorreplaced.
Whenaworkpieceistoolongorheavy,
makesureitissupportedwitharollertable
(recommended).
Alwaysremembertoswitchoffthemachine
whentheworkiscompleted.
Useasharpsawbladeandkeepthemachine
initsbestandsafestperformanceby
followingaperiodicalmaintenanceschedule.
Donotforcethebandsawbeyondits
intendeduse.Itissafertooperatewiththe
cuttingrateforwhichitwasdesigned.

1‐3
SAFEGUARDDEVICES
Thesafeguarddevicesincorporatedinthismachineincludethefollowingtwomainparts:
1. Protectioncovers&guards
2. Safety‐relatedswitches
ProtectionCovers&Guards
1. Idlewheelhousingcover
2. Drivewheelhousingcover
3. Gearreducercover
4. Wirebrushbeltcover
5. Bladeguardcover(left&right)
6. Chipconveyorcover(CEmodelonly)
Theprotectiondevicesshouldalwaysbemountedonthemachinewheneverthemachineisrunning.
Donotremoveanyofthesesafeguarddevicesunderanycircumstancesexceptwhenservicingthe
machine.Evenskilledservicetechniciansshouldstilltakecautionswhenperformingrepairsorservice
onthemachinewithanyoftheseprotectorsremoved.Itistheresponsibilityoftheusertomakesureall
theseelementsarenotlostanddamaged.
Takenoteofthefollowingmainmovingpartsonthemachinepriortoandduringmachineoperation:
Sawbowassembly
Driveandidlewheels
Bladeguidearm
Sawbladeguiderollers
Quickapproachdevice
Wirebrush
Chipconveyor(optional)
Workpiececlampingvises
Shuttlevisesandworkbedrollers
Topclamps(optional)
Gearreducer

1‐4
SafetyRelatedSwitches
Toprotecttheoperator,thefollowingsafetyrelatedswitchesonthemachineareactuatedwhenthe
machineisinoperation.
WheelmotiondetectorThisisaproximitysensorusedtodetectthemotion
ofthedrivewheel.Oncethesawbladeisbrokenor
assoonasitstartsslipping,thesensorwilldetect
andstopthedrivewheelandthemachine.
PowerswitchLocatedonthecoverofelectricalcabinet,thepower
switchcontrolsthemainpowerofthemachine.Up
toyourcompany’sinternalrules,thispowerswitch
canbelockedwithapadlockoraluggagelockto
protecttheoperatorandthemachine.
EmergencystopbuttonLocatedonthecontrolpanel,thebuttonwhen
pressedwillstopthemachinecompletely.
ViseclampswitchThisswitchassuresfirmclampingoftheworkpiece.If
theworkpieceisnotclampedproperly,thesaw
bladeisnotallowedtorun.
Wheelcoverinterlockswitches
(CEmodelonly)
Locatedonthetwowheelhousings,theseswitches
areusedtoassurethatthemachinewillstop
wheneverthewheelcoversareopen.Thisdeviceis
toprotectusersfrombeingcutbytherunningsaw
blades.
Amongallthesesafetyswitches,someofthemareusedtoprotecttheusersandsomeofthemare
usedtopreventdamagetosawblades,theworkpieceandthemachineitself,etc.Wehavetaken
everyprecautiontopreventinjuryordamageandtoprovidesafeandeconomicaloperationofthe
machine.
EMERGENCYSTOP
Designedtobeeasilyaccessible,theemergencystopbuttonislocatedontheleftbottomcorneron
thecontrolpanelandismadeinredcolorandrubbermaterial.ForCEmodels,supplementary
emergencystopbuttonmaybeavailableatotherarea(s)ofthemachinedependingonmachinetype.
PleaserefertoIllustration:EmergencyStop.
Whenyoupressthebutton,themachinewillimmediatelycometoafullstoptoavoidinjuryor
damagewhenanaccidentoccurs.Thebuttonwillbelockedwhenyoupressit.Tounlockit,pullit
upward.
Youshouldpressitimmediatelywithoutanyhesitationwhenobserving:
Anemergencysituationthatwouldcauseanyinjuryordamage
Anabnormalsituationorproblemsuchasfire,smoke,abnormalnoiseandetc.

1‐5
Illustration:EmergencyStop
EmergencyStop
急停按鈕

1‐6
SAFETYLABELS
Safety‐relatedlabelsmountedonthemachinearecategorizedintothefollowingfourcategories.
Pleasereadthroughandunderstandthembeforeoperatingthemachine.RefertoIllustration:Safety
Labels.
DANGERLabels
AredandwhiteDANGERlabelsmarksshazardsorunsafepracticesthatwillresultinseverepersonal
injuryordeath.
LabelMeaningLabelMeaning
HazardousVoltage
TURNPOWEROFFbefore
servicing.Failureto
followingthewarningcan
resultinsevereinjury.
DANGER:RunningBlade
Bladerunsthroughthisarea.Keep
yourhandsawayfromarunning
bladetoavoidsevereinjury.The
arrowindicatesdirectionofthe
blade.
WARNINGLabels
AnorangeandblackWARNINGlabelmarkshazardsorunsafepracticesthatcanresultinsevere
personalinjuryordamagetothemachine.
LabelMeaningLabelMeaning
CuttingHazard
KEEPCOVERCLOSEDwhile
thebladeisrunning.Turn
poweroffbeforeopening
cover.Failuretofollowthe
warningcanresultinsevere
injury.
CuttingHazard
KEEPHANDOFFwhilethebladeis
running.Turnpoweroffbefore
openingcover.Failuretofollowthe
warningcanresultinsevereinjury.
Pleaseaddantifreeze
coolantwhentheambient
temperatureisbelow0˚C
(32˚F).
LooseHandHazard
KEEPHANDOFF.Donottouchchip
conveyor.Failuretofollowthe
warningcanresultinsevereinjury.
ImpactHazard
WEARSAFETSHOES.Donot
approachdroppingarea
duringoperation.

1‐7
CAUTIONLabels
YellowandblackCAUTIONlabelsmarkhazardsorunsafepracticesthatcanresultin
considerablepersonalinjury.
LabelMeaning
Keephandsoutofthemachinewhilethebladeisrunning.
Powertomachinemustbeturnedoffwhenchangingbladesor
adjustingwirebrush.
NOTICELabels
BlueandwhiteNOTICElabelsmeanunsafepracticesthatcouldresultindamagetoproductsor
property.
LabelMeaning
Replacethehydraulicoileverysixmonthsorevery1,200hours
ofoperation.
Oilspecification:ShellTELLUS27orMobilDTEOILLIGHT/
HYDRAULIC28
Toextendbladelife,alwaysadjustthelocationofwirebrushso
thatitisproperlytouchingtheblade.Alsoreplaceawornwire
brushwithanewone.

1‐8
SAFETYINSTRUCTIONLabels
GreenandwhiteSAFETYINSTRUCTIONSareimportantremindersthatshouldbereadbefore
operatingthemachine.
LabelMeaning
1. Readandunderstandtheinstructionmanualandwarning
signsbeforeoperatingmachine.Failuretofollowthese
instructionsandwarningscanresultinseriousinjuryor
death.
2. Donotweargloves,neckties,jewelryorlooseclothing
whileoperatingthemachine.
3. Alwaysweareyeprotectiongoggles.
4. Checkbladetensionandadjustbladeguidebeforestarting
tocut.
5. Alwaysclampstockfirmlyinplacebeforecutting.
6. Donotremovejammedorcut‐offpiecesuntilbladehas
stopped.
7. Keepfingersoutofpathofblade.
8. Bladeguardsshouldbeinplaceandusedatalltimes.
9. Disconnectmachinefrompowersourcebeforemarking
repairsoradjustments.
10. Donotoperatewhileundertheinfluenceofdrugs,alcohol
ormedication.

1‐9
Illustration:SafetyLabels

1‐10
HEARINGPROTECTION
Noisehasamajoreffectonthequalityofyourworkenvironment.Herewereferyoutotestingdata
andinformationasfollows:
Excessiveexposuretohighlevelsofnoisemaycauseimpairmenttohearing,butthevulnerabilityto
hearinglossvariesbetweenindividualsandmustbetakenintoaccountinspecifyinganallowable
limitfornoiseexposure.
Alevelof90dBAiswidelyacceptedasacriterionfor8hour/dayexposuretosteady‐statebroad‐
bandnoise.Theunprotectedearshouldnotbeexposedtonoiselevelshigherthan120dBA.
Noisegeneratedbythemachinemaycomefromthefollowing:
Sawbladeduringcuttingormaterialfeedmechanism
Wirebrushunit
Chipconveyorunit
Speedreducer
Hydraulicmotor/pump
Belttransmissionsvariablespeedmotors
Blademotor
Coolantpump
Drivewheel
Partsnotassembledtightlycausingmechanicalvibration
Whenyourmachineisrunning,noisewillcomeout.Thisisamachine‐electricinterfaceproblemthat
maymakepeoplefeeluncomfortable.Ourproductspassnoisetestinglessthan78dBA.Ifyour
machineproducesanundesirablenoisewhileitisrunning,youshould:
1. Makesureallmaintenancetaskshavebeenperformedfollowingtheprescribedmaintenance
schedule(RefertoSection7)
2. Ifmaintenancedoesnotseemtosolvetheproblem,followthetroubleshootingprocedures
underSection8.
CECOMPLIANCE
Cosen’sCEmodelisdesignedtosatisfyregulationsoftheCouncilDirectiveontheapproximationof
thelawsoftheMemberStatesrelatingtomachinery(2006/42/EC)‐AnnexIEssentialhealthand
safetyrequirementsrelatingtothedesignandconstructionofmachinery.
RISKASSESSMENT
Riskassessmentgenerallytakesaccountofintendeduseandforeseeablemisuse,includingprocess
controlandmaintenancerequirements.Wemadeeveryefforttoavoidanypersonalinjuryor
equipmentdamageduringthemachinedesignstage.However,theoperator(orotherpeople)still
needstotakeprecautionswhenhandlinganypartofthemachinethatisunfamiliarandanywhereon
themachinethathaspotentialhazards(e.g.theelectricalcontrolbox).

2-1
Section 2
GENERAL
INFORMATION
SPECIFICATION
MACHINE PARTS IDENTIFICATION
FLOOR PLAN
This band saw machine is designed by Cosen’s R&D engineers to provide you the following features
and advantages:
Safety
This machine is designed to fully protect the operator from its moving parts during cutting
operation.
The machine and each compoment has passed strict testing (Council Directive on the
approximation of the laws of the Member States relating to Machinery).
The machine will shut off automatically when the saw blade is broken, protecting both the
operator and the machine.
Convenience & High-Performance
The machine is designed in the way that the operation and adjustment can be easily
performed.
The machine will stop automatically when out of stock.
Dual valve system is designed to achieve optimal cutting performance with the simple
setting of feed rate and perspective cutting pressure for different material.
Durability
The intended life-span of the machine is counted based on regular daily operation. It is
calculated with the life expectancy of 10 years under normal operating condition and exact
attention to the maintenance schedule.
8 hours × 5 days × 52 weeks × 10 years =20,800 hours
Table of contents
Other Cosen Saw manuals

Cosen
Cosen SH-710LDM User manual

Cosen
Cosen MH-460M User manual

Cosen
Cosen C-620NC User manual

Cosen
Cosen C-420NC User manual

Cosen
Cosen AH-250H User manual

Cosen
Cosen SH-3026L User manual

Cosen
Cosen SH-510LDMM User manual

Cosen
Cosen CNC-800DM User manual

Cosen
Cosen G320 User manual

Cosen
Cosen V2230NC User manual