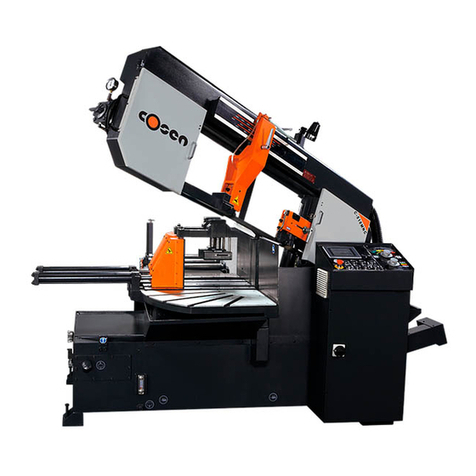
Cosen SH-510LDMM User manual

COSEN SAWS
SH-510LDMM
Semi-Automatic Linear Guided
Double Miter-Cutting Horizontal Band saw
(Standard model)
Instruction Manual
The Pinnacle of Cutting Performance
Cosen Mechatronics Co., Ltd.


NOTE:
Read this instruction manual carefully to familiarize yourself with the installation,
operation and maintenance of your COSEN bandsaw machine.
Operate the machine following the procedures described in the manual to prevent
personal injuries or machine damage.
Keep this manual handy and refer to it whenever you are uncertain of how to
perform any of the procedures.
For technical support or parts purchase, please contact your nearest COSEN
representative or our service center:
For Europe:
phone: +31-77-7600280
fax: +31-77-7600288
web: www.cosensaws.eu
For Taiwan and other countries:
phone: +886-3-5332143
fax: +886-3-5348324
web: www.cosen.com.tw
For US, Mexico, and Canada:
phone: +1-704-943-1030
toll free: +1-877-SAWING1
fax: +1-704-943-1031
web: www.cosensaws.com
For China:
email: service@cosensaws.cn
phone: +86-152-50127815
web: www.cosensaws.cn
Instruction Manual: SH-510LDM Semi-Automatic Linear Guided
Double Miter-Cutting Horizontal Band saw (Standard model)
Ver.1 2018/01/30
©2018 by COSEN MECHATRONICS CO., LTD.
No part of this publication may be photocopied or otherwise reproduced without the prior written
permission of COSEN.
Printed in Taiwan
FROM THE MANUFACTURER
Thank you for your purchase of COSEN’s bandsaw machine and your trust in the COSEN
brand.
We are excited to have you as our valued customer and look forward as much as you do to
the accelerated productivity, long-lasting endurance and superb cost-effectiveness this
machine is about to bring to you.
To ensure you are fully utilizing our machine and being advantaged in every possible way,
please do take your time and read through this instruction manual.
Any comment or suggestion in making our service better, please do not hesitate to let us
know. Thank you again!


Safety rules
Make sure your work area is cleared of uninvited people and obstacles
every time before you start operating the machine.
Never step or stand on the roller table. Your foot may slip or trip on the
rollers and you will fall.
Never wear gloves or loose clothing when operating the machine. It may
lead to serious injury if they are caught in the running machine. Wrap or
cover long hair.
Never touch the running saw blade with gloves or not. It is dangerous if
your hands, clothing or gloves are caught by the running blade.
Make sure any use of fire is prohibited in the shop and install a fire
extinguisher or other fire control device near the machine when cutting
titanium, magnesium, or any other material that produces flammable chips.
Never leave the machine unattended when cutting flammable materials.
Use a water-soluble cutting fluid on this machine. Oil-based cutting fluids
may emit smoke or catch fire, depending on how they are used.
Never cut carbon or any other material that may produce and disperse
explosive dust. It is possible that sparks from motors and other machine
parts will ignite and explode the air-borne dust.

Safety rules
Never adjust the wire brush or remove chips while the saw blade is still
running. It is extremely dangerous if hands or clothing are caught by the
running blade.
Stop the saw blade before you clean the machine. It is dangerous if hands or
clothing are caught by the running blade.
Never start the saw blade unless the workpiece has been clamped firmly. If
the workpiece is not securely clamped, it
will be forced out of the vise
during cutting.
Take preventive measures when cutting thin or short pieces from the work
to keep them from falling. It is dangerous if the cut pieces fall.
Use roller tables at the front and rear sides of the machine when cutting
long work. It is dangerous if the work piece falls off the machine.
Turn off the shop circuit breaker switch before performing maintenance on
the machine. Post a sign indicating the machine is under maintenance.

i
Table of Contents
Section 1 –Safety Information
1-1
Safety Instructions ………………………………………………………………………………………………………
1-1
Safeguard Devices ……………………………………………………………………………………………………….
1-3
Illustration: Safety Fence ………….……………………………………………………………………………..…
1-4
Emergency Stop ………………………………………………………………………………………………………….
1-5
Illustration: Emergency Stop ………………………………………………………………………………………
1-6
Safety Labels ……………………………………………………………………………………………………………….
1-7
Illustration: Safety Labels ………………………………………………………………………………………..…
1-8
Hearing Protection ……………………………………………………………………………………………………...
1-9
CE Compliance …………………………………………………………………………………………………………….
1-9
Risk Assessment ………………………………………………………………………………………………………….
1-9
Section 2 –General Information
2-1
Specification ……………………………………..………………………………………………………………………..
2-2
Machine Parts Identification ……………………………………………………………………………………….
2-3
Floor Plan …………………………………………………………………………………………………..……………….
2-5
Section 3 –Moving & Installation
3-1
Location & Environment ………………………………..……………………………………………………………
3-1
Unpacking & Inspecting ……..……………………………………………………………………………………….
3-2
Lifting …………………………………………..………………………………………………………………….………….
3-3
Illustration: Lifting Points …………………………………………………………………….…………….
3-5
Removing Shipping Bracket …………………………..……………………………………………….……………
3-6
Cleaning …………………………………………..…………………………………………………………….……………
3-6
Installing …………………………...………………………………………………………………………….…………….
3-6
Supplying Hydraulic Oil …………………………………………………………………….…………….
3-6
Supplying Coolant ………..………………………………………………………………….……………..
3-7
Connecting Electric Power ……………………………………………………………….……………..
3-7
Leveling & Anchoring …………………………………………………………………….……………….
3-8
Installing Roller Table (Optional) ………………………………………………….………………….
3-9
Installing Fire Control Device ………………………………………………….………………………
3-9
Relocating ………………………...…………………………………………………………………….………………….
3-9
Section 4 –Operating Instructions
4-1
Safety Precautions …………………..…………………..……………………………………….…………………….
4-2
Before Operating …………………………..…………………………………………………………………………….
4-3
Control Panel ……..……………………………………..………………………………………….…………………….
4-4
Control Panel ………………….………………………………………………………………………..…….
4-4

ii
Table of Contents
Control Buttons ……………………………………………………………………………………….……..
4-5
Blade Descend Pressure & Speed ………..…………………………………………………….……
4-7
HMI Touch Screen & Functions …………………………………………………………….…………
4-7
HMI Error Codes ………………………..……………………………………………………….………….
4-17
Standard Accessories ………….………………………..……………………………………………….……………
4-18
Optional Accessories …….…….………………………..…………………………………………….………………
4-20
Unrolling & Installing the Blade …………………………………………………………………….…………….
4-21
Adjusting Wire Brush ………..……………………………………………………………………….……………….
4-23
Placing Workpiece onto Workbed ………………………..……..………..…………………………………….
4-23
Positioning Workpiece for Cutting ………..………..………………………………….……………………….
4-24
Adjusting Saw Arm……………………………………………………………………………………………………….
4-25
Adjusting Coolant Flow ………..………..…………………………………………………………………..……….
4-25
Adjusting Blade Speed ………..………..…………………………………………………………………………….
4-26
Breaking-In the Blade ………..………..…………………………………………………………………..………….
4-26
Test -Running the Machine ....………..……………………………………………..…………………………….
4-26
Cutting Operation ………..………..……………………………………………..…………………………………….
4-27
Starting an Automatic Cutting………………………………………………………………………………………
4-28
Using Top Clamp for Bundle Cutting……………………………………………………………………………..
4-28
Terminating a Cutting Operation ………..………..…………………………………….……………………….
4-29
Section 5 –Electrical System
5-1
Electrical Circuit Diagrams ……….…………………..……………………………………………………………..
5-1
Section 6 –Hydraulic System
6-1
Hydraulic Diagrams ……….…………………..………………………………………………………………………..
6-1
Section 7 –Bandsaw Cutting: A Practical Guide
7-1
Introduction ……………………….……..…………………..…………………………………………………………..
7-1
Saw Blade Selection ………………….….………………..…………………………………………………………..
7-2
VISE LOADING …………….…………………..………………………………………….………………………………
7-3
BladeBreak -In …………………………………………………………………………………….……………………..
7-4
Section 8 –Maintenance & Service
8-1
Introduction ……………………….…….……….…………..…………………………………………………………..
8-1
Basic Maintenance …..……………….…………………..…………………………………………….……………..
8-1
Maintenance Schedule …..………….…………………..…………………………………………………………..
8-2
Before Beginning a Day’s Work ….……………………………………………………………………
8-2
After Ending a Day’s Work …………..………………………………………….………………………
8-2
Every 2 weeks ……………………………………………………………………….……………………….
8-2
First 600hrs for new machine,then every 1200h………………..………………………….
8-2

iii
Table of Contents
Every Six Months ……………….……….………………………………………….………………………
8-3
Storage Conditions …………………………....…………..…………………………………………………………..
8-3
Terminating the Use of Machine ……..……………..…………………………………………………………..
8-3
Oil Recommendation for Maintenance …………..…………………………………………………………..
8-4
Section 9 –Troubleshooting
9-1
Introduction ……………………….…….………………………………………………………………………………..
9-1
Precautions ………………….…………………..…………….………………………………………………………....
9-2
General Troubles & Solutions ………………………..….………………………………………………………..
9-2
Minor Troubles & Solutions ………………………..……..…………………………………………..…………..
9-3
Motor Troubles & Solutions ………………………..………..…………………………………………..………..
9-3
Blade Troubles & Solutions ………………………..………………………………………………………………..
9-4
Sawing Problems & Solutions ………………………..………….………………………………………………..
9-5
Re-Adjusting the Roller Table ………………………..……………..……………………………………………..
9-12
Section 10 –Parts
10-1
Spare Parts Recommendations …………………..…………………..…………………………………………..
10-1
Part List …………………..………………………………………………………………………………………………….
10-2
Section 11 –Warranty
11-1
Warranty………………………………….…………………..……………………………………………………………..
11-1


1-1
Section 1
SAFETY
INFORMATION
SAFETY INSTRUCTIONS
SAFEGUARD DEVICES
EMERGENCY STOP
SAFETY LABELS
HEARING PROTECTION
CE COMPLIANCE
RISK ASSESSMENT
Safety is a combination of a well-designed machine, operator’s knowledge about the machine and
alertness at all times. COSEN’s band machine has incorporated many safety measures during the
design process and used protective devices to prevent personal injuries and potential risks. Warning
labels also serve as a reminder to the operator.
Throughout this manual, you will also see various safety-related symbols indicating important
information that you should take note of prior to use of the machine or part of its functions. These
important safety instructions do not cover all possible situations that might occur. It is your
responsibility to take caution and follow procedures stated in this manual when installing,
maintaining and operating your machine. Cosen will not be liable for damages resulting from
improper use.
SAFETY INSTRUCTIONS
What the icons and signs in this user manual mean:
This icon marks WARNING; hazards or unsafe practices that may result in
personal injury or damage to the machine.
Supplementary information to the procedures described in this manual.
Call your local agent or our service center for help.

1-2
This manual has important safety
information. Read through it carefully
before operating this machine to
prevent personal injury or machine
damage. Learn the operation, limitation
and the specific potential hazards
peculiar to this band saw. All users must
read it before performing any activity on
the machine, such as replacing the saw
band or doing regular maintenance.
Disconnect the power cord before
making adjustment, maintenance or
blade changes.
Do not operate this machine unless it is
completely assembled.
Make sure the power switch is off before
plugging in power cord.
Always remember to switch off the
machine when the work is completed.
Use recommended accessories.
Improper accessories may be hazardous.
Never hold the material by hand for
cutting. Always use the vise and make
sure the material is clamped securely
before cutting.
When a workpiece is too long or heavy,
make sure it is supported with a roller
table (recommended).
Keep your work area well illuminated at
minimum 500 lumen.
Remove adjusting keys, wrenches or any
loose parts or items from the machine
before turning on power.
Use a sharp saw blade and keep the
machine in its best and safest
performance by following a periodical
maintenance schedule.
Wear proper apparel during operation
and when servicing the machine. Some
personal protective equipment is
required for the safe use of the machine,
e.g. protection goggles.
Moving parts should be kept in proper
alignment and connection with the
machine. Check for breakage, mounting
and any other conditions that may
affect its operation. Any damaged part
or guard should be properly repaired or
replaced.
It is dangerous to operate the machine
when the floor is slippery. Keep the floor
clean and dry. Check for ice, moisture, or
grease before entering.
Do not use the machine to cut explosive
material or high pressure vessels as it
will generate great amount of heat
during the sawing process and may
ignite an explosion.
Keep your work area clean. Cluttered
and slippery floors invite accidents.
Keep blade protection cover and wheel
covers in place and in working order.
Never operate while under the influence
of drugs, alcohol or medication.
Do not reach over or stand on any part
of the machine.
Keep the work environment safe. Do not
use band saw in a damp or wet location.
Keep all guards and shields in place
before installing or starting up the
machine.
Keep unauthorized personnel away.

1-3
SAFEGUARD DEVICES
The safeguard devices incorporated in this machine include the following two main parts:
1. Protection covers & guards
2. Safety-related switches
Protection Covers & Guards
1. Idle wheel housing cover
2. Drive wheel housing cover
3. Gear reducer cover
4. Wire brush belt cover
5. Blade guard cover (left & right)
6. Safety fence (left & right)(CE model only, as shown in Illustration: Safety Fence)
7. Chip conveyor cover (CE model only)
The protection devices should always be mounted on the machine whenever the machine is running.
Do not remove any of these safeguard devices under any circumstances except when servicing the
machine. Even skilled service technicians should still take cautions when performing repairs or service
on the machine with any of these protectors removed. It is the responsibility of the user to make sure
all these elements are not lost and damaged.
Take note of the following main moving parts on the machine prior to and during machine operation:
Saw bow assembly
Drive and idle wheels
Blade guide arm
Saw blade guide rollers
Quick approach device (optional)
Wire brush
Chip conveyor (optional)
Workpiece clamping vises
Shuttle vises and workbed rollers
Top clamps (optional)
Gear reducer

1-4
Safety Related Switches
To protect the operator, the following safety related switches on the machine are actuated when the
machine is in operation.
Wheel motion detector
This is a proximity sensor used to detect the motion
of the drive wheel. Once the saw blade is broken or
as soon as it starts slipping, the sensor will detect
and stop the drive wheel and the machine.
Power switch
Located on the cover of electrical cabinet, the power
switch controls the main power of the machine. Up
to your company’s internal rules, this power switch
can be locked with a padlock or a luggage lock to
protect the operator and the machine.
Emergency stop button
Located on the control panel, the button when
pressed will stop the machine completely.
Vise clamp switch
This switch assures firm clamping of the workpiece. If
the workpiece is not clamped properly, the saw
blade is not allowed to run.
Wheel cover interlock switches
(CE model only)
Located on the two wheel housings, these switches
are used to assure that the machine will stop
whenever the wheel covers are open. This device is
to protect users from being cut by the running saw
blades.
Among all these safety switches, some of them are used to protect the users and some of them are
used to prevent damage to saw blades, the workpiece and the machine itself, etc. We have taken
every precaution to prevent injury or damage and to provide safe and economical operation of the
machine.
EMERGENCY STOP
Designed to be easily accessible, the emergency stop button is located on the left bottom corner on
the control panel and is made in red color and rubber material. For CE models, supplementary
emergency stop button may be available at other area(s) of the machine depending on machine type.
Please refer to Illustration: Emergency Stop.
When you press the button, the machine will immediately come to a full stop to avoid injury or
damage when an accident occurs. The button will be locked when you press it. To unlock it, turn the
button clockwise.
You should press it immediately without any hesitation when observing:
An emergency situation that would cause any injury or damage
An abnormal situation or problem such as fire, smoke, abnormal noise and etc.

1-5
Safety Related Switches
To protect the operator, the following safety related switches on the machine are actuated when the
machine is in operation.
Wheel motion detector
This is a proximity sensor used to detect the motion
of the drive wheel. Once the saw blade is broken or
as soon as it starts slipping, the sensor will detect
and stop the drive wheel and the machine.
Power switch
Located on the cover of electrical cabinet, the power
switch controls the main power of the machine. Up
to your company’s internal rules, this power switch
can be locked with a padlock or a luggage lock to
protect the operator and the machine.
Emergency stop button
Located on the control panel, the button when
pressed will stop the machine completely.
Vise clamp switch
This switch assures firm clamping of the workpiece. If
the workpiece is not clamped properly, the saw
blade is not allowed to run.
Wheel cover interlock switches
(CE model only)
Located on the two wheel housings, these switches
are used to assure that the machine will stop
whenever the wheel covers are open. This device is
to protect users from being cut by the running saw
blades.
Among all these safety switches, some of them are used to protect the users and some of them are
used to prevent damage to saw blades, the workpiece and the machine itself, etc. We have taken
every precaution to prevent injury or damage and to provide safe and economical operation of the
machine.
EMERGENCY STOP
Designed to be easily accessible, the emergency stop button is located on the left bottom corner on
the control panel and is made in red color and rubber material. For CE models, supplementary
emergency stop button may be available at other area(s) of the machine depending on machine type.
Please refer to Illustration: Emergency Stop.
When you press the button, the machine will immediately come to a full stop to avoid injury or
damage when an accident occurs. The button will be locked when you press it. To unlock it, pull it
upward.
You should press it immediately without any hesitation when observing:
An emergency situation that would cause any injury or damage
An abnormal situation or problem such as fire, smoke, abnormal noise and etc.

1-6
Illustration: Emergency Stop
Emergency Stop Button

1-7
SAFETY LABELS
Please read through and understand these safety labels before operating the machine. Refer to
Illustration: Safety Labels.
Label
Meaning
Label
Meaning
Impact Hazard
WEAR SAFETY SHOES. Do
not approach dropping area
during operation.
Read Operator’s Manual
This manual has important safety
information. Read through it
carefully before operating this
machine to prevent personal injury
or machine damage.
Keep Unauthorized
Personnel Away
Do not step.
Do not stand on the machine or on
the accessories!
DANGER: Running Blade
Blade runs through this
area. Keep your hands away
from a running blade to
avoid severe injury. The
arrow indicates direction of
the blade.
Cutting Hazard
KEEP COVER CLOSED / KEEP HAND
OFF while the blade is running.
Turn power off before opening
cover. Failure to follow the warning
can result in severe injury.
Hazardous Voltage
TURN POWER OFF before
servicing. Failure to
following the warning can
result in severe injury.
Burn Hazard/Hot Surface
Hand Crush/Force from
Above
Crush hazard by vise
Loose Hand Hazard
KEEP HAND OFF. Do not
touch chip conveyor. Failure
to follow the warning can
result in severe injury.
Pinch Point/Hand Entanglement

1-8
Illustration: Safety Labels

1-9
HEARING PROTECTION
Always use ear protection!
When your machine is running, noise generated by the machine may come from the following:
Saw blade during cutting or material feed mechanism
Wire brush unit
Chip conveyor unit
Speed reducer
Hydraulic motor/pump
Belt transmissions variable speed motors
Blade motor
Coolant pump
Drive wheel
Parts not assembled tightly causing mechanical vibration
Our products pass noise testing less than 78 dBA. Noise level vary according to working conditions
and we recommend ear plugs or other hearing protection at all time. If your machine produces an
undesirable noise while it is running, you should:
1. Make sure all maintenance tasks have been performed following the prescribed maintenance
schedule (Refer to Section 8).
2. If maintenance does not seem to solve the problem, follow the troubleshooting procedures
under Section 9.
CE COMPLIANCE
Cosen’sCE model is designed to satisfy regulations of the Council Directive on the approximation of
the laws of the Member States relating to machinery (2006/42/EC) - Annex I Essential health and
safety requirements relating to the design and construction of machinery.
RISK ASSESSMENT
Risk assessment generally takes account of intended use and foreseeable misuse, including process
control and maintenance requirements. We made every effort to avoid any personal injury or
equipment damage during the machine design stage. However, the operator (or other people) still
needs to take precautions when handling any part of the machine that is unfamiliar and anywhere on
the machine that has potential hazards (e.g. the electrical control box).

Table of contents
Other Cosen Saw manuals

Cosen
Cosen V2230NC User manual

Cosen
Cosen AH-250H User manual

Cosen
Cosen MT-105 User manual

Cosen
Cosen C-325NC User manual

Cosen
Cosen SH-250R User manual

Cosen
Cosen C-650MNC User manual

Cosen
Cosen SH-700DM User manual

Cosen
Cosen SH-330ER User manual

Cosen
Cosen SH-7550S User manual

Cosen
Cosen C-510MNC User manual
Popular Saw manuals by other brands

Milwaukee
Milwaukee M18 FUEL 2732-20 Operator's manual

GÜDE
GÜDE 9000 PRO Translation of original operating instructions

Toolex
Toolex 535819 instruction manual

EINHELL
EINHELL TC-SM 2531 2 U Original operating instructions

F.F. Group
F.F. Group BPS 25/40V PLUS Original instructions

Scheppach
Scheppach 5901310901 Translation of original operating manual