6
7
9H
I
I
I
H
7
11
13
D
12
A
A
A
A
A
A
14
D
D
D
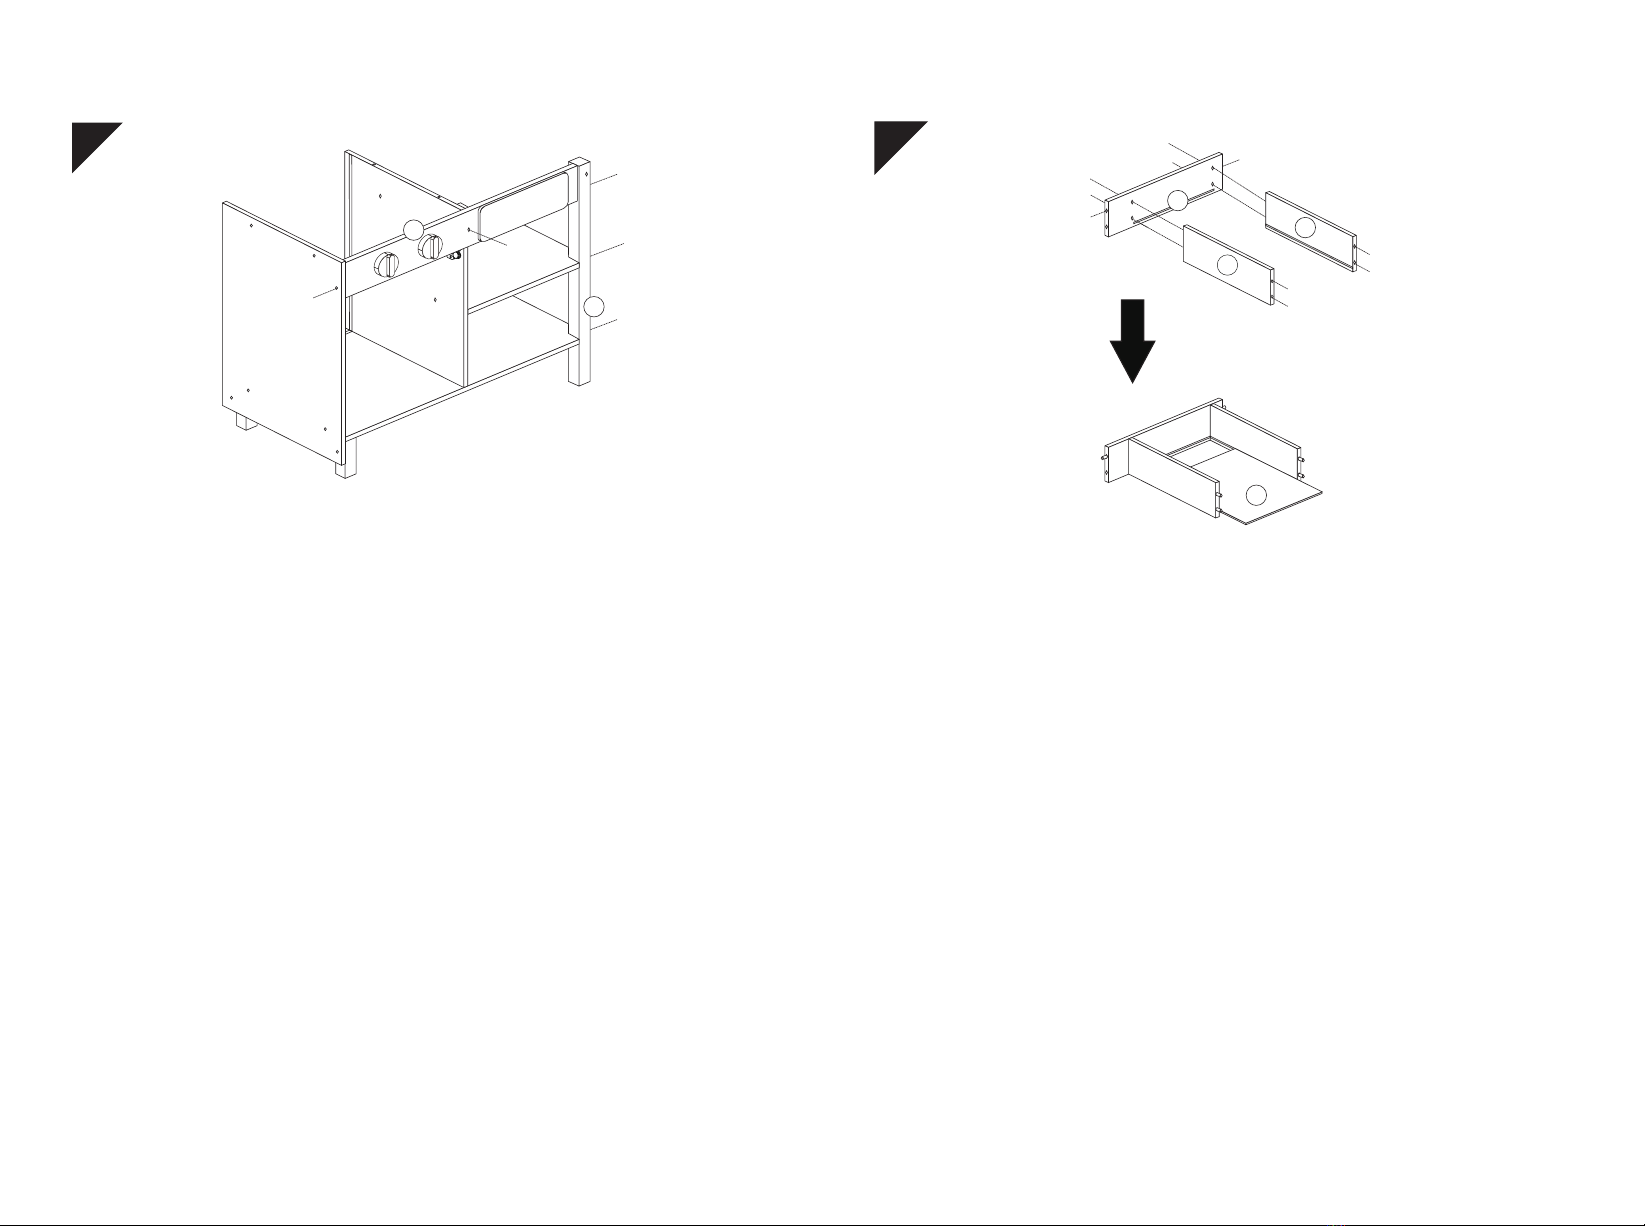
STEP 6: Assemble No.9 to No.2 and No.5 with screws H, then assemble No.7
with screws I.
SCHRITT 6: Montieren Sie Nr. 9 an Nr. 2 und Nr. 5 mit den Schrauben H,
dann montieren Sie Nr. 7 mit den Schrauben I.
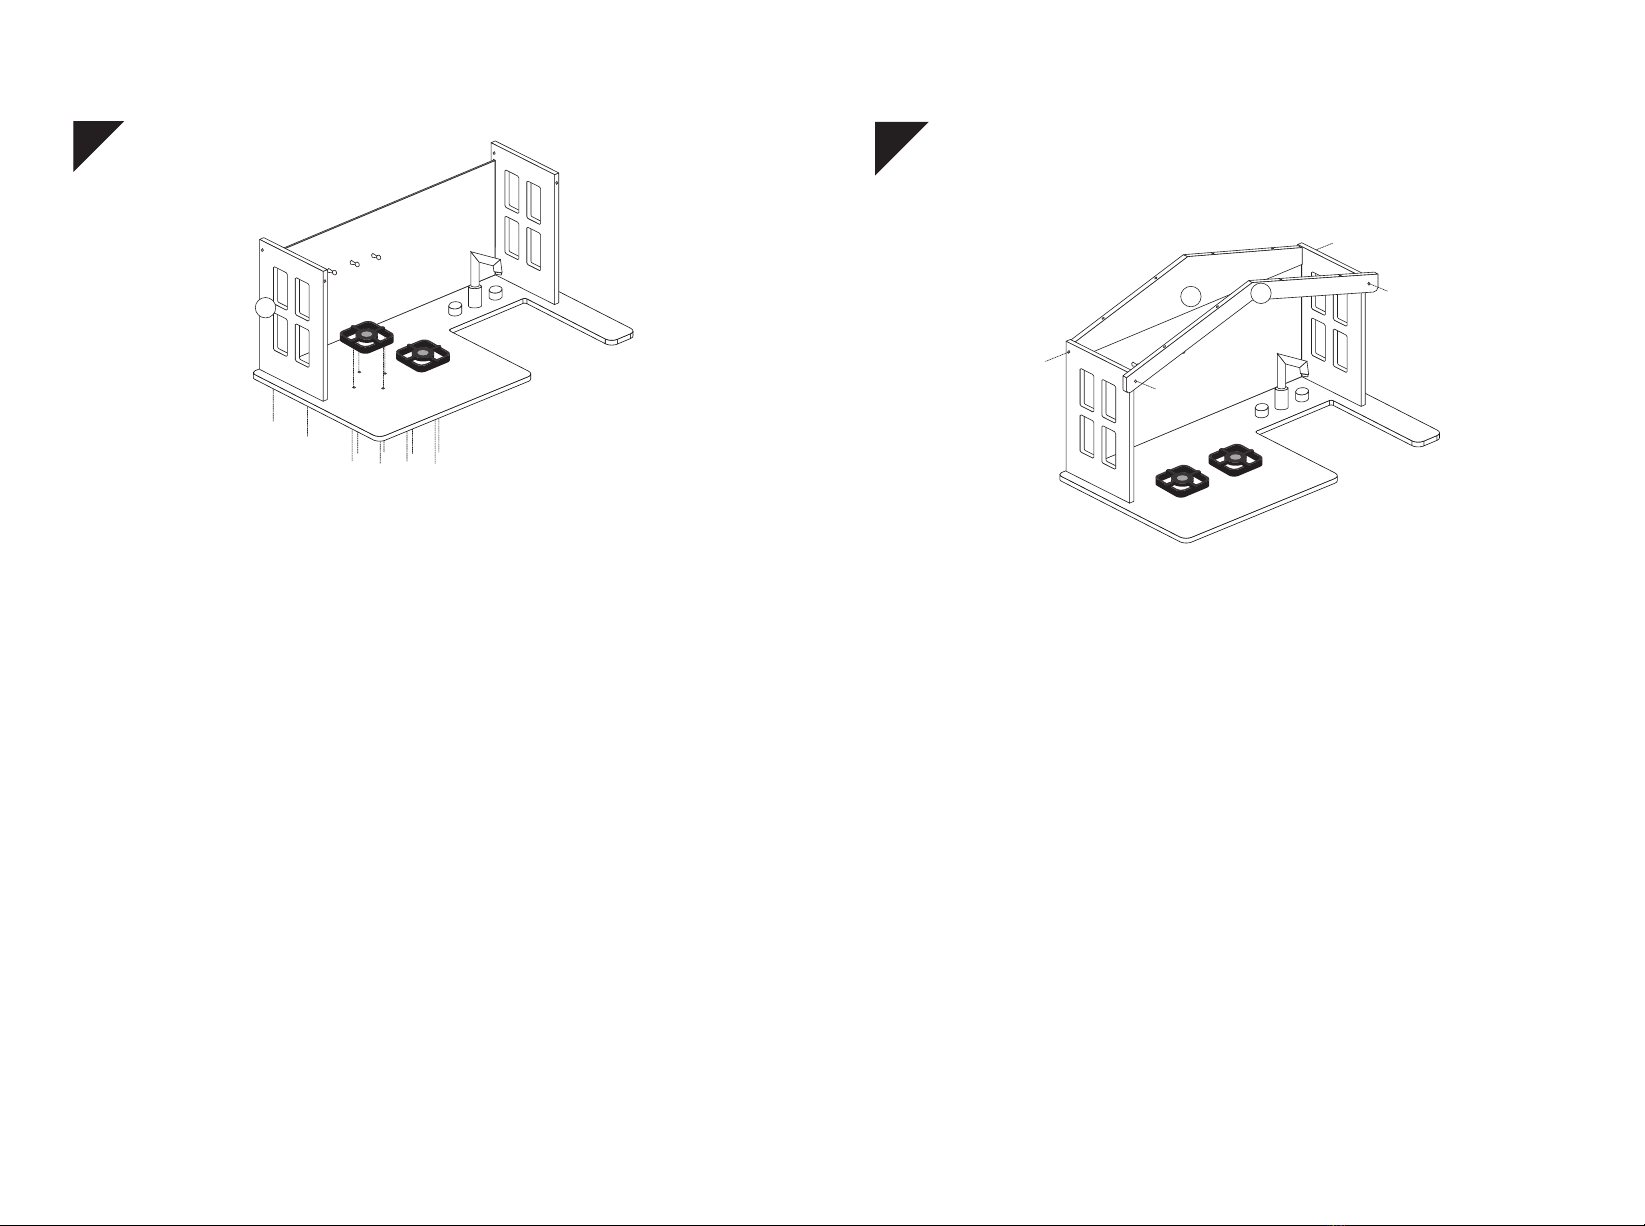
STEP 7: Assemble No.12 and No.13 to No.11 with screws D, then insert
wooden dowels A to No.11, 12, 13. Then insert No.14 to No.11, 12, 13.
SCHRITT 7: Montieren Sie Nr. 12 und Nr. 13 mit Schrauben D an Nr. 11 und
setzen Sie dann Holzdübel A in Nr. 11, 12 und 13 ein. Setzen Sie dann Nr. 14
in Nr. 11, 12, 13 ein.
ÉTAPE 6 : Assemblez Nº9 à Nº2 et Nº5 avec les vis H, puis assemblez Nº7
avec les vis I. ÉTAPE 7 : Assemblez Nº12 et Nº13 à Nº11 avec les vis D, puis insérez les
chevilles en bois A à Nº11, 12, 13. Insérez ensuite le Nº14 dans le Nº11, 12,
13.
PASO 6 Ensamble el N° 9 con el N° 2 y el N° 5 con tornillos H, luego
ensamble el N° 7 con tornillos I.
PASSO 6: Assemblare il n. 9 al n. 2 e al n. 5 con le viti H, quindi assemblare il
n. 7 con le viti I.
KROK 6: Przymocuj część nr 9 do części nr 2 i 5 za pomocą wkrętów H.
Następnie przymocuj część nr 7 za pomocą wkrętów I.
PASO 7: Ensamble los N° 12 y N° 13 con el N° 11 con tornillos D, luego
inserte las clavijas de madera A en los N° 11, N° 12 y N° 13. A continuación,
inserte el N° 14 en el N° 11. Luego inserte el N° 14 al N° 11, N° 12, N° 13.
PASSO 7: Assemblare il n. 12 e il n. 13 al n. 11 con le viti D, quindi inserire i
tasselli di legno A nei n. 11, 12, 13. Inserire quindi il n. 14 nei n. 11, 12, 13.
KROK 7: Przymocuj części nr 12 i 13 do części nr 11 za pomocą wkrętów D.
Następnie umieść drewniane kołki A w otworach w częściach nr 11, 12 i 13.
Zamocuj część nr 14 w szczelinach w częściach nr 11, 12 i 13.
12 13