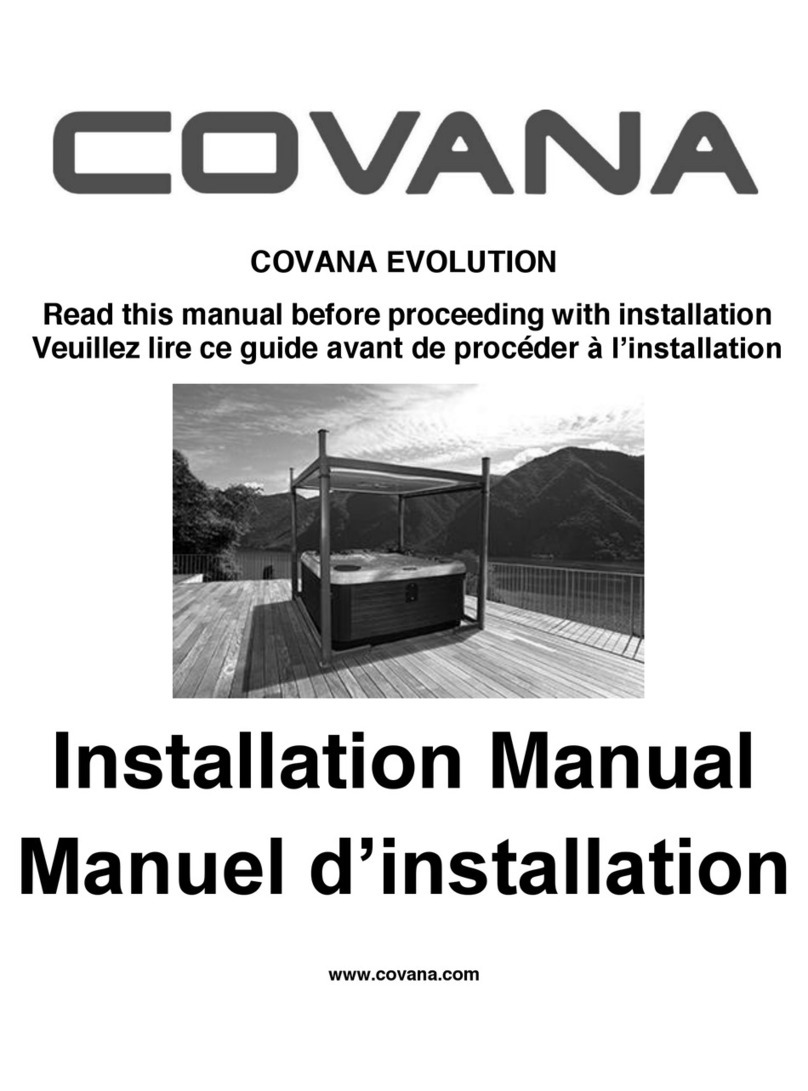
COVANA Evolution User manual

COVANA EVOLUTION
Read this manual before operating the Covana
Lisez ce manuel avant d'utiliser le Covana
User Manual
Manuel de l’utilisateur
www.covana.com

2
FRANÇAIS
La version française du manuel débute à la page 13.

3
WARNING
RISK OF ELECTROCUTION
ALL ELECTRICAL WIRING MUST BE DONE BY A QUALIFIED PROFESSIONAL.
THE WIRING MUST MEET THE REQUIREMENTS OF ANY LOCAL CODES AND REGULATIONS.
WARNING
RISK OF ELECTROCUTION
THE COVANA OPERATOR MUST BE CONNECTED TO A DEDICATED GFCI
(GROUND FAULT CIRCUIT INTERRUPTERS) PROTECTED CIRCUIT.
REFERENCE: MUST COMPLYWITH ALL LOCAL CODES AND REGULATIONS.
WARNING
RISK OF INJURY
DISCONNECT OR TURN OFF ALL POWER SUPPLY BEFORE STARTING
INTERVENTION ON THE COVANA.
WARNING
RISK OF INJURY
DO NOT OPERATE THE COVANA WHILE IN WATER.
WARNING
AVOID DROWNING RISK –ENTRAPMENT POSSIBLE.
FAILURE TO FOLLOW ALL INSTRUCTIONS MAY RESULT IN INJURY OR DROWNING.
INSPECT COVER PERIODICALLY.
POWER SAFETY COVER MEETING ASTM F1346-91 REQUIREMENTS.

4
5
feet
1.5
meters
IMPORTANT
ANY MODIFICATION TO THIS PRODUCT WILL VOID THE WARRANTY.
NOTICE
DO NOT STEP ON THE COVANA OPERATOR.
NOTICE
REMOVE THE CONTROL KEY AFTER OPERATING THE COVANA.
STORE THE KEY IN A SECURE LOCATION WHEN NOT IN USE.
BRING THE KEYWITH YOU IN THE HOT TUB TO PREVENT
UNAUTHORIZED OPERATION OF THE COVANA.
NOTICE
Roof
The key switch must be permanently mounted and
located 5 feet (1.5 m) away from the spa and 5 feet
(1.5 m) above the deck. User must have full view of
the Covana when operating.
5 feet
1.5 meters
Spa

5
OPERATINGINSTRUCTIONS
1.
Be sure all debris and snow is removed from the roof of the Covana before operating.
2.
Ensure there are no persons in the spa or near the spa.
3.
Ensure there are no obstructions in the way.
4.
The key must be held in the proper position until fully opened/closed.
5.
The Covana will automatically stop in both the fully opened and fully
closed modes.
6.
Turn the key clockwise to raise the roof.
7.
Turn the key counterclockwise to lower the roof.
8.
Key will automatically return to center/off position when released.
9.
Remove key when finished operating the Covana.
Using the escape hatch
From below
1.
Turn red handle by a quarter turn in either direction to retract the arms.
2.
Push straight up on the escape hatch and place to the side.
3.
Escape via the hole and call for assistance if required.
From above
1. Do not at any point put your weight on the escape hatch as it
may
hinder the person trapped below.
2.
Use the Covana key inside the slot located in the white centre part of the handle.
3.
Turn the handle until the key falls down.
4.
Continue to turn handle one quarter turn in either direction.
5.
Lift the escape hatch straight up by gripping its sides and place it to the side.
6.
Assist the person trapped below in climbing out of the spa via the hole.
SAFETY
Never operate the Covana until all persons and objects are out of the spa.
The Covana should only be operated by an adult.
Always remove key after use, never leave the key in the key switch.
Do not operate the Covana while in spa.
The Covana should be in full view when operating key switch.
Never leave the Covana partially opened or partially closed.
Lower the Covana in extreme wind conditions.
Objects inside the spa cannot be seen when the Covana is closed.
Supervise children at all times.
Never allow persons or objects on the roof.
Ensure that users of the Covana understand the escape hatch and how it operates.
Escape hatch is to be used for emergencies only.
Inspect escape hatch regularly and ensure that it can open both from the outside and the inside.
WARNING
RISK OF INJURY
DISCONNECT OR TURN OFF ALL POWER SUPPLY BEFORE STARTING
INTERVENTION ON THE COVANA OPERATOR.

6
MAINTENANCE AND CARE
Roof
1.
Wash only with mild detergent or soap and water.
2.
Inspect the cover every month for wear and/or damage.
Lift System
1.
The internal jacks will require yearly greasing, early fall is the best time. Use of “Loctite ViperLube High
Performance Synthetic Grease” recommended.
a.
Lower the roof until it is fully closed.
b.
Remove the five screws on the top plate of EACH post.
c.
Turn the key to activate the system.
d.
The four internal jacks will start to elevate but the roof will stay lowered on the spa.
e.
Elevate the jacks until the system stops on its own.
f.
Spray grease on all of the sliding and mechanical components.
g.
Cycle the system up and down a couple times and inspect if any further grease should be applied.
h.
Lower the system and reinsert the screws using a hand screwdriver as a power tool may break the
screws.
2.
The operator will require yearly greasing of its mechanical components.
a.
Disconnect or turn off the power.
b.
Remove the four screws on the operator cover.
c.
Remove the operator cover.
d.
Spray grease on all the mechanical components.
e.
Replace the operator cover and reconnect power.
Escape Hatch
1.
The escape hatch should be checked monthly to ensure function and safety.
a.
Ensure that the Covana cover is completely down on the spa prior to checking the escape hatch.
b.
Remove the key from the key switch.
c.
From above, use the Covana key and insert it into the slot located within the white centre portion of
the handle.
d.
Turn handle until the key drops into place.
e.
Continue to turn handle a quarter turn. You should feel resistance as the arms move. If no resistance
is felt ensure the key is through both slots. If the handle still does not turn the arms, contact your
dealer.
f.
Lift out escape hatch by gripping the sides.
g.
With escape hatch out, turn the bottom handle and the arms on the
side
should move in and out. After this is confirmed, turn the handle so
that
the arms are in. If they do not move, contact your dealer.
h.
Re-insert the escape hatch.
i.
With the key still in, turn the handle back by a quarter turn.
j.
Remove key.
k.
From the key switch, use the key to lift the cover back into the air and ensure that the arms
of the
escape hatch are extended as shown.
l.
Lower the cover cover back down and remove the key.

7
TROUBLESHOOTING
PROBLEM
CAUSE
SOLUTION
The Covana will not elevate or lower
motor is silent
no visible movement
No power
Check GFCI and reset if tripped.
Check breaker panel.
Check key switch –open the key switch
and review connections –might need
retightening.
Motor overheated –wait 30 minutes and
try again.
Review electrical troubleshooting guide.
Review operator’s manual for the proce-
dure to operate the Covana manually.
Consult Electrician.
The Covana will not elevate or lower
motor is humming
some visible movement
Posts are frozen
Remove all snow and ice from Covana
roof and release all shades/screens from
lower restraining brackets.
Turn key off and on a number of times to
free up frozen post.
Slap the side of each post to free up the
system and to break loose any ice/frost.
Spray a silicone base lubricant on the
telescoping aluminum sleeves.
Ensure proper seal –turn on all the jets
and air, lower roof, detect any leakage in
the area of the posts. If leakage is occur-
ring, loosen the outside post clamp and
push down on the roof until leakage stops
and retighten clamp and reinsert safety
screw.
Perform the jack greasing procedure.
Mechanical issue
Call your dealer.
Shades or screens
Too loose
Do not retract properly
Restraining bar disconnects from
restraining brackets when fully lowered
Insufficient winding of
the internal spring
Review the installation procedure and add
extra tension.
View video on YouTube for procedure.
Escape hatch does not open
Call your dealer
Mechanical issue

8
MANUAL OPERATION IN CASE OF POWER FAILURE
WARNING
RISK OF INJURY
DISCONNECT OR TURN OFF ALL POWER SUPPLY BEFORE STARTING
INTERVENTION ON THE COVANA OPERATOR.
1.
Disconnect or turn power off.
2.
Unscrew and remove the four screws at the bottom of the operator and take cover off.
3.
Use a 1/2" or 13 mm hexagon socket wrench to operate the operator by turning the input shaft.
SLOWLY TURN THE SHAFT - STOP IF EXCESS TENSION IF FELT.
NEVER USE A POWER TOOL AS THIS WILL DAMAGE THE UNIT.
4.
Turn the input shaft clockwise to lower the roof and counterclockwise to raise the roof.
5.
Reinstall the operator cover.
6.
Reconnect or turn on power.
COVER
OPERATOR

9
SAFETY
WARNING
AVOID DROWNING RISK –ENTRAPMENT POSSIBLE
FAILURE TO FOLLOW ALL INSTRUCTIONS MAY RESULT IN INJURY OR DROWNING.
INSPECT COVER PERIODICALLY —POWER SAFETY COVER MEETING ASTM F1346-91
REQUIREMENTS.
Never operate the Covana until all persons and objects are out of the spa.
The Covana should only be operated by an adult.
Always remove key after use, never leave the key in the key switch.
Do not operate the Covana while in tub.
The Covana should be in full view when operating the key switch.
Never leave the Covana partially opened or partially closed.
Lower the Covana in extreme wind conditions.
Objects inside the spa cannot be seen when the Covana is closed.
Supervise children at all times.
Inspect roof for premature wear.
Never allow persons or objects on the roof.
Actual labels on all four (4) exterior sides of the COVANA EVOLUTION.
If the original labels are damaged or no longer meet legibility requirements for safe viewing distance, please obtain
replacement labels by contacting Covana or your retailer.

12/03/2015
285, Saint-Georges, Drummondville, QC, J2C 4H3 Canada
order@covana.com 1-877-278-8010 1-819-477-7212
COVANA EVOLUTION Consumer Limited Warranty 2015
WARRANTIES FOR THE EVOLUTION SERIES
The warranty for the EVOLUTION Series covers parts and labor for the first twelve (12) months after purchase. After twelve (12) months the
warranty continues to cover 100% of part replacement until the end of terms described within this Limited Warranty. Canimex Inc. will not
cover charges related to the removal of the defective part and installation of the new one, as well as travel expenses. Canimex Inc. will cover
the cost of shipping of parts for the first 90 days from the date of sale. Contact your dealer for details regarding any such charges.
PERFORMANCE
To obtain service in the event of a defect covered by this Limited Warranty, notify your EVOLUTION dealer as soon as possible and use all
reasonable means to protect the EVOLUTION from further damage. Upon proof of purchase, a designated service representative will correct
the defect subject to the terms and conditions contained in this Limited Warranty. Providing access to affect the repair is the responsibility of
the EVOLUTION owner. In the event that the EVOLUTION is removed to a repair facility for repair and reinstalled, the cost of removal and
reinstallation will be the responsibility of the EVOLUTION owner. Any replacement shall retain the remaining portion of the original warranty.
In the event that you are unable to obtain service from you dealer please contact Covana Customer Service Department 1-877-278-8010 or
via email at service@covana.com.
WARRANTY LIMITATIONS
This Limited Warranty is void if; (i) Canimex Inc. or its agent determines that the EVOLUTION has been subject to alteration, neglect, misuse,
abuse or improper adjustment or installation of the equipment, (ii) used with equipment not covered in this warranty, (iii) installed or relocated
to the extent that problems are attributable to the installation or relocation, (iv) located on any support surface other than that recommended in
the installation manual; and/or (v) failure caused by accident, Acts of God or other causes beyond the control of Canimex Inc. EVOLUTION's
in commercial use are excluded from any coverage whatsoever. The EVOLUTION owner accepts liability for repair work performed by
anyone other than the designated Covana dealer.
LIMITATIONS
This Limited Warranty takes the place of all other warranties either expressed or implied. All warranty work must be performed by an
authorized agent or Canimex Inc. Customer may not dismantle the EVOLUTION and any attempt to dismantle systems other than describe
herein, constitutes a modification or alteration of the EVOLUTION which may void the applicable warranty. No party, other than Canimex Inc.
is authorized to alter this Limited Warranty in any way. Failure to install the EVOLUTION on improper foundation as per the installation
manual will void the warranty. Warranty is void if the EVOLUTION has been used in a non-residential application or in an application for which
it was not designed for.
DISCLAIMERS AND LEGAL RIGHTS
This Limited Warranty gives you specific legal rights. You may also have other rights that vary depending on country, state or province. The
liability of Canimex Inc. under this limited warranty, if any, shall not exceed the original amount paid for the defective product. Prompt return of
a completed warranty registration (by mail or e-mail) protects your warranty rights.
This Limited Warranty is extended solely to the original purchaser of the EVOLUTION purchased after January 1st, 2015 and installed for
residential recreational use only. The warranty shall commence upon the original date of purchase for the EVOLUTION.
WHAT'S COVERED?
5 Years Structure -The aluminum frame, brackets and telescoping sleeves are warranted against fracture, deformation and
fatigue, due to defects in materials and workmanship for five (5) years from original date of purchase.
2 Years Cover - The Fiberglass Cover is warranted against fracture and deformation for a period of two (2) years from original date
of purchase. Fading/weathering of surface and surface abrasions will occur naturally over time and are not considered defects.
Improper spa water chemistry and misuse of spa chemicals may cause discoloration of the inner surface. Inner surface
discoloration is not considered a defect and is not covered under this warranty.
3 Years Powder Coat Paint Finish –The powder paint on all surfaces is warranted against chipping and peeling for three (3) years
from original date of purchase. Fading/weathering of surface and surface abrasions will occur naturally over time and are not
considered defects. Chipping of power paint on hardware may occur during assembly and servicing of the EVOLUTION. These
chips are not covered under this warranty.
3 Years Mechanical –The mechanical components including; the motor, chains, drive shafts and jacks are warranted against
malfunctions due to defects in materials or workmanship for three (3) years from original date of purchase.
2 Years Electrical –The electrical components including; cables, electrical wires, and key switch controller are warranted against
malfunctions due to defects in materials or workmanship for two (2) years from original date of purchase.
Warranties for Other Components –All other components not mentioned, including but not limited to the custom seal and
accessories, are to be free of defects in materials and workmanship at the time of delivery and installation.
208332 / Covana037-EN
WARRANTY REGISTRATION PROGRAM
You can register your product warranty on our website: www.covana.com/warranty.html
We want our customers to enjoy their Covana products and in the case of warranty work needed, filling out this
form will speed up the process as it is important to us that we have your product up and running as fast as
possible.
No internet access?
Call us at 1-877-278-8010 to register over the phone
Or
Complete and mail in the form below to register or fax to 1-819-477-7212
Mail this form to: CANIMEX INC.
345 du Moulin
Door 61 –64
Drummondville, (Québec)
Canada
J2B 0V1
Covana Model: Serial Number:
Name:
Street Address: _City:
Zip Code/Postal Code: Prov/State: Country:
Phone Number:
Store Name of Purchase:
Name or Company of Installer:
Date of Install: Copy of Sales Invoice: Attached
285, Saint-Georges, Drummondville, QC, J2C 4H3 Canada
admin@covana.com 1-877-278-8010 1-819-477-7212

12
Covana041-EN-FR / 213631
Contact your dealer for all related service issues.
Made in Canada
by Canimex
www.covana.com
PATENTED
CANADA 2,532,429
US 11/162,557
UK 0515168.3
AUSTRALIA 2006200251

13
COVANA EVOLUTION
Lisez ce manuel avant d'utiliser le Covana
Manuel de l’utilisateur
www.covana.com

14
AVERTISSEMENT
RISQUED'ÉLECTROCUTION
TOUT LE CÂBLAGE DOIT ÊTRE EFFECTUÉ PAR UN PROFESSIONNEL QUALIFIÉ.
LE CÂBLAGE DOIT RESPECTER TOUS LES CODES ET LES RÈGLEMENTS
MUNICIPAUX APPLICABLES.
AVERTISSEMENT
RISQUED'ÉLECTROCUTION
LE MOTEUR DU COVANA DOIT ÊTRE RACCORDÉ À UN CIRCUIT PROTÉGÉ
PAR UN DISJONCTEUR DE MISE À LA TERRE.
RÉFÉRENCE : DOIT SE CONFORMER À TOUS LES CODES ET RÈGLEMENTS MUNICIPAUX.
AVERTISSEMENT
RISQUE DE BLESSURES
DÉBRANCHEZ OU ÉTEIGNEZ L'ALIMENTATION ÉLECTRIQUE AVANT D'ENTREPRENDRE
TOUTE INTERVENTION SUR LE COVANA.
AVERTISSEMENT
RISQUE DE BLESSURES
NE PAS FAIRE FONCTIONNER LE COVANA LORSQUE VOUS ÊTES DANS L'EAU.
AVERTISSEMENT
ÉVITEZ TOUT RISQUE DE NOYADE
RISQUE DE PRISE AU PIÈGE
LE NON-RESPECT DE TOUTES LES CONSIGNES PEUT ENTRAÎNER DES BLESSURES OU LA NOYADE.
INSPECTEZ LE TOIT RÉGULIÈREMENT.
CONFORME À LA NORME ASTM F1346-91 : POWER SAFETY COVER.

15
5
pieds
1,5
mètre
IMPORTANT
TOUTE MODIFICATION DE CE PRODUIT ANNULE LA GARANTIE.
AVIS
NE PAS MARCHER SUR LE MOTEUR DU COVANA.
AVIS
RETIREZ LA CLÉ DE L’INTERRUPTEUR QUAND VOUS AVEZ FINI D’UTILISER LE COVANA.
RANGEZ LA CLÉ DANS UN ENDROIT SÛR POUR QU’ELLE NE SOIT PAS UTILISÉE.
AMENEZ LA CLÉ AVEC VOUS DANS LE SPA POUR EMPÊCHER
UN FONCTIONNEMENT PAR INADVERTANCE DU COVANA.
AVIS
Toit
L’interrupteur à clé doit être fixé de façon
permanente à une distance de 5 pieds (1,5 m) du spa
et à 5 pieds (1,5 m) au-dessus du sol avec une vue
directe sur le Covana lors de son fonctionnement.
5 pieds
1,5 mètre
Spa

16
CONSIGNES D'UTILISATION
1.
Enlevez tout débris et neige du toit avant de le mettre en marche.
2.
Vérifiez qu'il n'y ait personne dans le spa ou à proximité.
3.
Vérifiez que le chemin n'est pas obstrué.
4.
La clé doit être maintenue dans la bonne position jusqu'à ce que le toit
soit
entièrement ouvert / fermé.
5.
Le Covana s'arrêtera automatiquement aussi bien en mode totalement ouvert que
totalement fermé.
6.
Tournez la clé dans le sens horaire pour monter le toit.
7.
Tournez la clé dans le sens antihoraire pour baisser le toit.
8.
La clé reviendra automatiquement au centre, en position arrêt, lorsque relâchée.
9.
Retirez la clé quand vous avez fini d’utiliser le Covana.
Utilisation de la trappe d'évacuation
De l’intérieur
1.
Tournez la poignée rouge d'un quart de tour dans n'importe quel
sens
pour rétracter les bras.
2.
Poussez la trappe d'évacuation vers le haut et placez-la sur le côté.
3.
Sortez par le trou et appelez de l'aide si nécessaire.
De l’extérieur
1.
Ne placez jamais votre poids sur la trappe d'évacuation,
car
cela pourrait nuire à la personne prise au piège en
dessous.
2.
Utilisez la clé du Covana dans la fente située dans la partie centrale blanche de la poignée.
3.
Faites tourner la poignée jusqu'à ce que la clé se mette en place.
4.
Continuez à tourner la poignée d'un quart de tour dans n'importe quel sens.
5.
Soulevez la trappe d'évacuation tout droit vers le haut en la tenant par les deux côtés, puis placez-la de côté.
6.
Aidez la personne prise au piège en dessous du couvercle à s'extraire du spa par le trou
d'évacuation.
SÉCURITÉ
Ne manœuvrez jamais le Covana en présence de personnes ou d'objets dans le spa de nage.
Le Covana ne doit être opéré que par des adultes.
Retirez toujours la clé après usage, ne laissez jamais la clé dans l'interrupteur.
Ne manœuvrez jamais le Covana lorsque vous êtes dans le spa de nage.
Veillez à avoir une vue directe sur le Covana lorsque vous actionnez l'interrupteur à clé.
Ne laissez jamais le Covana partiellement ouvert ou fermé.
Abaissez le Covana dans les conditions de grand vent.
Les objets à l'intérieur du spa de nage ne sont pas visibles quand le Covana est fermé.
Surveillez les enfants en tout temps.
Ne laissez jamais personne monter sur le Covana ou placer des objets sur le toit.
Assurez-vous que les utilisateurs du Covana sont familiers avec la trappe d'évacuation et son fonctionnement.
La trappe d'évacuation doit être utilisée en cas d'urgence uniquement.
Inspectez régulièrement la trappe d'évacuation et assurez-vous qu'elle peut être ouverte à la fois de l'extérieur
et de l'intérieur
AVERTISSEMENT
RISQUE DE BLESSURES
DÉBRANCHEZ OU ÉTEIGNEZ L'ALIMENTATION ÉLECTRIQUE AVANT D'ENTREPRENDRE
TOUTE INTERVENTION SUR LE MOTEUR DU COVANA.

17
MAINTENANCE ET ENTRETIEN
Toit - Nettoyez uniquement avec un détergent doux ou du savon et de l'eau.
Système de levage
1.
Les vérins internes doivent être graissés tous les ans. Le début de l'automne est le meilleur moment.
L'utilisation de la graisse “Loctite ViperLube High Performance Synthetic Grease” est recommandée.
a.
Baissez le toit jusqu'à ce qu'il soit totalement fermé.
b.
Enlevez les cinq vis de la plaque supérieure de CHAQUE poteau.
c.
Tournez la clé pour activer le système.
d.
Les quatre vérins internes commenceront à se lever, mais le toit restera baissé sur le spa.
e.
Faites monter les vérins jusqu'à ce que le système s'arrête de lui-même.
f.
Vaporisez de la graisse sur tous les composants mécaniques et de coulissement.
g.
Faites fonctionner le système en le levant et le baissant deux ou trois fois et vérifiez s'il est
nécessaire d'appliquer plus de graisse.
h.
Baissez le système et replacez les vis en utilisant un tournevis manuel, car un outil électrique
pourrait casser les vis.
2.
Les composants mécaniques du moteur doivent être graissés tous les ans.
a.
Débranchez ou éteignez l'alimentation.
b.
Enlevez les quatre vis du couvercle du moteur.
c.
Enlevez le couvercle.
d.
Vaporisez de la graisse sur tous les composants mécaniques.
e.
Remettez le couvercle du moteur et rebranchez l'alimentation électrique.
Trappe d'évacuation
1.
Inspectez la trappe d'évacuation tous les mois pour vous assurer qu'elle fonctionne bien et sans risque.
a.
Assurez-vous que le couvercle Covana est complètement abaissé sur le spa de nage avant
de vérifier la trappe d'évacuation.
b.
Retirez la clé de l'interrupteur à clé.
c.
En vous plaçant au-dessus, utilisez la clé du Covana
dans la fente
située dans la partie centrale blanche de la
poignée.
d.
Tournez la poignée jusqu'à ce que la clé se mette en place.
e.
Continuez à tourner la poignée d'un quart de tour. Vous
devriez
percevoir une certaine résistance tandis que les bras
se déplacent. Si
vous ne percevez aucune résistance,
assurez-vous que la clé traverse
les deux fentes. Si la
poignée ne tourne toujours pas les bras,
contactez votre
détaillant.
f.
Soulevez la trappe d'évacuation en la tenant par les deux côtés.
g.
Une fois la trappe d'évacuation sortie, tournez la poignée du bas, les
bras sur
les côtés devraient alors se rétracter et se dégager. Ceci
confirmé, tournez la poignée de façon à ce que les bras se
remettent en place. S'ils ne se
déplacent pas, contactez votre
détaillant.
h.
Remettez la trappe d'évacuation en place.
i.
Tout en gardant la clé insérée, faites tourner la poignée vers
l'arrière d'un
quart de tour.
j.
Retirez la clé.
k.
Avec l'interrupteur à clé, levez le Covana et assurez-vous que
les bras de
la trappe d'évacuation sont étendus comme illustré.
l.
Abaissez à nouveau le Covana puis retirez la clé.

18
GUIDE DE RÉSOLUTION DE PROBLÈMES POUR COVANA
PROBLÈME
CAUSE
SOLUTION
Le Covana ne se lève pas ou ne s’abaisse pas
Le moteur est silencieux
Pas de mouvement visible
Pas d’alimentation
électrique
Vérifiez le disjoncteur de mise à la
terre et réinitialisez-le s’il a sauté.
Vérifiez le panneau du disjoncteur.
Vérifiez l’interrupteur à clé – ouvrez-le
et vérifiez les branchements –ils
pourraient avoir besoin d’être
resserrés.
Surchauffe du moteur –attendez 30
minutes et essayez à nouveau.
Consultez le guide des pannes
électriques.
Référez-vous au manuel de
l’opérateur pour activer le Covana
manuellement.
Consultez un électricien.
Le Covana ne se lève ou ne s’abaisse pas
Le moteur fait du bruit
Un mouvement est visible
Les poteaux sont gelés
Enlevez toute la neige et la glace sur
le toit du Covana et retirez toutes les
toiles / moustiquaires des crochets
inférieurs de restriction.
Tournez la clé pour éteindre et
allumer un nombre de fois suffisant
afin de dégripper un poteau gelé.
Tapez le côté de chaque poteau pour
dégripper le système et enlever des
bouts de glace / gel.
Vaporisez un lubrifiant à base de
silicone sur les manchons
télescopiques en aluminium.
Vérifiez l’étanchéité – allumez tous les
jets et bulles, baissez le toit, détectez
s’il y a la moindre fuite dans l’espace
des poteaux. En cas de fuite, relâchez
la pince extérieure du poteau et
poussez vers le bas sur le toit jusqu’à
ce que la fuite s’arrête. Resserrez la
pince et remettez la vis de sécurité.
Effectuez la procédure de graissage
du vérin.
Problème mécanique
Contactez votre revendeur
Toiles ou moustiquaires
Trop lâches
Ne se rétractent pas correctement
Les barres de restriction se débranchent
des crochets de restriction lorsque le toit
est totalement baissé
Déroulement insuffisant
Révisez la procédure d’installation et
donnez une tension supplémentaire.
Regardez le film sur YouTube (en
anglais) pour suivre la procédure.
La trappe d’évacuation ne s’ouvre pas
Problème mécanique
Contactez votre revendeur

19
FONCTIONNEMENT MANUEL EN CAS DE
COUPURE D'ÉLECTRICITÉ
AVERTISSEMENT
RISQUE DE BLESSURES
DÉBRANCHEZ OU ÉTEIGNEZ L'ALIMENTATION ÉLECTRIQUE AVANT D'ENTREPRENDRE
TOUTE INTERVENTION SUR LE MOTEUR DU COVANA.
1.
Débranchez ou éteignez l'alimentation.
2.
Dévissez et enlevez les quatre vis du couvercle du moteur et retirez le couvercle.
3.
Utilisez une clé à douille hexagonale de 1/2" ou 13 mm pour faire fonctionner l'appareil en tournant l'arbre
d'entrée.
TOURNEZ L'ARBRE AVEC PRÉCAUTION - ARRÊTEZ SI VOUS SENTEZ UNE TROP GRANDE TENSION.
NE JAMAIS UTILISER D'OUTIL ÉLECTRIQUE, CAR CELA ENDOMMAGERAIT LE MOTEUR.
4.
Tournez l'arbre d'entrée dans le sens horaire pour baisser le toit et dans le sens antihoraire pour le monter.
5.
Remettez le couvercle sur le moteur.
6.
Rebranchez ou allumez le moteur.
COUVERCLE
MOTEUR

20
SÉCURITÉ
AVERTISSEMENT
ÉVITEZ TOUT RISQUE DE NOYADE
RISQUE DE PRISE AU PIÈGE
LE NON-RESPECT DE TOUTES LES CONSIGNES PEUT ENTRAÎNER DES BLESSURES OU LA NOYADE.
INSPECTEZ LE TOIT RÉGULIÈREMENT.
CONFORME À LA NORME ASTM F1346-91 : POWER SAFETY COVER.
Ne jamais faire fonctionner le Covana si des personnes ou des objets se trouvent dans le spa.
Le Covana doit uniquement être utilisé par un adulte.
Toujours enlever la clé après utilisation. Ne jamais laisser la clé dans l'interrupteur.
Ne pas faire fonctionner le Covana pendant que vous êtes dans le spa.
Vous devez toujours bien voir le Covana lorsque vous tournez la clé dans l'interrupteur.
Ne jamais laisser le Covana partiellement ouvert ou partiellement fermé.
Baissez le Covana en cas de vents forts.
Aucun objet ne peut être visible sous le toit lorsqu'il est fermé.
Surveillez les enfants à tout moment.
Vérifiez que le toit ne s'use pas prématurément.
Ne jamais laisser personne aller sur le toit ou y poser des objets.
Étiquettes telles qu'elles apparaissent sur les quatre (4) côtés extérieurs du COVANA EVOLUTION.
Si les étiquettes d'origine sont endommagées ou ne satisfont plus les conditions de lisibilité à
distance, veuillez vous procurer des étiquettes de remplacement
en contactant Covana ou votre détaillant
Other manuals for Evolution
5
Table of contents
Languages:
Other COVANA Hot Tub manuals

COVANA
COVANA OASIS User manual

COVANA
COVANA OASIS User manual

COVANA
COVANA C-HOR User manual

COVANA
COVANA LEGEND User manual

COVANA
COVANA LEGEND User manual

COVANA
COVANA HORIZON User manual

COVANA
COVANA OASIS User manual

COVANA
COVANA LEGEND User manual

COVANA
COVANA Evolution User manual

COVANA
COVANA LEGEND User manual
Popular Hot Tub manuals by other brands

Vicoustic
Vicoustic VicBooth Spa instruction manual

Aquatic
Aquatic Serenity 5 AI5AIR6636 specification

Coast Spas
Coast Spas INFINITY EDGE SWIM owner's manual

Watkins
Watkins SOLANA TX Pre-delivery instructions

Aquatic
Aquatic SERENITY STUDIO 23 Specification sheet

Aqua Pulse Spas
Aqua Pulse Spas regency designer user manual