COVANA LEGEND User manual
Other COVANA Hot Tub manuals

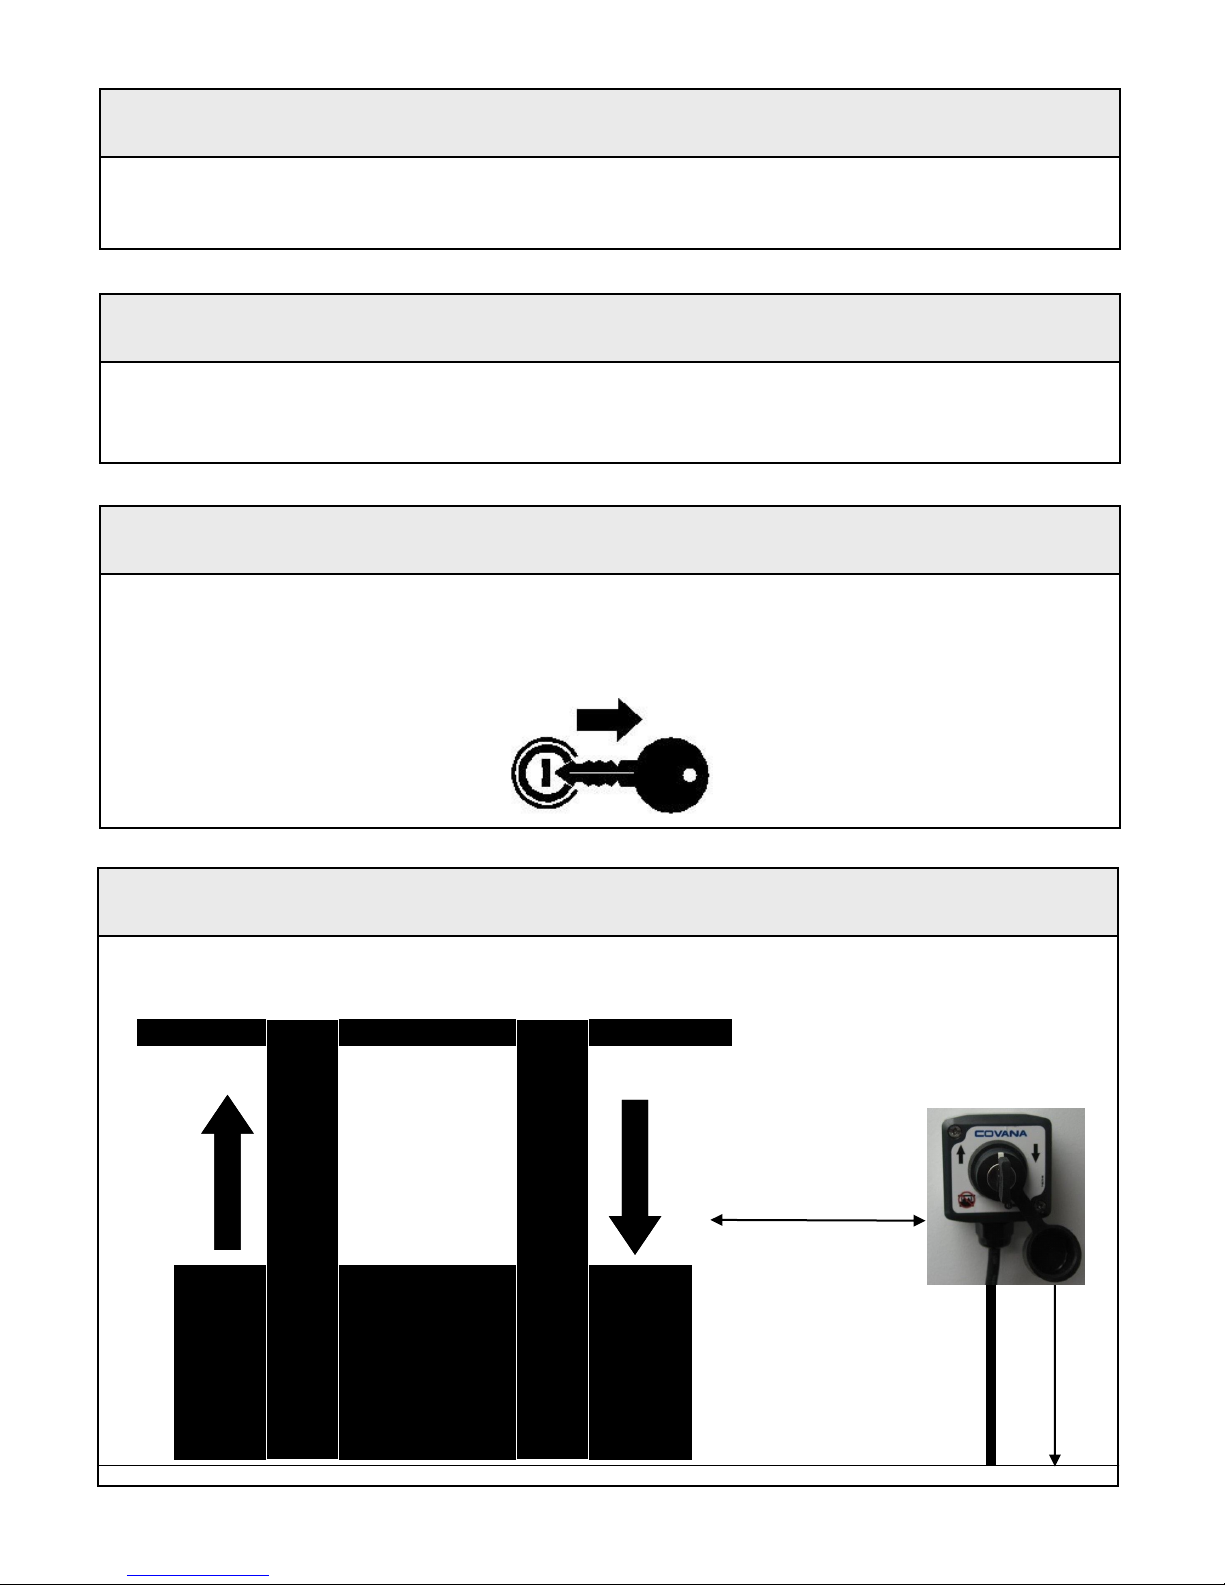
COVANA
COVANA OASIS User manual

COVANA
COVANA OASIS User manual

COVANA
COVANA C-HOR User manual

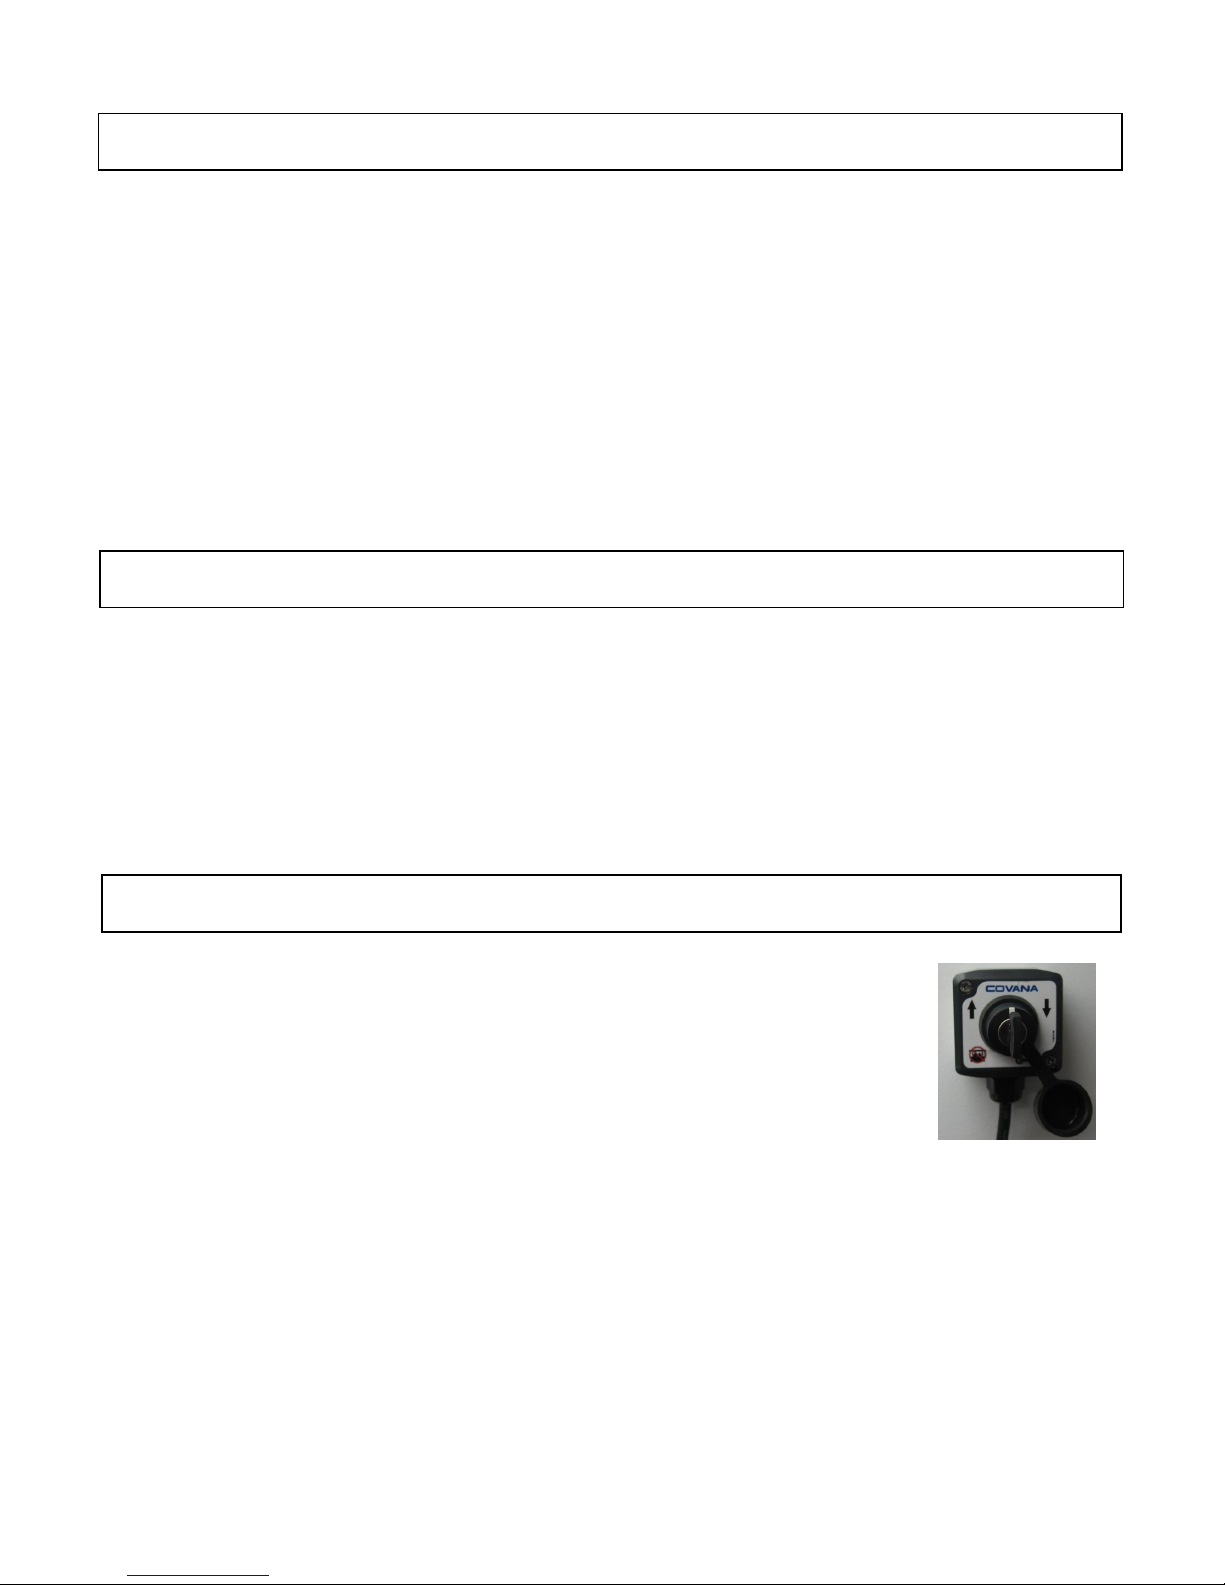
COVANA
COVANA LEGEND User manual

COVANA
COVANA OASIS User manual

COVANA
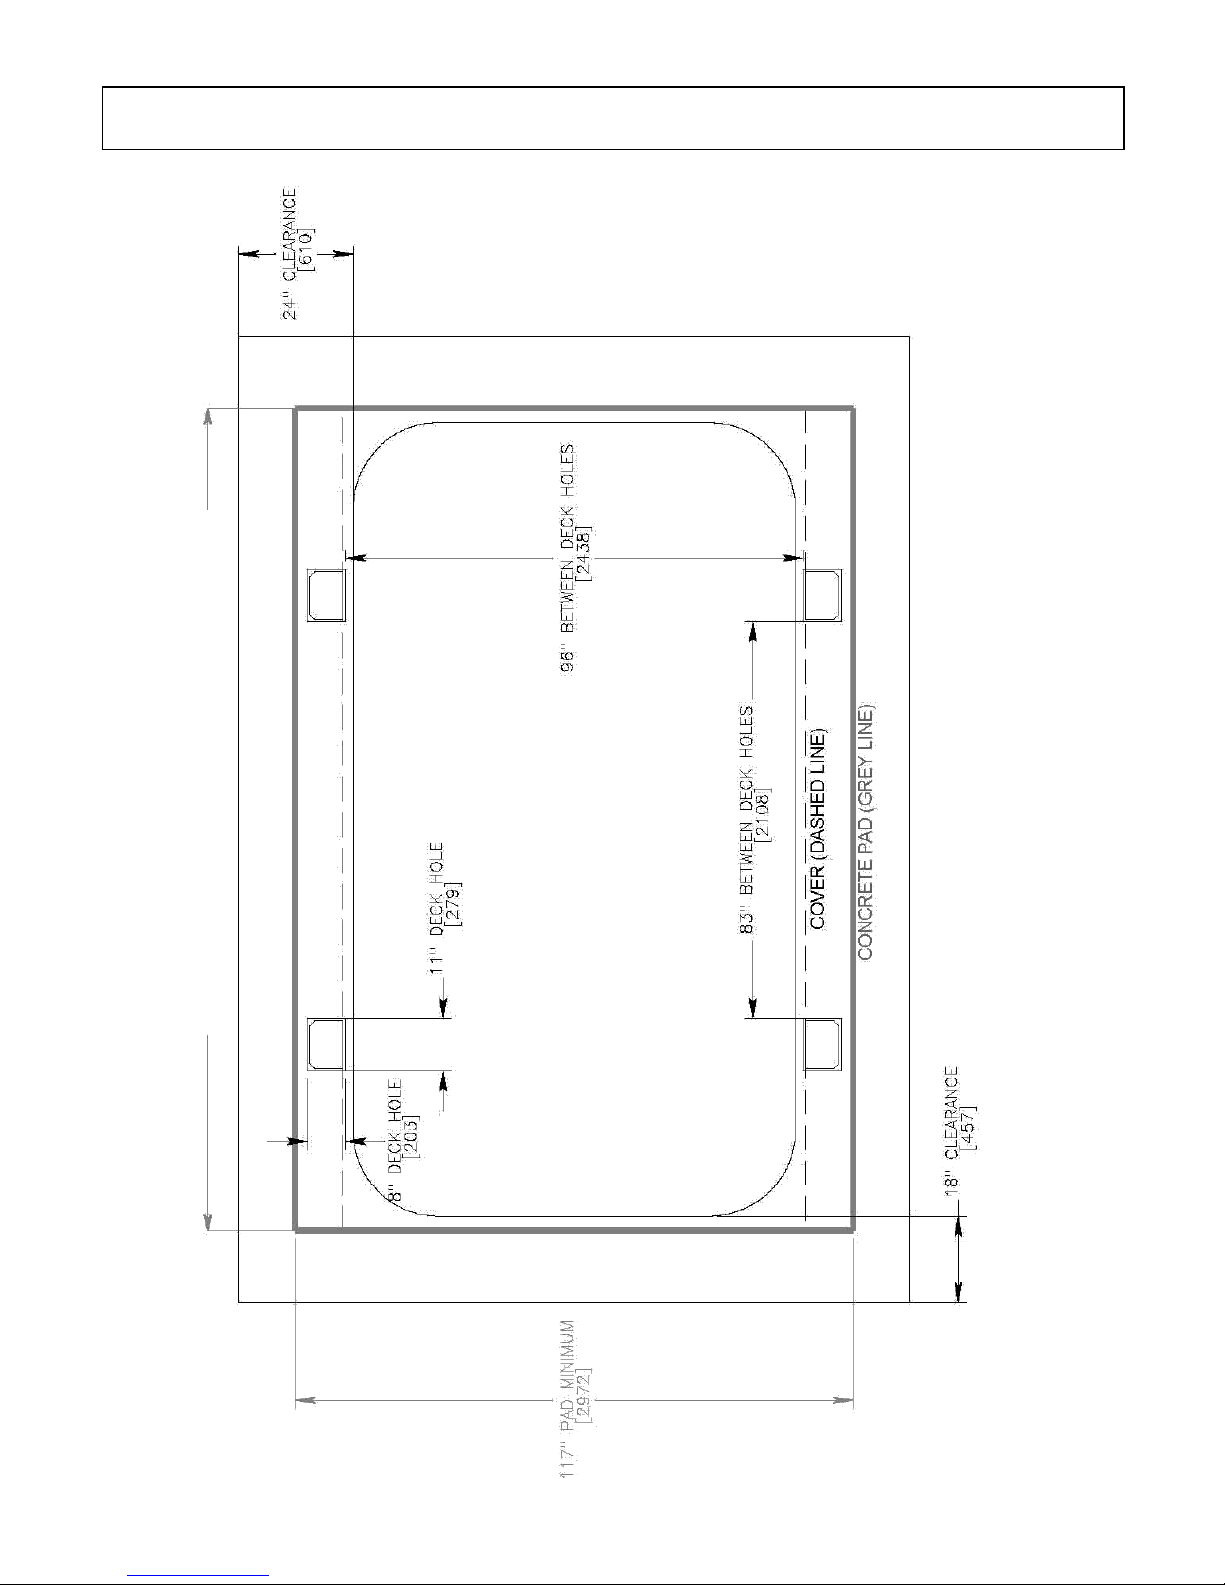
COVANA LEGEND User manual

COVANA
COVANA Evolution Series User manual

COVANA
COVANA Evolution User manual

COVANA
COVANA LEGEND User manual

COVANA
COVANA Evolution User manual

Popular Hot Tub manuals by other brands


 owner's manual")


CalderaSpas
CalderaSpas CalderaSpas Utopia Series owner's manual

anko
anko SS-601A user manual

CalderaSpas
CalderaSpas CANTABRIA owner's manual

Dimension One Spas
Dimension One Spas HYDRO SPORT Installation and owner's guide

Bestway
Bestway Lay-Z-Spa Maldives HydroJet Pro manual

Dimension One Spas
Dimension One Spas Nautilus Specifications