EHB-100
USER MANUAL v1.0
1723 W. 4th Street Tempe Arizona 85281
P: 800.638.6104 | F: 480.966.6728 | E: sales@covid.com | www.covid.com Page 2
Introduction
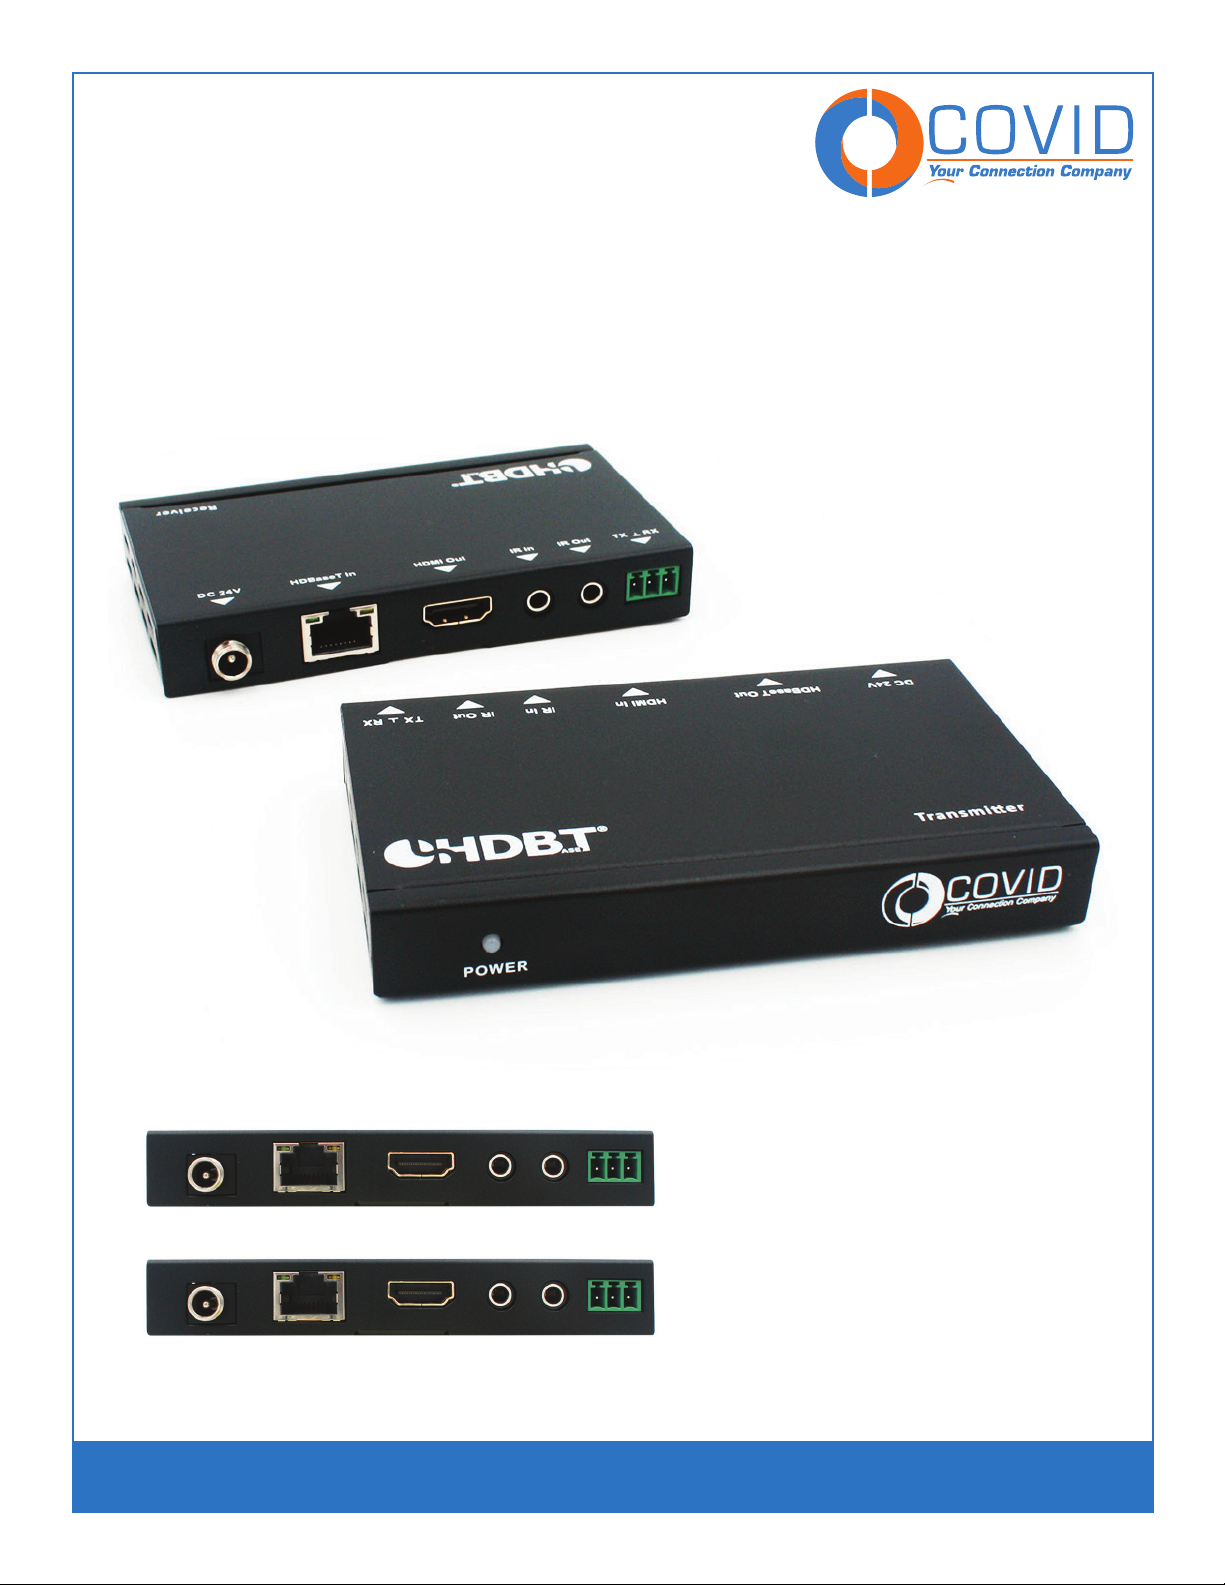
This HDBaseT transmitter/receiver set can extend HDMI over a single CAT5e/6/6A cable. This product
oers Bi-directional IR, RS-232 and Bi-directional PoC making any professional A/V set-up more e-
cient and easy to use. Uncompressed video and audio can be transmitted up to 230ft/70m. This design
of HDBaseT™ technology allows for full usage of HDMI and controls over CAT5e/6/6A cable.
Features
•HDMI 1.4b, HDCP 2.2 and 1.4
•Video resolutions up to 4K2K@30Hz
•Audio up to 7.1 channels of High Denition audio pass through (LPCM, Dolby TrueHD, and DTS-HD
Master Audio).
•Supports HDMI High Bit Rate (HBR) audio pass through
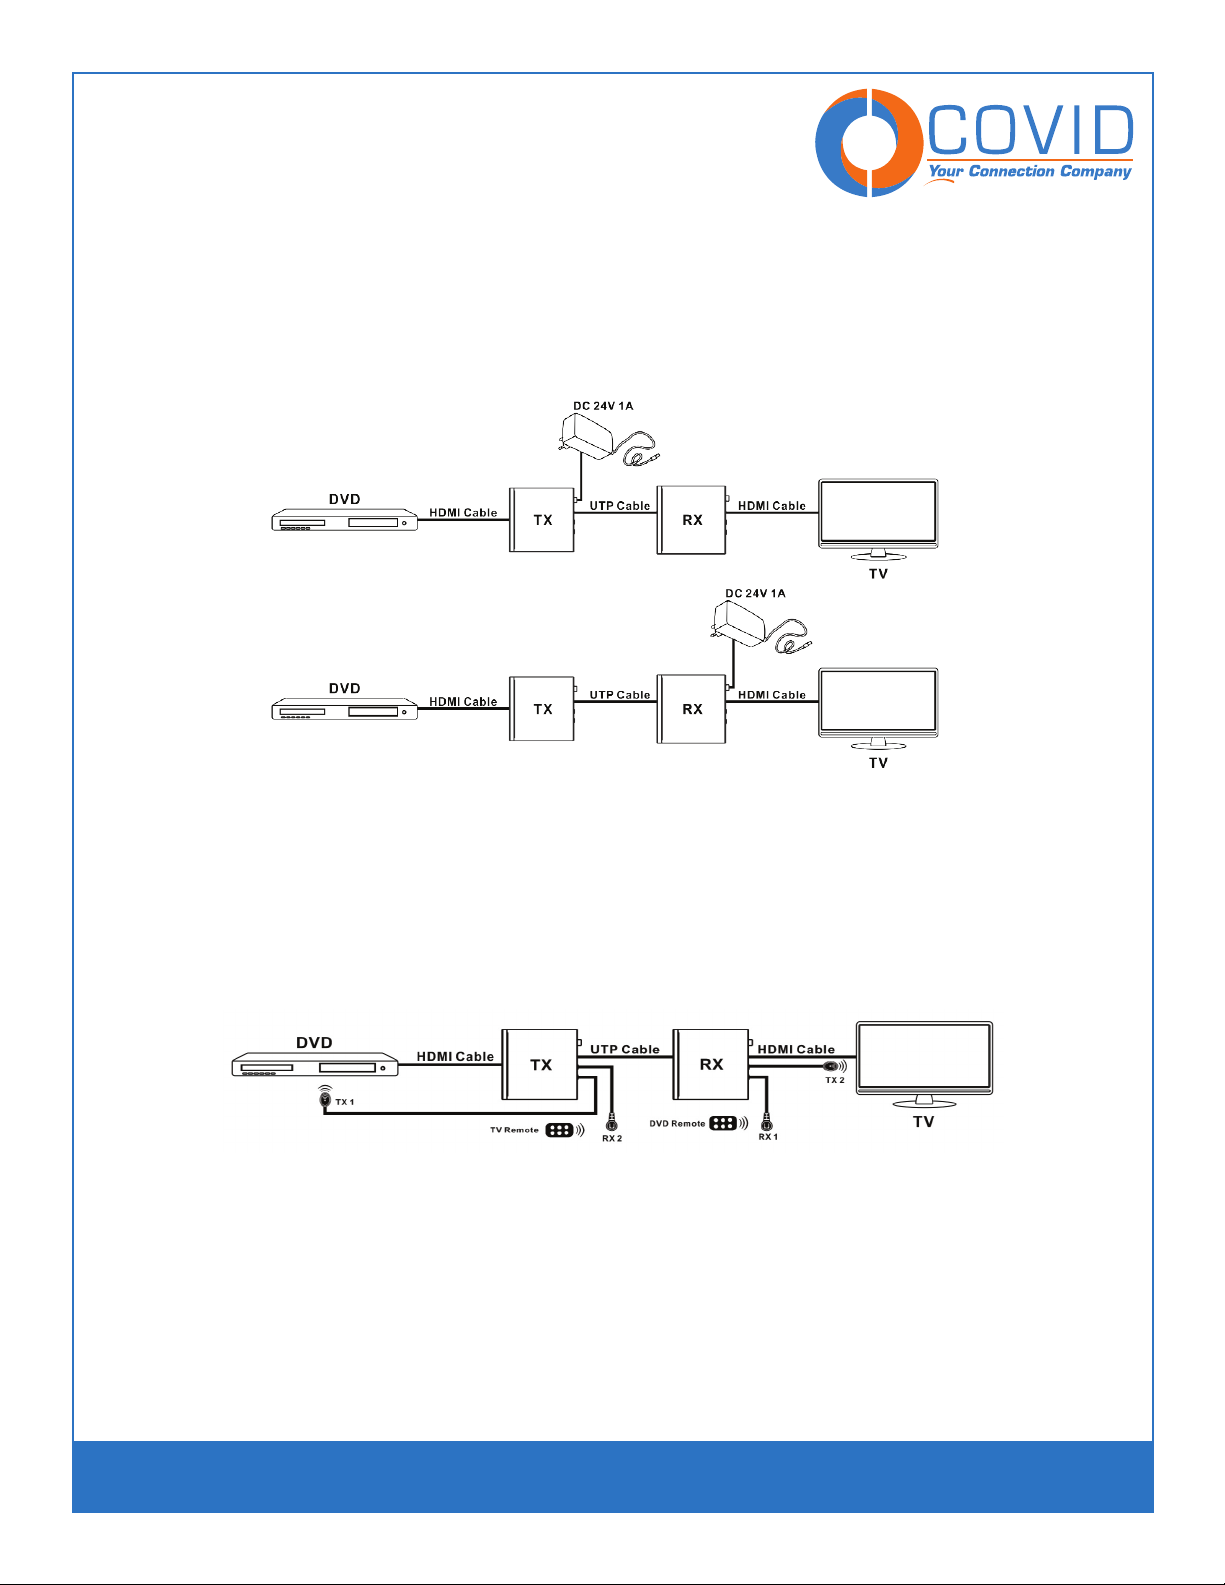
•POC (Power Over Cable) functionality is supported, either TX or RX is powered by a 24V@1A power
supply. POC Power consumption is less than 10W.
See application example1 (pg. 6)
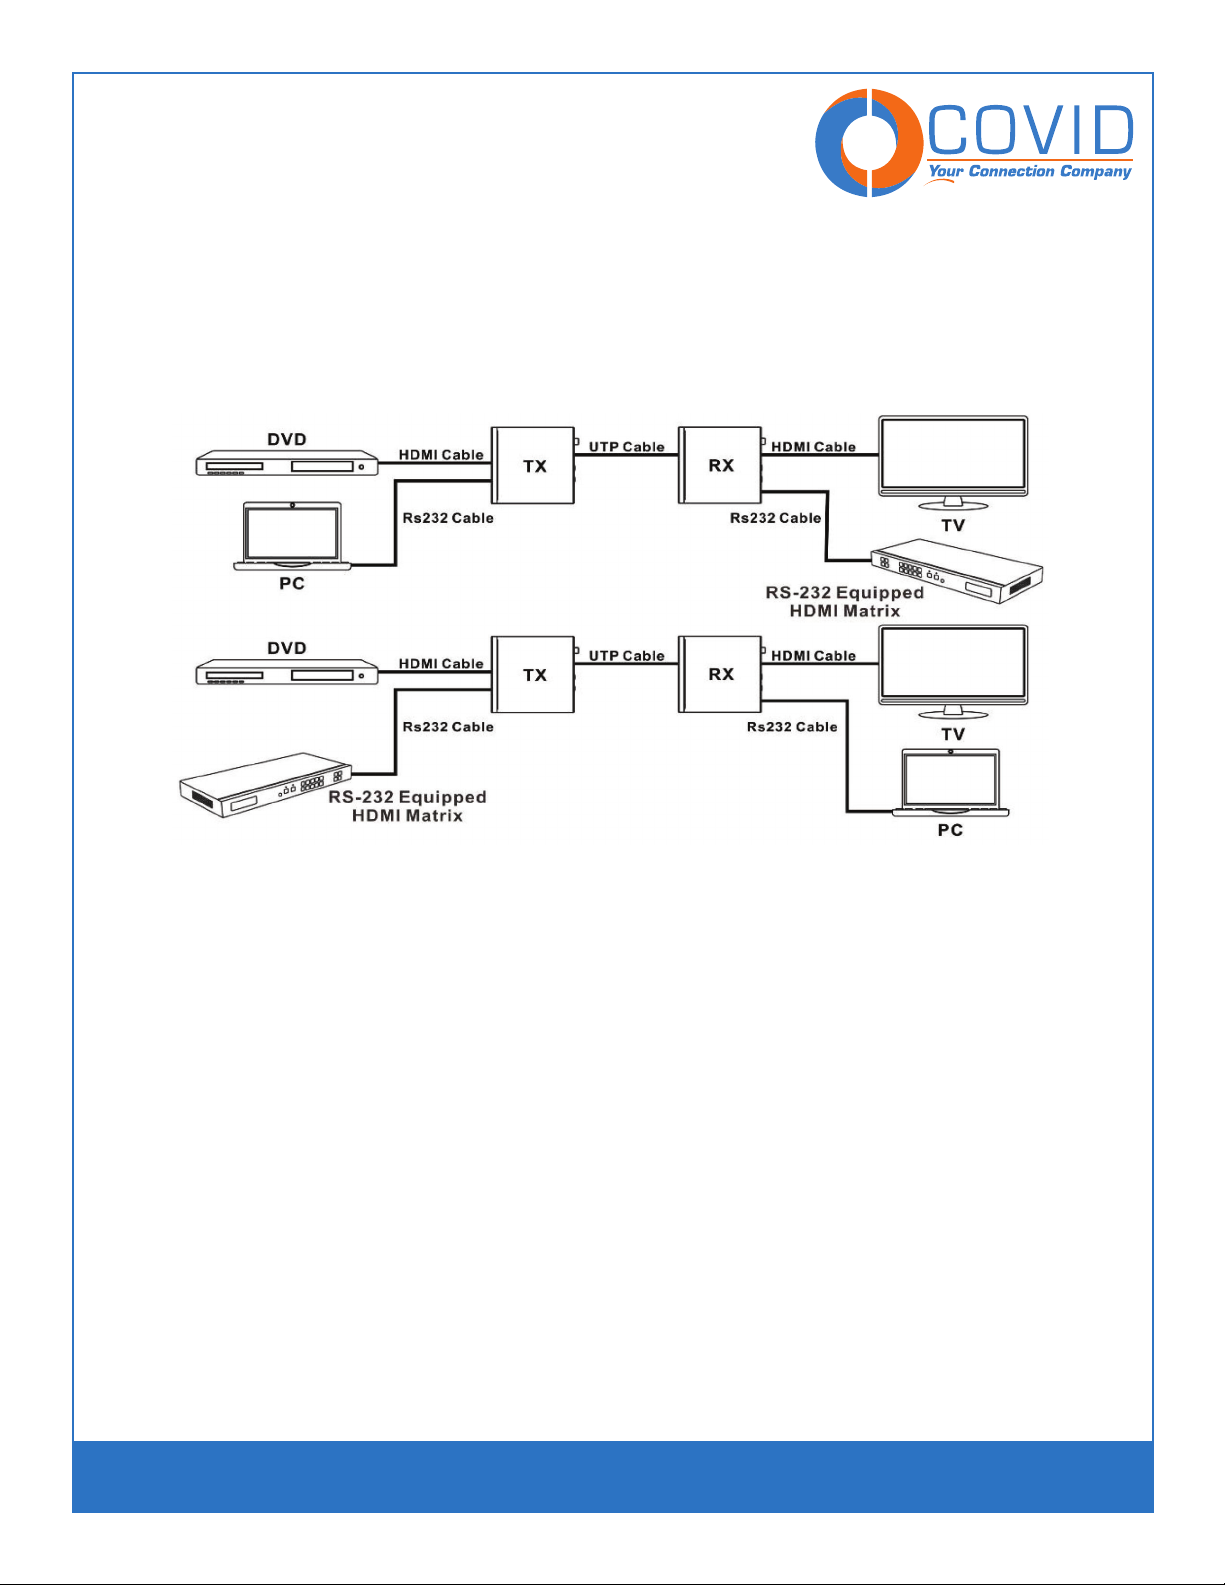
•Transfer Bidirectional RS-232 control signal together with the HDMI signal.
See application example 2 (pg. 6)
•Transmission distance: Over CAT6 cable
70 meters: 1080P @60Hz36bit; 3D1080P@30Hz36bit;
40 meters: 1080P @60Hz@48bit; 1080P @120Hz@24bit; 3D1080P@60Hz@36bit; 4K x 2K@30Hz@24bit.
See application example 3 (pg. 7)
Bidirectional RS232 Control Application Example
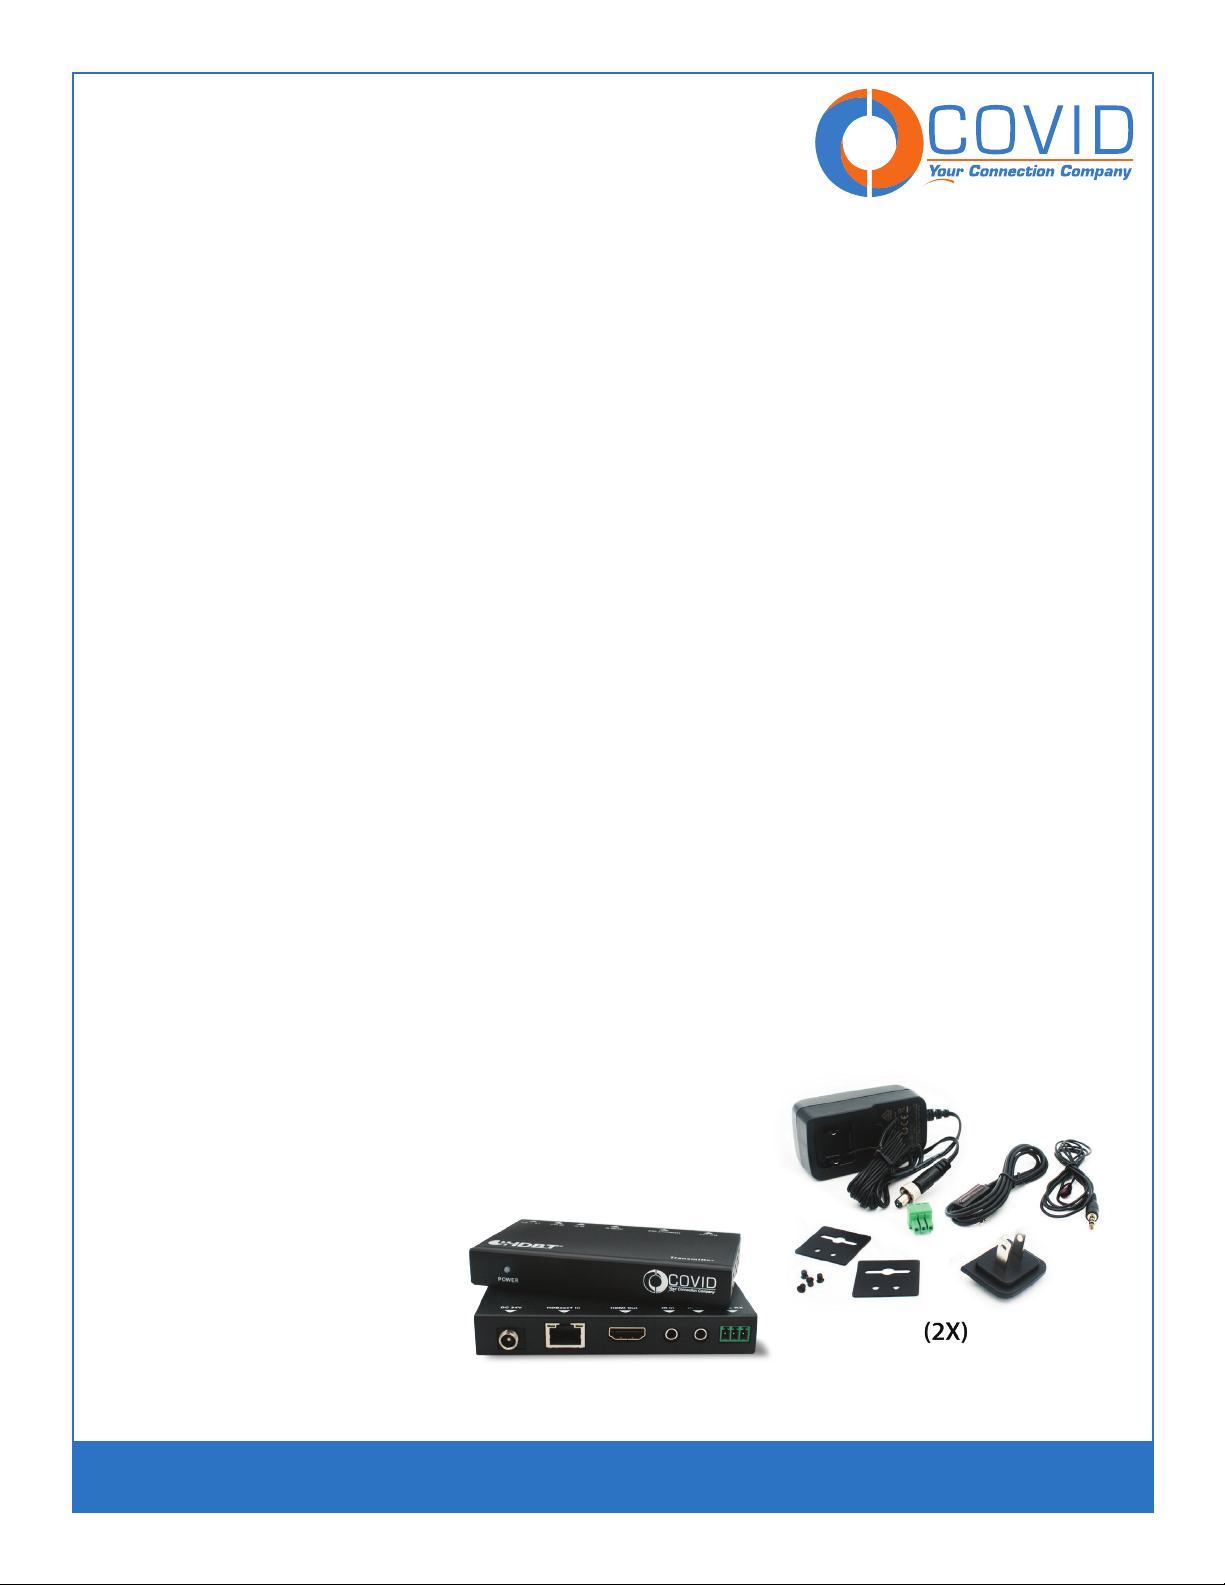
Package Contents
•HDMI Extender Transmitter - (1x)
•HDMI Extender Receiver - (1x)
•24V1A DC Power Supply - (2x)
• Wideband IR Emitter - (2x)
• Wideband IR Receiver - (2x)
•Mounting Brackets - (4x)
•3pin Screw Terminal Plug - (2x)
•Operation Manual - (2x)