Coway BAS25-AMY User manual

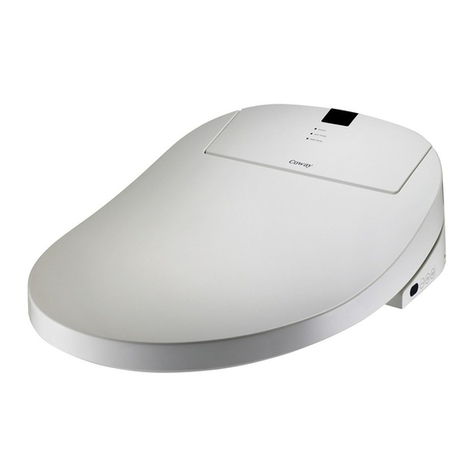
Coway Self-Sterilising Bidet BAS25-AMY
·
This product is designed for use in Korea. This product can not be used if the voltage is dierent from that mentioned in the
rating plate.
· Please read this User Manual before using this product for your safety and proper usage of it.

FEATURES
7
6
5
1
8
4
3
Slim and elegant design resembles a fully integrated bidet toilet.
·
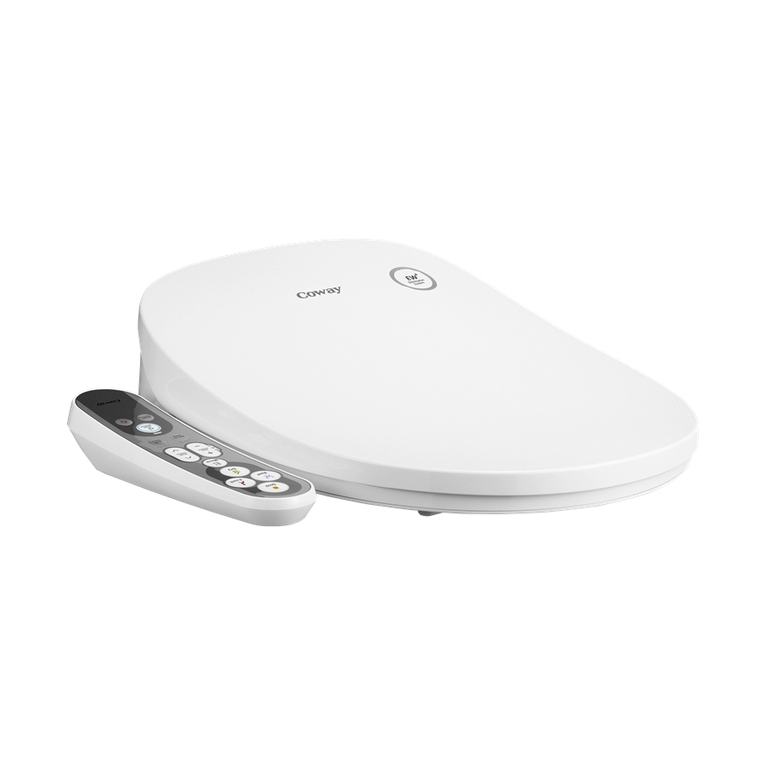
For space eciency, there is no control panel on the product; this bidet is being
controlled remotely. The back of the product is curvy and sleek instead of the
conventional square and rigid design.
The neness and elegance of the bidet design allows it to match well with any
porcelain toilet.
Customised WIDE function
·
The WIDE function allows gentle cleansing on a wider area.Press the WIDE button to
select the degree of water dispersion: Basic linear stream (LED is o)
→Wide (WIDE1,
LED is green) →Widest
(WIDE2, LED is red). Pressing the WIDE button on the bidet
allows circular spraying of water which is suitable for female body structure, giving
extra comfort for delicate areas.
High quality RF remote control
· Reception and user convenience has been enhanced with the wireless radio
frequency (RF) remote control which can be used in any direction.
Separated structure of the stainless nozzle and nozzle/drying duct
·
The nozzle and the drying duct which are most vulnerable to contamination can be
separated for easy cleaning.
Child cleansing/Air+ function
·
C
hild function is specially designed for children as their skin is more sensitive than adults.
With one button, you can select the setting suitable for children, such as low water pressure,
warm temperature, WIDE 1 stream and the position of the nozzle considering the size of the
user/child. The Child mode operates for 1 minute of cleansing and 2 minutes for drying.
·
Air+ function adds air to the water spray to increase its cleansing ability. A more
powerful and ecient cleansing can be achieved with Air+.
Super power saving, GREENPLUG system
·
This super power saving technology developed by Coway, can remember and adjust
according to the most used and least used time of the day. This allows the bidet’s
power consumption to be saved up to 50.9% compared with previous models.
2
Daily automated sterilisation system (Nozzle, hose)
·
The Hose Sterilisation function sterilises all water passage paths inside the bidet,
and the Nozzle Sterilisation function sterilises nozzle on a regular basis to guarantee
hygiene.
Approx.
2 Sec.
Approx.
1 Min.
1Step2Step
Hygienic
cleansing
General
cleansing
Safe rear cleansing with sterile water
·
Hygienic cleansing is enhanced with a 2-second cleansing process with sterile water,
which is electrolysed without using chemicals.

2
1
DEAR CUSTOMERS
- Always keep the User Manual in an easily accessible location. -
CONTENTS
Product Information How to use
Maintenance Other
| 03 | Safety precautions
Power Supply
Installation
Operation
Other
| 07 | Part names
Front/Rear View
Installation kit
| 09 | Important!
How to connect with the remote
control (pairing)
How to set special modes
| 12 | Buttons and display panel
| 15 | Automatic sterilisation/
Rear cleansing with sterile water
| 16 | Choosing the desired cleansing
For rear cleansing
For front cleansing
For child function (cleansing)
| 19 | Installation
Removing existing toilet seat
Product installation
Remote control installation
Precautions for placing the
remote control
| 24 | Cleaning
Cleaning of the nozzle
Cleaning of the product body
Removing the product
| 27 | Maintenance
| 28 | Filter replacement
| 29 | Troubleshooting
| 31 | Product Specications
Thank you for using the Coway Self-Sterilising Bidet.
Please read this User Manual to use and maintain the product correctly.
If you encounter any problem while using the product, please refer to the User Manual to solve the problem.
Coway FEATURES / CONTENTS

SAFETY PRECAUTIONS
Critical injury
or even death
could result from
negligence.
Serious injury
or property
damage could
result from
negligence.
Minor injury
or property
damage could
result from
negligence.
DANGER WARNING CAUTION
Please follow the instructions for your own safety.
Please read this information for your own safety and to prevent property damage.
Please read the precautions carefully and use the product correctly.
Power Supply
Do not use a damaged power plug or faulty electrical outlet.
Failure to do so may result in electric shock or re.
Do not move the product by pulling the power cord.
Failure to do so may result in electric shock or re.
Do not forcefully bend the power cord or place heavy objects on it to prevent it from being
damaged or deformed.
Failure to do so may result in electric shock or re.
If water gets into the electrical outlet, unplug the product and only use after it is completely dry.
Failure to do so may result in electric shock or re.
Remove any dust or water from the power plug pin.
Failure to do so may result in electric shock or re.
The power plug must be connected to 220 ~ 240 V - 50 Hz outlet only.
Failure to do so may result in electric shock or re.
Do not handle the power plug with wet hands.
Failure to do so may result in electric shock or re.
Do not connect and pull out the power plug repeatedly.
Failure to do so may result in electric shock or re.
Unplug the product before repairing, inspecting, or replacing parts.
Failure to do so may result in electric shock or re.
Use an individual power outlet, not a power strip that is being used by several other appliances.
Failure to do so may result in electric shock or re.
Unplug the product if the product will not be in use for a prolonged period.
Failure to do so may result in electric shock or re.
If the power cord is damaged, do not replace the cord by yourself. Contact the Coway
Service Center to have it replaced.
Failure to do so may result in electric shock or re.

SAFETY PRECAUTIONS
4
3
Installation
If the power cord is damaged, do not replace the cord yourself.
Failure to do so may result in electric shock or re.
Do not install near electrical heaters.
Failure to do so may result in re.
Do not use or store any ammable gas or materials near the product.
Failure to do so may result in electric shock or re.
Do not install in locations exposed to moisture, dust or places where water can
be splashed onto the product.
Failure to do so may result in electric shock or re.
Use tap water as the main water supply.
Using industrial water or gray water may cause skin damage or disease.
Do not connect the main water supply to the hot water pipe.
This may result in a malfunction or an accident. Make sure to connect the product to the cold
water pipe.
Do not use the product in a location exposed to direct sunlight.
This may result in discoloration.
After installation, check all the water supply connections to nd out whether
there is any leakage.
Rubber washers must be inserted in every T-shaped connector.
Operation
If the product produces strange noise, burnt smell or emits smoke, unplug
immediately from the electrical outlet and contact the Coway service center.
Failure to do so may result in electric shock or re.
Do not place an electrical heater near the product or dispose any burning
materials such as a lit cigarette in the toilet.
This may result in product deformation or re.
Do not use the product in locations exposed to excessive moisture and do not
splash water onto the product.
Failure to do so may result in electric shock or re.
Do not block the warm air outlet with your hand.
This may result in skin burns or re.
Do not insert a wire or sharp object in any product gaps or the warm air outlet.
This may result in electric shock, re, or product damage.
Do not place any containers lled with water, medicine, food, metallic objects,
or any ammable material on top of the product.
Any foreign material inserted into the product may result in electric shock or re.
Product Information

Do not use the product if it is not working properly.
* Unplug the product immediately, close the valve for the main water supply, and contact the
Coway service center. Failure to do so may result in electric shock or re.
Close the valve for the main water supply when replacing the lter.
Failure to do so may result in electric shock or product damage.
For children, elderly, or those who cannot adjust the temperature themselves or
have sensitive skin, set the water temperature and seat temperature to "L"or "O"
respectively and do not use the product for more than 30 minutes continuously.
Failure to do so may result in low temperature burns.
*A low temperature burn refers to any injuries that occur when skin is in contact with heat of
around 40 °C for a prolonged time.
*I
f the seat temperature remains high for more than 45 minutes, it automatically reverts to a low temperature.
Do not stand or place heavy objects objects on the seat cover.
This may result in product damage or malfunction.
Do not open/close the seat cover using excessive force or lean on the cover.
This may result in product damage or malfunction.
* "Soft opening technology" is applied to the seat cover to open and close slowly.
Take caution that urine does not come in contact with the nozzle, warm air
exhaust or any part of the surface.
Failure to do so may result in bad odors or malfunctions.
If the product will not be used for a long time, unplug it, close the valve of the
main water supply, and drain the water out from the water tank.
(For more details, see page 25)
This wireless product may experience electrical interference.
The following situations may result in temporary deactivation of communication (sending/
receiving) or change in reception due to the interference of signals between the remote control
and other appliances.
- If the maximum receiving distance is exceeded (10m linear distance between the bidet and
remote control without any obstacles).
- If the battery of the remote control is low.
- If there are obstacles around the bidet that interfere with the signal.
- If the location of the product is very cold.
- If the product is located near a police station, public oce, broadcasting station, military
base, transmitting tower, airport or port.
SAFETY PRECAUTIONS
Critical injury
or even death
could result from
negligence.
Serious injury
or property
damage could
result from
negligence.
Minor injury
or property
damage could
result from
negligence.
DANGER WARNING CAUTION

6
5
This product is only intended for use in the bathroom and should be used in
accordance with the User Manual. Do not use it for any other purposes.
Tips
Before taking a shower or cleaning the bathroom, unplug the power plug and
take caution not to splash water or detergent on the product.
Failure to do so may result in electric shock or re.
* If foreign materials enter the product, unplug it and turn o the main water valve, and contact
the Coway service center.
Do not disassemble, repair, or modify the product yourself.
This may result in electric shock, re, or product damage.
Do not separate the seat from the bidet.
This may result in electric shock, re, or product damage.
Unplug the product before cleaning, and do not splash water or use a thinner,
benzene, hydrochloric acid cleaners, or detergents containing vegetable oil.
This may result in corrosion, discoloration or scratches.
* Use a soft cloth or sponge to clean the product.
Do not pull out the bidet hose or connection hose using excessive force.
This may result in leakage or malfunction.
Kindly use the new hose-sets supplied for the appliance and do not reuse the old
hose-sets.
Children are not allowed to play with the appliance for safety reasons.
Children should be supervised to ensure that they do not play with the appliance.
Cleaning and user maintenance shall not be made by children without
supervision.
If the supply cord is damaged, it must be replaced by the manufacturer, its service
agent or similarly qualied persons in order to avoid hazards.
This appliance can be used by children aged from 8 years and above, persons
with reduced physical, sensory or mental capabilities or lack of experience and
knowledge only if they have been given supervision or instruction concerning
usage of the appliance in a safe way and understand the hazards involved.
- If a remote control for another bidet nearby is being used nearby.
If there is a problem with the remote control, use the side buttons on the bidet for operation.
Contact the Coway service center for examination if the problem persists.
*
Do not carry or store the remote control with other communication devices, such as a walkie-talkie
or a mobile phone.
This may cause the product to malfunction due to signal interference.
Other
SAFETY PRECAUTIONS
Product Information

PART NAMES
Front/Rear View
1 Bidet
1 Water tank hose
1 Water pipe
1 T-shaped connector
1 Valve for main
water supply
1 Bidet hose
Seat cover
1 Caution sticker
1 Rear nozzle
1 Front nozzle
1 Body sensor sticker
1 Seat
1 Power cord
1 Product sticker
1 Drain
1 MF
1 RF remote control

8
7
* Parts mentioned above may vary depending on the manufacturer.
Installation kit
1 MF1 Installation adapter
1 Filter clip
1 Installation plate 2 Fixing sliders
1 Silicone sealant
1 Filter xing stopper
1 Bidet hose
2 Anchor screws
2 Anchor rubbers
2 Anchor washers
2 Anchor nuts
3 AAA batteries
PART NAMES
Product Information

IMPORTANT!
Connect product to power.
Plug the power cord and press the Power button on the control panel to turn on the bidet.
The bidet only functions properly when it is connected to power.
Open the main water supply valve.
A water source must be supplied to the product for it to function properly.
After completing the installation, and before using, remove the protective lm on the product and the remote control.
Check the remote control before use.
The remote control will not function properly if it is not paired or if the bidet is switched o.
If the bidet does not work when you press a button on the remote control, turn on the bidet and set the pairing connections.
When batteries are low and need to be replaced, the LED will ash 3 times whenever a button is pressed. It will eventually
stop ashing and the remote control will stop working as the batteries run out.
*
Batteries are not covered by the warranty. You need to purchase and replace the batteries separately.
Check the GREENPLUG before use.
- Setting up the GREENPLUG
∙ It allows smart control of the product based on user history.
∙ Regular usage time: Seat temperature will be set to "L".
∙ Non-usage time: On standby mode, seat temperature is kept at 23 °C.
∙ On standby mode, water temperature is kept at 20 °C. (Regular usage/Non-usage time)
∙ After sitting the temperature of water and the seat temperature are switched to user settings.
- Setting up general power saving mode
∙ After 1 minute: Seat temperature will be switched to "L".
∙ After 30 minutes: The power indicating LED on the control panel turns o and the power saving mode is initiated.
GREENPLUG mode
Press and hold the GREENPLUG button until the GREENPLUG indicator lights up and the function is initiated.
After installation
Check there are no leakages between main water supply valve and hose.
There must be a rubber washer between the T-shaped connector and the main water supply valve.
Use a soft, dry cloth to wipe the bidet and the remote control after shower or cleaning the bathroom.
Regular lter replacement
Replacing the lter regularly is crucial for hygienic cleansing. If you are using an old lter, the ltering performance
will degrade and may spray unltered water. Always replace the lter according to the recommended interval.
*
Filter replacement interval: Every 4 months
Prolonged periods of non-usage
If the product has been unused for an extended period of time, make sure to replace the lter and clean the nozzle, seat
and the product according to appropriate cleaning methods before use.
(For more details, see page 23)
This product is for 220 ~ 240 V - 50 Hz only.
Connect the power plug to a grounded electrical outlet for 220 ~ 240 V - 50 Hz.
Tips
Remove the protective lm on the remote control before use.
Tips

10
9
How to connect with the remote control (pairing)
1.
Plug in the bidet, then press and hold the Cleansing button
together with the Nozzle Cleaning button for 2 seconds. There
will be a "beep" sound and the LED indicator will blink to show
that the pairing mode is being accessed.
2. Within 15 seconds of entering the pairing mode, press and hold
the Cleansing button on the remote control for more than 5
seconds to pair with the product.
3. The LED indicator (WIDE, Warm water/Drying temperature, Seat
temperature, GREENPLUG) of the remote control will blink 3 times
in orange, after which the pairing process in complete.
(Wait for approximately 15 seconds after the pairing process
completed.)
*
You will be automatically directed out of the pairing mode with a beeping sound after
15 seconds, regardless of whether pairing is complete or not.
(You have to complete pairing within 15 seconds or try again.)
How to pair the remote control with the product
Pairing is creating a wireless connection between the controller of the remote control
and the bidet.
Follow the instructions below to correctly pair the remote control with the bidet.
How to Use
IMPORTANT!

How to set special modes
3. Automatic drain mode
Press the Nozzle Cleansing button on the control panel and there will be a "beep" sound
with a display of the current settings on the LED. (ON: Activated, OFF: Deactivated)
Press the Nozzle Cleansing button to activate or deactivate the automatic drain mode.
If the automatic drain mode is activated, water in the tank will be automatically
drained via the nozzle and the hose to maintain a hygienic environment after the
product is unused for 48 hours.
- Activated: LED on the main body turns on.
- Deactivated: LED on the main body turns o.
*
The automatic drain mode is initially being set as deactivated.
1. Silent mode
Press the Power button on the control panel. There will be a "beep" sound
and the LED will indicate the current status. (ON: Activated, OFF: Deactivated)
Press the Power button to activate or deactivate the silent mode.
The silent mode also mutes the button sounds on the remote control.
- Activated: LED on the main body turns on.
- Deactivated: LED on the main body turns o.
*
The silent mode is initially being set as deactivated.
2. Seat sensor lock mode
Press the Cleansing button on the control panel and there will be a "beep"
sound together with the display of current setting on the LED. (ON:
Activated, OFF: Deactivated)
Press the Cleansing button to activate or deactivate the seat sensor lock mode.
If the seat sensor lock mode is activated, the cleansing, bidet and dry
functions are only enabled when the sensor detects a human body.
- Activated: LED on the main body turns on.
- Deactivated: LED on the main body turns o.
*
The seat sensor lock mode is initially being set as activated.
4. Sterile water cleansing mode
Press the Nozzle Cleansing button on the side control panel for 2 seconds
and there will be a "beep" sound and the current status will be displayed
with the LEDs. (ON: Activated, OFF: Deactivated)
Press and hold the Nozzle Cleansing button for 2 seconds to activate or
deactivate the sterile water cleansing mode.
The sterile water cleansing mode uses electrolysed sterile water for 2
seconds before proceeding with the general cleaning process. When
deactivated, only the general cleaning process is carried out.
- Activated: LED on the main body turns on.
- Deactivated: LED on the main body turns o.
*
Sterile water cleansing mode is initially being set as activated.
Press and hold the Power button together with the Cleansing button on the
control panel for 2 seconds. There will be a "beep" sound and the LED will turn
o, indicating that the mode is being accessed.
*You will be automatically directed out of the special mode if no action is taken for 10
seconds.
IMPORTANT!

12
11
BUTTONS AND DISPLAY PANEL
Product body
RF remote control
Display panel Control panel
Cleansing water /
dryer temperature
adjustment button
9
11 Sterilisation button
Seat Temperature
Adjustment button
10
AIR+function button
14
Child function button
13
GREENPLUG button
15
12 Nozzle Cleansing/
Cleaning function button
1
2
4
5 6
8
10
12
14
3
9
11
13
15
7
1
3
5
6
4
2
1Stop button
Rear cleansing button
2
Front cleansing button
3
Dryer button
4
WIDE Adjustment button
5
6Move function button
7Water Pressure
Adjustment button
Nozzle Adjustment button
8
Power button
Rear cleansing button
Nozzle Cleaning button
How to Use
IMPORTANT!
5
WIDE function indicator
Water pressure adjustment/
Nozzle position indicator
Cleansing water /
dryer temperature
adjustment indicator
Seat temperature
adjustment indicator
Sterilisation function
indicator
GREENPLUG indicator
1
2
3
4
6

BUTTONS AND DISPLAY PANEL
WIDE Adjustment button
WIDE function allows softer cleansing on a
wider area.Press the button to adjust the range
of water sprayed while using the front/rear
cleansing functions. Press the WIDE button to
adjust the level: 1 (Green)
→
2 (Red)
→
O.
Display panel
Rear cleansing button
Press the button to activate the rear
cleansing function.
Stop button
Stops all current operating functions.
Dryer button
Press the button to use the dry function.
This helps to dry excess moisture after using
the front/rear cleansing function.
Front cleansing button
Press the button for the cleansing functions
for women.
Move function button
Press the button to select the move function.
When the cleansing/bidet operation is being
selected, the nozzle moves back and forth to
provide a wider range of cleansing.
Cleansing water / dryer
temperature adjustment indicator
The indicator lights in the order of: Low (Green) →
Medium (Orange) →High (Red) →O.
*
While cleansing/bidet mode is activated, the
indicator displays warm water temperature
adjustments. While the dry function is
activated, the indicator displays drying
temperature adjustments.
3
2
Water pressure indicator/
Nozzle position indicator
Press the Water Pressure button to
adjust the pressure from level 1 to 5.
*
When the Move button of the nozzle is
pressed, the LED changes according to the
position of the nozzle.
WIDE function indicator
When the WIDE button is pressed,
the LED changes to following the
levels:
1 (Green)
→
2 (Red)
→
O
1
12
43
6
5
Control Panel
Sterilisation function indicator
The indicator lights up when the sterilisation
function is activated.
5
GREENPLUG indicator
LED changes according to the mode settings:
GREENPLUG (Green)
→
General power saving
mode (Orange)
→
Non-power saving mode
(O ).
6
Seat temperature adjustment
indicator
Press the Seat Temperature Adjustment button,
the LED changes according to the
temperature of the seat: Low (Green)
→
Medium (Orange)
→
High (Red)
→
O.
4

14
13
8
12
11
Child function button
This function is specically designed for children
whose skin is more sensitive than adults.Press
the button and cleansing will occur for 1 minute
and drying for 2 minutes. The nozzle will position
according to the size of the user and low water
pressure will be used.
*
The child function operates regardless of the seat sen-
sor detecting a human body.
*
Move, water pressure, seat temperature, warm water/drying tem-
perature functions can be adjusted while using the child function.
Press the Child function button again while using the cleansing
or drying functions for an additional cleansing or drying function.
15
AIR+ button
Air+function adds air to the water spray to
increase the cleansing ability.Press the Air+
button for a more powerful and ecient
cleansing.
Cleansing water / dryer temperature
adjustment button
Press the button to control warm water/drying
temperatures. When the Warm Water/Drying
Temperature Adjustment button is being pressed,
the LED changes to following the levels: Low (Green)
→ Medium (Orange) → High (Red) → O.
*
While on standby or when front/rear cleansing function is
activated, the indicator displays the warm water temperature
adjustments. While the dry function is activated, the indicator
displays the drying temperature adjustments.
9
GREENPLUG button
Press the button to activate the GREENPLUG mode.
Non-power saving mode ↔GREENPLUG mode
- Press and hold the GREENPLUG button on the remote control for 2 seconds, there will be a "beep" sound and the green LED of the
GREENPLUG function will turn ON (GREENPLUG)
GREENPLUG mode ↔General power saving mode
- Press and hold the GREENPLUG button on the remote control for 2 seconds, there will be a "beep" sound and the orange LED of the
GREENPLUG function will turn ON (General power saving mode)
General power saving mode ↔Non-power saving mode
- Press and hold the GREENPLUG button on the remote control for 2 seconds, there will be a "beep" sound and the green LED of the
GREENPLUG function will turn o (Non-power saving mode)
*
The GREENPLUG is initially set as activated.
10
13
Nozzle Adjustment button
Press the button to move the nozzle back or forth
while cleansing/bidet cleansing function is in
operation. The nozzle position can be adjusted in
5 levels.
7
Nozzle Cleansing/Cleaning function
button
Nozzle Cleansing: Press the button while the
product is turned on and the nozzle will be
cleansed for 10 seconds.
Nozzle Cleaning: Press the button while the prod-
uct is turned o and the cleansing/bidet nozzles
will protrude consecutively and self-clean for a
total of 3 minutes.
Seat Temperature Adjustment button
Press the button to adjust the temperature of the
seat.
When the Seat Temperature Adjustment button
is pressed, the LED changes according to the
temperature of the seat: Low (Green)
→
Medium
(Orange)
→
High (Red)
→
O.
14
Sterilisation button
Press the button to activate the automatic
sterilisation function. LED changes between two
levels: Hose sterilisation (20 seconds)
→
Nozzle
sterilisation
2 (15 seconds).
*
Automatic sterilisation: Based on 12 bidet uses a day, 1
automatic sterilisation occurs.
*
Manual sterilisation: Recommended use is twice a day.
*
Level 2 automatic sterilisation is activated when the seat
sensor does not detect a human body.
*
Manual sterilisation function is not activated when cleansing/
bidet/child/drying functions are in operation. If the button is
pressed once more while the sterilisation function is in opera-
tion, there will be a "beep"sound and sterilisation will end.
Water Pressure Adjustment button
Water pressure can be adjusted in 5 levels. The
selected water pressure indicator will light up
each time when the button is being pressed.
How to Use
BUTTONS AND DISPLAY PANEL

AUTOMATIC STERILISATION/REAR CLEANSING WITH STERILE WATER
Automatic sterilisation system
Rear cleansing with sterile water
Rear cleansing function uses electrolysed
sterile water for 2 seconds before
proceeding with the general cleansing
process.
Sterile water is created by electrolysis
without any chemicals, guaranteeing safety
and hygiene.
* For more details, see page 11, "How to set special modes" on deactivating the initial 2-second sterilisation function.
* If this function is deactivated only general cleansing will be operated when rear cleansing is selected.
What is an automatic sterilisation function
Automatic hose sterilisation
This function automatically sterilisation all water paths inside the product to eliminate
99.9% of all germs, including colon bacillus and enterococcus. With the hose
sterilisation function, you do not need to worry about bidet contamination when
using this product
Automatic nozzle sterilisation
The function eliminates 99.9% of germs including colon bacillus and enterococcus
by spraying sterile water onto the nozzle, which is the most susceptible place for
contamination.
The nozzle is automatically sterilised during the 2-step sterilisation function and also
when the nozzle retracts after using the front/rear cleansing function.
Approx.
1 Min.
Approx.
2 Sec.
1
Step
Cleansing with
electrolysed
water
2
Step
General
cleansing
Good hygiene is achieved with the 2-step sterilisation of the hose
→
and nozzle,
which ensures hygiene both inside and outside of the bidet.
This 2-step total automated system for sterilisation is operated once a day (based on
12 bidet uses a day).
Press the sterilisation function button to use the sterilisation function manually.
The sterilisation process will operate for 20 seconds for the hose
→
15 seconds for the
nozzle. (Recommended use of manual sterilisation up to twice a day.)
* Sterile water may not be available depending on water quality.
(E.g.Sterile water may not be available if underground water is used as a supply.
Concept of producing sterile water:Without adding chemicals, tap water is
electrolysed to sterile water, eliminating 99.9% of all germs, including colon
bacillus and enterococcus.

16
15
CHOOSING THE DESIRED CLEANSING
For rear cleansing
Cleansing
Sit down and press the Cleansing button on the control panel.
- The nozzle drains cold water before cleansing water is sprayed so cleansing begins at
the previously set temperature.
- Cleansing water will spray for 1 minute and stop automatically.
- When the nozzle retracts, the nozzle is cleaned automatically for 6 seconds.
* Press the Move button to adjust the position of the nozzle.
* Press the Cleansing button again while in operation for an additional minute of
cleansing.
* You can adjust the warm water temperature, water pressure and nozzle position
according to your preference.
Move
Sit down and press the Move button on the control panel.
- The nozzle moves back and forth to cover a wide area.
* This continues while the cleansing function is used.
* Press the Move button to adjust the position of the nozzle.
* Press the Move button again to stop the nozzle.
Dry
Sit down and press the Dry button on the control panel.
- Warm air is emitted for 2 minutes to dry the wet areas.
* Wipe the wet area lightly before using dry feature to speed up drying.
* Press the Warm Water/Air Temperature button to adjust air temperature.
* Press the Dry button again during use to add an additional 2 minutes of
drying.
* If you press the Dry button while cleansing, cleansing function stops so you
can start drying immediately.
Stop
Press this button to stop all currently operating functions.
- All current operating functions stop.
* The dry function stops 2 seconds after the Stop button is being pressed.
How to Use
AUTOMATIC STERILISATION/REAR CLEANSINGWITH STERILE WATER / CHOOSING THE DESIRED CLEANSING

CHOOSING THE DESIRED CLEANSING
For front cleansing
Front cleansing
Sit down on the bidet and press the Front Cleansing button on the remote control.
- The front nozzle drains cold water in the nozzle, before water is sprayed so cleansing
can be done at a warm temperature.
- Cleansing water will spray for 1 minute and stop automatically.
- When the nozzle retracts, the nozzle gets cleaned automatically for 6 seconds.
* Press the Move button to adjust the position of the nozzle.
* Press the Front Cleansing button again while in operation for an additional
minute of cleansing.
* You can adjust the warm water temperature, water pressure and nozzle position
according to your preference.
Move
Sit down and press the Move button on the remote control.
- The nozzle moves back and forth to cover a wide area.
* This continues while the cleansing function is being used.
* Press the Move button to adjust the position.
* Press the Move button once again to stop the nozzle.
Stop
Press this button to stop all currently operating functions.
- All current operating functions stop.
* The dry function stops 2 seconds after the Stop button is being pressed.
Dry
Sit down and press the Dry button on the remote control.
- Warm air is emitted for 2 minutes to dry the wet areas.
* Wipe the wet area lightly before using dry feature to speed up drying.
* Press the Warm Water/Air Temperature button to adjust air temperature.
* Press the Dry button again during use to add an additional 2 minutes of drying.
* If you press the Dry button while cleansing, cleansing function stops so you can
start drying immediately.

For child function (cleansing)
Child function
Sit down and press the Child button on the remote control.
There will be a beep sound and the child function will be activated.
- You can adjust the water pressure, water temperature, warm air and nozzle position
according to the child's preference.
[Water pressure: Level 1 (Soft spray), Warm water temperature: Level 2 (Warm water),
Nozzle position: Level 5 (Maximum), WIDE Level 1 (Wide and soft spray)
-
Cleansing water will be sprayed for 1 minute then will switch automatically to the dry function.
[Drying temperature: Level 2 (Warm air)]
- The nozzle retracts after cleansing and will be automatically cleaned for approximately
6 seconds.
* Press the Move button to adjust the position of the nozzle.
* You can adjust the warm water temperature, water pressure and nozzle position
according to your preference.
*
Press the Child button again while in operation for an additional minute of cleansing.
Move
Sit down and press the Move button on the remote control.
- The nozzle moves back and forth to cover a wide area.
* This continues while the cleansing function is being used.
* Press the Move button to adjust the position of the nozzle.
* Press the Move button again to stop the nozzle.
Dry
Automatically activated when cleansing is completed.
- Warm air is emitted for 2 minutes to dry the wet areas.
* Wipe the wet area lightly before using dry feature to speed up drying.
* Press the Warm Water/Air Temperature button to adjust air temperature.
* Press the Child button again during use to add an additional 2 minutes of
drying.
Stop
Press this button to stop all currently operating functions.
- All current operating functions stop.
* The dry function stops 2 seconds after the Stop button is being pressed.
18
17
How to Use
CHOOSING THE DESIRED CLEANSING

INSTALLATION
Install product
Tighten the anchor nuts so the bidet is attached rmly onto the toilet.
Installation location
The bidet is for use in the bathroom so make sure to install it in a place where water cannot splash it directly.
After installation
Store the existing toilet away from direct sunlight.
Cold water pipe
Make sure to connect the bidet to a cold water pipe.
(If it is connected to the hot water pipe, the lter and hose may be damaged.)
Install remote control
Install the remote control on the side of the bidet.
Remove any dust or foreign substance from the surface before applying the double-sided tape for the
remote control holder.
Use silicone caulk to attach the remote control holder.
Replacing batteries in the remote control
Place a screwdriver or a coin into the groove and turn anti-clockwise. The screw will become loose and the battery
cover will be removed. Remove and replace the old batteries (3 X 1.5 V AAA). Reattach the cover and tighten the
screws clockwise.
* Take caution not to lose the screws.
Tips
Consult with a Coway technician for the detailed installation method to ensure optimal
performance of the product.
Table of contents
Other Coway Toilet manuals
Popular Toilet manuals by other brands

Polhus
Polhus Ecoteco-utedass Assembly instructions

Gaius
Gaius DUO 17788 installation instructions

closomat
closomat Palma Vita Installation & user guide

Porcelanosa
Porcelanosa Noken VITAE 100184336 N346779937 manual

GoodHome
GoodHome teesta 3663602690573 manual

Geberit
Geberit AQUACLEAN MERA COMFORT user manual

Porcelanosa
Porcelanosa Noken Arquitect 100121996 N390000040 installation instructions

BidetMate
BidetMate BM-2000R user guide

American Standard
American Standard KASTELLO VF-2781 manual

DURAVIT
DURAVIT 0064590000 Care Instructions

Miomare
Miomare Z31849A manual

nella
nella RENI NBMU-7312 installation instructions