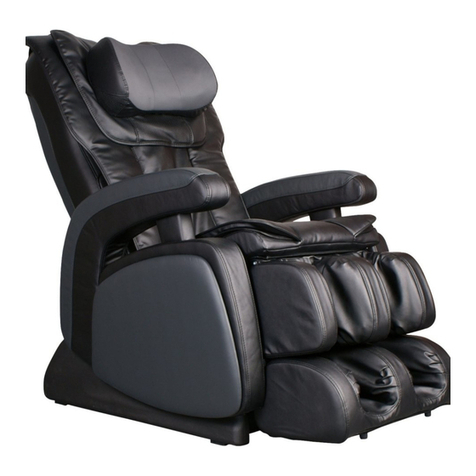
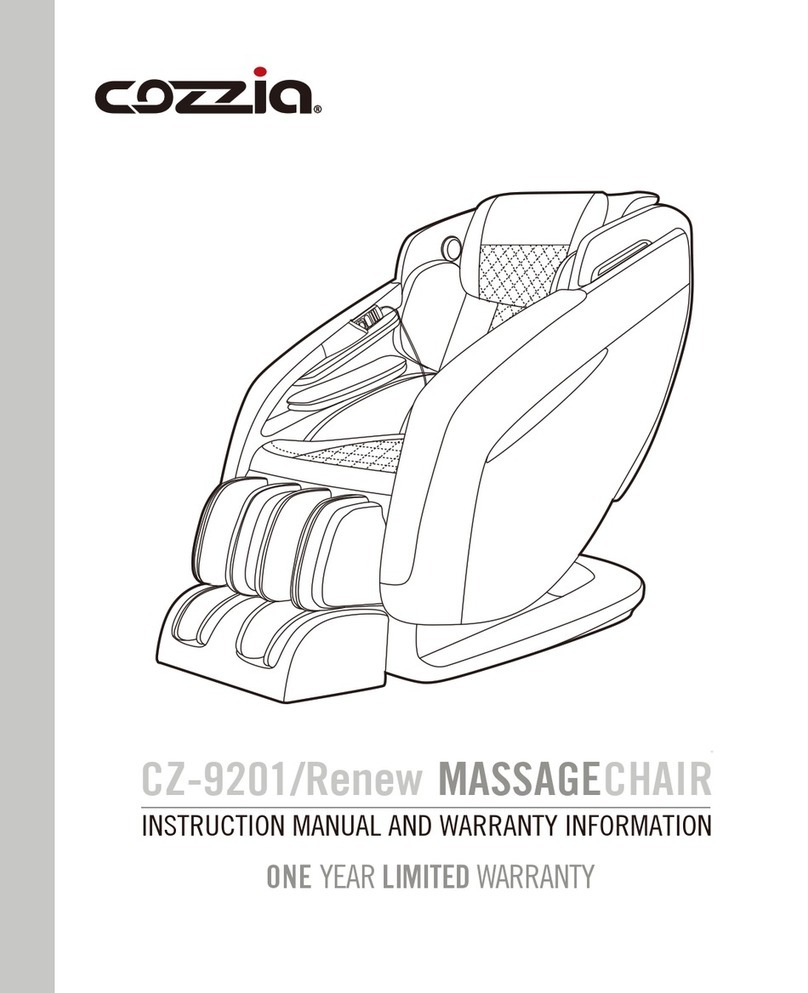
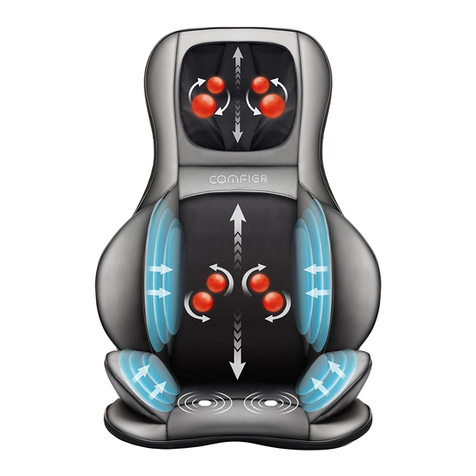
Cozzia EC-363C Manual

Maintenance Service Manual
MODEL: EC-363C

V. Malfunction catalog
Common Trouble and processing Methods are listed as follow:
Serial NO. Phenomenon
Description Maintenance Methods
01
No Function
When
Starting.
开机无功能
The LCD isn’t illuminating:
LCD 显示屏不亮
① Fuse melts (in the Power
Source Box or on the
transformer wire).
保险丝断(在电源盒处或变压器
导线上)
②Power supply circuit poorly
connected.
电源电路接触不良
② main PCB fails.
中心板坏
① Replace Fuse.
更换保险丝
② Replace Power Box.
更换电源盒
③ Replace main PCB.
更换中心板
02
No function
when starting.
开机无功能
The LCD is illuminating:
LCD 显示屏不亮
① Mechanical switch fails or it’s
wire is opened.
机械开关坏或机械开关的线材
断开
② Up or Down Stroke
Photo-electricity fails.
上下行程光电坏
③ Main PCB fails.
中心板坏
④ Kneading is on without
pressing any key when
① Replace mechanical
switch or it's wire.
更换机械开关或机械开关
线材
②Replace Stroke Photo-
electricity.
更换行程光电
② Replace the main PCB.
更换 PCB 板
③ Width Inspection Board
of PCB fails, replace it.
宽地检测板坏
更换宽度检测板

starting and no response by
pressing other keys.
开机揉捏其他按键无效
03
No Width
switchover.
宽度无法切
换
① The terminals of Width
Inspection on main PCB and
wires are poorly connected.
中心板宽度检测端子线材接触
不良
② The terminals of Width
Inspection on massage
mechanical and wires are
poorly connected.
机芯宽度检测板线材接触不良
③ Width Inspection fails.
宽度检测板坏
④ Main PCB fails.
中心板坏
①&②Plug the terminal
securely or replace the
wires.
端子接插到位或更换线材
④ Replace the Width
Inspection.
更换宽度检测板
⑤ Replace the main PCB.
更换中心板
04
No Partial
Function.
无区间功能
① Height Inspection Terminal or
wire poorly contacts.
高度检测板接线端或线材接触
不良
② Height Counting
Subassembly fails.
高度计算组件坏
① Plug the terminal
securely or replace the
wires.
把接线端插到位或跟换线
材
② Replace Height
Counting Sub-assembly.
更换高度计算组件

05
No Rolling.
不行走
① Terminal or Wire Poorly
Contacts.
接线端或线材接触不良
②Down-stroke Photo-electricity
Subassembly Fails.
下行程光电组件坏
③Up-stroke Photo-electricity
Subassembly Fails.
上行程光电组件坏
③ Rolling Motor Fails.
行走电机坏
④ Main PCB Fails.
中心板坏
① Plug the terminal
securely or replace the
wires.
将接线端插到位或更换线
材
② Replace Down-Stroke
Sub-assembly.
更换下行程光电组件
③Replace Up-Stroke Sub-
assembly.
更换上行程光电组件
④Replace Rolling Motor.
更换行走电机。
⑤Replace main PCB. 更换
下行程中心板
06
No kneading.
不揉捏
① The terminals on main PCB
and wires are poorly
connected.
中心板端子没插到位或是线材
接触不良。
② Kneading motor fails.
③ 揉捏电机坏
④ Main PCB fails.
中心板坏
① 、 P
lug the terminal
well or replace the wires
将端子接插到位或是更换
线材。
②、
Replace the kneading
motor
更换揉捏电机
③ 、 R
eplace main PCB
更换中心板。
07
No tapping.
不敲击
① The terminals on main PCB
and wires are poorly
connected.
中心板接线端或线材接触不良
① Plug the terminal
securely.
将接线端接插到位
② Replace the tapping

② Tapping motor fails.
敲击电机坏
③ Main PCB fails.
④ 中心板坏
motor.
更换敲击电机
③ Replace main PCB.
更换中心板
08
No response
when pressing
the keys on
the remote
controller.
手控器按键
无反应
① The terminals and wires are
poorly connected.
接线端或线材接触不良
② The PCB in the remote
controller fails.
手控器中心板坏
① Plug the terminal
securely or replace the
wires.
将接线端接插到位或更换
线材
② Replace the remote
controller.
更换手控器
09
Back rest
cannot be
reclined or
raised
不升倒背
① The terminals of reclining
actuator and wires are poorly
connected.
电动推杆接线端或线材接触不
良
② The reclining actuator fails.
电动推杆坏
③ Main PCB fails.
④ 中心板坏
① Plug the terminal
securely.
将接线端接插到位
② Replace reclining
actuator.
更换电动推杆
③ Replace main PCB.
更换中心板

10
Foot rest
cannot be
raised or
lowered.
小腿不能升
降
① The terminals of foot rest
actuator and wires are poorly
connected.
小腿电动推杆接头或线材接触
不良
② The foot rest actuator fails.
小腿电动推杆坏
③ Main PCB fails
中心板坏.
① Plug the terminal
securely.
将接线端接插到位
② Replace foot rest
actuator.
③ 更换小腿电动推杆
④ Replace main PCB.
更换中心板
11
No vibration
by the motors
in the
seat-pad.
座部电机不
振动
① Print motors fail.
振动电机坏
② The terminals and wires are
poorly connected or the wires
fail.
接线端或线材接触不良
③ Main PCB fails.
中心板坏
① Replace the print motor.
更换振动电机
② Plug the terminal
securely or replace the
wires.
将接线端接插到位或跟换
线材
③ Replace main PCB.
更换中心板
12
No gas
charging in
the seat-pad.
座部部充气
① The terminal of the snuffle
valves and wires are poorly
connected.
气泵泄气阀端子或线材接触不
良
② The snuffle valves fail.
泄气阀坏
③ The inflator pump fails.
气泵坏
④ Main PCB fails.
中心板坏
① Plug the terminal
securely.
将接线端接插到位
② Replace the snuffle
valves.
更换泄气阀
③ Replace the inflator
pump.
更换气泵
④ Replace main PCB.
更换中心板

13
No gas
charging in
the foot rest.
小腿不充气
① The terminal of the snuffle
valves and wires are poorly
connected.
气泵泄气阀端子或线材接触不
良
② The snuffle valves fail.
泄气阀坏
③ The inflator pump fails.
气泵坏
④ Main PCB fails.
中心板坏
① Plug the terminal
securely.
将接线端接插到位
② Replace the snuffle
valves.
更换泄气阀
③ Replace the inflator
pump.
更换气泵
④ Replace main PCB.
更换中心板

目录
Table of Contents
1.靠背的拆卸 Disassembly of the backrest ...................................................................................... 9
2.靠背拉绒布的拆卸 Disassembly of the fabric ........................................................................... 10
3.靠背盖的拆卸:Disassembly backrest cover ............................................................................. 10
5.上下行程光电的更换 Disassembly of the up & down stroke photo-electricity. ........................ 11
6.揉捏的拆卸:Disassembly kneading motor ............................................................................... 12
7.机芯的拆卸:Disassembly of the gear box ................................................................................ 13
8.行走电机组件的拆卸:Disconnect rolling motor ...................................................................... 14
9.披风的拆卸 Disassembly of the backrest pad .......................................................................... 15
10.披风腰部气袋与加热器的拆卸 Disassembly of the haunch rest air bag and heater ................ 16
11.坐垫的拆卸 Disassembly of the seat pad ................................................................................. 17
12.坐垫皮套的更换 Steps of change the cover of the seat pad. ................................................. 18
13.坐垫助站器的更换 Disassembly of air bag for standing which on the seat ............................ 18
14.手控器的拆卸 Disassembly of remote control ......................................................................... 19
15.上下前挡板的拆卸 Disassembly the front board ..................................................................... 19
16.侧板的拆卸 Disassembly of the side board .............................................................................. 19
17.靠背推杆的拆卸 Disassembly of the backrest reclining actuator ............................................. 20
18.小腿电动推杆的拆卸 Disassembly of the foot rest actuator .................................................... 21
19.零重力推杆的拆卸 Disassembly of the zero gravity actuator .................................................. 22
20.中心板的拆卸 Disassembly of main PCB................................................................................ 23
21.变压器的拆卸 Disassembly of transformer ............................................................................. 23
22.充气泵的拆卸 Disassembly of the inflator pump .................................................................... 24
23.泄气阀的拆卸 Disassembly of air valves ................................................................................. 25
24.小腿组件的拆卸 Disconnect Leg rest ...................................................................................... 25
25.小腿电机的更换 Replacement the extend motor ...................................................................... 26
26.小腿行程光电的更换 Leg rest `s stroke photo-electricity ..................................................... 27
27.小腿 PCB 板的更换 Replace the leg rest PCB ........................................................................ 27
28.触地检测开关的更换 Replace the sensor switch of ground .................................................... 28
29.小腿丝杆螺母座的更换: Replace pin rocker bearing `s nut ................................................. 28
30.小腿外套的更换 Replace Leg rest `s coat ................................................................................ 29
附(中心板实物接线图) ............................................................................................................. 31

一,靠背部分的分解 Maintenance of the backrest
1.靠背的拆卸 Disassembly of the backrest
A:首先拉开披风与靠背连接的拉链,把披风放在座位上。(如下图)
First,unzip the zipper which fixing the backrest and the backrest pad,then put the pad on
the seat.
B:拔掉靠背总线端子。
Find the 2 wire plugs below the backrest then disconnect these two plugs(one
is gray, one is black).
C 取下连接靠背与靠背电动推杆的销轴。
Take off the bolt which joint the backrest and the backrest actuator.
D 调整靠背至竖直状态,然后将靠背向上拉,可以把靠背取下。
Pull the backrest vertically, then the backrest can be take off.
披风与靠背连接的拉链
The zipper
披风放在座位上
Put the pad on the seat
靠背总线
The 2 wire plugs
销轴
Actuator fixing
靠背被调整至竖直状态
Raise the backrest vertically,

2.靠背拉绒布的拆卸 Disassembly of the fabric
A:在靠背下部找到两个拉链头,拉开这两个拉链即可取下靠背拉绒布.
Find two zippers at the bottom of the front back and unzip these two zippers. Then we
can take off the fabric.
3.靠背盖的拆卸:Disassembly backrest cover
A:拉开外套靠背的两个拉链, 锨开外套靠背即可看到 3个固定靠背后盖的螺丝,在左
下角的警示标下还有一颗螺丝。
Unzip the two zippers of the backrest cover,then we can see three screws that fixing the
rear cover. And another one is under a warning card.
B:拆下 4枚螺丝,即可取下靠背后盖
Slacken and remove the 4 screws, then we can take the rear cover off.
C:靠背后盖被取下之后,我们可以看见固定靠背前盖的四个螺丝。取下这四个螺丝即
可将前靠背拆下
After the rear cover has been taken off, we can find four screws that fixing the front
cover.
拉绒布拉链
here are the zippers of the fabric 靠 背 拉 绒 布 已 被 取 下
the fabric has been taken off
靠背后盖被取下
rear cover has been taken off
固 定 靠 背 后 盖 的 螺 丝 的 位 置
the position of the screws that
fixing the rear cover
外套靠背的两个拉链
the two zippers

5.上下行程光电的更换 Disassembly of the up & down stroke photo-electricity.
A:参考靠背后盖的更换方法取下靠背后盖。
Refer to the Disassembly of the rear cover of the backrest to take off the rear cover.
B:用螺丝刀转动行走电机,确保上行程光电不被挡住
Use a screw driver to turn the rolling motor, make sure the magnet not block the up
stroke.
C: 取下接线端
Disconnect the connecter.
D: 取下铁架上的 3枚螺母
Take off the three nuts which fixing the limit sensor to the frame.
固定靠背前盖的 4枚螺丝
four screws that fixing the front
cover
靠背前盖被取下
the front cover of the backrest
has been taken off.
上 行 程 光 电 接 线 端 被 取 下
The connecter of the up stroke limit
sensor has been taken off
在此处调整行走电机
Turn the rolling motor at here
The nuts have been taken off

E:换上新的行程光电,确保其能正常工作,注意位置要让机芯触碰的到
Get a new limit sensor and fix it to the frame then connect the connecter. Test whether the
up limit sensor works fine,and also we have to adjust limit sensor’s position make sure the
mechanism can not hit it.
6.揉捏的拆卸:Disassembly kneading motor
A:参考靠背后盖的更换方法取下靠背后盖。
Refer to the Disassembly of the rear cover of the backrest
to take of the rear cover.
B:取下揉捏皮带
Take off the kneading belt.
C:剪掉扎带,可以找到揉捏电机接线上的压线帽。
Cut the cable ties and peel the tube,then find the socket of jacks
of the kneading motor.
D:将压线帽取下,即可将揉捏电机连接线断开。
Take the socket of jacks and disconnect the wire of kneading motor.
E:松卸揉捏电机上的 4个螺丝
Take off the screws and then we can take the kneading motor away
Kneading belt has been taken off
The socket of jacks
Make sure this part can not hit the up
stroke limit sensor
揉捏电机上的 4枚螺丝
the 4 screws of the kneading
motor

F:换上新的揉捏电机
Get a new kneading motor and fix it to the frame.
G:调整滑轮的高度,必须确保滑轮与皮带轮在同一水平面上
Then adjust the height of pulley, make sure the wheels in the same level.
H:固定皮带轮,确保皮带轮不会晃动,装上揉捏皮带
Fix the wheel and make sure it can not move up and down,then fix the kneading belt.
7.机芯的拆卸:Disassembly of the gear box
A:参考靠背后盖的更换方法取下靠背后盖。
Refer to the Disassembly of the rear cover of the backrest
to take of the rear cover.
B:打开按摩椅电源开关,使机芯移动到靠背的中间位置
Turn on the chair, and let the massage mechanism move to the
middle of the backrest.
C:取下揉捏皮带
Take off the kneading belt.
D:剪断扎带并剪开导线接线帽
Cut the cable ties and peel the tube,
机芯移动到靠背的中间位置
the middle of the backrest
The wheels in the same level
用内六角扳手固定皮带
轮,确保皮带轮不晃动
Use tool fix the wheel
剪开扎带
cut the cable tie
剪开接线冒 peel the tube

E:剪掉扎带,拔下宽度检测板的接线头
Cut the cable ties then disconnect the connecter on the width inspection board.
F:松卸下固定机芯的四个螺丝
Take off the four screws which fix the massage mechanism.
G:转动揉捏皮带轮,调节机芯滚轮至狭窄位置
Turn the wheel to adjust the roller to narrow position, then take off the massage
mechanism.
H:取下敲击电机上的 4个螺丝,分离敲击电机与机芯,取下机芯
Take off the four screws to separate the tapping motor and the massage mechanism. Then
we can take off the massage mechanism.
8.行走电机组件的拆卸:Disconnect rolling motor
A,拆除背架顶端的横条
Remove the rail on the top of backrest
固定机芯的四个螺丝
The screws(4pcs)fixing the mechanism
The four screws that fixing
the tapping motor
拆除背架顶端两侧的两个螺丝
Slacken and remove the four screws on the top of the frame
扎带 cable tie
接线头 the connecter

B. 使小车从齿轨中走出来,有两种方法:
①给行走电机加 24V 直流电压,此方法省力省时
②用冶具(例“—”螺丝刀),来旋转电机机轴,比较麻烦;见下图
Remove rolling car take from rack rail have 2 ways
①Fist way is better than② , Just give rolling motor to 24V
②Use tools turn around axletree to revolve until the rolling car take from backrest
(See image below)
C:拆下行走电机。
Disassembly the rolling motor
9.披风的拆卸 Disassembly of the backrest pad
A:拉开连接披风与坐垫的拉链
Unzip the zipper between the seat rest and the backrest pad。
B:顺着披风往下,找到并断开 3个气管接头和披风腰部加热丝的接线头,取下披风。
Find the terminals of the 3 air hose and the terminal of the heater wire follow the backrest
pad,then disconnect them,take the pad down.
The 3 air hoses of the
backrest pad
The backrest pad The terminal of the
heater wire
披风与坐垫的拉链
The zipper
用 冶 具 旋 转 此 轴就
可使小四行走(注意
行走方向)

F:拉开披风右边的拉链,拉出气管,取下小枕头。
Unzip the zipper on right side of the backrest pad ,then pull out the air hose of the
pillow(small),then take off the pillow(small).
G:拉开拉链,取下大枕头
Unzip the zipper,take down the pillow(big).
10.披风腰部气袋与加热器的拆卸 Disassembly of the haunch rest air bag and
heater
A:首先参考披风的拆卸取下靠背披风。
Refer to the Disassembly of the backrest pad to take off the backrest pad.
B:拉开披风上的拉链,剪开扎扣和压线冒,拉出加热器和气袋。
Unzip the zipper on the backrest pad, then cut the cable tie and the wire terminal.
C:取下气袋和加热丝
Take down the air bag and the heater
Haunch massages
The air bag has been taken off
The zipper
The heater
小枕头的气管
th
e air hose
小枕头被取下
the pillow(small) has been taken off
the pillow(big)has taken off

二,座部的分解 Maintenance of the seat rest
11.坐垫的拆卸 Disassembly of the seat pad
A:拉开连接小腿与坐垫的拉链。
Unzip the zipper between the seat pad and the footrest.
B:拉开连接靠背披风与坐垫的拉链。
Unzip the zipper between the backrest pad and the seat pad.
C:拉开座垫与座部的拉链
Unzip the zipper between the seat rest cover and the seat rest.
D:松卸下固定座部气管的 4枚螺丝
Slack and remove the 4 screws of the seat rest air hose
E:拔下座部 3个气管插头,断开座部振动电机的连接端
子(1个),然后即可将坐垫取下
Disconnect 3 air hoses of seat pad and a wire terminal of
seat pad’s vibration motor, Then we can take off the seat
pad.
The zipper between the footrest and
the seat pad has been unzipped.
靠背披风与坐垫的拉链
the zipper
坐垫与座部的拉
the zipper
固定坐垫气管的 4枚
螺丝
the 4 screws of the
seat rest

12.坐垫皮套的更换 Steps of change the cover of the seat pad.
A:找到坐垫上的拉链打开,取下皮套。
Find the zipper off the cover of the seat pad and unzip it, then we can take off it.
B:换新的皮套,先装好气袋。
Take an new seat leather, put the air bag on first.
13.坐垫助站器的更换 Disassembly of air bag for standing which on the seat
A:取下坐垫(参考坐垫的皮套的更换)
Take off the seat pad(Refer to the disassembly
of the seat pad)
C:掀开座部,顺着气管找到气管接头并拔开,松
卸下 6枚螺丝,取下座部座部助站器
Open the seat rest,follow the air hose,find and
disconnect the connecter ,slack and remove the
6 screws,take down the big air bag for standing on
the seat rest
座部振动电机接线头
Vibratory motor terminal
先装气袋
put the air bag
first
助站器上的 6枚螺丝
the 6 screws of the air bag for
standing
座部的 3个气管插头 3
air hoses of seat pad

14.手控器的拆卸 Disassembly of remote control
A 取下靠背(参考靠背的拆卸)
Remove the backrest(refer to disassembly of backrest)
B 剪掉固定手控器插头的扎带
Cut the cable tie of the remote control terminal
C:取下固定手控器连接线与内侧板上的 2枚螺丝
Slack and remove the 2 screws between the remote
control wire and the inner board
D:拉开手控器接头,取下手控器
Pull out the terminal of the remote control then you can take the remote control
15.上下前挡板的拆卸 Disassembly the front board
抬起小腿后,你能看到所有的固定螺丝,取下它们
Raised the foot rest then slacken and remove all the screws on front board
16.侧板的拆卸 Disassembly of the side board
A,打开零重力状态使座部提到最高,可以找到
侧板上的四枚螺丝。
Please use Zero-G function to raise up the board
and you can find 4 screws on the sideboard.
前挡板上螺丝的位置
the position of the screws of the
front board

17.靠背推杆的拆卸 Disassembly of the backrest reclining actuator
① 取下靠背,可以看到靠背推杆
Disassemble the backrest from the chair, then find the backrest reclining actuator
② 顺着推杆找到 2个导线接端并拆开
Along the connecting wires of the reclining
actuator to find the 2 connectors, then
disconnect them.
③ 取下右边的上前挡板
Remove the upper part of the front boards
on the right.
④ 这样靠背推杆就可以取下
Then the reclining actuator can be disassembled.
⑤倒序换上新的推杆
Proceed in the reverse order of disassembly when
assembly.
Backrest reclining actuator
Table of contents
Languages:
Other Cozzia Massager manuals

Cozzia
Cozzia CZ-710 Manual
Cozzia
Cozzia CZ-730/Qi User manual
Cozzia
Cozzia EC-618B User manual

Cozzia
Cozzia EC-380 Manual

Cozzia
Cozzia CZ-357 User manual

Cozzia
Cozzia ZEN CZ-641 User manual

Cozzia
Cozzia HMC-200 Owner's manual

Cozzia
Cozzia CZ-710 Manual
Cozzia
Cozzia CZ-710V User manual

Cozzia
Cozzia CZ-361 User manual
Popular Massager manuals by other brands
ELEEELS
ELEEELS R7 instruction manual
Interactive Health
Interactive Health iJoy 320 Use & care manual

Otto Bock
Otto Bock Terra Instructions for use
HoMedics
HoMedics MCS-1210HBK-AU Instruction manual and warranty information
Sheffield
Sheffield PLA1333 instruction manual

HoMedics
HoMedics BubbleSpa BL-100 Instruction manual and warranty information
